Are you looking to multiply your beloved rosemary plant without breaking the bank or resorting to nursery-bought cuttings? Propagating rosemary from clippings is a simple and cost-effective way to share this fragrant herb with friends, family, or even create a thriving indoor garden. With the right techniques, you can easily grow new rosemary plants from stem cuttings, allowing you to enjoy its fresh flavor and aroma year-round.
But how do you choose healthy mother plants, prepare the perfect cuttings, and give them the best chance of rooting successfully? This comprehensive guide will walk you through each step of the process, covering essential tips on choosing the right materials, preparing your clippings for rooting, and providing aftercare instructions to ensure your new rosemary plants thrive. Whether you’re a seasoned gardener or just starting out, this article is packed with expert advice and advanced techniques to help you master the art of growing rosemary from clippings.
Benefits and Uses of Growing Rosemary from Cuttings
When growing rosemary from cuttings, one of the best parts is being able to enjoy the benefits of having fresh, fragrant herbs on hand all year round. We’ll explore these advantages in more detail below.
Introduction to Rosemary
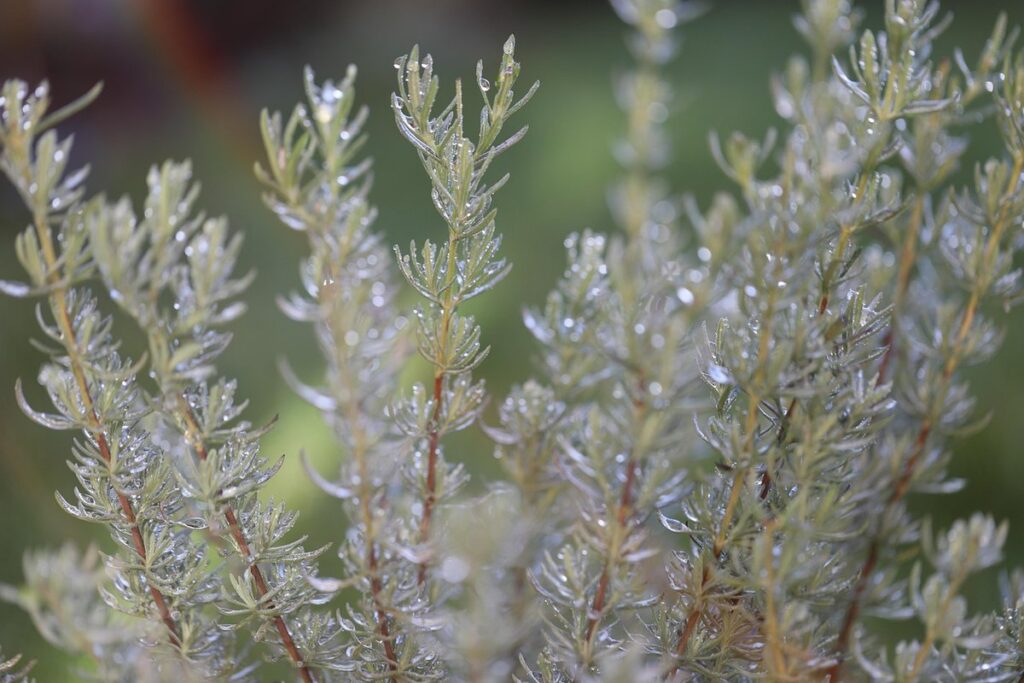
Rosemary is one of the most widely used and revered herbs globally, boasting an impressive array of benefits that transcend culinary applications. This versatile herb has been employed for centuries in cooking, herbal remedies, and ornamental purposes, cementing its importance across various cultures.
In the realm of cooking, rosemary is a staple ingredient in Mediterranean cuisine, adding a distinctive piney flavor to dishes like roasted meats, vegetables, and breads. Its essence also pairs well with olive oil, garlic, and lemon juice, making it a popular choice for marinades and sauces.
Beyond its culinary significance, rosemary has been used in traditional medicine to alleviate digestive issues, improve memory retention, and even combat stress and anxiety. In aromatherapy, the herb’s essential oils are employed to promote relaxation and reduce muscle tension.
Rosemary also holds cultural and symbolic value in many societies. For instance, it is often associated with remembrance, faithfulness, and love in European folklore. The herb is frequently used in wedding ceremonies, as a symbol of commitment and fidelity.
In your own garden or kitchen, you can harness the benefits of rosemary by cultivating it from cuttings. This comprehensive guide will walk you through every step of the process, ensuring that you’re able to grow healthy, thriving rosemary plants for years to come.
Choosing Healthy Mother Plant for Cuttings
When it comes to growing rosemary from cuttings, the health and quality of the mother plant play a crucial role in determining the success of the propagated stems. A healthy mother plant is essential for producing robust and resilient cuttings that will thrive when transferred to their new environment.
To identify a suitable mother plant, look for one with vibrant growth, firm leaves, and an overall bushy appearance. Avoid plants with signs of disease or pests, such as yellowing leaves, black spots, or evidence of insects. Check the plant’s root system too – a healthy rosemary plant should have a well-developed root network that is firmly attached to the soil.
When selecting the best stem for propagation, choose one with at least two sets of leaves and no signs of damage or disease. Cuttings taken from the tip of the stem tend to root more easily than those taken from lower branches. To increase your chances of success, take cuttings in the morning when the plant is at its most turgid. This will help reduce stress on the cutting during the rooting process.
Preparing the Clippings for Rooting
Now that you’ve harvested your rosemary clippings, it’s time to prepare them for rooting. This crucial step ensures a healthy and successful start for your new plants.
Harvesting the Right Time
When it comes to harvesting rosemary clippings for rooting, timing is everything. The ideal time to harvest is crucial for successful propagation. You want to take cuttings from a healthy, vigorous plant with plenty of new growth.
Check the weather forecast and plan accordingly. Spring and early summer are usually the best times to harvest rosemary clippings. Avoid taking cuttings during extreme heatwaves or cold snaps, as this can cause stress to the plant. Temperature is also an important factor; ideal temperatures for harvesting rosemary clippings range from 65°F to 75°F (18°C to 24°C).
A mature and healthy rosemary plant will typically produce new growth in the spring, which makes it perfect for harvesting. Look for stems with plenty of nodes – these are the small bumps on the stem where leaves meet. These nodes are essential for rooting, as they contain the necessary hormones for the cutting to develop into a new plant.
If you’ve already harvested your rosemary clippings and are now preparing them for rooting, make sure to select cuttings with at least two nodes, as this will increase their chances of success.
Trimming and Pruning Techniques
When trimming and pruning the mother rosemary plant to encourage new growth and remove weak or damaged stems, timing is everything. Prune the mother plant after it has finished flowering, usually during late spring or early summer when new growth begins to emerge. Remove any dead or damaged stems, as these can harbor diseases that may spread to healthy parts of the plant.
Cut back about one-third to one-half of the top growth to encourage bushy growth and promote new stem development. Make clean cuts just above a node (where a leaf meets the stem) using sharp, sterile pruning tools. This will help the plant direct its energy towards producing new stems rather than focusing on old, woody growth.
By regularly trimming and pruning your rosemary mother plant, you’ll encourage it to produce plenty of healthy cuttings for rooting, ensuring a successful propagation process.
Rooting Methods for Rosemary Clippings
Now that you have your rosemary clippings, it’s time to learn how to root them successfully. This section will walk you through various rooting methods to encourage healthy growth.
Water Method: Stem Cuttings in a Glass of Water
The water method is an excellent way to root rosemary cuttings, and it’s surprisingly easy. To get started, take a few healthy rosemary clippings with at least two sets of leaves on each stem. Remove lower leaves, leaving only the top set of leaves intact. This will help prevent the cutting from becoming too waterlogged.
Next, fill a glass or container with fresh, lukewarm water and add a rooting hormone powder or liquid to stimulate root growth. Gently place the rosemary cuttings into the water, making sure they’re fully submerged but not touching each other. Keep the water level topped up and ensure the container is placed in a bright, indirectly lit spot.
Monitor your progress daily by checking for root development. You should start seeing roots emerge within 7-10 days. Once roots have developed, transfer the cuttings to a pot filled with well-draining soil, making sure not to disturb the roots. Water thoroughly and care for as you would any other rosemary plant.
This method works because it provides an optimal environment for root growth, allowing the cutting to develop a strong root system before being transplanted into soil.
Soil Method: Planting in Potting Mix
When using the soil method to root rosemary cuttings, it’s essential to select a suitable potting mix that provides good drainage and aeration. A mix specifically designed for herbs or cacti would work well, as they tend to dry out quickly. Fill a small pot with about 1-2 inches of potting mix, leaving enough room for the cutting.
Plant the rosemary cutting in the potting mix up to its leaf node (where the leaf meets the stem). Firm the soil gently around the cutting to secure it in place. Water the mixture well, but make sure not to overwater – the potting mix should be moist but not soggy.
Aftercare is crucial for successful rooting. Place the potted cutting in a bright, indirectly lit area with consistent temperatures between 65-75°F (18-24°C). Keep the soil consistently moist, reducing watering as the roots develop. Monitor the plant’s progress closely and transplant it into a larger pot once new growth appears.
Aftercare and Maintenance Tips
Now that you’ve successfully grown your rosemary from clippings, it’s time to keep it thriving with proper aftercare and maintenance techniques. Learn how to care for your new rosemary plant in this next step.
Providing Ideal Conditions for Growth
Providing ideal conditions for your rosemary cutting to grow is crucial. After taking the initial steps of preparing and planting the clipping, you’ll want to create an environment that fosters healthy growth.
Lighting plays a significant role here – rosemary requires at least four hours of direct sunlight per day, so make sure it’s placed near a sunny window or outside in a spot with partial shade. East- or west-facing windows are ideal options.
Temperature is also essential; maintain room temperatures between 65°F to 75°F (18°C to 24°C), avoiding extreme fluctuations that can stress the plant. Rosemary thrives in dry climates, but it does require some humidity – use a humidifier if your space tends towards arid environments.
Watering schedules should be adjusted according to climate and season. In warm weather, allow the top inch of soil to dry between waterings; in cooler months, reduce watering to once every 7-10 days.
Common Challenges and Solutions
Root rot is a common challenge when growing rosemary from clippings. This can be caused by overwatering, which leads to roots sitting in waterlogged soil. To avoid this, ensure the propagation medium has good drainage and only water when the top inch of soil feels dry.
Fungal diseases such as root rot and leaf spot are also a threat during the rooting process. These can be prevented by providing sufficient light (4-6 hours direct sunlight) and maintaining a humid environment without overwatering.
For rosemary clippings to develop strong roots, they need adequate light. Provide supplemental lighting if necessary. Keep an eye out for signs of etiolation – stretching or elongated stems – which can occur when the plant is not receiving sufficient light.
Monitor your plants regularly and adjust your care routine accordingly. A well-maintained propagation area with good air circulation will help prevent fungal diseases from taking hold.
Advanced Techniques: Layering and Division
Once you’ve mastered the basics of growing rosemary from clippings, it’s time to take your skills to the next level by learning advanced techniques like layering and division.
Layering Method
To propagate rosemary using the layering method, you’ll need to bend a stem down to form roots while it’s still attached to the mother plant. This technique is perfect for creating new plants from mature rosemary bushes. Choose a healthy stem with several sets of leaves, and gently bend it downwards towards the ground. Secure the bent stem with a small rock or a U-shaped wire, making sure it doesn’t come into contact with the soil.
Over time, roots will develop along the buried section of the stem. This process can take anywhere from 2-6 weeks, depending on factors like temperature and humidity. As roots form, you’ll start to notice new growth emerging from the top of the bent stem. Once the new roots have developed a good system, carefully cut the stem below the node where it meets the mother plant.
This will allow you to transplant the newly formed root system into its own pot or garden bed. With proper care, your layer-grown rosemary should start producing its own flowers and foliage within a few weeks.
Dividing Established Rosemary Plants
Dividing established rosemary plants is an essential technique to encourage new growth and prevent overgrowth. As rosemary grows, it can become pot-bound, leading to reduced vigor and a decrease in the production of new stems. To promote healthy growth and maintain the plant’s shape, divide established rosemary plants when they have outgrown their containers or have become too dense.
To divide your rosemary plant, start by gently removing it from its pot and inspecting the roots. Use a sharp, sterile tool to cut through any circular or root-bound areas, taking care not to damage the surrounding tissue. Next, separate the plant into sections, making sure each section has at least one growing tip and some roots attached.
Replant the divided sections in well-draining soil, giving them enough space to grow without becoming overcrowded. Water thoroughly and provide adequate light to help the new plants establish themselves quickly. This process can be repeated as necessary to keep your rosemary plant healthy and thriving throughout its life cycle.
Propagation Success Rates and Troubleshooting
While growing rosemary from clippings can be a bit finicky, knowing how to troubleshoot common issues will help you achieve higher success rates. Let’s explore some tips for overcoming propagation hurdles.
Factors Affecting Success Rates
When growing rosemary from clippings, several factors can significantly impact propagation success rates. One crucial aspect is soil quality. Using a well-draining potting mix specifically designed for herbs will promote healthy root development and prevent waterlogged conditions that can lead to root rot.
The rooting medium is another critical factor. You can use a propagation tray with individual cells or a glass jar filled with water as a rooting medium. The key is to maintain the correct moisture levels, ensuring the cutting has enough oxygen while still providing adequate hydration.
Light exposure also plays a vital role in successful propagation. Rosemary clippings require bright, indirect light to stimulate root growth. Placing them near an east- or west-facing window or under grow lights is ideal. Maintaining optimal humidity levels between 40% and 60% will help promote rooting and reduce stress on the cutting.
Lastly, temperature fluctuations can impact propagation success rates. Rosemary prefers temperatures between 65°F to 75°F (18°C to 24°C) for successful rooting. Avoid placing clippings in areas with drafts or extreme temperatures, as this can hinder root development.
Common Mistakes to Avoid
When attempting to grow rosemary from clippings, there are several common mistakes that can lead to decreased success rates. One of the most significant errors is overwatering, which can cause the roots to rot and prevent healthy growth.
To avoid this issue, make sure the cutting has a dry surface before planting it in well-draining soil. Keep the soil consistently moist but not waterlogged, as this will help promote root development without causing damage.
Another mistake is neglecting proper humidity levels. Rosemary requires high humidity to develop roots effectively, especially during the initial stages of growth. You can cover the pot with a clear plastic bag or a cloche to maintain a humid environment and encourage healthy rooting.
Avoid placing the cutting in direct sunlight, as this can cause it to dry out too quickly. Instead, provide bright, indirect light to help regulate temperature and humidity levels.
Incorrect temperature settings can also hinder the rooting process. Rosemary prefers temperatures between 65°F to 75°F (18°C to 24°C) during the day and no lower than 55°F (13°C) at night.
Frequently Asked Questions
Can I propagate rosemary from clippings indoors or do I need direct sunlight?
Yes, you can successfully propagate rosemary from cuttings indoors with bright indirect light. However, ensure the area receives sufficient natural light to promote healthy growth and root development. Monitor your plants’ response to their environment and adjust accordingly.
How long does it typically take for rosemary clippings to root?
The time frame for rooting rosemary clippings can range from 7-21 days, depending on factors such as the health of the mother plant, cutting quality, and environmental conditions. Keep an eye on your cuttings and transfer them to a pot once roots develop.
What are some common mistakes people make when propagating rosemary from clippings?
Some common pitfalls include overwatering, which can lead to root rot, and under-watering, resulting in weak or stunted growth. Additionally, failure to provide sufficient humidity around the cuttings can hinder successful rooting. Be mindful of these potential issues and adjust your techniques accordingly.
How often should I water my newly propagated rosemary plants?
Newly propagated rosemary plants require consistent moisture levels, especially during the initial stages of establishment. Water them gently but thoroughly when the top inch of soil feels dry to the touch. Adjust your watering schedule as needed based on changing environmental conditions and plant maturity.
Can I propagate rosemary from clippings year-round or is there an optimal time?
While you can propagate rosemary from cuttings throughout the year, it’s generally more successful during spring and early summer when the plant is actively growing. Avoid taking cuttings during periods of extreme weather, such as intense heatwaves or cold snaps, for best results.