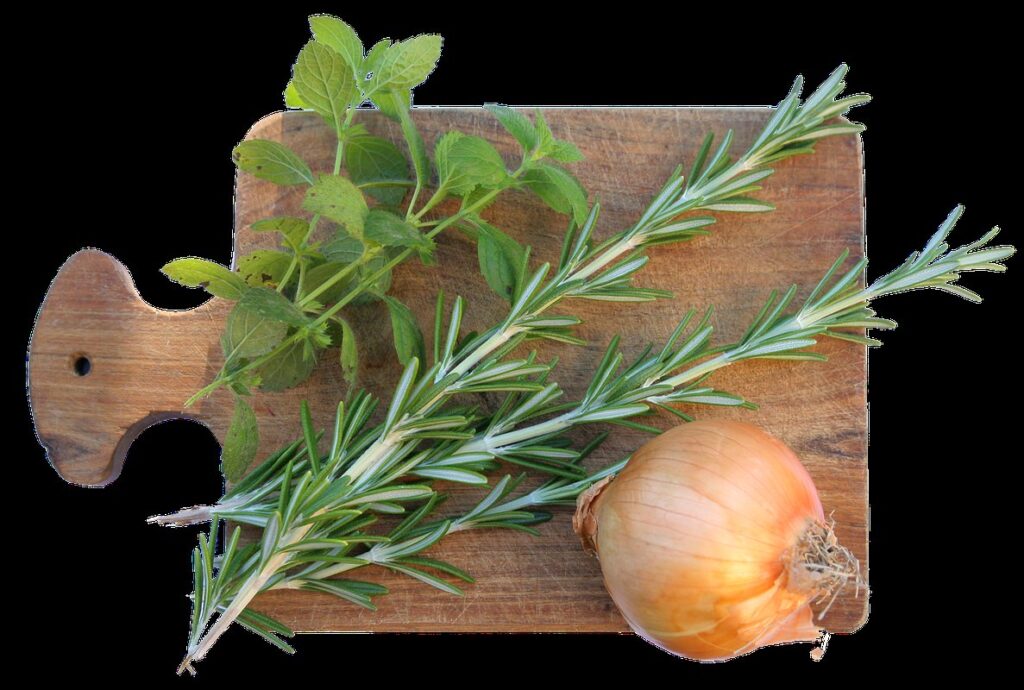
Are you tired of buying expensive rosemary plants or struggling to keep them alive? Growing rosemary cuttings from your existing plants is a simple and cost-effective way to have this versatile herb on hand all year round. Not only will it save you money, but it’s also an excellent way to propagate new plants and share with friends and family.
In this article, we’ll walk you through the steps of preparing rosemary cuttings for rooting, providing tips on how to increase your chances of success. We’ll cover everything from choosing healthy stems to aftercare techniques, so you can enjoy a thriving herb garden filled with fresh rosemary. Whether you’re an experienced gardener or just starting out, our guide will help you master the art of growing rosemary cuttings and make the most of this wonderful herb’s benefits.
Preparing the Environment
Before we dive into the nitty-gritty of propagating rosemary cuttings, let’s make sure your environment is ready to support new growth. Ensure your workspace and growing area are clean and free of pests.
Choosing the Right Time of Year
When it comes to growing rosemary cuttings, choosing the right time of year is crucial for optimal growth and success. Typically, the best months for taking rosemary cuttings are during the spring and summer seasons when the plant is actively producing new growth.
In particular, aim to take cuttings in late spring or early summer, around May or June, depending on your location and climate. This allows the newly propagated plants to establish themselves before the hot summer weather sets in. Conversely, autumn is also a suitable time for taking rosemary cuttings, as the plant’s growth slows down in preparation for winter.
Avoid taking cuttings during the dormant winter months when the plant is not actively producing new growth. The ideal temperature range for rooting rosemary cuttings is between 65°F to 75°F (18°C to 24°C), which typically falls within the spring and summer seasons. By timing your cutting sessions correctly, you’ll give your newly propagated plants a head start on establishing themselves in their new environment.
Creating a Suitable Climate
When creating a suitable climate for propagating rosemary cuttings, it’s essential to consider three critical factors: temperature, humidity, and light. Temperature plays a crucial role in the success of propagation. Rosemary prefers temperatures between 65°F (18°C) and 75°F (24°C). Avoid placing your cutting tray near heating vents or drafty windows, as sudden temperature fluctuations can shock the delicate roots.
Maintaining optimal humidity levels is also vital for successful propagation. Covering the cutting tray with a clear plastic bag or cloche will help retain moisture and create a humid microclimate around the cuttings. This will ensure that the tiny roots develop without drying out. As for light, rosemary prefers bright indirect light but can tolerate some direct sunlight. However, avoid placing your cutting tray in direct sunlight as it may cause scorching of the leaves.
By controlling these environmental factors, you’ll create an ideal climate for your rosemary cuttings to thrive and develop robust roots.
Taking Rosemary Cuttings
Now that you’ve got a healthy rosemary stem, let’s learn how to propagate it into new plants by taking cuttings from your favorite herb. This simple process requires minimal equipment and care.
Identifying Healthy Mother Plants
When selecting mother plants for taking cuttings, it’s essential to choose mature and healthy rosemary plants with numerous stems and leaves. These robust plants will be more likely to produce viable and successful cuttings.
Look for plants with a bushy shape, as they typically have a higher concentration of stem nodes. Avoid plants that are too leggy or sparse, as they may not yield the best results. Ideally, choose mother plants with multiple stems, at least 6-8 inches long, to ensure you get several cuttings.
Inspect the leaves for any signs of pests or diseases. Healthy leaves should be a vibrant green color and have no visible damage or discoloration. The plant’s overall appearance can also indicate its health; look for sturdy stems and a robust root system.
By selecting healthy mother plants with an abundance of stems and leaves, you’ll set your cuttings up for success and increase their chances of thriving once planted. This simple step may seem minor, but it makes all the difference in growing successful rosemary cuttings.
Preparing the Cutting Tools
Before you start harvesting cuttings from your rosemary plant, make sure you have all the necessary tools within arm’s reach. This will not only save you time but also ensure that you handle the delicate stems with care. You’ll need a good pair of pruning shears specifically designed for cutting woody plants like rosemary. These shears should be sharp and clean to prevent crushing the stem, which can lead to poor rooting.
Next, choose a clean pot or container to place your cuttings in. This will provide a sterile environment for them to develop roots. Make sure it’s slightly larger than the number of cuttings you plan to propagate, as this will give each one enough room to grow.
To promote healthy root development, apply a small amount of rooting hormone to the cut end of each stem. This will stimulate cell division and increase the chances of successful propagation.
Rooting the Cuttings
Now that you’ve successfully propagated your rosemary cuttings, it’s time to root them. This is where patience comes into play as you create a suitable environment for healthy growth.
Preparing the Potting Mix
When it comes to rooting rosemary cuttings, the potting mix plays a crucial role in determining their success. A well-draining potting mix specifically designed for propagation is essential for healthy root development and preventing waterlogged conditions that can lead to root rot.
For this reason, avoid using regular potting soil or garden soil as they tend to be too dense and may retain too much moisture, causing the cuttings to suffocate. Instead, opt for a specialized potting mix that is formulated with propagation in mind. These mixes typically have the right balance of ingredients to provide excellent drainage while retaining enough water for the cuttings.
Look for a mix that contains perlite or vermiculite, which are excellent additives for improving drainage and preventing waterlogging. You can also add some sand or grit to your potting mix if you don’t have access to a specialized propagation mix. By using the right potting mix, you’ll set your rosemary cuttings up for success and increase their chances of rooting successfully.
Planting the Cuttings
When planting the cuttings, make sure to handle them gently to avoid damaging the delicate roots. Place the cut end of each cutting into a small indentation in the potting mix, about 1-2 cm deep. Pack the mix firmly around the stem, making sure it’s snug and secure.
Water the soil gently but thoroughly after planting, taking care not to overwater. The mix should be moist but not waterlogged. You can check the moisture level by sticking your finger into the mix up to the first knuckle; if it feels dry, it’s time to water.
It’s essential to keep the cuttings in a humid environment for the first week or two after planting. To achieve this, cover the pot with a clear plastic bag or a cloche, securing it with a rubber band. This will help retain moisture and promote rooting. Remove the covering when you start to notice new growth, usually within 7-10 days.
Remember that rosemary cuttings can be sensitive to overwatering, so monitor their progress closely and adjust your watering schedule accordingly.
Caring for Newly Planted Cuttings
Now that you’ve successfully rooted your rosemary cuttings, it’s time to give them the TLC they need to thrive. This next step is crucial in ensuring healthy growth and a robust harvest.
Providing Optimal Watering and Humidity
When it comes to caring for newly planted rosemary cuttings, providing optimal watering and humidity is crucial for successful propagation. Too little water can cause the cutting to dry out and die, while too much water can lead to root rot.
Aim for a balance by keeping the soil consistently moist but not waterlogged. Check the soil daily by sticking your finger into it up to the first knuckle. If the soil feels dry at this point, it’s time to water. Water gently but thoroughly until water starts to flow out of the drainage holes. Avoid getting water on the leaves or crown of the plant to prevent fungal diseases.
Humidity also plays a significant role in rosemary propagation. Rosemary cuttings thrive in humid environments, typically between 40-60% relative humidity. You can achieve this by covering the pot with a clear plastic bag or cloche, which will trap moisture and heat. Check the humidity level daily and remove the cover if it becomes too high to prevent fungal growth.
Keep in mind that different climates and temperatures may require adjustments to your watering and humidity schedule. Monitor your cutting’s response and adjust accordingly to ensure optimal conditions for healthy growth.
Maintaining Suitable Temperature and Light Conditions
When it comes to growing rosemary cuttings, maintaining suitable temperature and light conditions is crucial for their growth and development. Ideally, you should aim for a temperature range of around 70-80°F (21-27°C) during the day. This warm temperature will encourage healthy growth, while also preventing root rot that can occur in cooler temperatures.
In terms of lighting, rosemary cuttings require bright, indirect light to photosynthesize and thrive. A south-facing window or a grow light with a 12-hour photoperiod is ideal. Avoid direct sunlight, as it can cause the leaves to become scorched and stressed. East- or west-facing windows are also suitable options, but make sure they receive plenty of morning or afternoon sun.
Remember that rosemary cuttings are delicate, so keep them away from drafts and extreme temperature fluctuations. A stable environment will help them establish a strong root system, paving the way for healthy growth and eventual harvest. Monitor your cutting’s progress, and adjust its position accordingly to ensure optimal growing conditions.
Common Issues and Solutions
Even experienced gardeners may encounter problems when growing rosemary cuttings, so let’s address some common issues and find solutions.
Identifying and Addressing Root Rot
Rosemary cuttings are prone to root rot if not properly cared for. Recognizing the symptoms is crucial to preventing its occurrence and correcting it if necessary. Typically, you’ll notice yellowing leaves, soft stems, and a foul smell emanating from the plant. In severe cases, the roots may become mushy or blackened.
To prevent root rot, ensure your rosemary cutting receives good air circulation, adequate light, and moderate watering. Waterlogging is a common cause of root rot, so avoid overwatering. Check the soil moisture by sticking your finger into the soil up to the first knuckle; if it’s dry, water thoroughly. However, make sure not to get water on the leaves or crown to prevent fungal diseases.
If you suspect root rot, gently remove the cutting from its pot and inspect the roots. Trim off any affected areas with sterile scissors or pruning shears. Repot the cutting in well-draining soil and a slightly larger container to give the remaining roots room to grow. Provide optimal growing conditions, including bright light and temperatures between 60°F to 70°F (15°C to 21°C).
Overcoming Slow Growth or Death of Cuttings
If you’re experiencing slow growth or death of rosemary cuttings, don’t worry – it’s more common than you think. In fact, many gardeners face this issue when trying to propagate their favorite herb. One reason for slow growth is insufficient light. Rosemary cuttings require bright, direct sunlight to photosynthesize and grow well. If your cuttings are not receiving enough natural light, consider moving them to a sunnier location or supplementing with artificial lighting.
Another common issue is overwatering. Cuttings don’t need much water, as this can lead to root rot. Make sure the soil feels dry to the touch before watering again. Also, ensure good air circulation around your cuttings to prevent fungal diseases.
If you notice your cuttings are dying off, it may be due to a lack of humidity or a sudden drop in temperature. To combat this, cover your cutting with a clear plastic bag or cloche to maintain humidity and regulate the temperature.
Monitor your cuttings closely and adjust your care routine as needed. With patience and attention, you can overcome slow growth or death and successfully grow healthy rosemary plants from cuttings.
Tips for Successful Propagation and Transfer
To ensure healthy growth, it’s crucial to understand how to properly propagate and transfer rosemary cuttings, which can be a bit tricky but don’t worry, we’ve got you covered.
Hardening Off Before Transplantation
Before transplanting your newly propagated rosemary plants into larger containers or directly into gardens, it’s essential to acclimate them to outdoor conditions through a process called hardening off. This crucial step helps prevent shock and promotes healthy growth.
Hardening off typically takes 7-10 days, during which time you’ll gradually expose the plants to increased sunlight, wind, and temperature fluctuations. Start by moving the plants outdoors for short periods, such as 1-2 hours a day, under partial shade. Gradually increase the duration over the next few days, ensuring they receive full sun by the end of the process.
Monitor your plants’ response closely, looking out for signs of stress like yellowing leaves or wilted stems. If you notice any adverse effects, slow down the hardening-off process to prevent damage. To further aid acclimation, maintain a consistent temperature range between 60-75°F (15-24°C) and avoid exposing the plants to extreme weather conditions.
By following this careful approach, you’ll give your rosemary cuttings the best chance of thriving in their new environment, allowing them to develop strong roots and establish themselves as healthy, productive plants.
Encouraging Healthy Growth After Transfer
After transferring rosemary cuttings from propagation pots to garden beds, it’s essential to encourage healthy growth. This stage is crucial as it sets the foundation for a robust and thriving plant.
Start by hardening off your newly transferred cuttings over the course of 7-10 days. Begin by placing them in a shaded area outside for a few hours each day, gradually increasing their exposure to direct sunlight. This process helps rosemary adapt to outdoor conditions, reducing shock and promoting healthy growth.
Ensure your garden bed has well-draining soil with a pH between 6.0 and 7.0, which is ideal for rosemary’s growth. Water the cuttings regularly, but avoid overwatering, as this can lead to root rot. Mulch around the base of the plants to retain moisture, suppress weeds, and regulate soil temperature.
Fertilize your rosemary cuttings with a balanced, water-soluble fertilizer (20-20-20) during the first month after transfer. Follow the manufacturer’s instructions for application rates to avoid overfertilizing, which can cause more harm than good.
Frequently Asked Questions
What are the chances of success with rosemary cuttings, and what factors affect their growth?
The chances of success depend on various factors, including the quality of the mother plant, the timing of cutting, and proper care after rooting. To maximize your chances, ensure you take healthy stem cuttings during the optimal growing season (spring or summer), provide suitable climate conditions, and maintain adequate watering and humidity.
How often should I water my newly planted rosemary cuttings, and what signs indicate overwatering?
Water your rosemary cuttings when the top inch of soil feels dry to the touch. Overwatering can lead to root rot, which causes droopy or yellowing leaves, soft stems, and a foul odor. Monitor your plants’ response to watering, and adjust your schedule accordingly.
Can I propagate rosemary in containers year-round, or are there specific conditions for indoor growth?
While you can grow rosemary cuttings indoors during the winter months, they still require proper lighting (4-6 hours of direct sunlight) and temperature conditions (65-75°F). Use a well-draining potting mix and maintain adequate humidity to prevent root rot.
How do I prevent pests from infesting my newly propagated rosemary plants?
Regularly inspect your plants for signs of pests, such as spider mites, mealybugs, or aphids. Isolate new plants for 2-3 weeks before introducing them to the main herb garden. Use organic pest control methods whenever possible, and maintain a clean growing environment.
Can I propagate rosemary from old or woody stems, or do they need to be fresh?
It’s best to use healthy, fresh stem cuttings (4-6 inches long) with at least two sets of leaves. Avoid using woody or older stems, as their lower success rate may result in weak and leggy growth.