Are you ready to get your hands dirty and grow some delicious homegrown pumpkins? Starting with pumpkin seeds can be a fun and rewarding experience, especially when done correctly. But let’s face it, growing pumpkins from scratch can seem daunting, especially for beginners. Not only do you need the right seeds, but also a well-prepared soil and proper sowing techniques to ensure a bountiful harvest. In this comprehensive guide, we’ll walk you through every step of the process – from selecting the perfect pumpkin seeds to harvesting your very own pumpkins. We’ll cover essential tips on seed selection, soil preparation, sowing, and even provide expert advice on how to grow pumpkins with ease. By the end of this article, you’ll be equipped with all the knowledge needed to grow a thriving pumpkin patch right in your own backyard!
Choosing the Right Pumpkin Seeds
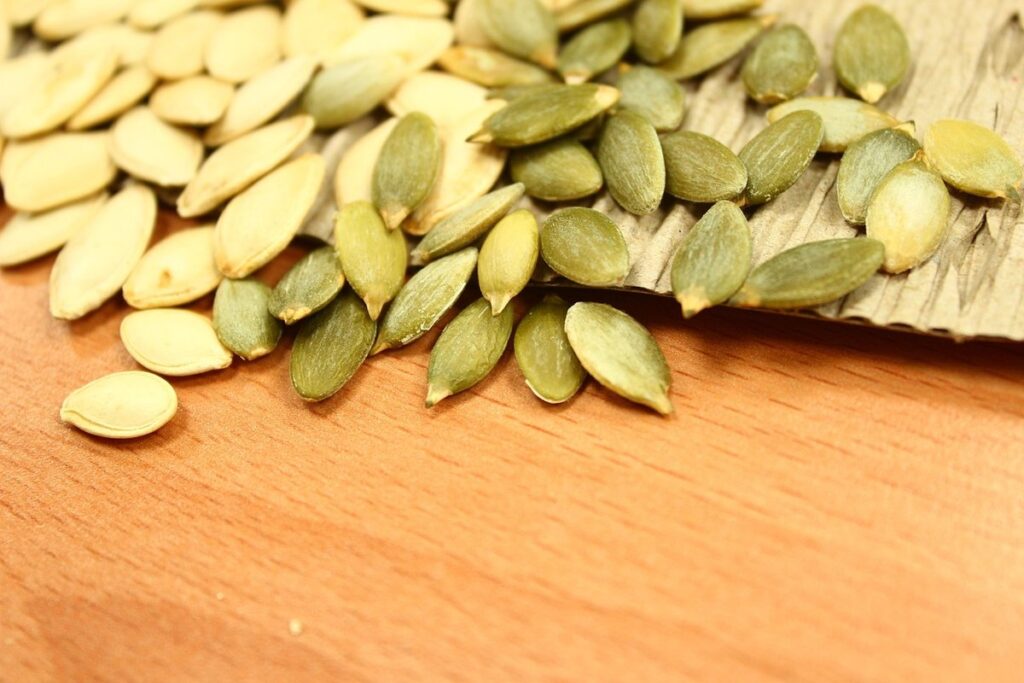
When selecting pumpkin seeds, it’s essential to choose varieties that thrive in your climate and have a good disease resistance profile. This will ensure your harvest is healthy and bountiful.
Selecting High-Quality Seeds
When it comes to growing pumpkins from seeds, selecting high-quality pumpkin seeds is crucial for a bountiful harvest. A good seed can mean the difference between a thriving vine and a disappointing crop. Let’s break down what to look for when choosing the right seeds.
First, consider the origin of the seeds. Seeds from reputable breeders or farmers who specialize in growing pumpkins are more likely to produce high-quality fruits. Look for seeds that have been grown in regions with similar climate conditions to your own. This will help ensure the seeds adapt well to your local environment.
Another important factor is germination rate, which indicates how many seeds will actually grow when planted. A good seed supplier should guarantee a minimum germination rate of 80%. Some reputable suppliers may even offer guarantees as high as 95%.
Reputable seed suppliers also prioritize genetic diversity, offering a range of varieties to choose from. This ensures that your crop is not only healthy but also resilient against diseases and pests.
When selecting seeds, look for companies that have been in business for a while and have a good reputation among gardeners. Check online reviews and ask fellow growers for recommendations. A little research upfront can save you a lot of trouble down the line.
Understanding Seed Types
When it comes to choosing pumpkin seeds for growing, understanding the different types available is crucial. There are primarily three categories: heirloom, hybrid, and open-pollinated varieties.
Heirloom seeds, often passed down through generations, offer unique characteristics such as vibrant colors, distinctive shapes, and exceptional flavor. They’re perfect for gardeners who value preserving traditional cultivars and experimenting with new traits. However, heirloom varieties can be less reliable in terms of yield and may require more maintenance.
Hybrid seeds, bred for specific desirable traits like disease resistance or improved growth rate, offer high yields but often lack the genetic diversity of heirloom seeds. While they’re an excellent choice for commercial growers seeking efficiency, their offspring typically don’t exhibit the same characteristics as the parent plant.
Open-pollinated (OP) varieties, a mix of both heirloom and hybrid traits, are becoming increasingly popular among home gardeners. They offer reliability in terms of yield while still allowing for seed saving and propagation of unique cultivars.
Preparing the Soil for Pumpkin Growth
Before we dive into sowing our pumpkin seeds, it’s essential to prepare the soil to give them a strong foundation for growth. This means creating an optimal environment for your pumpkin plants to thrive in.
Testing and Amending the Soil
Testing and amending the soil is a crucial step in preparing it for pumpkin growth. Before you start planting, it’s essential to test the pH level of your soil to ensure it’s suitable for pumpkin cultivation. Pumpkins prefer a slightly acidic to neutral soil pH, ranging from 6.0 to 7.0. If your soil is too alkaline or acidic, amend it with lime or sulfur accordingly.
To further assess the nutrient levels in your soil, you can conduct a simple test using a DIY kit or send a sample to a lab for analysis. This will help identify any deficiencies in nitrogen, phosphorus, potassium, and other essential micronutrients. Based on the results, add organic matter like compost or well-rotted manure to improve soil structure and fertility. You can also use balanced fertilizers like 10-10-10 NPK to provide a boost of nutrients for pumpkin growth.
For example, if your test reveals low levels of potassium, you can mix in 1 cup of potassium sulfate per square foot of soil before planting. Similarly, if the pH level is too high, add a small amount of sulfur or peat moss to adjust it. By amending the soil with the right organic matter and fertilizers, you’ll create an ideal environment for your pumpkin plants to thrive in.
Creating a Sunny Location
When selecting a location for your pumpkin patch, it’s essential to choose an area that receives full sun. This means ensuring that your spot gets at least 6 hours of direct sunlight per day. Pumpkins need plenty of light to undergo photosynthesis and produce a bountiful harvest.
To determine if your location is sunny enough, observe the area during different times of the day. Stand in the spot where you plan to plant your pumpkins and note how much sunlight it receives between 10 am and 4 pm. If the area is shaded or receives less than 6 hours of direct sunlight, consider relocating.
Air circulation is also crucial for healthy pumpkin growth. Make sure there’s enough space around the plants for air to circulate freely. A gap of at least 3 feet between rows will help prevent fungal diseases that thrive in humid environments.
Avoid planting pumpkins near buildings or trees, as they can block sunlight and create a shaded environment. Also, steer clear of areas prone to frost pockets, which can damage your pumpkin plants. By choosing the right location with plenty of sunlight and good air circulation, you’ll set your pumpkin patch up for success.
Sowing Pumpkin Seeds
To get started, you’ll want to sow your pumpkin seeds directly into a prepared garden bed when the soil has warmed up to at least 60°F. This is a crucial step in growing healthy pumpkins.
Sowing at the Right Depth and Spacing
When sowing pumpkin seeds, it’s essential to get the depth and spacing just right. The ideal seed size is a crucial factor to consider. Small-seeded varieties like ‘Baby Boo’ require a shallower sowing depth of about 1-2 inches (2.5-5 cm), while larger seeded varieties like ‘Jack Be Little’ need around 2-3 inches (5-7.5 cm).
Soil type also plays a significant role in determining the optimal seed depth and spacing. In well-draining sandy soils, seeds can be sown slightly deeper than in heavy clay or loam soils, where they may rot if too deep. For example, in regions with hot summers and dry spells, it’s better to sow pumpkin seeds on the surface and thin them out later.
In most cases, spacing pumpkin seeds about 4-6 feet (1.2-1.8 meters) apart is a good starting point. This allows for healthy growth and prevents overcrowding, which can lead to fungal diseases. However, some compact varieties like ‘Bush Pumpkin’ may require closer spacing of around 12-18 inches (30-45 cm). Be sure to research specific seed package instructions or consult with local gardening experts for climate-specific advice.
Watering after Sowing
Watering after sowing is crucial to ensure that your pumpkin seeds germinate successfully. When you water newly sown seeds, it’s essential to avoid washing away the fine layer of soil covering them. To prevent this, gently sprinkle a small amount of water over the soil, rather than pouring it directly onto the seeds.
Consistency is key during the germination period. The ideal temperature for pumpkin seed germination is between 70-80°F (21-27°C), and maintaining consistent moisture levels helps to promote healthy root growth. Aim to keep the soil consistently moist but not waterlogged. Check the soil daily, and if the top inch feels dry to the touch, it’s time to water.
A good rule of thumb is to water your pumpkin seeds gently but thoroughly once a day during the first week after sowing. As the seedlings emerge, you can gradually reduce watering to every other day. Remember that overwatering can lead to fungal diseases and root rot, so keep an eye on your soil’s moisture levels and adjust your watering schedule accordingly.
Caring for Young Pumpkin Plants
Now that you’ve successfully sown and germinated your pumpkin seeds, it’s time to learn how to care for young pumpkin plants as they begin to grow. This section will walk you through essential tips for their early development.
Thinning and Pruning
When you sow multiple seeds together, it’s inevitable that some will emerge stronger and healthier than others. This is why thinning seedlings becomes a crucial step in the pumpkin-growing process. Overcrowding can lead to reduced air circulation, making plants more susceptible to diseases like powdery mildew and fungal infections.
To thin your seedlings, wait until they have two sets of leaves, then carefully remove the weakest ones, leaving about 12-18 inches between each remaining plant. This allows for optimal growth and prevents competition for resources like water, nutrients, and sunlight. Make sure to handle the roots gently when removing weak seedlings to avoid damaging the others.
In addition to thinning, pruning young pumpkin plants promotes bushy growth and increases yields. Prune your vines by cutting them back to about 6 inches from the base of the plant, encouraging new growth to emerge. This also helps control the spread of fungal diseases that thrive in humid environments. By regularly pruning your pumpkin plants, you’ll encourage a more compact, robust growth habit and maximize the number of pumpkins each vine will produce.
Pest and Disease Management
As your young pumpkin plants grow and mature, they may face challenges from pests and diseases that can significantly impact their health and yield. Common issues include powdery mildew, a fungal disease causing white patches on leaves, and squash bugs, which suck sap from the plant’s stems and leaves.
To manage these threats, start by practicing good garden hygiene: remove weeds to reduce humidity around the plants and prevent pests from hiding in weeds. Inspect your plants regularly for signs of infestation or infection, such as holes in leaves or a sticky substance on the plant.
For organic pest control, introduce beneficial insects like ladybugs or lacewings that prey on squash bugs, or use neem oil to repel pests without harming beneficial insects. To combat powdery mildew, remove infected leaves and treat the remaining plants with a fungicide specifically designed for powdery mildew.
In addition to organic methods, consider integrated pest management techniques like crop rotation, which can reduce pest populations by breaking their life cycle. By implementing these strategies, you’ll be better equipped to protect your young pumpkin plants from pests and diseases, ensuring they thrive throughout the growing season.
Feeding and Supporting the Plant
Once you’ve got your seedlings off to a great start, it’s time to focus on feeding and supporting them as they grow into healthy, productive vines. This includes providing essential nutrients and training systems.
Fertilization Schedule
As your pumpkin plants grow and mature, they will require different amounts of nutrients to reach their full potential. Fertilizing at the right times is crucial for optimal growth, fruit size, and flavor. A well-planned fertilization schedule will ensure your pumpkins receive the necessary nutrients throughout their development.
Start by determining the N-P-K (nitrogen-phosphorus-potassium) ratio of your fertilizer. For pumpkin plants, a balanced formula with equal amounts of nitrogen, phosphorus, and potassium is ideal. You can also consider adding a starter solution for seedlings, which contains higher levels of phosphorus to promote root development.
As the vines spread, side-dress with a high-phosphorus fertilizer (such as 10-20-10) about 2 weeks after transplanting, followed by another application when the first flowers appear. Finish with a potassium-rich fertilizer (like 0-0-60) just before harvest to promote fruit size and overall health.
Remember to follow the instructions on your specific fertilizer package for proper application rates, as over-fertilization can be detrimental to plant growth.
Providing Support
As your pumpkin plants mature, they’ll start to produce massive leaves and vines that can become heavy with fruit. Without support, these plants may collapse under their own weight, causing the pumpkins to rot or become damaged. To prevent this, you’ll need to provide them with some structure to lean on.
You can use trellises or cages specifically designed for vining plants like pumpkins. These will keep your mature pumpkin plants upright and off the ground, allowing air to circulate around the leaves and preventing moisture from accumulating on the fruit. Simply place the trellis or cage next to the plant when it’s about 3-4 feet tall, and gently tie the vines to the support using twine or wire.
Another option is to create a makeshift support system using stakes or tomato cages. Drive the stakes into the ground near the plant, then tie the vines to them with twine. Make sure the stakes are sturdy enough to hold the weight of your mature pumpkin plants. With proper support, you’ll be able to enjoy a bountiful harvest of healthy, symmetrical pumpkins that will thrive in your garden for years to come.
Harvesting Your Pumpkins
Now that your pumpkin vines are flourishing, it’s time to reap the rewards of all your hard work and harvest those delicious pumpkins. We’ll guide you through the process step by step.
Timing and Inspection
When it comes time to harvest your pumpkins, timing is everything. You’ll want to wait until they’ve reached their full maturity, which can be determined by several factors. One of the most common signs of readiness is a fully developed skin color. For example, if you’re growing a white pumpkin variety, look for a creamy yellow or brown tint on the stem end. This indicates that the sugar levels have dropped and the rind has hardened, making it easier to handle.
Another key indicator is the texture of the skin. A mature pumpkin will have a hard, smooth rind with no soft spots. Avoid any pumpkins with bruising, cuts, or excessive scratches, as these can lead to rot and decay. Size is also important – most varieties are ready when they reach their maximum diameter, typically between 10-20 pounds.
To inspect your pumpkins, gently lift them off the vine, taking care not to damage the stem. Check for any signs of disease, pests, or damage. A healthy pumpkin will be heavy for its size and have a sturdy stem that’s easy to twist off. If you’re still unsure, use a gentle tug on the stem – if it comes off easily, your pumpkin is likely mature enough for harvest.
Handling and Storage
When it’s finally time to harvest your pumpkins, proper handling is crucial to prevent damage and ensure they remain fresh for as long as possible. Begin by carefully cutting the vines that connect the pumpkin to the rest of the plant. Use a sharp knife or pruning shears to avoid tearing the stem or causing excessive bleeding.
Next, gently lift the pumpkin away from the vine, taking care not to bruise or scratch its skin. Place it in a dry, well-ventilated area with indirect sunlight to prevent moisture buildup and promote drying.
When storing your pumpkins, consider the following tips: store them on a layer of newspaper or paper towels to absorb excess moisture; keep them away from direct sunlight, heat sources, and humid areas like basements or attics; and monitor their temperature – ideally between 50°F and 60°F (10°C and 15°C) is best.
By handling your pumpkins with care and providing a suitable storage environment, you’ll be able to enjoy them for longer periods and preserve the quality of your harvest.
Troubleshooting Common Issues
Don’t worry if things don’t go as planned – we’ve got you covered with solutions to common issues that might arise when growing pumpkins from seeds. Let’s troubleshoot together!
Common Problems and Solutions
As you embark on growing pumpkins from seeds, it’s essential to be aware of common problems that may arise during the growth cycle. Poor germination is one of the most significant challenges many gardeners face. This can be attributed to factors such as inadequate moisture, incorrect soil temperature, or old seeds. To boost germination rates, ensure your soil has a pH between 6.0 and 6.8, and maintain consistent moisture levels.
Pests and diseases are another set of common issues that may threaten your pumpkin crop. Aphids, whiteflies, and squash bugs can all cause damage to the plant’s leaves and stems. To address these issues using integrated pest management (IPM) techniques, start by inspecting your plants regularly for signs of infestation or disease. If you spot any problems, use neem oil or insecticidal soap as a gentle yet effective treatment.
Diseases like powdery mildew and downy mildew can also impact pumpkin growth. To prevent these issues, ensure good air circulation around the plant and avoid overwatering. Regularly inspect your plants for signs of disease, such as yellowing leaves or white powdery patches. If you do notice any problems, treat the affected area with a fungicidal spray.
Some other common issues gardeners may encounter include:
* Squash vine borer damage: inspect the base of the stem and vines for signs of tunneling or frass
* Blossom end rot: ensure consistent moisture levels and provide adequate calcium through fertilization
* Leaf scorch: protect your plants from intense sunlight by providing shade cloth or row covers
Frequently Asked Questions
How Do I Know if My Pumpkin Seeds Are Still Viable?
Check the moisture level of your seeds by placing a single seed between two damp paper towels. If it sprouts within 2-3 days, it’s still viable. You can also perform a simple germination test by soaking the seeds in water for 24 hours.
What’s the Best Time to Sow Pumpkin Seeds in My Area?
The ideal sowing time varies depending on your location and climate. Generally, sow pumpkin seeds when the soil has warmed up to at least 60°F (15°C) and the danger of frost has passed. Consult a local gardening calendar or consult with a nursery expert for specific guidance.
How Do I Prevent Common Pests Like Aphids and Slugs from Damaging My Pumpkin Plants?
To control aphid infestations, use neem oil or insecticidal soap. For slugs, set up traps using beer-filled containers or copper tape barriers around your plants. Regularly inspect your plants for signs of pests and take action promptly to prevent damage.
Can I Grow Pumpkins in Containers or Do They Need a Lot of Space?
Yes, you can grow pumpkins in containers! Choose a container with good drainage (at least 5-gallons) and use a well-draining potting mix. Keep the soil consistently moist but not waterlogged. Make sure your container is at least 6 feet tall to accommodate the mature plant’s spread.
How Do I Handle and Store My Harvested Pumpkins to Maintain Their Quality?
Handle harvested pumpkins carefully to avoid bruising or scratching their skin. Store them in a cool, dry place (around 50-60°F/10-15°C) with good air circulation. Avoid direct sunlight exposure, as it can cause the fruit to spoil faster.