Growing delicious potatoes in pots has never been easier or more rewarding. Whether you’re a seasoned gardener or just starting out, cultivating potatoes in containers is a great way to enjoy this versatile crop year-round. Not only do container-grown potatoes save space and eliminate the need for deep soil, but they also offer flexibility and control over growing conditions.
With the right variety and some basic care, you can successfully grow high-yielding potatoes that are bursting with flavor and nutrients. But where do you start? In this comprehensive guide, we’ll walk you through the entire process of growing potatoes in pots, from selecting the perfect variety to harvesting your crop at just the right time. By following our expert advice and tips, you’ll be enjoying fresh, homegrown potatoes in no time!
Choosing the Right Variety and Pot Size
When growing potatoes in a pot, selecting the right variety is crucial for success. We’ll walk you through choosing a suitable potato type and determining the perfect pot size for your needs.
Understanding Potato Types and Their Suitability for Container Growing
When it comes to growing potatoes in a pot, understanding the different types of potatoes is crucial for success. With over 4,000 varieties worldwide, choosing the right one can be overwhelming. However, not all potatoes are created equal when it comes to container growing.
Some popular potato varieties suitable for container growing include ‘Nicola’, ‘Charlotte’, and ‘Shetland Black’. These varieties produce smaller tubers that mature quickly, making them ideal for pots. ‘Nicola’ and ‘Charlotte’ are excellent choices for beginners, as they’re easy to grow and have a high yield.
On the other hand, larger varieties like ‘Maris Piper’ or ‘King Edward’ may not be the best fit for containers, as they require more space to produce large tubers. When selecting a variety, consider factors such as maturity days, disease resistance, and growth habits. For container growing, look for compact or dwarf varieties that mature within 10-12 weeks.
When choosing your potato variety, research the specific needs of each type to ensure you provide optimal growing conditions in your pot. This will help you achieve a bountiful harvest and enjoy delicious homegrown potatoes all season long.
Selecting the Perfect Pot Size for Your Potato Crop
When growing potatoes in a pot, selecting the perfect pot size is crucial for their healthy growth. A pot that’s too small will restrict root development and yield, while one that’s too large can lead to waterlogged soil and other issues.
As a general rule, you’ll want to choose a container that’s at least 12-14 inches deep and has a wide enough diameter to accommodate the mature plant size. A minimum pot size of 5-gallon capacity is recommended for most varieties, but some compact or fingerling potatoes can thrive in smaller pots as small as 3 gallons.
To determine the right pot size for your specific needs, consider the type of potato variety you’re growing and its expected mature height. For example, a ‘Russet’ potato can grow quite tall, so it’ll require more room to spread out than a compact ‘Red Thumb’ variety. Look for pots with good drainage holes and a sturdy base to prevent tipping over in strong winds.
Preparation is Key: Soil and Climate Considerations
Before you start planting, let’s talk about the most crucial factors that’ll determine your potato’s success: soil quality and climate conditions. We’ll cover everything you need to know to get started.
Understanding Soil pH Requirements for Potatoes
When growing potatoes in a pot, understanding the optimal soil pH requirements is crucial for their healthy development. Potatoes prefer a slightly acidic to neutral soil pH, ranging from 4.5 to 7.0. This range allows them to absorb necessary nutrients efficiently.
To determine your soil’s pH level, you can use a DIY soil testing kit or send a sample to a laboratory for analysis. These kits are inexpensive and easy to use, providing an approximate reading that will guide further action.
If your soil is too acidic (below 4.5), add dolomitic limestone to raise the pH gradually over several weeks. On the other hand, if your soil is alkaline (above 7.0), mix in elemental sulfur or peat moss to lower it slowly. Adjustments should be made at least six weeks before planting to give your potatoes a head start on optimal growth.
Keep in mind that soil pH can fluctuate during the growing season due to various factors, including fertilizer application and moisture levels. Monitor your potato plants’ response to these adjustments and make further tweaks as needed for optimal yields.
Preparing Your Container for Potato Growing: Temperature and Climate Factors
When growing potatoes in a pot, understanding the ideal temperature ranges and climate considerations is crucial for a successful harvest. Potatoes prefer cooler temperatures between 40°F (4°C) and 70°F (21°C), with optimal growth occurring between 50°F (10°C) and 60°F (15°C). Avoid exposing your container to extreme temperatures, as this can lead to poor growth or even plant death.
When it comes to climate considerations, choose a location that provides partial shade, especially during the hottest part of the day. Direct full sun can cause the soil temperature to rise, potentially leading to scorching and reduced yields. East- or west-facing windows are ideal for indoor growing, while outdoor containers should be placed in a spot that receives morning sunlight.
To protect your container from extreme weather conditions, use a breathable cover or shade cloth during intense heatwaves. You can also bring the pot under a shaded area if possible. Keep in mind that potatoes need consistent moisture to grow well; avoid placing them in areas with standing water or where water tends to collect.
Planting Potatoes in Containers: A Step-by-Step Guide
To successfully grow potatoes in a pot, it’s essential to choose the right container and follow a simple yet precise planting process that ensures optimal yields. Let’s dive into the steps for planting potatoes in containers.
Chitting Seeds or Seed Potatoes: What’s Best?
When it comes to growing potatoes in containers, you have two options for getting started: chitting seeds or seed potatoes. But what’s the difference between these two methods? Chitting seeds are small potato tubers that are harvested specifically for seed production, whereas seed potatoes are mature potatoes that have been certified disease-free and suitable for planting.
Chitting seeds can be a cost-effective option, but they may not produce as high of yields as seed potatoes. On the other hand, seed potatoes offer better germination rates and more robust growth, making them ideal for beginners. They’re also less likely to harbor diseases that can affect your potato crop. If you’re new to growing potatoes in containers, we recommend starting with seed potatoes. This will give you a head start on a healthy and productive harvest.
One thing to keep in mind when selecting seed potatoes is to choose certified disease-free varieties specifically labeled as “seed potatoes.” These have been bred for their high yield potential and resistance to common potato diseases. Avoid using store-bought potatoes, as they may not be suitable for planting. With the right variety of seed potatoes and proper care, you’ll be on your way to a successful and delicious homegrown crop.
Planting Depth and Spacing: Crucial Factors for Healthy Growth
When planting potatoes in containers, getting the depth and spacing right is crucial for healthy growth. A common mistake is planting seed potatoes too deeply, which can lead to rot and poor yields. Aim to plant them 2-4 inches (5-10 cm) deep, depending on their size and variety.
The ideal spacing also varies, but a general rule of thumb is to leave about 6-8 inches (15-20 cm) between each seed potato. This allows for even growth and prevents overcrowding, which can lead to fungal diseases like powdery scab.
To arrange your potatoes in the container, start by placing two or three seed potatoes on one side, spaced evenly apart. Then add more seed potatoes around them, leaving enough space between each plant for proper growth. Make sure the ‘eyes’ (small buds) of each seed potato are facing upwards, as this will help them grow new tubers.
Remember, it’s also essential to leave some space at the top of the container for air circulation and easy harvesting. A general guideline is to fill the container about 2/3 full with soil, leaving enough room for the potatoes to grow without getting too cramped.
Caring for Your Container-Grown Potatoes
Now that you’ve successfully grown your potatoes in a pot, it’s time to focus on their care and maintenance to ensure they remain healthy and continue to thrive. This section covers essential tips for container-grown potatoes.
Watering and Irrigation Strategies for Optimal Growth
Consistent moisture levels are crucial for optimal growth of container-grown potatoes. Overwatering can lead to rot and other diseases that can quickly kill the tubers, while underwatering can cause stunted growth and reduced yields. To maintain a healthy balance, water your potato plants when the top 1-2 inches of soil feel dry to the touch.
Soaker hoses or drip irrigation systems are excellent options for delivering water directly to the roots, minimizing evaporation and runoff. These methods also help you avoid overwatering by providing a steady supply of moisture as needed. Watering in the morning or early evening allows plants to absorb the moisture throughout the day.
To prevent overwatering, check the soil regularly and avoid getting water on the leaves or crown of the plant. A good rule of thumb is to water your potato plants when you see the first signs of green shoots emerging from the container’s surface. As the plants grow, increase watering frequency accordingly, but never let the soil get soggy or waterlogged.
Fertilization and Pest Control: Essential Practices for Healthy Plants
When it comes to fertilizing and controlling pests for container-grown potatoes, you want to maintain a delicate balance between providing essential nutrients and preventing potential threats. Start by using a balanced fertilizer with an N-P-K ratio of 10-10-10, which will provide your potatoes with the necessary nitrogen, phosphorus, and potassium.
Apply this fertilizer once a month during the growing season, making sure not to over-fertilize as this can lead to weak or spindly growth. Alternatively, you can also use a slow-release fertilizer that provides nutrients for an extended period.
As for pest control, common issues affecting container-grown potatoes include aphids, slugs, and powdery scab. To manage these pests, keep an eye out for signs of infestation and treat promptly with neem oil or insecticidal soap. For more severe problems like powdery scab, a fungicide specifically labeled for use on potatoes can help control the disease.
Some other preventive measures include keeping your container well-draining and maintaining good air circulation to reduce humidity levels. Additionally, inspect your plants regularly and remove any weak or infected growth to prevent the spread of pests and diseases. By following these practices, you’ll be able to enjoy a healthy and bountiful harvest from your container-grown potatoes.
Harvesting Your Container-Grown Potatoes
Now that your potatoes have matured, it’s time to carefully dig them up and enjoy the fruits of your labor, literally. This next step is crucial for maximizing flavor and yield.
Knowing When to Harvest: Signs of Maturity and Over-Maturity
When harvesting container-grown potatoes, it’s crucial to know when they’re mature and ready for digging. Visual signs are essential indicators of a potato’s readiness. Check the foliage: as the plant reaches maturity, its stems will start to yellow and die back. This process can take anywhere from 70 to 100 days after sowing.
However, don’t wait too long, as over-maturity sets in when the plants become fully dormant. At this stage, the tubers are often damaged by frost or disease. Look for signs of over-maturity: a complete cessation of growth, a change in foliage color from green to brown, and a slight softening of the stems.
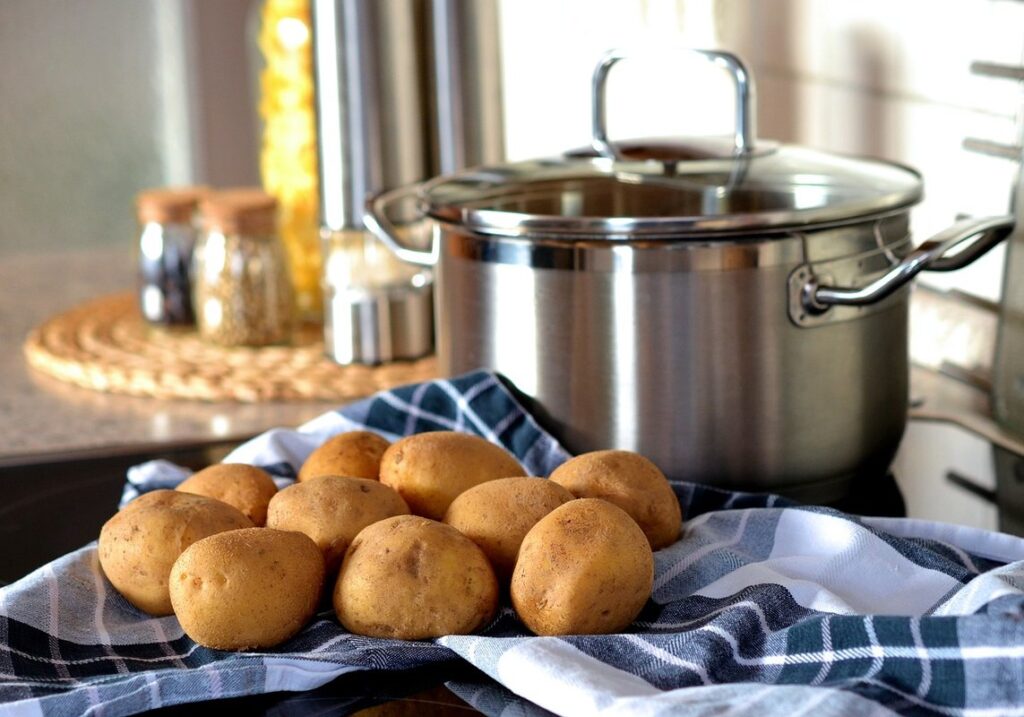
Check the size and shape of the potatoes themselves. Mature potatoes will be about 3-5 inches in diameter and have a smooth, unblemished skin. To determine if they’re ready for harvest, carefully dig around the plant with your fingers or a fork, being careful not to damage the tubers. Harvest mature potatoes before over-maturity sets in, usually between 10 to 14 weeks after sowing.
Tips for Easy Harvesting: Avoiding Damage and Maximizing Yields
When it’s time to harvest your container-grown potatoes, careful planning and execution are crucial to avoid damaging the tubers and maximize yields. To start, make sure you’ve allowed enough time for the plants to mature, typically around 70-100 days after sowing.
Before digging up the potatoes, stop watering them a few days in advance to make the soil easier to work with. Use a fork to carefully loosen the soil around each plant, taking care not to damage any of the tubers beneath. Once you’ve loosened the soil sufficiently, use your hands or a gentle spade to gently lift out the plants and their surrounding soil.
As you dig, handle the potatoes by the leaves rather than grasping them directly, which can cause bruising or breakage. Gently brush off any excess soil from the tubers and place them in a container for further cleaning and storage. This method will not only ensure your harvested crop remains intact but also reduce waste and give you a better understanding of how many potatoes are actually growing under your care.
Troubleshooting Common Issues with Container-Grown Potatoes
If you’re experiencing problems with your container-grown potatoes, don’t worry – we’ve got some expert advice to help you troubleshoot common issues and get back on track. From wilting leaves to poor yields, we’ll cover it all.
Identifying and Addressing Root Bound Conditions
As you tend to your container-grown potatoes, it’s essential to recognize the signs of root bound conditions. This common issue can stunt the growth and productivity of your potato plants. So, what are the telltale symptoms?
Look for slow growth rates, yellowing leaves, or a general decline in plant health. If your potato plants have outgrown their containers and are showing these signs, it’s likely they’ve become root bound. This occurs when the roots of the plant grow beyond the container’s capacity, restricting water and nutrient uptake.
Root bound conditions can be caused by inadequate pot sizes at planting or failure to repot as the plant grows. It’s not just a matter of waiting for the plant to outgrow its container; timely action is necessary to prevent this issue from becoming more severe.
To address root bound conditions, inspect your potato plants carefully and gently remove them from their containers. Gently tease apart the roots with your fingers or a blunt instrument to encourage new growth. Transfer the plant into a larger container with fresh potting mix, taking care not to damage any roots during the process.
Overcoming Other Challenges: Too Much Water, Not Enough Sunlight, and More
In addition to common issues like poor soil quality and inadequate drainage, container-grown potatoes can also face challenges related to water and light. Overwatering is a common problem that can be detrimental to potato tubers. When the soil is consistently waterlogged, it prevents oxygen from reaching the roots, leading to rot and decay. To address this issue, check the soil moisture regularly by sticking your finger into the soil up to the first knuckle. If the soil feels wet, wait a few days before watering again.
On the other hand, underwatering can also cause problems, especially during hot weather when potatoes need consistent moisture to produce well. Aim to provide about 1-2 inches of water per week, either from rainfall or irrigation. Make sure your container has good drainage holes in the bottom to prevent waterlogged soil.
Potatoes grown in containers may not receive enough sunlight, which can lead to weak and spindly growth. If possible, move the container to a spot that receives direct sunlight for at least 6 hours a day. If this isn’t feasible, consider using grow lights to supplement the natural light.
Conclusion and Next Steps
Now that you’ve successfully grown potatoes in a pot, it’s time to take your knowledge to the next level by considering what’s next for your harvest. Let’s review our progress and look ahead.
Recap of Key Takeaways from This Guide
Now that you’ve worked through this comprehensive guide on growing potatoes in a pot, let’s recap the essential points to ensure you’re well-equipped to successfully cultivate these delicious tubers.
This guide started with choosing the right potato variety for container gardening and understanding their specific needs. You learned how to prepare your container by selecting a suitable size, filling it with the perfect blend of soil mix, and providing adequate drainage.
You also discovered how to obtain seed potatoes from certified suppliers or through proper storage and handling techniques to avoid disease issues. The guide covered proper sowing methods, including planting at the right depth and spacing, as well as providing sufficient sunlight and maintaining consistent moisture levels throughout the growing season.
Additionally, you learned various tips for promoting healthy growth, such as fertilizing regularly, monitoring for pests and diseases, and harvesting at the optimal time to avoid new growth. By following these key takeaways, you’ll be on your way to enjoying a bountiful harvest of fresh homegrown potatoes from your very own container garden.
Encouragement for Experimentation and Continued Learning
As you’ve reached the end of this comprehensive guide on growing potatoes in a pot, we hope you’re feeling confident and inspired to give it a try. Growing potatoes in pots can be a rewarding experience, but it’s essential to remember that experimentation and continued learning are key to achieving success.
Don’t be discouraged if your first attempts don’t yield the desired results – every gardener starts somewhere! The beauty of growing potatoes in pots lies in its flexibility and adaptability to different environments. You might need to tweak your approach based on factors like temperature, sunlight, or soil quality.
To continue learning and improving your potato-growing skills, consider trying out new varieties each season. Some popular heirloom varieties like ‘Nicola’ and ‘Shetland Black’ have unique characteristics that can add variety to your harvest. Experiment with different growing methods, such as using a self-watering pot or incorporating compost tea into your soil mix.
By embracing experimentation and continued learning, you’ll not only refine your technique but also develop a deeper understanding of the potato plant‘s needs and preferences. This knowledge will enable you to adapt to changing conditions and optimize your harvest for future seasons.
Frequently Asked Questions
Can I Grow Potatoes in a Shaded Location?
Yes, you can grow potatoes in partially shaded locations, but be aware that this will affect the yield and flavor of your crop. When growing in shade, choose varieties that are specifically bred for container growing or those with a higher tolerance to shade.
How Do I Know If My Container-Grown Potatoes Are Root Bound?
Root bound conditions can occur when the roots have outgrown the container’s capacity. Check by gently removing the plant from its pot; if the roots are circling or filling the entire container, it’s time to transplant them into a larger one.
What Happens If I Don’t Use Seed Potatoes? Can I Still Grow Healthy Potatoes?
While seed potatoes are ideal for growing new plants, you can also use store-bought potatoes. However, be aware that the resulting plants may not produce tubers of the same quality or quantity as those grown from true seed potatoes.
How Do I Prevent Pests and Diseases in My Container-Grown Potato Crop?
To prevent pests and diseases, make sure your container is well-ventilated and use a balanced fertilizer. Keep an eye out for signs of common issues like aphids, slugs, and powdery scab. Regularly inspect your plants and take action promptly if you notice any problems.
Can I Grow Potatoes in Containers Year-Round?
In regions with mild winters, it’s possible to grow potatoes year-round by adjusting the planting schedule accordingly. However, in colder climates, you’ll need to plan for separate spring and fall harvests, using cold frames or greenhouses to extend the growing season if necessary.