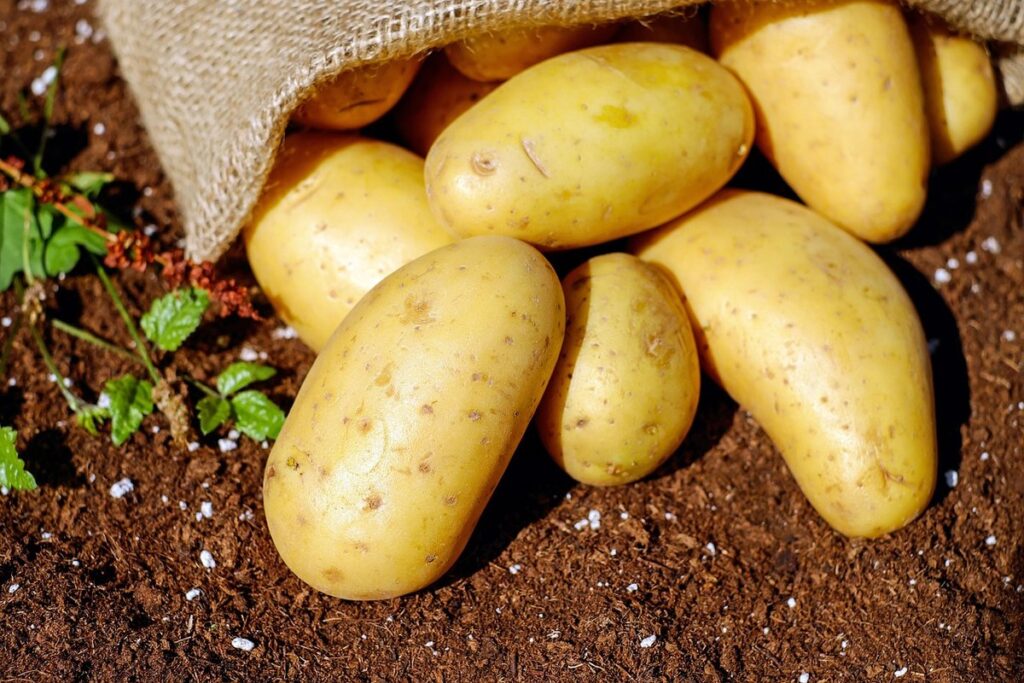
Are you tired of wasting space in your garden for bulky potato beds? Do you want to enjoy fresh, homegrown potatoes without sacrificing precious gardening real estate? Growing potatoes in a sack is a game-changer for space-conscious gardeners. Not only does it save room, but it also makes harvesting and storing your crop a breeze. But before you start growing your own spuds, you need to know the secrets to success.
In this article, we’ll cover everything from selecting disease-resistant varieties to overcoming common issues like pests and poor yields. We’ll share expert tips on space-saving gardening techniques and provide guidance on how to properly harvest and store your potatoes for maximum flavor and nutrition. Whether you’re a seasoned gardener or just starting out, our step-by-step guide will have you growing delicious potatoes in no time.
Choosing the Right Variety
When growing potatoes in a sack, selecting the right variety is crucial for success. This section will walk you through the process of choosing the perfect potato type for your garden needs.
Selecting Disease-Resistant Varieties
Selecting disease-resistant varieties is crucial when growing potatoes in a sack. Late blight and scab are two of the most common diseases that can devastate a potato crop. These diseases can spread quickly, especially in moist environments like a sack. To avoid this, look for potato varieties that have built-in resistance to these diseases.
When shopping for disease-resistant varieties, check the seed catalog or ask your supplier about the specific traits of the variety you’re interested in. Some popular disease-resistant varieties include ‘Nicola’, ‘Charlottes’, and ‘Maris Piper’. These varieties have been bred to resist late blight and scab, making them a great choice for growers who want to minimize the risk of disease.
When evaluating a potato variety, look for keywords like “resistant” or “tolerant” in the description. This indicates that the variety has been tested and shown to be resistant to specific diseases. Additionally, consider factors like climate and soil type when selecting a variety, as some varieties may perform better in certain conditions.
By choosing disease-resistant varieties, you can reduce the risk of disease outbreaks and enjoy a healthier, more productive potato crop.
Considering Climate and Soil Conditions
When choosing a potato variety for growing in a sack, it’s essential to consider the climate and soil conditions where you live. Different varieties have unique requirements when it comes to temperature, sunlight, and moisture.
If you’re living in a hot and dry climate, look for varieties that are resistant to heat stress such as ‘Beauregard’ or ‘Yukon Gold’. These varieties will tolerate temperatures above 85°F (30°C) and require minimal watering. On the other hand, if you live in an area with cool and wet winters, choose varieties like ‘Nicola’ or ‘Maris Piper’ that thrive in these conditions.
In terms of sunlight, most potato varieties require at least six hours of direct sunlight per day. However, some varieties like ‘Red Thumb’ can tolerate partial shade. Consider the amount of sunlight your sack-grown potatoes will receive when selecting a variety.
It’s also crucial to choose a variety suitable for your soil type. If you have heavy clay or sandy soil, look for varieties that are tolerant of these conditions, such as ‘Russet’ or ‘Charlottes’. By considering climate and soil conditions, you can ensure the best possible outcome for your sack-grown potatoes.
Preparing the Sack Garden
Before we start growing our potatoes, let’s prepare a clean and welcoming space for them to thrive in their sack garden at home. Choose a location with good drainage and sunlight.
Sack Selection and Preparation
When it comes to growing potatoes in a sack, the right equipment is essential. You can use old burlap bags or specialized potato sacks specifically designed for this purpose. The former are often readily available and inexpensive, while the latter may offer better durability and easier handling.
For a successful grow, make sure your sack has sufficient drainage holes. You can achieve this by drilling a series of small holes around the bottom and sides of the bag. This will ensure excess water doesn’t accumulate and cause root rot.
Old burlap sacks typically have more defined stitching lines that allow for easy puncturing with an awl or drill bit. On the other hand, specialized potato sacks may require more effort to pierce due to their thicker materials.
To optimize drainage and aeration, you can also punch two to three larger holes near the bottom of the sack for air exchange. This will help roots breathe while keeping moisture levels under control. The size and placement of these holes are crucial in maintaining a healthy environment for your potato crop.
Soil Mix and Amendments
When it comes to growing potatoes in a sack, using the right soil mix is crucial. A well-draining potting mix specifically designed for container gardening will help prevent waterlogged soil and root rot, which can be disastrous for your potato crop. Look for a mix that contains ingredients like perlite or vermiculite, which will improve drainage and aeration.
In addition to a good potting mix, you may also want to consider adding some amendments to give your potatoes an extra boost. Compost is an excellent choice – it’s rich in nutrients and will help retain moisture in the soil. You can either buy bagged compost or make your own at home using kitchen scraps and leaves.
If you’re short on space or prefer a more concentrated fertilizer, a balanced potash-based fertilizer like 10-10-20 will work well too. Just be sure to follow the instructions carefully and avoid over-fertilizing, as this can damage your plants.
Planting Potatoes in Sacks
When planting potatoes in sacks, it’s essential to start by preparing your container and filling it with a suitable growing medium. Follow these steps for a successful sack-based potato harvest.
Spacing and Depth Guidelines
When planting potatoes in sacks, it’s essential to get the spacing and depth just right. This will ensure healthy growth, prevent overcrowding, and maximize yields.
As a general rule of thumb, plant 2-3 seed potatoes per 10-liter sack, leaving about 5-7 cm (2-3 inches) between each potato. You can also plant them in two rows if the sack is wide enough, with 1-2 cm (0.5 inch) between each row.
When planting, make sure to place the “eyes” of the seed potatoes facing upwards and about 10-15 cm (4-6 inches) below the surface of the compost or potting mix. Plant them too deeply, and the eyes may rot before they can produce new growth.
To achieve the correct depth, simply fill the sack with compost to about half its height, plant the seed potatoes, and then add more compost on top, leaving a small amount of space at the top for watering. This will give your potatoes room to grow and allow you to harvest them easily when they’re mature.
Using Seed Potatoes vs. Store-Bought Potatoes
When it comes to planting potatoes in sacks, one crucial decision is whether to use certified disease-free seed potatoes or store-bought potatoes. While store-bought potatoes may be cheaper and readily available, they’re not the best choice for growing potatoes in a sack.
Using store-bought potatoes can lead to several problems. Firstly, these potatoes have often been treated with chemicals to extend their shelf life, which can harm your plants’ growth. Moreover, store-bought potatoes are more likely to carry diseases such as late blight or scab, which can easily spread through your potato crop.
In contrast, certified disease-free seed potatoes offer several advantages. They’re bred specifically for cultivation and have been tested for disease presence, ensuring a higher yield and healthier plants. These seed potatoes also come in various varieties, offering you the opportunity to experiment with different flavors and textures.
To ensure success when planting seed potatoes, make sure to order from reputable suppliers or grow your own seed potatoes by saving tubers from last year’s crop. When selecting seed potatoes, look for ones that are certified disease-free and suitable for your region’s climate.
Caring for Sack-Grown Potatoes
Now that you’ve successfully grown your potatoes in a sack, it’s time to learn how to care for them to ensure they stay healthy and produce a bountiful harvest. In this section, we’ll guide you through the key steps for optimal potato care.
Watering and Humidity Management
Watering and humidity management are crucial for healthy sack-grown potatoes. To maintain consistent moisture levels, it’s essential to monitor soil moisture regularly. Stick your finger into the soil up to the first knuckle, and if the soil feels dry, it’s time to water. Water thoroughly until you see water coming out of the drainage holes.
Watering frequency depends on the climate and weather conditions in your area. In hot and dry weather, potatoes may need watering every 2-3 days, while in cooler and more humid climates, they can go a week or more without watering. A good rule of thumb is to check the soil daily and adjust your watering schedule accordingly.
Maintaining humidity around the plants is also vital for healthy growth. You can cover the sack with a breathable cloth or plastic bag to maintain moisture levels and regulate temperature. However, be cautious not to overdo it, as excessive moisture can lead to rot and disease.
Fertilization and Pest Control
Fertilization and pest control are crucial aspects of caring for sack-grown potatoes. Regular fertilization ensures that your potato plants receive the necessary nutrients to produce a bountiful harvest.
To maintain optimal soil health, fertilize your potatoes with a balanced fertilizer (10-10-10 NPK) once a month. However, if you’re using compost tea or worm casting as a natural fertilizer, you can apply it every two weeks. This will not only provide essential nutrients but also promote healthy microbial growth in the soil.
Common pests that affect sack-grown potatoes include aphids, potato beetles, and Colorado potato beetles. To control these pests organically, introduce beneficial insects like ladybugs or lacewings into your sack garden. These natural predators feed on the pest population, preventing them from damaging your crop.
Additionally, you can use neem oil or insecticidal soap to repel aphids and other pests. Mix 2-3 tablespoons of neem oil with water and spray it on your potato plants to keep them safe from infestation.
Harvesting Potatoes from Sacks
Now that your potato crop is mature, it’s time to harvest them from their sacks. Let’s go through a step-by-step guide on how to gently remove your spuds without damaging them.
Timing and Methodology
When to Harvest Potatoes from Sacks: Timing and Methodology
The moment of truth has finally arrived – your potato plants have reached maturity, and it’s time to dig up those delicious tubers. But when exactly is that? Look for the following signs to determine if your potatoes are ready for harvest:
* The tops of the plants will start to yellow and die back, indicating that the energy is being transferred from the plant to the tubers.
* The soil around the base of the plants will become loose and easy to dig into.
As you prepare for harvest, it’s essential to use a gentle approach to avoid damaging the delicate tubers. Start by carefully digging around the base of each plant with a fork, working your way gently through the soil without applying too much pressure. Once you’ve loosened the soil, use your hands or a gentle digging tool to carefully lift out the potatoes, taking care not to bruise or break them. Remember, patience is key – take your time and work slowly to avoid damaging those precious tubers.
Storing and Preserving Harvested Potatoes
When you’ve finally harvested those delicious potatoes from your sack, it’s essential to store and preserve them properly to maintain their quality and nutritional value. Here are some tips to help you do just that.
Firstly, make sure the area where you’ll be storing your potatoes is cool, dark, and dry. A basement or a root cellar is ideal, but if you don’t have one, a cupboard or pantry will do. The key is to keep them away from direct sunlight, heat sources, and moisture. This will help prevent sprouting, rotting, and other issues that can affect their flavor and texture.
To further extend the storage life of your potatoes, consider these tips: store them in paper bags or breathable containers to maintain airflow; don’t wash them before storing; keep them away from strong-smelling foods, as potatoes absorb odors easily; and regularly inspect your stored potatoes for any signs of spoilage. By following these simple steps, you’ll be able to enjoy your homegrown potatoes well into the winter months.
You can also consider freezing or dehydrating some of your harvest if you want to make them last even longer. This way, you can enjoy them in soups, stews, and other dishes throughout the year.
Troubleshooting Common Issues
Don’t worry if things don’t go as planned – we’ve got you covered! This section will walk you through common issues that may arise while growing potatoes in a sack.
Identifying Pests and Diseases
When growing potatoes in a sack, it’s not uncommon for pests and diseases to strike. Being able to identify them early on is crucial in preventing their spread and minimizing damage to your crop. Here are some common pests and diseases that can affect sack-grown potatoes:
* Aphids: These tiny insects can be identified by their pear-shaped bodies and long, thin legs. They feed on sap, causing curled or distorted leaves.
* Nematodes: Microscopic worms that infect the plant’s roots, leading to stunted growth and yellowing leaves.
To prevent infestations, ensure your sack-grown potatoes have good air circulation and are not overcrowded. Regularly inspect your plants for signs of pests, such as eggs or actual insects on the undersides of leaves or stems. If you suspect an issue, treat with neem oil or insecticidal soap. Keep in mind that prevention is key – if left unchecked, these problems can spread rapidly.
Common diseases to watch out for include powdery scab and blackleg. Look for white powdery patches on the tubers or small, dark spots on the leaves. Early detection allows for timely treatment with fungicides, which can help control the problem before it’s too late.
Addressing Soil pH and Nutrient Deficiencies
Maintaining optimal soil pH levels is crucial for potato growth. Potatoes prefer a slightly acidic to neutral soil pH between 4.5 and 7.0. If the soil pH is too high, it can lead to nutrient deficiencies and reduced yields. To check your soil pH, you can purchase a DIY testing kit or send a sample to a lab for analysis.
Common nutrient deficiencies that impact potato growth include nitrogen (N), phosphorus (P), potassium (K), magnesium (Mg), sulfur (S), and boron (B). Nitrogen promotes leaf growth, while phosphorus is essential for root development. Potassium helps with water balance and stress tolerance. Magnesium aids in photosynthesis, while sulfur supports the synthesis of amino acids.
To address nutrient deficiencies, you can add organic matter like compost or well-rotted manure to improve soil fertility. You can also use balanced fertilizers that provide a mix of N-P-K (nitrogen-phosphorus-potassium). For example, if your test results show low phosphorus levels, apply a fertilizer rich in P, such as bone meal or fish emulsion. Regularly monitoring and adjusting your fertilizer applications will help you maintain optimal nutrient levels for healthy potato growth.
Conclusion
Now that you’ve successfully grown potatoes in a sack, it’s time to reflect on what worked well and what didn’t. Start by evaluating your soil quality and sunlight exposure – were there any areas where you could improve? Perhaps you noticed some of your potatoes developed eyes or shoots outside the sack; consider this when planning for next season’s harvest.
When storing your harvested spuds, keep them in a cool, dark place to prevent sprouting. If you notice any green spots or sprouts on your potatoes, be sure to remove them as they can be toxic. Consider experimenting with different potato varieties to see which ones thrive best in sack cultivation – it might just become your new favorite method!
As you look back on your experience, think about what you’d like to change or improve next time. Take note of any tips or advice from fellow gardeners and make adjustments accordingly. With a little creativity and experimentation, growing potatoes in a sack can be a fun and rewarding endeavor – so don’t give up!
Frequently Asked Questions
How often should I water my sack-grown potatoes?
When growing potatoes in a sack, it’s essential to maintain consistent moisture levels to promote healthy growth and prevent disease. Water your potato sacks when the top 2-3 inches of soil feel dry to the touch. Avoid overwatering, as this can lead to root rot and other issues.
Can I reuse the same sack for multiple harvests?
Yes, you can reuse a sack for multiple harvests by properly cleaning and disinfecting it after each use. Remove any remaining potato debris, scrub the sack with soap and water, and let it dry completely before refilling and replanting. This will help prevent disease buildup and ensure continued success.
How do I handle pests like aphids and Colorado potato beetles when growing potatoes in a sack?
To control pests when growing potatoes in a sack, use integrated pest management techniques. Encourage beneficial insects, such as ladybugs and lacewings, which prey on aphids and other pests. Use neem oil or insecticidal soap to control infestations, and remove any affected plants to prevent the problem from spreading.
What’s the ideal temperature range for growing potatoes in a sack?
Potatoes prefer cooler temperatures between 40°F (4°C) and 60°F (15°C) for optimal growth. Avoid exposing your potato sacks to direct sunlight or extreme temperatures, as this can lead to scabbing and other issues.
Can I grow other root vegetables like carrots or beets alongside potatoes in a sack?
While it’s technically possible to grow multiple crops together, it’s not recommended for optimal results. Potatoes have unique needs that may compete with those of other root vegetables. For best success, dedicate separate sacks to each crop type, taking into account their individual growing requirements and space needs.