Want to have fresh homegrown spuds at your fingertips? Growing potatoes from potato eyes is a fun and rewarding experience that requires minimal space and equipment. Not only can you save money on grocery bills, but you’ll also enjoy the satisfaction of harvesting your very own crop. But before you start digging in, it’s essential to choose the right variety for your climate and needs. In this article, we’ll guide you through the entire process, from selecting high-yielding potato eyes to optimal growing conditions and common issues to watch out for. We’ll also cover long-term care tips to ensure a bountiful harvest. With our expert advice, you’ll be on your way to growing delicious potatoes in no time!
Choosing the Right Variety and Tools
To grow delicious potatoes, you’ll want to choose a variety that suits your climate and desired yield, and have the right tools on hand for harvesting. Let’s get started!
Selecting the Best Seed Potatoes
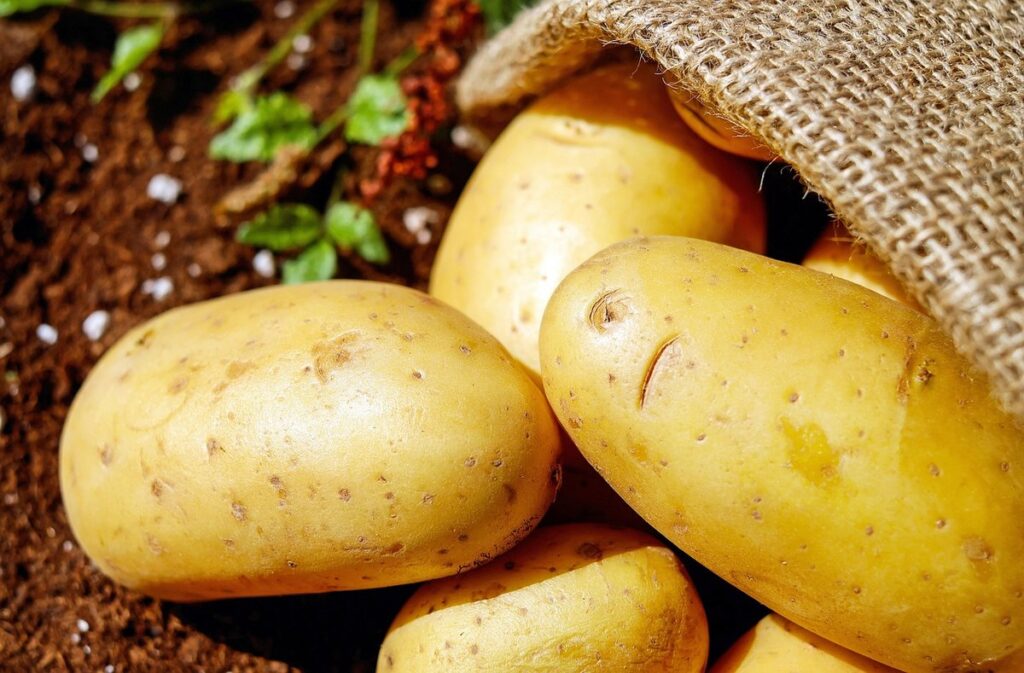
When selecting seed potatoes for growing, it’s essential to choose varieties that are disease-free and suitable for your climate. Start by purchasing certified disease-free seed potatoes from a reputable supplier. These seeds have been tested for diseases such as potato blight, scab, and powdery scab.
Consider the climate in your area when choosing seed potatoes. For example, if you live in a cool, moist climate, look for varieties that are resistant to late blight. If you live in a hot, dry climate, choose varieties that are drought-tolerant.
There are two main types of seed potatoes: ‘chitted’ and ‘un-chitted’. Chitted seeds have been allowed to sprout before sale, which can give them a head start on the growing season. Un-chitted seeds require a longer growing period but are often less expensive. Decide which type is best for your needs and choose varieties that fit your desired potato type, such as maincrop or new potatoes.
Remember to handle seed potatoes carefully to avoid bruising, which can lead to disease entry points. When in doubt, choose certified seed potatoes from a trusted supplier.
Essential Tools for Growing Potatoes from Eyes
When it comes to growing potatoes from eyes, having the right tools on hand can make all the difference. Let’s start with the basics: containers or bags. You’ll need something that can hold at least 5-7 gallons of soil, so a large bucket or container is ideal. If you prefer to use bags, make sure they’re specifically designed for growing potatoes and have drainage holes to prevent waterlogged soil.
Next up are the essentials: soil, water, and sunlight. You’ll need high-quality seed starting mix that’s rich in organic matter and has a pH between 4.5 and 7.0. Water your potato eyes gently but thoroughly, making sure not to wash away any emerging roots or sprouts. As for sunlight, aim for at least 6 hours of direct sun per day – south-facing windows are perfect.
Additional equipment can also come in handy, such as a soil thermometer to monitor temperature (around 60-70°F is ideal), a watering can with a fine rose to deliver gentle watering, and even a trellis or support system for larger varieties.
Preparing the Seed Potatoes
Before you start planting, it’s essential to prepare your seed potatoes by choosing the right variety and checking for any signs of disease or rot. This will give them the best chance to thrive.
Cleaning and Drying the Potato Eyes
When handling seed potatoes, it’s essential to follow proper hygiene practices to minimize the risk of disease and infection. Start by gently washing the potato eyes under cold running water to remove any dirt or debris that may be present. Use a soft-bristled brush to gently scrub away any stubborn bits, but be careful not to scratch the delicate skin around the eyes.
Next, dry the potato eyes thoroughly with a clean towel or paper towels. This step is crucial in preventing moisture from accumulating and fostering the growth of bacteria and other pathogens. You can also place the seed potatoes on a wire rack or tray, allowing air to circulate freely and speed up the drying process. To be extra cautious, some gardeners even use a disinfectant solution to gently swab the eyes before planting.
Remember, cleanliness is key when working with seed potatoes. A quick rinse under cold water and a thorough dry with a clean towel can go a long way in ensuring healthy growth and preventing potential problems down the line.
Creating an Optimal Environment for Sprouting
To create an optimal environment for sprouting, you need to provide the seed potatoes with the right conditions. Temperature plays a crucial role, and the ideal range is between 60°F to 70°F (15°C to 21°C). Keep in mind that temperatures above 75°F (24°C) can cause the seeds to sprout too quickly, leading to weak or deformed shoots.
Maintaining high humidity is also essential for sprouting. You can cover the seed potatoes with a clear plastic bag or a cloche to create a mini-greenhouse effect. This will help retain moisture and warmth, promoting healthy growth. Make sure to ventilate the area occasionally to prevent fungal diseases from taking hold.
Lighting requirements are minimal during the initial sprouting phase. In fact, direct sunlight can be detrimental as it can cause the seeds to dry out. A bright, indirectly lit space or a north-facing window is perfect for this stage. Keep the seed potatoes away from any heating vents or radiators to prevent excessive heat buildup.
Planting the Potato Eyes
To successfully grow potatoes from potato eyes, you’ll want to carefully prepare each eye for planting, making sure they’re healthy and ready to sprout. Follow these steps to get started.
Methods for Growing Potatoes from Eyes
When it comes to growing potatoes from eyes, you have several methods to choose from. One popular option is planting them in bags or containers. This method allows for good drainage and a consistent temperature, which can lead to healthier plants.
To plant potatoes in a bag, start by filling the container with about 6-8 inches of potting soil. Make sure the soil is well-draining and contains no weeds. Next, place two to three seed eyes on top of the soil, with the “eyes” facing upwards. Cover them gently with a thin layer of soil.
Raised beds are another great option for growing potatoes from eyes. This method provides good drainage and allows you to control the amount of sunlight your plants receive. Simply dig a trench in the bed, 2-3 inches deep, and plant two or three seed eyes in each one. Cover them with a thin layer of soil.
When planting in direct soil, make sure to choose an area with full sun and good drainage. Plant seed eyes 2-4 inches apart, with the “eyes” facing upwards. Space rows about 3 feet apart for optimal growth. Keep in mind that if you’re planting in direct soil, it may take longer for the plants to mature due to potential disease and pest issues.
It’s essential to note that regardless of which method you choose, make sure to provide adequate space between seed eyes for optimal growth. Overcrowding can lead to reduced yields and lower quality tubers.
Tips for Achieving Maximum Sprouting Success
When it comes to achieving maximum sprouting success with potato eyes, there are several key factors to monitor. First and foremost, temperature fluctuations can greatly impact the sprouting process. Ideally, you want to maintain a consistent temperature between 60°F to 70°F (15°C to 21°C) during the day, with a slight drop in temperature at night. This mimics the natural environment where potatoes typically grow.
To ensure optimal temperature conditions, consider placing your potato eyes in an area that’s protected from direct sunlight and drafts. Avoid placing them near heating vents or radiators, as these can cause sudden spikes in temperature.
Another crucial aspect to watch out for is overwatering. Potato eyes need consistent moisture but excessive watering can lead to rot and kill the sprouts. Check the soil daily and only water when it feels dry to the touch. By paying attention to these two factors – temperature and watering – you’ll significantly increase your chances of successful sprouting. This will give your potatoes a strong foundation to grow into healthy, thriving plants.
Nurturing the Potato Plants
Once you’ve successfully planted your potato eyes, it’s time to focus on nurturing them into healthy, thriving plants. This is where regular care and attention come into play.
Understanding the Growth Stages of Potatoes
As you nurture your potato plants, it’s essential to understand the different growth stages they’ll go through. The journey from sprouting to harvesting can be exciting, but also challenging if you don’t know what to expect.
It all begins with initial sprouting, where you should start to see green shoots emerging from the soil within 1-2 weeks after planting. This is a sign that your potato eyes are responding to the right conditions – adequate light, water, and temperature. As the plants grow, they’ll develop leaves and stems, and eventually produce flowers.
However, not all varieties of potatoes produce flowers, so don’t worry if you don’t see any blooms. The focus should be on developing a strong root system, which will help the tubers form underground. Common issues during this period include fungal diseases, pests, and nutrient deficiencies. Regular monitoring and maintenance can prevent these problems. For example, ensure good air circulation around your plants to reduce moisture that can lead to fungal growth.
By understanding the growth stages of potatoes and being proactive in addressing any potential issues, you’ll be well on your way to a successful harvest.
Common Pests and Diseases Affecting Potatoes
As you nurture your potato plants, it’s essential to be aware of common pests and diseases that can affect them. One of the most prevalent pests is the Colorado potato beetle (Leptinotarsa decemlineata), which can cause significant damage to leaves and tubers. These beetles are typically yellow or black with a distinctive white stripe running down their back, and they tend to congregate on the underside of leaves.
Another common pest is the potato aphid (Macrosiphum euphorbiae), which feeds on plant sap and can weaken the plant’s immune system, making it more susceptible to disease. Aphids are often found in clusters on the stems or leaves and can be controlled with neem oil or insecticidal soap.
Fungal diseases such as late blight (Phytophthora infestans) and scab (Streptomyces scabies) are also common issues affecting potato plants. To manage these pests and diseases, maintain good hygiene by removing weeds that can harbor pests and diseases, keep your garden free of debris, and practice crop rotation to reduce the risk of soil-borne pathogens.
Regularly inspect your plants for signs of infestation or disease, such as yellowing leaves, black spots, or aphid colonies. By being proactive and taking prompt action when issues arise, you can prevent minor problems from becoming major concerns.
Monitoring Progress and Harvesting
Now that your potato eyes have been planted, it’s time to keep a close eye on their progress. This is where careful monitoring comes in, ensuring your crop reaches its full potential.
Checking for Maturity and Optimal Harvest Time
As you tend to your potato plants, it’s essential to know when they’re ready for harvest. Checking for maturity and optimal harvest time is crucial to avoid missing the window of opportunity or leaving them on the vine too long. One way to determine if your potatoes are mature is by gently digging around the base of the plant with a fork, being careful not to damage any tubers.
If the tubers are small and green, they’re likely not yet ready for harvest. However, if they feel heavy for their size and have developed a nice firmness, it’s usually time to dig them up. Another method is to check the tops of the plants. When the leaves start to yellow and die back, it’s a sign that the tubers are mature.
In terms of optimal harvest time, aim to collect your potatoes when the majority of the tubers have reached their full size. This can vary depending on factors such as weather conditions and potato variety. Generally, maincrop varieties take around 70-100 days to mature after planting, while salad or new potatoes are ready in about 40-50 days.
When you’ve decided it’s time to harvest, make sure the soil is dry enough to allow for easy digging, but not so dry that it’s cracked and difficult to work with. Use a fork to carefully lift the tubers out of the ground, taking care not to damage any.
Tips for Harvesting Your Homegrown Potatoes
When you notice that the tops of your potato plants have begun to yellow and die back, it’s time to start harvesting. This is a sign that the tubers are mature and ready for digging.
To minimize damage to the roots and surrounding soil, wait until after a few light frosts have killed off the tops of the plants. This makes the tubers easier to spot as they’re less likely to be buried too deep in the soil. Use a garden fork to gently loosen the soil around the base of the plants, taking care not to damage any nearby roots.
Once you’ve loosened the soil, use your hands or a small shovel to carefully dig up the tubers. Start by digging on the periphery of each plant and work your way inwards to avoid compacting the surrounding soil. Be sure to handle the potatoes gently to prevent bruising or breaking them. It’s better to harvest them at this stage rather than leaving them to rot in the ground, so take a moment to appreciate your hard-earned harvest!
Troubleshooting Common Issues and Maintaining Soil Health
As you embark on growing your own potatoes from scratch, it’s essential to know how to address common problems and maintain a healthy environment for them to thrive. This section will guide you through common issues and best practices for soil care.
Addressing Common Growing Pains
Growing potatoes from eyes can be a rewarding experience, but it’s not uncommon for issues to arise that may impact yields and plant health. One of the most common problems is poor seed potato quality, which can lead to weak or diseased plants.
To troubleshoot this issue, inspect your seed potatoes carefully before planting. Look for any signs of rot, mold, or discoloration on the eyes, as these can indicate a lack of viability. If you notice any issues, consider replacing the affected seeds with fresh ones from a reputable supplier. This will ensure that you have healthy starting material.
Another common issue is plant decline due to inadequate sunlight or poor soil conditions. To address this, choose a location with full sun and well-draining soil rich in organic matter. Make sure not to overwater your seedlings, as this can lead to root rot and reduce yields.
In extreme cases of decline, it may be necessary to thin out weak plants and prioritize the healthiest ones.
Long-Term Care for Your Potato Plants
As you continue to tend to your potato plants, it’s essential to provide long-term care to ensure their health and performance. Just like humans, potatoes have different stages of growth that require specific attention. Once the plants start producing tubers, they’ll continue to grow throughout the season. To maintain optimal soil health and promote a bountiful harvest, keep the following tips in mind.
Water them regularly but avoid overwatering, which can lead to disease and pest issues. Monitor your plants’ needs daily, especially during periods of rapid growth. Mulch around the base of the plants to retain moisture and suppress weeds. This will help prevent competition for nutrients and reduce the need for additional fertilizers.
Keep an eye out for pests like aphids, slugs, and snails that can damage leaves and tubers. Regularly inspect your plants for signs of disease such as yellowing or wilted leaves, and take prompt action to treat any issues you find. With proper care and attention, your potato plants will continue to thrive and reward you with a healthy crop come harvest time. By maintaining soil health and providing ongoing care, you’ll be well on your way to achieving optimal performance from your potato plants.
Frequently Asked Questions
Can I grow potatoes from store-bought potatoes instead of buying seed potatoes specifically for growing?
No, it’s not recommended to use store-bought potatoes for growing as they may have been treated to prevent sprouting and may be contaminated with diseases. Buying certified disease-free seed potatoes ensures a healthy start to your potato crop.
How often should I water the potato plants during their growth stages?
Water the potato plants regularly, but avoid overwatering which can lead to rot and other issues. Aim for about 1-2 inches of water per week, either from rainfall or irrigation. Make sure the soil drains well to prevent waterlogged conditions.
Can I grow potatoes in containers if I don’t have a large garden space?
Yes, you can grow potatoes in containers! Choose a container that’s at least 6-8 inches deep and has good drainage holes. Use a high-quality potting mix and follow the same steps as growing in the ground. Keep in mind that container-grown potatoes may require more frequent watering.
What are some common pests and diseases to watch out for when growing potatoes from eyes?
Keep an eye out for common pests like aphids, slugs, and wireworms. Regularly inspect your plants for signs of disease such as blight, scab, or powdery scab. Use organic or chemical controls as needed to prevent infestations.
Can I grow multiple varieties of potatoes together in the same bed?
Yes, but be sure to choose varieties with similar growth habits and maturity dates. Plant them at different depths to avoid overcrowding and promote even growth. Also, consider using a trellis or other support system to keep the plants upright and make harvesting easier.
How do I know when my potatoes are ready for harvest?
Check for maturity by gently digging around the base of the plant with your fingers. If the tubers are about 1-2 inches in diameter and have developed a rough, papery skin, they’re ready to be harvested. Use a fork to carefully dig up the entire crop, making sure not to damage the tubers.