Are you tired of shelling out money for new plants every time your favorites get too big or leggy? Do you want to multiply your favorite blooms without breaking the bank? Growing plants from clippings, also known as propagation, is a simple and cost-effective method that’s perfect for gardeners on a budget. With this technique, you can easily create new plants from cuttings of existing ones, saving you time and money in the long run. In this article, we’ll delve into the world of plant propagation, covering the best techniques, species, and tips for successful results. We’ll explore how to choose the right materials, prepare your clippings, and provide optimal conditions for growth. Whether you’re a seasoned gardener or just starting out, you’ll be amazed at how easy it is to multiply your favorite plants with this method.
Understanding Plant Propagation
Propagating plants from clippings can seem intimidating, but understanding the basics is key to success. This section will break down the essential steps and techniques for successful plant propagation.
What is Plant Propagation?
Plant propagation is an age-old technique used to grow new plants from existing ones. At its core, it’s a method of reproducing plants by taking cuttings or other plant material and encouraging them to develop into healthy, independent specimens. This process allows you to create exact clones of your favorite plants, ensuring that they retain the same characteristics as their parent.
Plant propagation is an effective method for several reasons. Firstly, it enables you to multiply desirable traits, such as vibrant colors or robust growth patterns, in a short period. Secondly, it saves time and resources compared to starting from seed, which can be a hit-or-miss process. Lastly, plant propagation preserves the genetic integrity of the parent plant, making it an attractive option for commercial growers looking to maintain consistency.
When done correctly, plant propagation yields impressive results. For instance, you can take cuttings from your favorite succulent and watch as they quickly develop into new, thriving plants.
Types of Plant Propagation
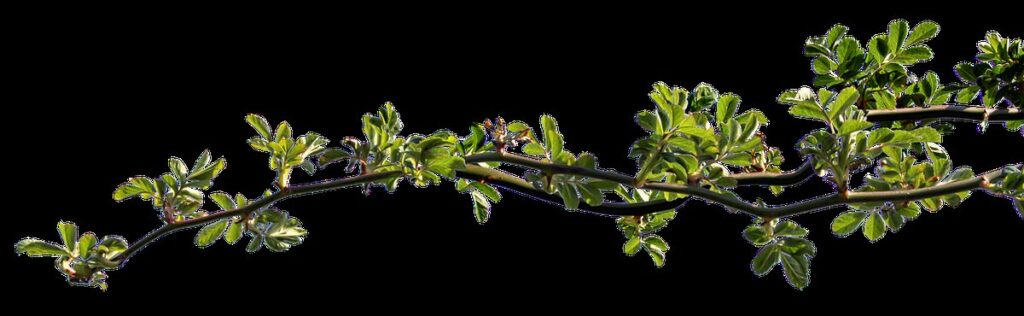
When it comes to propagating plants from clippings, there are several methods you can use depending on the type of plant and your personal preference. One of the most common methods is stem cutting, which involves taking a cutting from a mature stem and rooting it in soil or water. This method works best for plants like succulents, African violets, and begonias.
Another popular method is leaf cutting, where you take individual leaves from a mother plant and root them to produce new plants. This method is ideal for plants like peperomia and spider plants. Division is also an effective way to propagate plants, especially those with thick stems or bulbs, such as irises and hostas.
Seed starting is another option, but it requires more time and patience. You’ll need to sow seeds in a controlled environment, provide adequate light and water, and wait for them to germinate. Grafting involves joining two plants together at the stem, creating a new, hybrid plant with desirable traits from each parent. When done correctly, grafting can be an effective way to propagate certain types of trees and shrubs.
Each method has its advantages, so it’s essential to research which one works best for your specific plant.
Choosing the Right Plants for Clipping
When selecting plants for clipping, consider factors such as growth rate, leaf type, and propagation ease to ensure a successful outcome. This will also help you choose varieties that fit your desired plant size and style.
Selecting Easy-to-Propagate Species
When it comes to propagating plants from clippings, some species are significantly easier to work with than others. If you’re new to plant propagation, it’s best to start with varieties that have a high success rate and require minimal effort.
Succulents, for instance, are an excellent choice for beginners. They’re notorious for their ability to produce offsets or “pups,” which can be easily separated from the mother plant and rooted. This process is often referred to as “leaf pullings” or “offset separation.” Many popular succulent species, such as Aloe vera, Echeveria, and Crassula, are readily available at nurseries and home improvement stores.
Begonias are another great option for beginners. These versatile plants can be propagated through leaf cuttings, stem cuttings, or division of the roots. They’re also relatively fast-growing, which means you’ll see results in a short period of time. African violets, meanwhile, are popular houseplants that produce an abundance of leaves and stems, making them ideal for propagation.
When selecting plants to propagate from clippings, look for species with plump, juicy stems or leaves. These will be more likely to root successfully than dry or brittle ones. With a little practice and patience, you’ll be growing your own plants from clippings in no time.
Preparing Clippings from Difficult-to-Propagate Plants
When dealing with plants that are notoriously difficult to propagate, it’s essential to take extra care when preparing clippings. For instance, orchids and African violets are notorious for their finicky nature. To increase the chances of successful propagation, make a clean cut just above a node using a sharp, sterile tool.
It’s also crucial to remove lower leaves that would be submerged in water or soil, as this can cause rot and reduce the likelihood of rooting. For plants like succulents and cacti, it’s best to take a section with at least one areole (the small bump from which new growth emerges). This will give your clipping the best chance to develop into a healthy new plant.
Avoid handling clippings excessively, as this can cause damage to delicate tissues. Instead, place them in a propagation tray or container filled with water or a rooting medium, and provide indirect light. Check on them regularly to ensure they’re not developing any signs of decay, such as softening or discoloration. With the right care and attention, even the most challenging plants can be coaxed into producing healthy new growth from their clippings.
Preparing the Environment for Success
Before we dive into taking plant clippings, let’s make sure your workspace is set up for success by preparing a clean and optimal environment for rooting to occur naturally.
Lighting and Temperature Requirements
When it comes to growing plants from clippings, creating an ideal environment is crucial for successful propagation. Lighting and temperature requirements vary greatly between different plant species, so it’s essential to research the specific needs of the plant you’re working with.
For example, tropical plants like African Violets and Begonias thrive in bright, indirect light, while succulents and cacti prefer full sun. On the other hand, seedlings and delicate herbs require filtered or low-intensity light to prevent scorching. To create a versatile environment, consider using grow lights that can be adjusted to different spectrums and intensities.
Temperature is also critical, as most plants fall within a specific temperature range for optimal growth. Some plants, like orchids and bromeliads, prefer warmer temperatures between 65-75°F (18-24°C), while others, such as ferns and peace lilies, thrive in cooler temperatures around 55-65°F (13-18°C). To create an ideal environment, make sure to monitor temperature fluctuations and provide a stable range for your plants.
Keep in mind that even slight deviations from optimal conditions can affect the health and success of your propagated plants.
Humidity and Watering Considerations
Maintaining optimal humidity and watering conditions is crucial for successful plant propagation from clippings. When you take cuttings, they’re already stressed due to the separation from their parent plant, so it’s essential to provide a conducive environment to encourage rooting.
Humidity plays a significant role in this process. Most plants thrive in humid environments, typically between 40-70% relative humidity. You can achieve these levels using a humidifier or by placing the container on a tray filled with water and pebbles. This method allows for evaporation and maintains the desired humidity without overwatering.
Watering is another critical aspect to consider. Overwatering can lead to root rot, while underwatering slows down the rooting process. Water your cuttings when the top 1-2 inches of soil feels dry. Check the moisture level by inserting a toothpick or small stick into the soil – if it comes out dry, it’s time to water.
Monitor your clippings’ response to these conditions and adjust as needed. Keep in mind that some plants have specific requirements, so research the specific needs for your species.
Taking Clippings and Root Development
Now that you’ve successfully rooted your clippings, it’s time to focus on developing those new roots into a healthy, thriving plant. In this next step, we’ll explore how to care for your newly-rooted cuttings.
How to Take Healthy Clippings
When taking clippings from plants, it’s essential to do so at the right time and with the right technique to ensure healthy rooting. The best time to take cuttings is usually during the spring and summer months when plants are actively growing, as this increases their chances of successful propagation.
To prepare your clippings for rooting, start by selecting healthy stems with no signs of disease or pests. Cut just above a node, using a sharp, sterile pruning tool to minimize damage to the plant tissue. Make clean cuts at an angle, and remove any lower leaves that might be submerged in water or soil during the rooting process.
Gently trim any weak or damaged areas on the cutting, and dip the cut end into a rooting hormone powder or liquid to stimulate root growth. This step can significantly boost your chances of successful rooting. By following these steps, you’ll be well on your way to taking healthy clippings that are ready for rooting and eventual planting. Remember to work with fresh materials and keep your equipment clean to avoid any contamination issues.
Encouraging Root Development
Encouraging root development is a crucial step in growing plants from clippings. This process involves stimulating the cutting to produce roots, which will eventually support the entire plant. One common technique for promoting root growth is hormone application. Rooting hormones, such as indole-3-butyric acid (IBA), can be applied directly to the cut end of the stem or leaf node. These hormones stimulate cell division and promote the formation of new roots.
Misting is another effective method for encouraging root development. By creating a humid environment around the cutting, you can mimic the conditions found in nature where plants naturally develop their roots. To mist effectively, place the cutting on a tray filled with water or use a fine spray bottle to gently mist the leaves and stem. This technique helps maintain high humidity levels, which is essential for root growth.
When using hormone application and misting together, be sure to keep the environment warm and bright, but not directly in sunlight. Aim for temperatures between 65-75°F (18-24°C) and provide indirect light. By following these techniques, you’ll be well on your way to developing a robust root system that will support your newly grown plant.
Caring for Your New Plants
Now that you’ve successfully grown your new plants from clippings, it’s time to learn how to care for them and keep them thriving in their new environment. Let’s dive into some essential tips and tricks!
Transplanting and Aftercare
When you’ve successfully rooted your clipping propagation, it’s time to transplant them into individual pots. This process is crucial for continued growth and development. Start by gently removing the plant from its rooting medium, taking care not to disturb the roots.
Next, prepare a well-draining potting mix specifically designed for seedlings or newly propagated plants. Place a small amount of soil in the pot, leaving enough space at the top for watering. Gently place the root ball into the pot, making sure it’s centered and firm the soil around it.
Water your transplanted plant thoroughly after repotting to settle the soil. Allow the excess water to drain before placing the pot back on a bright, warm location. Water your newly potted plants when the top inch of soil feels dry to the touch, taking care not to overwater.
Aftercare also includes regular fertilization and pruning to promote healthy growth. Use a balanced fertilizer once a month, following the manufacturer’s instructions for application rates. Prune your plant as needed to maintain its shape and encourage bushy growth. Be cautious not to over-prune, which can cause stress to the plant.
Common Issues and Troubleshooting
As you embark on the journey of propagating plants from clippings, it’s not uncommon to encounter some common issues along the way. One of the most frequent problems is overwatering, which can lead to root rot and kill off the cutting. To avoid this, make sure to check the soil moisture regularly and only water when the top inch of soil feels dry.
Another issue you may face is low humidity, which can cause the leaves to wilt or become brittle. To combat this, place the propagated plants in a humid microclimate by covering them with a clear plastic bag or cloche. You can also increase the humidity around the plant by placing it on a tray filled with water and pebbles.
Fungal diseases like powdery mildew or leaf spot can also affect your propagated plants. To prevent this, ensure good air circulation and provide adequate light. If you do notice any fungal growth, treat the plant with a fungicide specifically designed for indoor plants.
Root bound is another potential issue that can occur when propagating from clippings. To avoid this, repot the established cutting into a slightly larger pot as soon as possible, using fresh, well-draining potting mix. By being aware of these common issues and taking proactive steps to address them, you’ll be well on your way to successfully growing healthy plants from clippings.
Advanced Techniques for Experienced Gardeners
Now that you’re comfortable with the basics of rooting plant cuttings, it’s time to dive into more advanced techniques to take your propagation skills to the next level. This section will explore specialized methods for challenging plants and materials.
Layering and Grafting
Layering and grafting are advanced techniques that allow experienced gardeners to propagate plants more efficiently. These methods involve joining a stem or branch from one plant with the root system of another, creating a new, robust individual.
When layering, you can either bury a part of the stem in the soil while it’s still attached to the parent plant, or use a method called “hanging layering” where you secure the stem to a stake and cover the buried section with soil. The latter is more suitable for plants like wisteria and clematis.
Grafting involves joining a piece of stem from one plant onto the root system of another using specialized techniques, such as whip grafting or cleft grafting. This method allows you to combine the desirable traits of two plants, creating hybrids with improved disease resistance, vigor, or flavor. For instance, citrus trees are often grafted for their enhanced tolerance to cold temperatures.
To get started, choose healthy stems and roots from mature plants. Prepare your tools, including a sharp knife or grafting tape, and follow online tutorials or consult gardening resources for specific instructions on the techniques mentioned above. Be aware that layering and grafting require some practice and patience, but the results can be rewarding for experienced gardeners looking to expand their plant collection.
Experimenting with Different Propagation Methods
As you continue to refine your skills as an experienced gardener, it’s time to think beyond the conventional methods of plant propagation. Experimenting with different techniques can not only make the process more engaging but also allow you to explore new ways of cultivating your favorite plants.
Consider layering, for instance, which involves bending a stem over and weighing it down until roots develop. This method works particularly well for plants like African Violets and Begonias. Alternatively, you could try using rooting powders or hormones to stimulate root growth in your cuttings.
Another approach is to propagate through division – essentially splitting a mature plant into smaller sections with their own root systems intact. This is an excellent way to share established plants with friends or create new specimens for your garden.
The key to successfully experimenting with various propagation methods lies in being willing to adapt and learn from your experiences. Keep track of what works and what doesn’t, and don’t be afraid to try something new if a particular technique isn’t yielding the desired results.
Frequently Asked Questions
Can I propagate plants from clippings indoors or does it require direct sunlight?
You can propagate plants from clippings indoors, but you’ll need to provide optimal lighting conditions for the cutting to grow. This might involve using grow lights or placing the clipping near a sunny window. Make sure the temperature is between 65-75°F (18-24°C) and maintain high humidity to promote healthy root development.
What’s the best time of year to take cuttings, considering factors like plant dormancy and growth cycles?
The ideal time for taking cuttings depends on the specific plant species and its growth cycle. For most plants, spring and summer are the best seasons for propagation, as they tend to be more vigorous during these periods. However, some plants like succulents and cacti can be propagated year-round. Research the specific needs of your plant to determine the best time for taking cuttings.
Can I propagate plants from clippings if they’re already flowering or producing seeds?
It’s generally not recommended to take cuttings from plants that are already flowering or producing seeds, as this can reduce their energy reserves and make it more challenging for the cutting to root successfully. Instead, wait until after the blooming period has passed before taking new cuttings.
How do I prevent root rot when propagating plants from clippings in water?
To minimize the risk of root rot when rooting plant cuttings in water, change the water every 1-2 weeks and make sure it’s fresh and clean. You can also add a few drops of fungicide to the water to help prevent fungal infections. Keep the container away from direct sunlight and maintain a consistent temperature between 65-75°F (18-24°C) to promote healthy root development.
Can I propagate plants from clippings that have been treated with pesticides or other chemicals?
It’s best to avoid propagating plants from clippings that have been treated with pesticides or other chemicals, as these substances can be transferred to the new plant and potentially harm it. Opt for healthy, organic plants when taking cuttings, and always follow proper sanitation procedures to prevent contamination.