Growing delicious and healthy carrots can be a rewarding experience for any gardener. Not only do they add a burst of color and flavor to your salads, but they’re also packed with essential nutrients like vitamin A and fiber. However, growing carrots can be challenging, especially for beginners. That’s why we’ve put together this step-by-step guide on how to grow carrots successfully.
In this article, we’ll cover everything you need to know about growing carrots, from selecting the right variety to harvesting techniques. We’ll discuss soil preparation, sowing seeds at the right depth and spacing, and provide tips on how to care for your carrot crop throughout its growth cycle. By following our guide, you’ll be able to grow a bountiful harvest of crunchy, sweet carrots that will make you proud of your gardening skills.
Choosing the Right Variety
With so many varieties of carrots available, selecting the right one for your garden can be a daunting task. Let’s explore some popular options to find the perfect fit for you.
Understanding Different Types of Carrots
When it comes to growing carrots, selecting the right variety is crucial for a bountiful harvest. There are numerous types of carrots available for cultivation, each with its unique characteristics, growth habits, and uses.
One popular variety is ‘Nelson’, known for its sweet flavor and crunchy texture. This heirloom carrot grows up to 6 inches in length, making it ideal for fresh eating and storage. If you’re looking for a shorter variety, consider ‘Thumbelina’, which reaches only 1-2 inches in length and is perfect for snacking or adding to salads.
The ‘Danver’ variety is another popular choice among gardeners, prized for its high yield and resistance to disease. This maincrop carrot grows up to 7 inches in length and has a sweet, mild flavor. Regardless of the variety you choose, make sure to select a type that suits your climate and growing conditions.
When selecting a variety, consider factors such as maturity days, growth habits, and intended use. For example, ‘Little Finger’ is a good choice for small spaces or containers, while ‘Imperator’ is ideal for larger gardens with plenty of room for sprawling varieties to grow.
Selecting Carrots for Your Climate
When selecting carrots for your climate, it’s essential to consider factors such as temperature tolerance and disease resistance. Different regions have varying temperature ranges, and choosing a variety that can thrive within those conditions will ensure successful harvests.
Start by researching the specific climate requirements for various carrot varieties. Some popular options include ‘Thumbelina’, which is well-suited for warmer climates, while others like ‘Danver’s Half-Long’ perform better in cooler temperatures. Check the seed packet or consult with local nurseries to determine which variety is best suited for your region.
Consider factors such as maturity dates and disease resistance when selecting a carrot variety. For example, if you live in an area prone to root maggots, choose a variety like ‘Little Finger’ that offers some level of resistance. Similarly, cooler climates may require varieties with longer maturity dates to ensure optimal harvests. By carefully evaluating these factors, you’ll be able to select carrots that will thrive in your specific climate and provide a bountiful harvest.
Soil Preparation and Testing
Before you start planting, it’s essential to prepare your soil for carrot cultivation by testing its pH levels and nutrient content. This will ensure optimal growing conditions.
The Importance of Well-Draining Soil
When it comes to growing carrots, one of the most critical aspects of soil preparation is ensuring that it drains well. Waterlogged conditions can be detrimental to carrot growth, leading to root rot and reduced yields. In fact, according to a study by the University of California, root rot is responsible for up to 50% of carrot crop losses worldwide.
To create a suitable growing medium, you’ll want to focus on incorporating ingredients that improve drainage. A mix of compost, perlite, or vermiculite can help break up clay soils and prevent water from pooling around the roots. You can also add a small amount of sand to further enhance drainage. The ideal mix will depend on your specific soil type and climate.
When mixing your growing medium, aim for a balance between moisture retention and water drainage. A general rule of thumb is to use 20-30% compost or well-rotted manure, 10-20% perlite or vermiculite, and the remainder as sand or fine gravel. By creating a well-draining soil mix, you’ll be giving your carrots the best chance at thriving in optimal conditions.
pH Levels and Nutrient Balancing
Maintaining the optimal pH range for carrot cultivation is crucial to ensure a healthy and thriving crop. The ideal pH range for carrots falls between 6.0 and 7.0. If your soil’s pH levels are outside this range, it can lead to nutrient deficiencies or an overabundance of certain nutrients that may harm your plants.
To test the pH level of your soil, you’ll need a pH meter or testing kit. These tools will give you an accurate reading of your soil’s acidity or alkalinity. For most gardeners, a simple DIY soil test using household items like vinegar and baking soda can also provide a rough estimate.
Once you’ve determined your soil’s pH level, you may need to make adjustments by adding lime or sulfur to balance the nutrient levels. For example, if your soil is too acidic (pH 4.0-6.0), adding dolomitic limestone will help raise the pH and provide magnesium and calcium for healthy plant growth.
For those using a DIY test kit, keep in mind that results may vary depending on factors like soil type, temperature, and moisture levels. For precise measurements and tailored advice, consult with local gardening experts or take your sample to a lab for analysis.
Sowing Seeds and Planting Techniques
To grow healthy carrots, it’s essential to understand how to sow seeds and plant them correctly, avoiding common mistakes that can affect their size and quality. Here’s what you need to know.
Sowing Carrot Seeds at the Right Depth
When it comes to sowing carrot seeds at the right depth, it’s essential to get it just right. If you sow them too deep, they may struggle to germinate, while sowing them too shallow can make them vulnerable to pests and diseases.
The ideal sowing depth for carrot seeds is between ¼ inch (6-8 mm) and ½ inch (1 cm). This allows the seeds to establish themselves firmly in the soil without being buried too deeply. To give you a better idea, think of it like planting a seed about two-thirds as deep as its thickness.
It’s also crucial to consider the timing of sowing. In cooler climates, sow carrot seeds directly into the ground 2-4 weeks before the last frost date. In warmer climates, sow them in early spring or late summer for a fall crop.
Remember to maintain an even spacing between seedlings to prevent overcrowding, which can lead to poor growth and reduced yields. A general rule of thumb is to sow seeds about ¼ inch apart and then thin them out to around 1-2 inches (2.5-5 cm) as they grow.
Using Seed Starting Mixes and Cell Trays
When it comes to growing carrots from seed, using a high-quality seed starting mix and cell trays can make all the difference. These specialized mixes are designed to provide optimal conditions for germination and root development, which is especially important for carrots.
One of the key benefits of using seed starting mixes is that they retain moisture but also drain excess water, preventing overwatering and promoting healthy growth. Carrot seeds typically require a consistent temperature between 65-75°F (18-24°C) to germinate. Seed starting mixes help regulate this temperature, ensuring that your carrot seeds get the best possible start.
When using cell trays, it’s essential to maintain optimal moisture levels by watering carefully. Overwatering can lead to poor germination and increased risk of fungal diseases. To avoid this, water your seedlings gently but thoroughly, making sure the soil is moist but not soggy. By using a seed starting mix and cell trays, you’ll be giving your carrot seeds the best chance to thrive, setting you up for success in the next stages of growth.
Care and Maintenance
To keep your carrots healthy and thriving, it’s essential to know how to properly care for them throughout their growth cycle. This includes regular watering, weeding, and soil maintenance tips.
Watering Techniques to Prevent Rot
Proper watering is crucial when growing carrots to prevent waterlogged conditions that can lead to root rot. Carrots are a cool-season crop and require consistent moisture, especially during germination and early growth stages. However, overwatering is the most common cause of root rot in carrots.
To avoid this issue, it’s essential to water your carrot plants correctly. Here are some key guidelines: Water your carrots when the top 2-3 inches of soil feels dry to the touch. This usually means watering every 3-4 days during hot weather and every 5-7 days during cooler months. Avoid getting water directly on the leaves or crown, as this can lead to rot and other diseases.
When watering, use a gentle flow of water to prevent washing away the fine soil particles that carrots prefer. Aim to provide about 1 inch of water per week, either from rain or irrigation. By following these simple steps, you’ll be able to maintain the right moisture levels for your carrot crop, preventing root rot and ensuring a healthy harvest.
Mulching and Weeding Strategies
Mulching and weeding are essential practices for maintaining a healthy carrot crop. Mulch acts as a physical barrier that suppresses weeds from germinating, reducing the need for manual weeding. It also retains moisture, regulating soil temperature, and preventing water loss due to evaporation. A 2-3 inch layer of organic mulch, such as straw or wood chips, is ideal for carrot cultivation.
For effective weeding, hand-weeding remains the best approach. Regularly inspect your bed and remove any emerging weeds by their roots. Tools like a hoe or cultivator can be used to loosen soil and eliminate weeds that have already germinated. It’s crucial to weed when the soil is moist, as this reduces the risk of damaging the carrot plants.
Aim to remove weeds before they produce seeds, preventing the spread of unwanted growth in future seasons. Consider incorporating a pre-emergent herbicide into your mulch for added weed control, especially in regions with heavy weed pressure.
Pest and Disease Management
Effective pest and disease management is crucial for a healthy carrot crop, so let’s dive into some strategies to keep those pesky critters and diseases at bay.
Identifying Common Carrot Pests
Carrots are susceptible to various pests that can cause significant damage and affect their quality. One of the most common carrot pests is the carrot rust fly (Psila rosae), also known as the carrot fly. These insects lay eggs near the base of the carrots, which hatch into legless maggots that feed on the roots.
Other common pests include carrot flies, such as the spotted wing drosophila and the Mediterranean fruit fly. These pests can cause damage by laying eggs in the soil, leading to larvae that feed on the carrots’ roots. The larvae can weaken the carrots’ structure, making them more prone to rot and decay.
To minimize pest damage, it’s essential to adopt an integrated pest management (IPM) approach. This involves combining physical barriers, crop rotation, and cultural controls with targeted treatments when necessary. For example, you can cover your carrot bed with fine mesh or row covers to prevent adult flies from reaching the plants. Additionally, maintaining good garden hygiene by removing weeds and debris can help reduce the risk of pest infestations.
Recognizing and Managing Diseases in Carrots
Carrot crops are susceptible to various diseases that can significantly impact yields and overall health. Recognizing symptoms early is crucial for effective management. Root rot, often caused by overwatering or poor drainage, manifests as a soft, mushy texture or discoloration on the root surface. Powdery mildew appears as a white, powdery coating on leaves, while leaf blight causes yellowing or blackening of leaf tips.
To manage these issues, start with sanitation practices like removing and disposing of infected plants to prevent further spread. Inspect your soil regularly for signs of fungal growth or pests that can contribute to disease development. Prune affected areas or remove entire sections of the plant if necessary to contain the issue.
If infections persist, consider using fungicides specifically labeled for use on carrots. However, exercise caution when handling chemicals and always follow instructions carefully to avoid harming the environment or yourself. Regularly inspect your crop and address any issues promptly to prevent minor problems from escalating into larger-scale disease outbreaks.
Harvesting and Storage
Now that you’ve successfully grown a healthy crop of carrots, it’s time to harvest and store them properly to enjoy your bounty for months to come. This section will walk you through both steps.
Timing the Perfect Harvest
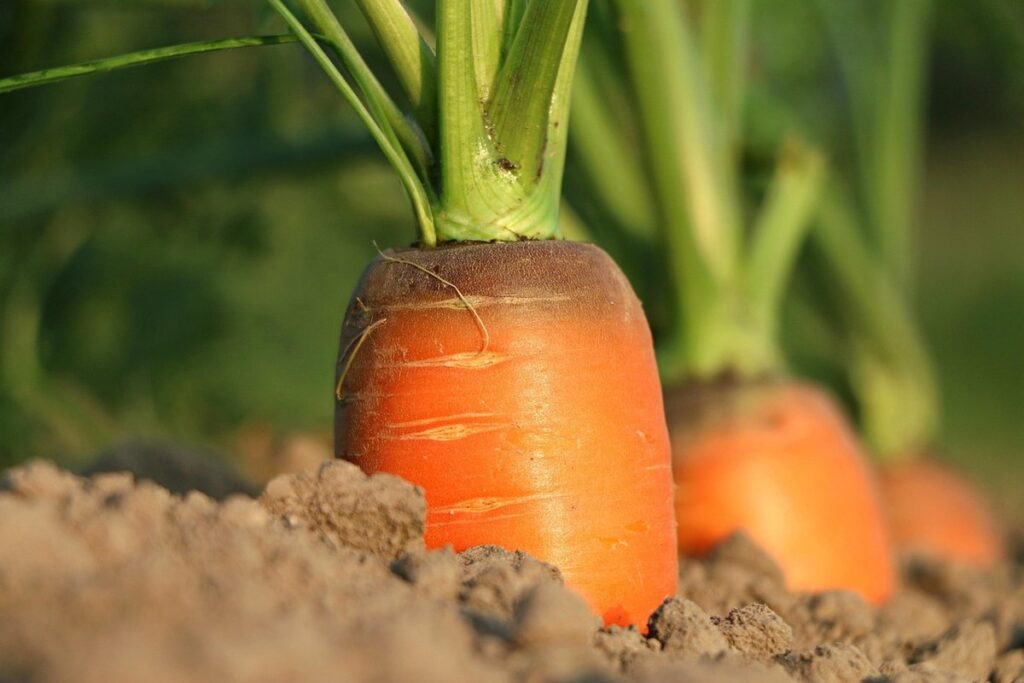
Timing the perfect harvest is crucial to ensure that your carrots are at their peak flavor and texture. To determine when they’re ready, check for size, color, and texture.
Carrots should be harvested when they reach a diameter of about 0.5-1 inch (1-2.5 cm). However, don’t wait until they’ve reached their full size, as this can cause the taproot to become woody and fibrous. For most varieties, it’s best to harvest them within 60-70 days after sowing.
Check the color of the carrot tops. When they’re ready, the leaves will start to yellow and fall over. This is a sign that the roots are mature and sweet. Also, gently dig around the carrots with your fingers or a fork to check for size and firmness. A good rule of thumb is to harvest them when about 1/3 of the root is still above ground.
Timing is everything when it comes to harvesting carrots. Waiting too long can result in a lower yield or tough, fibrous roots. So, keep an eye on your carrot crop, and with a little practice, you’ll be able to time the perfect harvest every time!
Storing Carrots to Preserve Quality
Proper storage is crucial to maintaining carrot quality over time. When storing carrots, it’s essential to control temperature and humidity levels. Store them in a cool, dry place with temperatures between 32°F (0°C) and 40°F (4°C). Avoid storing carrots near direct sunlight or heat sources.
Maintaining optimal humidity levels is also vital. Carrots should be stored in a breathable container, such as paper bags or mesh sacks, to allow for airflow. Excessive moisture can cause roots to become soft and develop off-flavors.
To prevent damage, store carrots with their tops intact. This will help maintain moisture and prevent the growth of ethylene-producing bacteria that can hasten spoilage. If storing a large quantity, consider using wooden crates or bins lined with paper or cloth to absorb excess moisture.
Regularly check on stored carrots for signs of decay or rot. Remove any affected roots immediately to prevent further spoilage and keep the remaining carrots fresh for longer. By following these simple storage tips, you can enjoy your homegrown carrots for several weeks to come.
Frequently Asked Questions
Can I grow carrots in containers if my garden soil is poor?
Yes, you can still grow carrots in containers, but make sure they are at least 6-8 inches deep to accommodate the taproot’s growth. Use a high-quality potting mix and follow the same sowing and care instructions as for in-ground cultivation.
How do I know if my carrot crop is susceptible to pests or diseases?
Regularly inspect your plants for signs of pests (e.g., aphids, carrot rust flies) or diseases (e.g., powdery mildew, root rot). Check for discolored leaves, distorted growth, or actual damage on the roots. Take action promptly if you identify any issues to prevent the problem from spreading.
What’s the best way to store harvested carrots to preserve their quality?
Store carrots in a cool (40°F-50°F), dry place with good ventilation. You can also refrigerate them for up to two weeks or freeze them for later use. Remove any leafy tops and trim the roots to prevent moisture accumulation, which can lead to spoilage.
Can I grow multiple varieties of carrots together in the same bed?
While it’s technically possible, growing different carrot varieties together can increase competition for resources like water and nutrients. To minimize this risk, separate each variety by at least 12-18 inches to reduce overcrowding and allow for proper growth.
How often should I check my carrot crop for signs of nutrient deficiencies or imbalances?
Regularly monitor your plants’ health and adjust your fertilization schedule accordingly. Check the soil pH levels and nutrient balances every 4-6 weeks, adjusting your fertilizer applications as needed to ensure optimal conditions for healthy carrot growth.