Growing your own peanuts can be a truly rewarding experience. Not only do you get to enjoy the fresh flavor of homegrown nuts, but you also reap the benefits of a sustainable and nutritious crop. However, growing peanuts can be a bit challenging, especially for beginners. The key to success lies in understanding the specific climate and soil requirements, as well as how to prevent common pests and diseases.
In this comprehensive guide, we’ll take you through every step of the peanut-growing process, from choosing the right variety for your region to optimizing yields and harvesting your crop. We’ll cover the essential tips on sowing, care, fertilization, and more, so you can enjoy a bountiful harvest with minimal fuss. Whether you’re a seasoned gardener or just starting out, our expert advice will have you growing peanuts like a pro in no time!
Understanding Peanut Growing Basics
To grow peanuts successfully, you’ll need to understand their specific needs and requirements, including climate, soil conditions, and planting techniques. Let’s dive into these basics together!
Choosing the Right Variety
When choosing the right variety of peanuts for your garden, it’s essential to consider your climate and desired harvest. There are several types of peanuts to choose from, each with its unique characteristics.
For warm climates (USDA Hardiness Zones 8-10), ‘Georgia’ and ‘Virginia’ varieties are popular choices. They mature quickly, taking around 100 days to reach full maturity. These varieties thrive in well-drained soil and produce high yields. If you’re located in cooler regions (USDA Hardiness Zones 6-7), consider the ‘Spanish’ variety, which takes about 120 days to mature.
Consider your harvest goals as well. Do you want to grow peanuts for fresh consumption or for peanut butter production? Some varieties are better suited for one purpose over the other. For example, the ‘Florida Valencia’ variety is ideal for fresh eating due to its higher oil content and milder flavor. In contrast, ‘Spanish’ and ‘Georgia’ varieties have a nuttier flavor and are more commonly used in peanut butter production.
When selecting a peanut variety, also consider factors like disease resistance and drought tolerance. Research the specific characteristics of each variety and consult with local nurseries or experts to determine which type is best suited for your garden’s conditions.
Climate and Soil Requirements
Peanuts are a warm-season crop that thrive in well-draining soil with specific temperature and moisture requirements. The ideal temperature for peanut growth is between 65°F to 85°F (18°C to 30°C), with optimal temperatures ranging from 75°F to 80°F (24°C to 27°C). This allows for steady growth without exposing the plants to extreme heat or cold stress.
When it comes to soil pH, peanuts prefer a slightly acidic to neutral range between 6.0 and 7.0. Avoid planting in soils with extremely high acidity (pH below 5.5) or alkalinity (pH above 8.0), as this can lead to nutrient deficiencies and reduced yields.
Maintaining adequate soil moisture is crucial for peanut growth, but be cautious not to overwater. Aim for about 18-20 inches of rainfall or irrigation per growing season. Be aware that poor drainage can lead to root rot, so ensure the soil has good aeration and sufficient water penetration.
Avoid common mistakes such as tilling the soil too deeply, which can damage underground peanut roots. Instead, use shallow tillage to minimize disturbance. By understanding these climate and soil requirements, you’ll be well-prepared to create an optimal environment for your peanut crop to thrive.
Preparing the Land for Peanut Growth
Before you start planting peanut seeds, it’s essential to prepare your land properly. This involves selecting a suitable location and preparing the soil to ensure optimal growth conditions for your peanuts.
Planning and Designing Your Field
When planning and designing your peanut field, it’s essential to consider crop rotation strategies to maintain soil health and prevent pests and diseases from building up. A simple approach is to rotate peanuts with a legume like soybeans or beans, as they fix nitrogen in the soil, reducing the need for synthetic fertilizers. Alternatively, you can alternate peanuts with corn or sunflowers, which can help break disease cycles.
Companion planting is another crucial aspect of designing your peanut field. Certain plants repel pests or attract beneficial insects that prey on them. For example, planting marigolds or nasturtiums around the perimeter of your field can deter nematodes, a common peanut pest. Similarly, incorporating flowers like sunflowers or cosmos into your crop rotation can attract beneficial pollinators and improve overall yields.
When mapping out your field, consider creating “buffer zones” between different crops to prevent cross-contamination and promote healthy growth. This might involve planting a border of marigolds around the edges of your peanut patch or using windbreaks like sunflowers to shield the crop from harsh weather conditions. By implementing these strategies, you can create a thriving and resilient ecosystem that supports optimal peanut production.
Tilling and Fertilizing the Soil
Proper tilling and fertilization are crucial steps in creating a healthy environment for peanuts to grow. When you prepare the soil correctly, it helps break up compacted layers, improve drainage, and increase the availability of nutrients for your peanut plants.
Tilling should be done about 8-10 inches deep, just before planting time. This allows you to loosen up any stubborn clods and mix in organic matter like compost or well-rotted manure. The goal is to create a smooth, even surface that’s free from debris and obstacles.
As for fertilization, peanuts are relatively low-maintenance when it comes to nutrient requirements. However, they do benefit from a balanced diet of nitrogen, phosphorus, and potassium. You can apply a starter fertilizer at planting time, followed by additional doses as needed based on soil tests and plant growth. A general rule of thumb is to provide about 20-30 pounds of actual nitrogen per acre.
Some key considerations when fertilizing peanuts include avoiding over-fertilization, which can lead to water pollution and other environmental issues. Instead, opt for organic or slow-release options that promote sustainable farming practices.
Sowing Peanut Seeds
Now that you have your peanuts, it’s time to get started on sowing them into the ground. This next step is crucial for a successful peanut harvest.
Seed Selection and Germination Rates
When it comes to growing peanuts, selecting high-quality seeds with good germination rates is crucial for a successful harvest. But what exactly makes a peanut seed “high-quality”? Look for seeds that are specifically bred for your region and climate. This will help ensure the seeds can withstand local pests and diseases.
For optimal germination rates, choose seeds that have been stored properly in a cool, dry place. Check the packaging or label for any signs of damage or moisture exposure. Aim for seeds with a moisture content between 6-8%.
Factors like temperature and light exposure also play a significant role in seed germination. Peanuts require a minimum soil temperature of 65°F (18°C) to germinate. If the soil is too cold, it can take longer for the seeds to sprout.
To achieve better germination rates, consider using seed starting mix specifically designed for legumes like peanuts. Avoid compacting the soil around the seeds as this can hinder root growth and lead to reduced yields.
Planting Techniques and Spacing
When it comes to planting peanut seeds, technique and spacing are crucial for optimal growth. To begin with, choose a location that receives full sun and has well-draining soil. For optimal results, plant peanut seeds 1-2 inches deep and 3-4 inches apart in rows spaced 36 inches apart. This allows for proper air circulation and reduces the risk of disease.
For smaller gardens or containers, you can plant multiple seeds together in a small block, about 6-8 inches square. Thin out the weakest seedlings to their strongest counterparts once they reach around 6 inches tall. Keep in mind that overcrowding can lead to stunted growth and reduced yields.
To ensure even spacing, use a grid system or a simple tool like a trowel with markings on it. Plant seeds at the correct depth by using a garden fork to create a shallow trench for each seed. Fill the trench gently but firmly, covering the seed completely. This attention to detail will pay off in the long run as your peanut plants thrive and produce a bountiful harvest.
Caring for Peanut Plants
Now that you’ve got your peanut plants growing, it’s time to learn how to care for them properly to ensure a bountiful harvest. We’ll walk you through the essential steps of maintenance and upkeep.
Irrigation and Water Management
When it comes to growing peanuts, proper irrigation and water management are crucial for preventing disease and promoting healthy growth. Overwatering can lead to root rot, while underwatering can cause the plants to become stunted. To avoid these issues, it’s essential to understand the specific watering needs of your peanut plants.
Peanut plants require about 20-25 inches of rainfall or irrigation per growing season, which is roughly equivalent to about 1 inch of water per week. However, this amount can vary depending on factors such as climate, soil type, and location. To determine the ideal watering schedule for your crop, check the soil moisture by inserting a finger into the soil up to the first knuckle.
A general rule of thumb is to provide about 2-3 gallons of water per foot of row length. For example, if you have a 100-foot row of peanut plants, aim to provide around 200-300 gallons of water each time you irrigate. It’s also essential to avoid overhead watering, which can spread diseases and promote fungal growth. Instead, use drip irrigation or soaker hoses to deliver water directly to the roots, minimizing evaporation and runoff.
Pest and Disease Control
Peanut plants are susceptible to various pests and diseases that can significantly impact yields. Common issues include aphids, whiteflies, and spider mites, which can be controlled using insecticidal soap or neem oil. Nematodes, tiny worms that feed on plant roots, can also cause significant damage and may require systemic pesticides.
Diseases such as leaf spot, stem rot, and powdery mildew can be prevented by maintaining good air circulation around the plants and watering them in the morning to allow excess moisture to evaporate during the day. Regularly inspecting your peanut crop for signs of disease is crucial, and treating affected areas promptly with fungicides will help prevent further spread.
To minimize pest and disease issues, ensure that your soil has a balanced pH level (between 6.0 and 7.0) and adequate nutrients. Rotate your peanut crops to avoid depleting the soil’s nutrient reserves and reduce the risk of pests adapting to specific crops over time. By implementing these strategies, you can significantly reduce the impact of common pests and diseases on your peanut crop.
Fertilization and Nutrient Management
Proper fertilization is crucial for a healthy peanut crop, so let’s dive into how to give your peanuts the nutrients they need to thrive. We’ll cover the best soil amendments and timing for optimal results.
Understanding Peanut Nutrition Needs
Peanut plants require a balanced diet of essential nutrients to thrive and produce high-quality yields. Nitrogen (N), phosphorus (P), and potassium (K) are the primary macronutrients that peanut plants need to grow.
Nitrogen is crucial for leaf growth, stem development, and root formation. It’s also involved in protein synthesis, which is vital for plant defense mechanisms against diseases. Peanut plants require about 50-60 kg of N per hectare during their growth cycle. You can apply nitrogen-rich fertilizers like ammonium nitrate or urea at planting time (20-25% N) and side-dress with a high-phosphorus fertilizer (10-15% N) when the plants are around 6 inches tall.
Phosphorus is essential for root development, flower formation, and seed production. Peanut plants need about 30-40 kg of P2O5 per hectare during their growth cycle. You can apply phosphorus-rich fertilizers like diammonium phosphate or monopotassium phosphate at planting time (20-25% P) and side-dress with a high-phosphorus fertilizer when the plants are around 6 inches tall.
Potassium plays a vital role in plant resistance to diseases, water balance, and overall plant health. Peanut plants require about 40-60 kg of K2O per hectare during their growth cycle. You can apply potassium-rich fertilizers like potassium chloride or potassium sulfate at planting time (20-25% K) and side-dress with a high-phosphorus fertilizer when the plants are around 6 inches tall.
It’s essential to maintain a balanced nutrient profile in your peanut fields, as excessive application of any single nutrient can lead to reduced yields and plant damage. A general rule of thumb is to apply N at planting time (20-25% N), followed by side-dressing with P when the plants are around 6 inches tall, and potassium application after flowering.
Fertilizer Application Strategies
When applying fertilizers to your peanut crop, it’s essential to follow best practices to avoid over-fertilization and ensure optimal plant growth. Over-fertilization can lead to environmental pollution, reduced yields, and increased costs.
Before applying fertilizers, determine the nutrient levels in your soil through a soil test. This will help you identify areas where additional nutrients are needed. Based on the test results, create a fertilizer plan that addresses specific deficiencies rather than making blanket applications. For example, if your soil is low in nitrogen, apply a balanced fertilizer with a higher nitrogen content.
Timing is also crucial when applying fertilizers. Peanut plants require different nutrient levels at various growth stages. For instance, during germination and seedling establishment, nitrogen-rich fertilizers are essential for promoting healthy growth. However, during pod fill and maturity, phosphorus and potassium levels become more critical to optimize yield and quality.
Apply fertilizers in the morning when the soil is moist but not waterlogged to minimize runoff and ensure better absorption. Use a fertilizer spreader or applicator to distribute nutrients evenly across the field, avoiding over-saturation of sensitive areas like irrigation zones or waterways. By following these best practices, you can effectively manage nutrient levels and promote healthy peanut growth without compromising environmental sustainability.
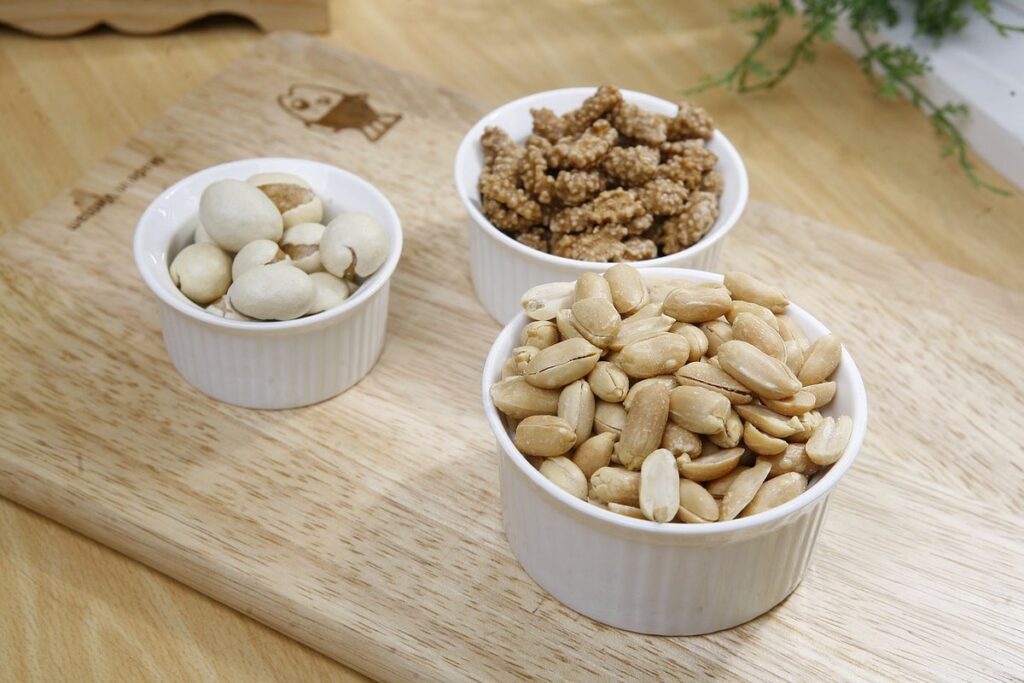
Harvesting and Processing Peanuts
Now that you’ve successfully grown your peanut crop, it’s time to harvest and process them for use in cooking and other applications. In this section, we’ll walk through the steps of harvesting and preparing peanuts for storage and use.
Identifying Maturity and Timing the Harvest
When it comes to harvesting peanuts, timing is everything. You want to ensure you’re picking them at just the right moment to avoid losing yield or quality. So, how do you know when they’re ready? One way to determine maturity is by observing the color and texture of the pods. As peanuts mature, they’ll turn from a greenish-yellow hue to a brown or tan color.
But that’s not all – you should also check for dryness. Mature peanuts are typically very dry, with some moisture still present in the stem. If the peanuts feel soggy or moist, it may be too early to harvest. In fact, research suggests that optimal harvest timing is when the pods contain around 40-50% moisture.
Other factors can influence harvest timing, such as weather conditions and regional growing practices. For example, if you’re experiencing a dry spell, you may need to adjust your harvest schedule accordingly. Conversely, if it’s been particularly wet, you might want to wait until the soil dries out a bit before heading out to harvest.
By paying attention to these cues and adjusting your timing accordingly, you can ensure a successful peanut harvest.
Threshing, Drying, and Storage
After harvesting your peanuts, it’s crucial to proceed with threshing, drying, and storage to preserve their quality and flavor. Threshing involves separating the peanuts from their pods, typically done using a combine harvester or by hand. To achieve efficient threshing, ensure the machine is set correctly and the peanuts are at an optimal moisture level.
Next, drying is essential to reduce the moisture content of the peanuts. This step helps prevent spoilage and mold growth. You can use a dryer specifically designed for peanuts or simply spread them out in the sun. However, be cautious not to overdry, as this can affect the flavor and texture of the peanuts.
Proper storage is vital to maintaining the quality of your peanuts. Store them in a cool, dry place with good airflow. Use airtight containers or bags to prevent moisture from entering and causing damage. It’s also essential to keep pests and rodents away by using rodent-proof containers and storing them off the ground.
For example, a study showed that properly stored peanuts can retain their quality for up to six months when stored at 60°F (15°C) with 50% relative humidity.
Tips and Best Practices for Successful Peanut Growing
When growing peanuts, following established tips and best practices can make all the difference between a bountiful harvest and disappointing results. Let’s explore the essential techniques to get you started.
Common Mistakes to Avoid
As you begin to grow peanuts, it’s essential to be aware of common mistakes that can lead to reduced yields or failed crops. One critical error is poor soil preparation. Peanut plants require a well-draining soil with a pH between 6.0 and 7.0. Failing to test your soil pH and adjust it accordingly can result in nutrient deficiencies, stunted growth, and decreased yields.
Another mistake to avoid is uneven watering. Peanuts need consistent moisture levels throughout their growth cycle, particularly during germination and flowering stages. Inconsistent water supply can lead to pod rot, reduced yield, or even plant death. Ensure you provide a steady supply of water, but also be mindful not to overwater, as this can cause more harm than good.
Additionally, neglecting to rotate your peanut crop is another common mistake. Growing peanuts in the same field consecutively can lead to soil depletion and increased susceptibility to diseases. Rotate your crops every 2-3 years to maintain soil fertility and reduce pests’ resistance to pesticides.
Advanced Techniques and Strategies
As you continue to refine your peanut-growing skills, it’s time to explore advanced techniques and strategies that can take your yields to the next level. One effective approach is to implement a crop rotation system, alternating between peanuts and other legumes or cereals to maintain soil health and reduce pests and diseases. For instance, rotating with soybeans can help control nematodes, while planting after corn can suppress weeds.
Another key strategy is to optimize irrigation management. This involves using drip irrigation systems or precision sprinklers to deliver water directly to the roots, reducing evaporation and runoff. By monitoring soil moisture levels and adjusting your watering schedule accordingly, you can conserve water resources and minimize stress on the plants. Additionally, consider implementing cover crops between peanut cycles to improve soil structure, increase organic matter, and provide a natural barrier against erosion.
By incorporating these advanced techniques into your peanut-growing routine, you’ll be well on your way to maximizing yields and improving overall productivity.
Frequently Asked Questions
How can I ensure my peanut crop is receiving adequate water during droughts?
Peanut plants require consistent moisture, especially when they’re producing nuts. During dry spells, increase irrigation frequency to about every 7-10 days, but avoid overwatering which can lead to fungal diseases. Install drip irrigation systems or soaker hoses to deliver water directly to the roots, minimizing evaporation and runoff.
Can I grow peanuts in containers or small spaces?
Yes! Peanut plants can thrive in containers with well-draining potting mix, provided they receive full sun (at least 6 hours of direct sunlight) and adequate support. Use a minimum container size of 12-18 inches deep to accommodate the taproot. Keep in mind that yields may be lower due to space constraints.
How do I prevent common pests like aphids, whiteflies, and spider mites from damaging my peanut crop?
Monitor your plants regularly for signs of infestation. Use neem oil or insecticidal soap to control soft-bodied pests. For more severe issues, consider introducing natural predators like ladybugs or lacewings. Apply these controls in the early morning or evening when pollinators are less active.
What’s the best way to handle frost damage on my peanut plants?
Frost can be devastating for peanut crops. If you live in an area prone to late-season frosts, consider using row covers or individual plant covers to protect your plants. Remove any damaged or diseased foliage to prevent further infection and promote healthy growth.
Can I grow multiple varieties of peanuts together, or should I stick with one type?
It’s generally recommended to grow a single variety per field to ensure uniform maturity and ease of harvesting. However, if you have space and plan to create a diverse peanut crop for different uses (e.g., roasting, grinding), choose varieties that mature at similar times to simplify management.