Are you ready to unlock the secrets of growing your own nutrient-packed superfoods right in the comfort of your own home? Microgreen gardening indoors is an incredibly rewarding and accessible way to bring fresh, healthy produce into your daily life. Not only does it allow you to control every aspect of the growth process, but it also means that you can have a constant supply of delicious microgreens at your fingertips.
In this beginner’s guide, we’ll take you through everything you need to know to get started with microgreen gardening indoors. From the essential equipment and seeds you’ll need, to expert tips on how to care for your young greens, we’ve got you covered. By the end of this article, you’ll be well-equipped to start cultivating your own thriving indoor garden and reaping the many benefits that come with it – from enhanced nutrition to reduced grocery bills.
Benefits of Indoor Microgreen Gardening
Indoor microgreen gardening offers a wide range of benefits, from increasing your daily nutrient intake to adding a touch of greenery to your home decor. Let’s dive into the advantages you can enjoy by growing microgreens indoors!
Easy to Grow and Maintain
When it comes to indoor gardening, microgreens are an excellent choice for those who want a hassle-free experience. Their fast growth rate means you can start harvesting within 7-10 days of sowing the seeds, and they require minimal space to grow.
In fact, microgreens can thrive in as little as 1-2 inches of space on your windowsill or indoor shelf. This makes them perfect for small apartments, dorm rooms, or even offices with limited space. Plus, their compact growth habits mean you don’t need a lot of equipment or specialized tools to care for them.
One of the biggest advantages of microgreens is that they require very little maintenance. They prefer bright, indirect light but can tolerate some shade, and they’re happy with temperatures between 65-75°F (18-24°C). Simply water them once or twice a week, depending on the humidity in your space, and you’ll be enjoying fresh, nutritious greens in no time.
To get started, choose a variety of microgreen that’s suitable for indoor growing, such as salad mix or pea shoots. Sow the seeds in a shallow tray or container, and keep the soil consistently moist but not waterlogged. With these simple steps, you can enjoy the benefits of microgreen gardening without breaking a sweat.
Improved Air Quality and Aesthetics
One of the most significant advantages of indoor microgreen gardening is its ability to improve air quality and aesthetics. While we often focus on the health benefits of fresh produce, microgreens can also play a vital role in purifying the air around us.
Studies have shown that plants are incredibly effective at removing pollutants from the air, including volatile organic compounds (VOCs) like benzene and formaldehyde. Microgreens, being young and nutrient-dense versions of leafy greens, are no exception. In fact, they can be up to 90% more efficient at purifying the air than mature plants.
By adding a microgreen garden to your indoor space, you’re not only getting a delicious and nutritious crop – you’re also creating a healthier environment for yourself and those around you. Plus, the natural beauty of greenery can have a profound impact on our mental well-being. Imagine walking into a room filled with lush, vibrant greens – it’s invigorating, isn’t it?
Nutritional Benefits and Versatility
When it comes to microgreens, one of their most significant advantages is their incredible nutritional value. Packed with vitamins, minerals, and antioxidants, they offer a concentrated dose of nutrients that can boost the flavor and health benefits of even the simplest dishes.
In fact, research has shown that microgreens contain up to 40 times more nutrients than their mature counterparts, making them an excellent addition to salads, smoothies, and other recipes. For example, pea shoots are rich in vitamin K, while kale microgreens are a powerhouse of vitamins A, C, and E. Radish greens, on the other hand, boast a high content of calcium and potassium.
But what’s truly remarkable about microgreens is their versatility in cooking. You can use them as a garnish for soups or salads, add them to sandwiches and wraps for an extra burst of flavor, or blend them into smoothies for a nutrient-packed drink. Experiment with different varieties and combinations to discover new flavors and textures, from the spicy kick of arugula microgreens to the delicate sweetness of lettuce sprouts.
Try adding microgreens to your favorite recipes today and experience the explosion of flavor and nutrition they bring!
Choosing the Right Equipment and Supplies
To successfully grow microgreens indoors, you’ll need the right equipment and supplies. Let’s walk through what you should consider when making your selections.
Essential Tools for Indoor Microgreen Gardening
To grow microgreens indoors successfully, you’ll need some essential tools. First and foremost, consider investing in a good quality grow light. These lights provide the necessary spectrum of light for photosynthesis to occur, and they’re especially crucial during the winter months or in areas with limited natural light.
Next, you’ll need containers specifically designed for microgreens. Look for ones that are shallow (about 1-2 inches deep), have drainage holes, and are made from a material like plastic or ceramic. You can also use old egg cartons or yogurt cups, but make sure they’re clean and sanitized before use.
An efficient irrigation system is also vital. Microgreens need consistent moisture levels to grow well, but overwatering can be detrimental. Consider using a self-watering planter or a watering globe that releases the perfect amount of water at regular intervals. You’ll also want to invest in a set of trowels and scissors for harvesting.
In addition to these basics, consider investing in pH test strips and a fertilizer specifically designed for microgreens. These will help ensure your plants get the right balance of nutrients they need to thrive. With the right tools in place, you’re ready to start growing your own delicious microgreens indoors!
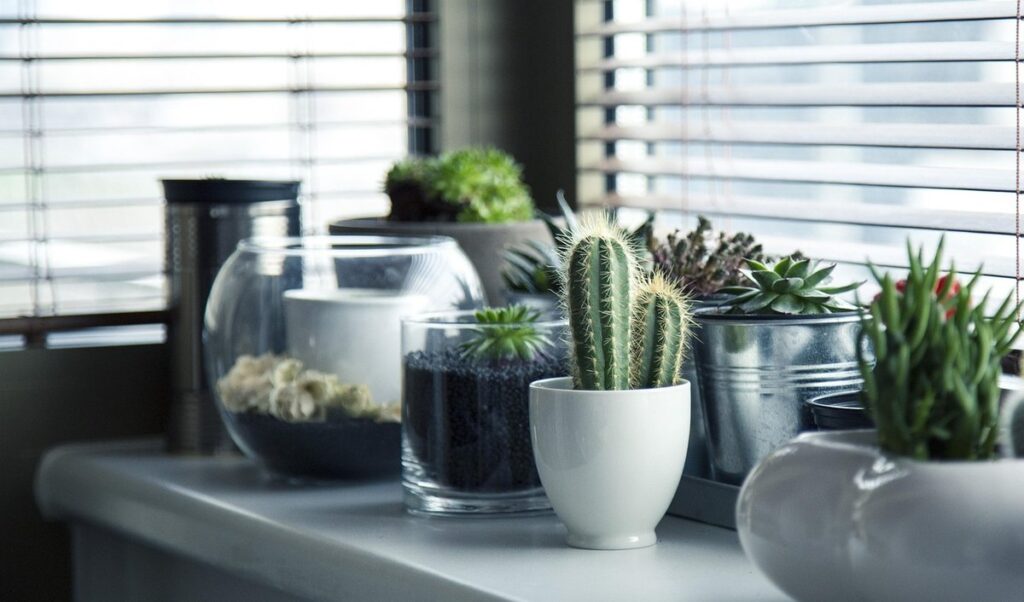
Selecting the Perfect Location
When it comes to setting up an indoor microgreen garden, choosing the perfect location is crucial for its success. As you begin planning, consider the fundamental factors that will impact your microgreens’ growth and well-being: lighting, temperature, and humidity.
Start by identifying a spot with sufficient natural light. Most microgreens require at least 12-14 hours of indirect sunlight or 20-25 watts of fluorescent lighting per day. Avoid placing your garden near windows with direct sunlight, as this can cause temperature fluctuations and potentially scorch your leaves. Consider using sheer curtains or blinds to filter the light.
Temperature is another vital factor to consider. Microgreens thrive in temperatures between 65°F and 75°F (18°C and 24°C). Place your garden away from heating vents, radiators, and air conditioning units to maintain a stable temperature.
Humidity levels also play a role in microgreen growth. Aim for a relative humidity of 40-60% by placing the garden on a tray filled with water or using a humidifier nearby. By carefully evaluating these factors, you’ll create an ideal environment for your indoor microgreens to flourish.
Soil and Nutrient Options
When it comes to growing microgreens indoors, selecting the right soil and nutrient options is crucial for their healthy growth. You’ll want to choose a medium that provides optimal moisture retention, drainage, and nutrient availability. Let’s start with the types of soil suitable for microgreens.
Organic potting mixes are an excellent choice, as they’re free from harsh chemicals and additives. Look for a mix specifically designed for seed starting or sprouting. These blends typically contain a balanced ratio of peat moss, vermiculite, and perlite. Another option is coconut coir-based soil, which is eco-friendly and retains moisture well.
If you prefer to go the hydroponic route, nutrient-rich solutions like General Hydroponics or Botanicare are popular choices. These concentrates provide a balanced blend of NPK (nitrogen, phosphorus, potassium) and micronutrients. You can also explore DIY recipes using fish emulsion, bone meal, and kelp meal.
When selecting a soil or nutrient option, consider the specific needs of your microgreen variety. For example, if you’re growing leafy greens like kale or lettuce, they require more nutrients than herbs like basil or cilantro.
Preparing Your Microgreen Seeds
Before you start growing microgreens, make sure you’ve got your seeds prepped and ready to go by following these essential steps to get started. This is where it all begins!
Types of Microgreen Seeds Available
When selecting microgreen seeds for your indoor garden, you’ll find an astonishing variety of options to choose from. Leafy greens are a popular choice among microgreen enthusiasts, and for good reason – they’re easy to grow, nutritious, and pack a punch in terms of flavor. You can opt for classic varieties like kale, arugula, and lettuce, or try more exotic options like sorrel, cress, or radicchio.
Herbs are another fantastic option for microgreen gardening indoors. Basil, mint, cilantro, and parsley are all easy to grow and will add a fresh, fragrant twist to your cooking. Not only can you use them as garnishes or add-ins, but they’re also great for teas, salads, and sandwiches.
Flowering plants like violas, pansies, and nasturtiums may not be the first choice for many microgreen gardeners, but they offer a unique opportunity to bring color and vibrancy to your indoor space. Not only will they add visual appeal, but some varieties – like nasturtiums – are edible flowers that can be used in salads or as garnishes.
Whether you’re after nutrition, flavor, or beauty, there’s sure to be a type of microgreen seed that suits your needs.
Seed Sourcing and Storage Tips
When it comes to growing microgreens indoors, the quality of your seeds is crucial. To source high-quality seeds, look for reputable suppliers that specialize in microgreen seeds. Check online marketplaces, gardening stores, and local nurseries to find trusted vendors. Some popular seed companies include Johnny’s Selected Seeds, High Mowing Seeds, and Seed Savers Exchange.
Proper storage is also vital to maintaining seed viability. Store your seeds in a cool, dry place with minimal light exposure. A dark cupboard or drawer with a consistent temperature between 40°F to 60°F (4°C to 15°C) is ideal. Keep the seeds away from direct sunlight, moisture, and extreme temperatures.
Check the expiration date on each seed packet and store the oldest packets first. Consider using glass jars or containers to store your seeds, as they are more resistant to moisture and light than plastic bags. Label each container with the seed type, storage date, and any specific storage instructions. By following these tips, you can ensure that your microgreen seeds remain viable for future harvests.
Understanding Germination Rates and Times
When starting your microgreen garden indoors, it’s essential to understand the germination rates and times for different varieties. This knowledge will help you plan ahead, ensure optimal growing conditions, and reduce the risk of crop failure.
Germination rates refer to the percentage of seeds that sprout within a specific timeframe, typically 1-3 weeks after sowing. Different microgreen varieties have varying germination rates, with some as high as 90% for fast-growing varieties like radish or pea shoots, while others may be lower at around 70-80% for more delicate types such as salad mix or arugula.
To give you a better idea, here are some approximate germination times for popular microgreen varieties:
* Radish: 1-3 days
* Pea Shoots: 2-4 days
* Cress: 2-5 days
* Kale: 7-10 days
Understanding these germination rates and times will allow you to adjust your sowing schedule, ensuring that you have a steady supply of fresh microgreens throughout the growing season. For example, if you know that a particular variety takes around 10 days to germinate, you can plan to sow new seeds on a specific day to maintain a continuous harvest.
By taking into account the unique characteristics of each microgreen variety, you’ll be able to optimize your indoor garden’s growth and yield.
Growing Microgreens Indoors: A Step-by-Step Guide
Getting started with microgreen gardening indoors can be overwhelming, but don’t worry – we’ve got you covered with a simple step-by-step guide to get you growing in no time.
Sowing Seeds and Watering Techniques
When it comes to growing microgreens indoors, sowing seeds and maintaining optimal moisture levels are crucial steps in ensuring healthy growth. To begin with, you’ll want to sow your seeds densely on a tray or container filled with a well-draining potting mix. Typically, the recommended density is around 2-4 grams of seeds per square inch. This ensures that the seedlings receive adequate light and nutrients.
Watering techniques also play a vital role in microgreen growth. It’s essential to keep the soil consistently moist but not waterlogged. A good rule of thumb is to water your microgreens with a gentle spray bottle once or twice a day, depending on the climate and air humidity in your growing area. You can also use a mister to distribute water evenly across the surface.
Aim for about 1-2 inches of moisture penetration into the soil by checking the weight of the tray after watering. If it feels heavy, it’s likely too wet. Similarly, if it feels extremely light, it may be time to add some more water. Keep in mind that different microgreen varieties have unique watering needs, so research specific requirements for your chosen variety.
Providing Optimal Lighting Conditions
Light plays a crucial role in microgreen growth, and indoor gardens can often present challenges when it comes to providing optimal lighting conditions. Microgreens require a specific balance of light intensity, spectrum, and duration to thrive.
When it comes to light intensity, most microgreens prefer bright light but not direct sunlight, which can cause scorching. LED grow lights are an excellent option for indoor gardens, as they provide a high intensity of light while being gentle on the plants. For example, a study showed that using LED grow lights increased lettuce yields by 30% compared to traditional fluorescent lighting.
The spectrum of light is also vital for microgreen growth. Different types of microgreens have varying color requirements – some prefer blue light, while others require more red or green light. Research has shown that broccoli microgreens grow best under a mix of red and blue light, while lettuce prefers a balanced spectrum.
In terms of duration, most microgreens need 12-14 hours of light per day to produce optimal yields. However, it’s essential not to overdo it – too much light can lead to weak or leggy growth. Be sure to observe your microgreens closely and adjust the lighting schedule as needed to ensure they receive the perfect balance of light.
Monitoring Temperature and Humidity Levels
Monitoring temperature and humidity levels is crucial to create an ideal environment for microgreens to thrive indoors. You can use a hygrometer to measure both temperature and humidity levels, ensuring they fall within the optimal range of 60-70°F (15-21°C) for temperature and 40-50% relative humidity.
For most microgreen varieties, temperatures above 75°F (24°C) or below 55°F (13°C) can slow down growth or even cause damage. Similarly, extremely low humidity levels can cause the leaves to wilt, while high humidity can lead to fungal diseases. To adjust these levels, you can use a space heater or fan to regulate temperature, and humidifiers or dehumidifiers to control humidity.
For example, if you’re growing pea shoots or radish greens, they prefer slightly higher temperatures around 65-70°F (18-21°C). On the other hand, sprouts like alfalfa or broccoli prefer cooler temperatures between 55-65°F (13-18°C). Monitor your microgreens closely and make adjustments as needed to create an optimal environment for their growth.
Common Challenges and Solutions
As you venture into microgreen gardening indoors, you’ll likely encounter some common obstacles that can deter even the most enthusiastic growers. Let’s tackle these challenges together to ensure a thriving indoor garden.
Overwatering and Pests Control
One of the most common challenges faced by indoor microgreen gardeners is overwatering. When you’re nurturing delicate greens in a controlled environment, it’s easy to get carried away with the watering schedule. However, this can lead to root rot, fungal diseases, and even kill off your entire crop. To avoid overwatering, make sure to check the soil moisture daily by inserting your finger into the growing medium up to the first knuckle. If the soil feels dry, it’s time to water.
Another common issue is pest infestations. Indoor microgreen gardens are susceptible to pests like spider mites, mealybugs, and thrips. To prevent these unwanted visitors from taking over your garden, use neem oil or insecticidal soap as a preventative measure. You can also introduce beneficial insects like ladybugs or lacewings that feed on common pests.
To control pest infestations, monitor your plants regularly for signs of infestation, and take action promptly if you notice any issues. Use a gentle spray to remove eggs, larvae, and adult pests, and repeat the process as necessary until the problem is resolved. By staying vigilant and taking proactive steps, you can prevent overwatering and pest infestations from ruining your indoor microgreen garden.
Lighting Limitations and Alternatives
When growing microgreens indoors, one of the most significant challenges you may face is ensuring they receive sufficient light. While many areas receive limited sunlight, there are alternative lighting options that can help your microgreens thrive.
LED grow lights are a popular choice for indoor gardening, as they provide high-intensity light without generating excessive heat. These energy-efficient lights come in various spectrums and intensities, making them suitable for different types of microgreens. For example, leafy greens like kale and spinach require less intense light than brassicas like broccoli or cauliflower.
Another option is to utilize natural light sources within your home. If you have a south-facing window with plenty of direct sunlight, consider placing your microgreen tray nearby. However, be mindful that this may not provide consistent lighting throughout the day, which can impact yields. To supplement natural light, consider using sheer curtains or blinds to diffuse and distribute the light more evenly.
If neither LED grow lights nor natural light is an option, you can also try using fluorescent lights as a backup solution. While they don’t offer the same spectrum as LEDs, they still provide sufficient illumination for microgreens to grow.
Soil-Borne Diseases and Fungal Growth
When it comes to microgreen gardening indoors, one common challenge is dealing with soil-borne diseases and fungal growth. These issues can be devastating to your crop, causing widespread damage and potentially killing off entire batches of microgreens.
To prevent these problems from arising, it’s essential to maintain good hygiene in your growing space. Start by cleaning and disinfecting all equipment, including trays, scissors, and utensils, after each use. This will help eliminate any lingering spores or bacteria that could contaminate new growth.
Another crucial step is to ensure proper drainage in your microgreen garden. Waterlogged soil can be a breeding ground for fungal growth, so make sure the growing medium isn’t too dense or heavy. Use a well-draining potting mix specifically designed for hydroponics or indoor gardening, and avoid overwatering at all costs.
Regular monitoring of temperature and humidity levels is also vital in preventing soil-borne diseases. Most microgreens thrive in temperatures between 65-75°F (18-24°C), so keep your growing space within this range to prevent fungal growth from taking hold. By following these simple tips, you can minimize the risk of soil-borne diseases and enjoy a healthy, thriving microgreen crop.
Harvesting and Preserving Your Microgreens
Now that you’ve successfully grown your indoor microgreens, it’s time to harvest them and make the most of their nutritional goodness. This section will guide you through the best practices for harvesting and preserving your precious greens.
Identifying the Perfect Harvest Time
When it comes to identifying the perfect harvest time for your microgreens, there are several factors to consider. One of the most important is texture – if they’re still too tender and haven’t developed their characteristic crunch, they won’t be as flavorful or nutritious. On the other hand, if you wait too long and they become tough and fibrous, they’ll lose their delicate taste.
A good rule of thumb is to check on your microgreens daily, gently touching the leaves with your fingers to gauge their texture. As a general guideline, most microgreens are ready to harvest between 7-21 days after sowing, depending on the variety. For example, peppery varieties like arugula and radish are usually ready within 10-14 days, while milder greens like salad mix and lettuce take around 14-21 days.
Another factor is color – many microgreens will deepen in hue as they mature, but some may actually lose their vibrant colors if over-matured. Finally, flavor is a key consideration – if your microgreens taste bitter or unpleasantly strong, it’s likely they’ve been left on the plant too long. Trust your instincts and harvest them when they look, feel, and taste just right.
Storage Methods for Freshness and Preservation
When it comes to maintaining the freshness and extending the shelf life of your microgreens, proper storage is crucial. Refrigeration is a simple yet effective method for short-term storage. Place your harvested microgreens in a sealed container or plastic bag with minimal air space, making sure to keep them away from direct sunlight and heat sources.
Freezing is another option for long-term preservation. Blanching the microgreens in boiling water for 10-15 seconds before freezing can help preserve their color and nutrients. Transfer the blanched microgreens to an airtight container or freezer bag, labeling it with the date and contents. Frozen microgreens can be stored for up to 6 months.
Dehydrating is also a great method for preserving microgreens. This process removes excess moisture, allowing you to store them in a dry environment. You can use a food dehydrator or simply air-dry the microgreens on a wire rack. Dehydrated microgreens can be stored for up to 6 months and rehydrated as needed.
To maintain freshness when storing microgreens, it’s essential to keep them away from moisture, heat, and light. Regularly check your stored microgreens for any signs of spoilage or mold.
Using Your Harvested Microgreens in Recipes
The excitement of harvesting your very own microgreens! Now that you’ve carefully nurtured them indoors, it’s time to get creative and incorporate them into a variety of dishes. Microgreens can add an explosion of flavor, texture, and color to salads, sandwiches, soups, and more.
Start by using them as a garnish or topping for your favorite meals. Simply chop the microgreens finely and sprinkle them over a bowl of soup, a sandwich, or a salad. You can also use them as a mix-in for sauces, marinades, and dressings. For example, add chopped pea shoots to a homemade pesto sauce for an extra burst of flavor.
Some popular ways to use microgreens include:
• Adding them to omelets, frittatas, and other breakfast dishes
• Mixing them into salads, such as a spinach and strawberry salad or a kale Caesar
• Using them as a topping for soups, like creamy broths or clear gazpacho
• Blending them into smoothies for an extra nutritional boost
Remember to use your microgreens within 3-5 days of harvesting for optimal flavor and texture. Store them in the refrigerator with the roots wrapped in a damp paper towel to keep them fresh. Get creative and have fun experimenting with different recipes and combinations – you’ll be amazed at how versatile these tiny greens can be!
Frequently Asked Questions
What is the ideal humidity level for growing microgreens indoors?
Humidity levels between 40-60% are suitable for most microgreen varieties. You can maintain this range by placing the growing tray on a tray filled with water and pebbles or using a humidifier.
Can I grow multiple types of microgreens together in the same container?
Yes, many microgreen varieties can be grown together, but it’s essential to choose compatible species with similar growth rates and space requirements. Research each variety’s specific needs to ensure harmonious coexistence.
How do I handle common pests like spider mites or aphids on my indoor microgreens?
Common pest control methods include using neem oil, insecticidal soap, or introducing beneficial insects that prey on the pests. Monitor your plants regularly and address any issues promptly to prevent infestations from spreading.
Can I grow microgreens in a windowless room with artificial lighting only?
Yes, many varieties of microgreens can thrive under artificial lighting conditions. Choose high-intensity LED grow lights specifically designed for indoor plant growth, and ensure the light spectrum is suitable for your chosen variety.
How do I store my harvested microgreens to maintain their freshness and flavor?
Store harvested microgreens in a sealed container with paper towels or a breathable cloth to absorb excess moisture. Keep them refrigerated at 32°F (0°C) or below to slow down spoilage, and consume within 3-5 days for optimal flavor and nutrition.