Starting seeds indoors with grow lights can be a game-changer for gardeners, especially during the off-season or in areas with limited natural light. However, using grow lights effectively is more than just plugging them in and hoping for the best. To get your seedlings off to a strong start, you need to understand the importance of spectrum, intensity, and coverage area.
This article will cover everything you need to know about choosing and using grow lights for starting seeds. We’ll explore how to select the right type of light for your needs, including LED vs HPS, and discuss key considerations like temperature control and humidity management. By avoiding common mistakes, such as overwatering or insufficient light, you can ensure your seedlings thrive under their new grow lights. Let’s dive in and learn how to use grow lights effectively for a successful start.
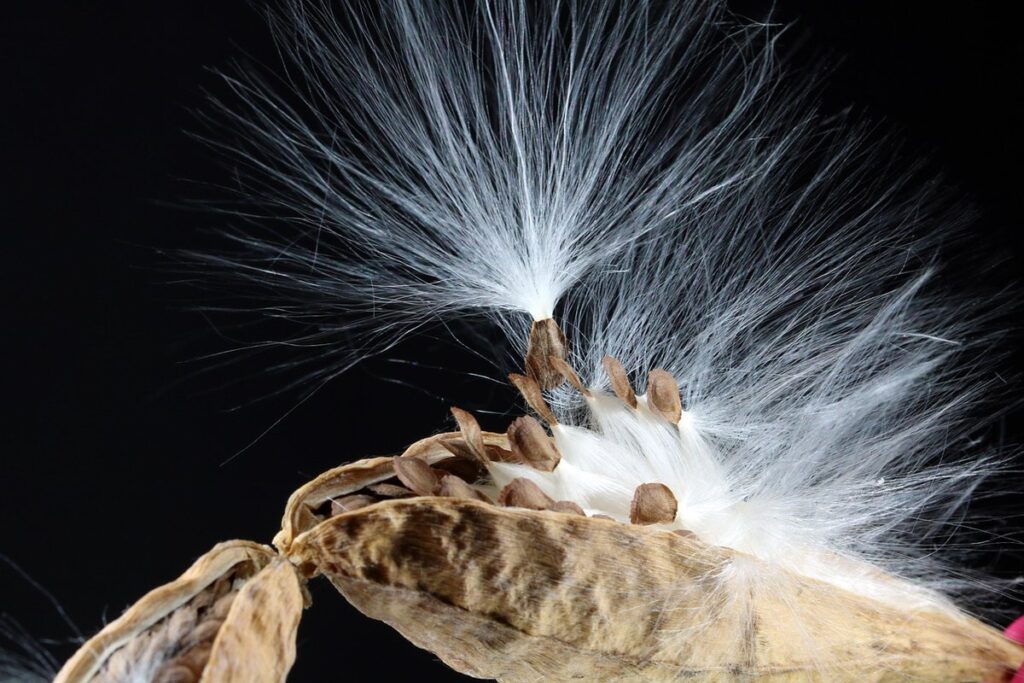
Understanding Seed Starting Basics
Before you can start using grow lights to nurture your seeds, it’s essential to understand the basics of seed starting. This includes choosing the right soil and temperature for optimal germination.
What are Grow Lights?
When starting seeds indoors, it’s essential to have the right tools to give them a strong foundation for growth. One crucial component of this process is grow lights – specialized lamps designed to provide artificial light for plants. So, what exactly are grow lights?
Grow lights are electrical devices that emit specific wavelengths and intensities of light to mimic natural sunlight. This is especially important for seed starting, as it allows gardeners to control the environment and ensure optimal growing conditions. Seed starting involves planting seeds indoors before transferring them outside when weather permits. It’s a crucial step in extending the growing season, allowing gardeners to start seedlings months ahead of time.
By using grow lights, you can replicate the light spectrum and duration required for healthy seed germination and growth. This is particularly beneficial for plants that require extended periods of light or specific wavelengths to thrive. In fact, many professional growers rely on grow lights to produce high-quality crops year-round. Whether you’re a seasoned pro or just starting out, understanding the role of grow lights in seed starting will help you achieve success in your gardening endeavors.
Types of Light Sources for Seed Starting
When it comes to growing seeds with success, choosing the right light source is crucial for their development and germination. There are several types of light sources available for seed starting, each with its own unique characteristics, advantages, and disadvantages.
LED (Light Emitting Diode) grow lights are a popular choice among seed starters due to their energy efficiency, long lifespan, and ability to emit specific wavelengths of light that promote healthy plant growth. They come in a variety of spectrums, including full-spectrum, blue-enriched, and red-enhanced options.
Fluorescent grow lights are another option for seed starting, offering a balanced spectrum of light that promotes seed germination and early growth. However, they tend to be less energy-efficient than LED grow lights and have a shorter lifespan.
HPS (High Pressure Sodium) bulbs provide an intense, yellow-red spectrum of light that is ideal for promoting stem elongation and leaf development in seedlings. However, they can produce excessive heat, which may require additional cooling measures.
CFL (Compact Fluorescent Lamp) bulbs offer a more affordable alternative to LED grow lights, but tend to have a shorter lifespan and less intense spectrum of light. They are still effective for seed starting, especially for smaller batches or seedlings that don’t require intense lighting.
When choosing the right type of light source for your seeds, consider factors such as energy efficiency, lifespan, and spectrum. Also, think about the specific needs of your seeds and adjust your lighting accordingly. For example, if you’re growing delicate herbs like lettuce or basil, a blue-enriched LED light may be more suitable than an HPS bulb.
In addition to these options, some growers also use T5 and T8 fluorescent lights for seed starting. These types of lights are known for their high light output and can provide excellent results when used correctly.
Choosing the Right Grow Lights for Your Seeds
When it comes to starting seeds, selecting the right grow lights is crucial. In this next step, we’ll walk you through choosing the perfect light for your tiny seedlings.
Factors to Consider When Selecting Grow Lights
When selecting grow lights for starting seeds, there are several key factors to consider. First and foremost, think about the spectrum of light that you need. Different types of plants require different spectrums, so it’s essential to choose a grow light that provides the right balance of blue, red, and green light. For example, seedlings prefer more blue light for healthy growth, while flowering plants require more red light.
Consider the intensity of the grow light as well. Seedlings typically need lower light intensities than mature plants, so it’s essential to choose a light that can be adjusted to meet their needs. Look for lights with adjustable dimmers or switches to allow you to tailor the light to your seedlings’ requirements.
Finally, think about the coverage area of the grow light. Make sure it can illuminate the entire growing space without leaving any shadows or dark spots. A general rule of thumb is to choose a light that covers at least 2×3 square feet per watt of power output.
Spectrum Options: Which One is Best for Seed Starting?
When it comes to seed starting, the right spectrum is crucial for optimal growth and development. You’ll find that most grow light manufacturers offer a range of spectrum options, each designed to cater to specific needs. Let’s break down the three main types: blue, red, and full-spectrum.
Blue spectrum lights are often used for promoting root growth and vegetative development in young seedlings. These lights emit shorter wavelengths (around 400-500 nanometers) that encourage cell elongation and division, leading to robust root systems. A good example is the FluoroStar Blue LED Grow Light, which boasts a high blue-to-red ratio ideal for seed starting.
Red spectrum lights, on the other hand, focus on promoting flowering and fruiting in more mature plants. They emit longer wavelengths (around 600-700 nanometers) that stimulate hormone production, leading to increased bud formation. However, red spectrum lights can be too intense for delicate seedlings, potentially causing scorching or delayed germination.
Full-spectrum lights offer a balanced mix of blue and red light, typically with a ratio of around 12:1 or 16:1 (blue:red). These lights provide the most comprehensive spectrum, promoting both root growth and flowering. A popular choice among growers is the Sylvania LED Full-Spectrum Grow Light, which mimics natural daylight and is suitable for seed starting, vegetative growth, and even flowering.
In terms of choosing the right spectrum, consider your specific needs: are you growing leafy greens or herbs that require more blue light? Or do you have flowering plants like tomatoes or peppers that need a boost from red light? Most importantly, ensure your chosen light has a sufficient intensity (measured in lumens per watt) to support your seedlings’ growth. Remember, it’s not just about the spectrum – also consider the light’s overall brightness and coverage area when selecting the perfect grow light for your seeds.
Grow Light Intensity: What Your Seeds Need to Thrive
When selecting a grow light, choosing the right intensity is crucial for your seeds’ growth and development. Let’s dive into what different levels of intensity can do for your seedlings.
Understanding PAR Values: The Measure of Grow Light Intensity
When it comes to growing seeds with success, choosing the right grow lights is crucial. But what exactly do you need to look for? One key factor to consider is PAR (Photosynthetic Active Radiation) values, which measure the intensity of grow light.
PAR values represent the amount of usable light that your plants can absorb and convert into energy. In other words, it’s a measure of how effectively your grow light can support photosynthesis. The higher the PAR value, the more intense the light will be. To give you an idea of just how important this is, consider that seedlings need around 20-40 micromoles per second (μmol/s) of PAR to thrive.
When selecting a grow light, look for one with a high PAR value. For example, if you’re using LED grow lights, aim for ones with a PAR value above 500 μmol/s. This will provide your seedlings with the intense light they need to develop strong roots and sturdy stems. Remember that PAR values are usually measured at a specific distance from the light source, so be sure to check the manufacturer’s specifications to ensure you’re getting the right amount of light for your plants.
Measuring and Adjusting Grow Light Intensity
Measuring and adjusting grow light intensity is crucial for optimal seed growth. Seeds are sensitive to light, and excessive intensity can lead to burning, while insufficient light may hinder development. To avoid this, it’s essential to monitor the light levels and make adjustments accordingly.
You can use a lux meter or a smartphone app to measure the light intensity. Start by placing the sensor in the center of the growing area, ensuring it’s not touching any leaves or other objects. Take multiple readings at different heights to get an accurate average.
A general rule of thumb is to maintain between 20-40 micromoles per second (μmol/s) for most seedlings. For larger plants, you can increase the intensity up to 60 μmol/s. Keep in mind that some grow lights have adjustable intensities, so be sure to check your light’s specifications.
Remember to adjust the light height and distance from the seeds as they grow. As seedlings develop, they may require more or less light. By regularly monitoring and adjusting the intensity, you’ll ensure optimal growth and a healthy start for your plants.
Coverage Area and Placement: Maximizing Your Grow Lights’ Effectiveness
When choosing grow lights for starting seeds, selecting the right coverage area and placement is crucial to maximize their effectiveness. Proper placement ensures your plants receive just the right amount of light they need.
Choosing the Right Size of Grow Light for Your Seed Starting Station
When it comes to choosing the right size of grow light for your seed starting station, determining the coverage area is crucial. Start by measuring the length and width of your growing space, including the number of trays you plan to use. A general rule of thumb is to provide 20-30 watts of light per square foot of growing space.
Consider the type of plants you’ll be starting, as some require more intense lighting than others. For example, seedlings for tomatoes and peppers may need more light than those for herbs like basil or cilantro. Take into account any obstructions within your growing space, such as shelves or corners that might reduce the effective coverage area.
To calculate the total wattage required, multiply the length and width of your growing space by 20-30 watts per square foot. Round up to the nearest whole number to ensure you’re providing enough light for your plants to thrive. For instance, a 4×8-foot grow station would require approximately 160-240 watts of lighting. Be sure to select a grow light that meets or exceeds this wattage requirement to ensure optimal seed starting conditions.
Placing Grow Lights for Maximum Effectiveness
When placing grow lights over your seed starting station, it’s essential to consider both height and distance to maximize their effectiveness. A general rule of thumb is to position the light 12-18 inches above the soil surface, taking care not to scorch delicate seedlings with excessive heat or light.
However, this can vary depending on the type of grow lights you’re using. LED lights, for example, tend to be cooler and more energy-efficient than traditional fluorescent or HPS bulbs, so they may require a slightly closer placement – around 6-12 inches above the soil surface.
When determining the optimal distance, also think about the size of your seed starting station. For smaller setups, you may want to start with a closer placement and adjust as needed, while larger stations can handle more light and benefit from a greater distance between the light source and the seeds.
Keep in mind that it’s better to err on the side of caution when placing grow lights too close to the soil surface – over-lighting can damage or even kill seedlings. By finding the sweet spot for your specific setup, you’ll ensure that your seedlings receive just the right amount of light to promote healthy growth and development.
Additional Tips for Growing Healthy Seeds with Grow Lights
To get the most out of your grow lights, consider these expert tips on maintaining optimal temperatures, humidity levels, and light cycles for seedlings. This will ensure a healthy start to their growth.
Temperature Control: A Critical Factor in Seed Growth
Maintaining a stable temperature range under grow lights is crucial for seed growth. Seeds typically require temperatures between 65°F to 75°F (18°C to 24°C) during the day and around 55°F to 65°F (13°C to 18°C) at night to germinate and develop properly.
If the temperature is too high or too low, it can hinder seed growth and lead to reduced yields. For example, if the temperature exceeds 85°F (29°C), seeds may become desiccated and fail to germinate. On the other hand, temperatures below 55°F (13°C) can slow down seedling development.
To achieve a stable temperature range under grow lights, consider the following tips:
* Position your grow light at least 12 inches away from the seeds to prevent overheating.
* Use a thermometer to monitor the temperature and adjust as needed.
* Consider using a heating mat or a space heater to maintain a consistent temperature during cold periods.
* Keep an eye on seedling growth, adjusting the distance between the light and the soil as they grow taller.
By maintaining a stable temperature range under grow lights, you can create optimal conditions for your seeds to germinate and thrive.
Humidity Management: Preventing Damping Off and Other Issues
When starting seeds under grow lights, it’s easy to overlook one crucial aspect: humidity management. High humidity levels can lead to a common issue known as damping off, which causes seedlings to collapse and die. Damping off is typically caused by overwatering, poor air circulation, or high temperatures.
To prevent this problem, you need to control the humidity level in your growing space. Aim for a relative humidity (RH) between 30% and 60%. You can achieve this by using fans to improve air circulation or by placing the grow lights at a distance that allows for better air movement.
Keep in mind that seedlings are more susceptible to overwatering than mature plants, so make sure not to water them excessively. Water only when the soil feels dry to the touch, and avoid getting water on the leaves to prevent fungal growth. By managing humidity levels and being mindful of watering habits, you can significantly reduce the risk of damping off and other issues that might arise when growing seeds under grow lights.
Common Mistakes to Avoid When Using Grow Lights for Seed Starting
When it comes to using grow lights for seed starting, there are several pitfalls to watch out for that can hinder your plants’ growth and success. Let’s take a closer look at some common mistakes to avoid.
Understanding the Limitations of Grow Lights
Grow lights are an excellent solution for seed starting, but it’s essential to understand their limitations. Overheating is a significant risk when using grow lights, especially high-intensity LED models. Prolonged exposure to intense light can cause temperatures to soar, potentially damaging the seeds or even causing them to germinate unevenly.
To mitigate this issue, ensure you have adequate air circulation in your growing space. This means keeping the area well-ventilated and using fans to circulate the air around the plants. Proper air circulation helps prevent heat buildup, reducing the risk of overheating.
Another limitation of grow lights is their impact on seedling development. While they provide necessary light for germination, excessive intensity can lead to weak or spindly growth. This is especially true for sensitive varieties that require more subtle lighting conditions.
To avoid these issues, choose grow lights with adjustable intensity settings and ensure you’re using them at the recommended distances from the plants. Regular monitoring of temperature and air circulation will also help prevent overheating and promote healthy seedling development.
Troubleshooting Common Issues with Grow Lights
When using grow lights for seed starting, it’s not uncommon to encounter issues that can hinder healthy growth and development. One common problem is poor growth, where seeds fail to germinate or grow at a slow rate. Weak seedlings are another issue, characterized by limp or spindly growth.
To troubleshoot these problems, start by checking the light spectrum. Ensure your grow lights emit sufficient blue light (400-500nm), as this promotes healthy seedling development. If using LED grow lights, check the color temperature, as a lower temp can hinder plant growth. Next, assess the light intensity, as insufficient light can also lead to weak seedlings.
Another issue is overwatering or underwatering, which can be caused by inconsistent watering schedules or inadequate drainage. Regularly inspect your growing medium for moisture levels and adjust your irrigation accordingly. Finally, check the grow lights’ distance from the seeds, as excessive heat can scorch seedlings. Adjust the light’s height to maintain optimal temperatures (around 70-80°F) for healthy growth.
Frequently Asked Questions
Can I use grow lights for other types of plants besides seeds?
Yes, grow lights are not just limited to starting seeds. They can be used to nurture a wide range of plants, from seedlings to mature plants that require supplemental lighting. When selecting a grow light for other types of plants, consider their specific needs in terms of spectrum and intensity.
How often should I replace the bulbs in my grow lights?
The lifespan of grow light bulbs varies depending on usage and quality. As a general rule, LED bulbs can last up to 50,000 hours or more, while HPS bulbs typically need to be replaced every 10-20,000 hours. Keep an eye on your bulb’s performance, and replace them as needed to maintain optimal light output.
Can I use grow lights outdoors?
Yes, but it’s essential to choose a grow light specifically designed for outdoor use. Look for IP65 or higher rating lights that can withstand harsh weather conditions like rain, snow, and direct sunlight. When placing outdoor grow lights, consider factors such as wind resistance and UV protection.
How do I balance the temperature and humidity levels in my indoor growing environment?
To create an optimal growing environment, ensure a temperature range of 65-75°F (18-24°C) for most seedlings. For humidity management, aim for a relative humidity of 40-60%. You can use humidifiers or dehumidifiers to adjust the levels as needed.
Can I use grow lights in conjunction with other lighting sources?
Yes, combining grow lights with natural light or supplemental LED strips can enhance plant growth and development. When integrating multiple light sources, ensure that they’re not overlapping or conflicting in terms of spectrum and intensity. This will help you create a more efficient and effective growing environment.