Garlic is one of those magical ingredients that can elevate any dish from ordinary to extraordinary. Not only does it add flavor, but it also boasts impressive health benefits. If you’re looking to grow your own garlic outdoors, you’ve come to the right place. With a little know-how and some TLC, you’ll be harvesting a bountiful crop in no time. But where do you start? Choosing the right variety of garlic is crucial for success, as some types thrive better in certain climates. In this guide, we’ll walk you through everything you need to know to grow garlic outdoors, from selecting the perfect variety and preparing your soil to planting techniques and pest management tips. Whether you’re a seasoned gardener or just starting out, by the end of this article, you’ll be well on your way to growing delicious, homegrown garlic.
Choosing the Right Variety
With so many garlic varieties to choose from, selecting the right one for your garden can be overwhelming. Let’s break down the key factors to consider when making your selection.
Understanding Garlic Types
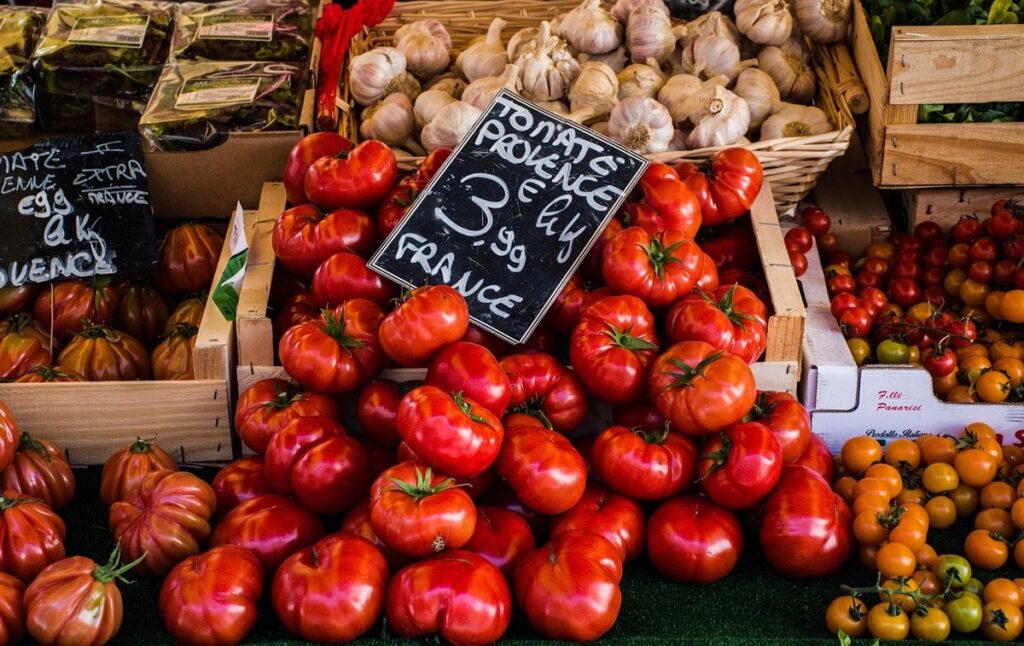
When it comes to growing garlic outdoors, understanding the different types of garlic is crucial for selecting the best variety for your climate and needs. There are three main types: softneck, hardneck, and elephant garlic.
Softneck garlic is one of the most widely available varieties and is often used in cooking. It has a softer, more pliable neck that’s less prone to splitting during storage. Softneck garlic prefers well-draining soil and full sun, making it ideal for warmer climates. For example, in California, softneck garlic thrives in the mild winters and hot summers.
Hardneck garlic, on the other hand, is known for its robust flavor and is often used by chefs. It has a harder, more woody neck that’s resistant to pests and diseases. Hardneck garlic prefers cooler climates with some frost, making it perfect for growers in areas like Oregon or Washington. Elephant garlic, as its name suggests, is the largest of the three types and produces massive cloves. It prefers well-draining soil and full sun, but can tolerate a wide range of temperatures.
When selecting a variety, consider your climate, available space, and personal preferences. For instance, if you live in a hot climate with little frost, softneck or elephant garlic might be the better choice. If you’re looking for robust flavor and can provide some frost protection, hardneck garlic could be the way to go.
Considering Climate and Hardiness Zones
When growing garlic outdoors, it’s essential to consider the climate and hardiness zones where you live. Garlic is a cool-season crop that thrives in temperate climates with moderate temperatures and adequate moisture. In regions with extreme heat or cold, garlic may not grow well or may be more susceptible to disease.
To determine which varieties of garlic will perform best in your area, refer to the USDA Plant Hardiness Zone Map. This map divides the country into 11 zones based on average annual extreme minimum temperatures. Garlic prefers zones 4-9, with optimal growth occurring in zones 6-8.
If you live in a region with hot summers or mild winters, choose varieties that are resistant to heat stress and moisture loss. For example, ‘Silverskin’ garlic is a good choice for warm climates, as it matures quickly and has some resistance to heat. In cooler regions, ‘Elephant’ garlic is a popular variety due to its robust growth and cold hardiness. When selecting a variety, consider your local climate and choose one that suits your conditions.
Preparing the Soil and Site
Before you start planting garlic, it’s essential to prepare the soil and site to create an optimal environment for your bulbs to thrive. This involves assessing the sun, drainage, and soil quality of your chosen location.
Soil Requirements
When growing garlic outdoors, it’s essential to understand the soil requirements that will ensure healthy growth and optimal flavor. Well-draining soil is crucial for garlic, as excessive moisture can lead to rot and other problems. Look for a spot with good drainage or create raised beds with a mix of topsoil, compost, and perlite.
The ideal pH range for garlic is between 6.0 and 7.0, slightly acidic to neutral. If your soil’s pH is too high (above 8.0), it may lead to nutrient deficiencies, while extremely low pH (below 5.5) can cause root damage. Test your soil before planting to determine its pH level.
Garlic also requires a balanced diet of nutrients, particularly nitrogen, phosphorus, and potassium. Add compost or well-rotted manure to the soil in spring, about two weeks before planting garlic cloves. This will provide essential nutrients and help the plants establish strong roots. If your soil is lacking in nutrients, consider using organic fertilizers specifically designed for garlic cultivation.
Maintain a nitrogen-rich fertilizer schedule throughout the growing season to promote healthy foliage growth and prevent bulb formation too early. A ratio of 10-10-5 (nitrogen-phosphorus-potassium) works well for most garlic varieties.
Selecting a Sunny Location
When selecting a sunny location for growing garlic outdoors, it’s essential to consider three key factors: sunlight, wind protection, and accessibility. Garlic requires at least 6 hours of direct sunlight per day to produce a bountiful harvest. If possible, choose a spot that receives full sun from morning till evening.
Wind protection is also crucial as garlic can be sensitive to strong winds, which may cause damage or even uproot the plants. A location with some tree cover or nearby structures can provide sufficient windbreaks. When selecting a site, observe how the wind blows in your garden and choose an area that’s partially shielded from gusts.
In addition to sunlight and wind protection, consider the accessibility of the location. Growing garlic outdoors often requires regular maintenance tasks such as watering, fertilizing, and harvesting. Choose a spot that’s easily accessible, preferably near a water source or other essential facilities. By considering these factors, you’ll set your garlic crop up for success from the start.
Planting Garlic Bulbs
To successfully grow garlic outdoors, you need to plant the bulbs at the right time and location. Here’s how to correctly plant garlic bulbs in your garden.
When to Plant
When to Plant Garlic: Timing is Everything!
As you plan to grow garlic outdoors, timing is crucial. The ideal planting time varies depending on your climate and region. In general, it’s best to plant garlic when the soil can be worked and the weather is cool.
In regions with frost dates earlier than November 15th, plant hardneck garlic in October or early November for a spring harvest. Softneck varieties, on the other hand, can be planted as late as December. Be sure to check your local frost dates and plan accordingly.
If you live in an area with mild winters, like Southern California or Florida, you can plant garlic year-round. However, avoid planting during periods of extreme heat, usually between mid-June and August.
Keep in mind that the soil temperature should be around 55°F (13°C) for optimal growth. You can check the soil temperature by using a thermometer or waiting until the soil has cooled down after a frost.
In regions with cold winters, such as in areas above 30°N latitude, it’s best to plant garlic in early spring, usually around late March or early April. This will give the bulbs enough time to mature before the first frost.
Planting Techniques
When planting garlic bulbs outdoors, it’s essential to get them off to a good start with proper technique. Begin by selecting a spot with well-draining soil and full sun. Dig a bed about 6-8 inches deep, loosening the soil as you go.
To plant the bulbs, place them in the trench with the pointed end facing upwards. Leave about 4-6 inches between each bulb, depending on the variety. This will give the cloves enough room to grow without becoming overcrowded.
The depth of planting is crucial – bury the neck of the bulb (where it meets the stem) about 2-3 inches below the surface. This will help prevent green shoots from sprouting before winter, when garlic is dormant.
Orient the bulbs with their basal plate (the flat bottom side) facing downwards to encourage the formation of a strong stem and healthy roots. Firm the soil gently around each bulb, making sure not to compact it too much. Water thoroughly after planting to settle the soil and provide enough moisture for establishment.
Caring for Garlic Plants
To keep your garlic plants thriving, it’s essential to provide them with proper care and maintenance throughout their growing season. This includes regular watering, fertilization, and pest management strategies.
Watering and Moisture
When it comes to watering and maintaining moisture levels for garlic plants grown outdoors, it’s essential to strike the right balance. Overwatering can lead to root rot and other diseases, while underwatering will stunt growth. To prevent this, aim to provide about 1 inch of water per week through rainfall or irrigation.
It’s also crucial to keep an eye on soil moisture levels by inserting a finger into the soil up to the knuckle. If it feels dry, it’s time for watering. Water deeply and infrequently to encourage deep root growth, which will help your garlic plants become more resilient to drought.
Another consideration is avoiding overhead watering, as this can lead to fungal diseases that thrive in moist environments. Instead, use soaker hoses or drip irrigation systems to deliver water directly to the roots. This will not only conserve water but also reduce evaporation and runoff. By following these guidelines, you’ll be able to keep your garlic plants healthy and thriving throughout their growing season.
Fertilization and Mulching
Fertilizing and mulching are two essential techniques for promoting healthy growth and maximizing yields from garlic plants. When it comes to fertilization, garlic benefits from a balanced fertilizer that is rich in nitrogen, phosphorus, and potassium. Aim to apply a high-nitrogen fertilizer in the early spring when the plants are actively growing, following the manufacturer’s instructions carefully to avoid over-fertilizing.
Mulching around the base of the plants also plays a critical role in maintaining soil health and regulating moisture levels. Organic mulch such as straw or wood chips helps retain moisture, suppress weeds, and regulate soil temperature. Aim to apply a 2-3 inch layer of mulch around each plant, keeping it a few inches away from the bulb to prevent rot.
Regular fertilization and mulching can significantly impact garlic yields. Studies have shown that regular feeding with balanced fertilizers can lead to increased yields by up to 20%. By incorporating these practices into your outdoor growing routine, you’ll be well on your way to harvesting a successful crop of homegrown garlic.
Managing Pests and Diseases
As you tend to your garlic crop, pests and diseases can quickly become a problem. This section will show you how to prevent and treat common issues that affect outdoor garlic growth.
Common Problems
When growing garlic outdoors, it’s essential to be aware of common pests and diseases that can affect your crop. One of the most prevalent pests is aphids, tiny sap-sucking insects that can spread disease and weaken the plant. To manage aphid infestations, inspect your plants regularly and use neem oil or insecticidal soap to control outbreaks.
Spider mites are another common pest that can cause damage to garlic leaves, leaving behind fine webbing. These microscopic arachnids thrive in dry conditions, so ensure you maintain adequate moisture levels to prevent their spread.
Fungal infections like white rot and purple blotch can also wreak havoc on your garlic crop. To prevent these diseases, avoid overhead watering, which can splash water onto the soil and facilitate fungal growth. Instead, use drip irrigation or soaker hoses to deliver water directly to the roots. Keep the area around your plants clean and free of debris, as this will help reduce the risk of disease transmission. Regularly inspect your plants for signs of infection, such as yellowing leaves or white patches on the bulbs.
Organic Control Methods
When growing garlic outdoors, it’s essential to use organic control methods to manage pests and diseases that can harm your crop. One of the most effective natural solutions is neem oil, which can be used to control a wide range of pests, including aphids, spider mites, and whiteflies. Mix neem oil with water according to the label instructions and spray it on the plants to prevent infestations.
Diatomaceous earth is another natural powder that can help control slugs, snails, and other soft-bodied pests. Sprinkle it around the base of the garlic plants to deter these pests from feeding on your crop. Copper-based fungicides are also a great option for controlling fungal diseases such as powdery mildew and botrytis. However, make sure to use them according to the label instructions to avoid burning your plants.
When using any organic control method, it’s essential to read the label carefully and follow the instructions to ensure you’re using the product effectively and safely. Remember that prevention is key when it comes to pest and disease management, so try to maintain a healthy growing environment by providing your garlic plants with adequate water, nutrients, and sunlight.
Harvesting and Storage
Once you’ve successfully harvested your garlic crop, it’s essential to store it properly to preserve its quality and flavor for as long as possible. We’ll walk you through the steps of harvesting and storing your outdoor garlic.
When to Harvest
When to harvest garlic is crucial for maximizing flavor and texture. Look for signs of maturity, such as yellowing leaves, which signal that the bulbs are forming beneath the soil. For hardneck varieties, the top growth will start to turn brown and dry, while softneck varieties will display a papery sheath.
Timing varies depending on the variety and climate. In general, harvest garlic in late spring or early summer when the tops begin to yellow. For warmer climates (USDA zones 8-10), this is usually around June, while cooler climates (zones 3-5) may need to wait until July. Consider the specific maturation period for your variety: some take as little as 90 days, while others require up to 120 days.
If you’re unsure whether it’s time to harvest, gently dig around a bulb with your fingers. If the cloves are still forming and not yet separated, let them stay in the ground for another week or two. For optimal flavor and texture, wait until the bulbs are fully mature before harvesting. This will ensure that the garlic has reached its peak flavor potential.
Storing Garlic
Proper storage of harvested garlic is crucial to maintaining its freshness and potency. Once you’ve carefully dug up your mature garlic bulbs, it’s essential to cure them before storing. Curing involves drying the soil from the garlic bulbs to prevent moisture from causing mold or rot.
To cure your garlic, start by gently brushing away any excess soil. Then, lay the bulbs out in a single layer on a wire rack or tray, making sure they don’t touch each other. Keep them in a dry, well-ventilated area with temperatures between 60°F to 70°F (15°C to 21°C). Allow them to cure for 7-10 days before storing.
When it comes to long-term storage, you have two options: air-drying or freeze-drying. Air-drying is the most common method and involves hanging the garlic bulbs in a warm, dry place with good air circulation. Freeze-drying, on the other hand, removes moisture from the garlic using a vacuum pump, resulting in a crumbly texture that’s perfect for long-term storage.
Regardless of the method you choose, make sure to store your garlic in an airtight container or paper bag to keep it fresh for up to 8 months. Keep it away from direct sunlight and heat sources to preserve its flavor and nutritional value.
Frequently Asked Questions
Can I grow garlic indoors if I don’t have a suitable outdoor spot?
No, it’s not recommended to grow garlic indoors as it requires full sun and well-ventilated conditions to thrive. Choose a sunny location outdoors with at least six hours of direct sunlight per day.
How often should I water my garlic plants during hot summer months?
Water your garlic regularly during the first growing season, but avoid overwatering, which can lead to rot and other problems. Aim for about 1 inch of rainfall or irrigation per week, and reduce watering as the plants mature.
What are some common pests that target garlic and how can I control them organically?
Common pests include aphids, spider mites, and thrips. Use neem oil, insecticidal soap, or horticultural oil to control infestations. Remove weeds and debris around the planting area to reduce pest habitats.
Can I grow elephant garlic if I live in a cold climate?
Yes, but choose a variety that’s specifically bred for your region’s hardiness zone. Elephant garlic is more resistant to cold temperatures than other types of garlic, but still requires protection from extreme frost.
How do I know when my garlic is ready to harvest?
Check the necks of the bulbs; they should be dry and papery. Gently dig around each bulb with a fork, being careful not to damage the cloves. Harvest when about 1/3 to 1/2 of the top foliage has died back, usually in mid-to-late summer.