Growing your own fresh herbs at home can be incredibly rewarding, especially when you get to enjoy them in all their flavorful glory. But let’s face it – not every herb is as easy to grow as others. Dill leaves, in particular, require a bit of TLC to flourish. From sowing the seeds to harvesting those fragrant green tops, learning how to grow dill leaves successfully can be a challenge for even the most seasoned gardeners.
In this article, we’ll dive into the world of dill cultivation and share expert tips on everything from soil preparation to pest management. You’ll learn how to coax your dill plants into producing that perfect balance of flavor and aroma – just what you need to elevate your pickling, salads, and other dishes to new heights! Whether you’re a seasoned gardener or just starting out, we’ve got the inside scoop on growing dill leaves that will make your taste buds dance with joy.
Choosing the Right Variety
When it comes to growing dill leaves, selecting the right variety is crucial for optimal flavor and growth. This section will help you navigate the different types of dill perfect for your garden.
Understanding Dill Types
When it comes to growing dill leaves, you’ll soon discover that there are several varieties to choose from. While they may look similar, each type has its own unique characteristics, growth habits, and uses in cooking.
French Dill, also known as Bouquet Dill or Fern-leaf Dill, is a popular variety among gardeners and chefs alike. Its leaves are narrower and more delicate than other types of dill, making them ideal for adding to salads and garnishing dishes. French Dill grows relatively quickly, producing an abundance of fragrant leaves in about 60 days.
Sweet Dill, on the other hand, has broader leaves with a slightly sweeter flavor profile compared to other varieties. It’s a bit slower-growing than French Dill but produces more seeds per plant, making it a popular choice for gardeners who want to harvest dill seeds as well as leaves. Sweet Dill is also often used in pickling and preserving due to its high oil content.
Other types of dill leaves include Mammoth Dill, which has huge, flat leaves that are perfect for adding flavor to soups and stews; and Dwarf Dill, a compact variety ideal for small gardens or containers.
Selecting Seeds or Seedlings
When it comes to growing dill leaves, you have two main options: starting from seeds or using seedlings. Both methods have their pros and cons, which we’ll break down below.
Growing from seeds can be a cost-effective and fun option. You can buy dill seeds in packets at most gardening stores and sow them directly into your garden bed or container. However, the germination rate may not be as high as using seedlings, with an average of 60-70% success rate. This means that about 1/3 of the seeds won’t sprout. On the other hand, once they do germinate, dill plants can grow relatively quickly, taking around 7-10 days to reach the first leaves.
Using seedlings, on the other hand, offers a higher germination rate and faster growth speed. You can buy seedlings at nurseries or online stores and transplant them into your garden bed or container. Seedlings typically have a head start of 1-2 weeks compared to growing from seeds, which means you’ll get to harvest dill leaves sooner. However, seedlings may be more expensive than buying seeds, and they can be more prone to disease if not handled properly.
When choosing between the two options, consider your level of experience and the specific climate conditions in your area. If you’re new to gardening or have a short growing season, using seedlings might be a better option. However, if you enjoy the process of nurturing seeds from scratch and want to save money, growing from seeds can be a great choice.
Some other factors to consider are disease resistance and plant vigor. Dill plants grown from seeds may be more susceptible to diseases like powdery mildew or root rot due to lower initial resistance. Seedlings, on the other hand, have been bred to withstand these conditions better but may still require additional care to prevent overwatering or nutrient deficiencies.
In summary, both growing dill from seeds and using seedlings have their advantages and disadvantages. It’s essential to weigh these factors based on your specific situation and goals to make an informed decision.
Preparing the Soil and Climate
Before we dive into growing dill leaves, let’s talk about creating a healthy environment for them to thrive. This means getting your soil and climate just right, so they get the best start in life.
Creating a Dill-Friendly Environment
To create an ideal environment for growing dill leaves, it’s essential to prepare the soil properly. Dill prefers well-draining, loose soil with a pH between 6.0 and 7.0, making it slightly acidic to neutral. If your soil is too alkaline or heavy clay, consider mixing in some organic matter like compost or peat moss to improve drainage and fertility.
When testing the soil’s nutrient levels, look for a balance of nitrogen (N), phosphorus (P), and potassium (K). A general rule of thumb is to aim for 1-2% N, 0.5-1% P, and 2-3% K. You can also add a balanced fertilizer specifically formulated for herbs like dill.
Another crucial factor in creating a dill-friendly environment is sunlight. Dill requires at least 4-6 hours of direct sunlight per day to thrive. Make sure the area receives adequate air circulation to prevent fungal diseases and promote healthy growth. Finally, plant dill seeds about 1/8 inch deep and 2-3 inches apart to allow for proper spacing and development. By considering these factors, you’ll be well on your way to cultivating a thriving dill crop.
Optimizing Temperature and Lighting
When it comes to growing dill leaves, getting the temperature and lighting just right is crucial for optimal growth. Dill prefers cooler temperatures between 60-70°F (15-21°C), making it an ideal crop for spring or fall harvests. If you’re growing in a warmer climate, consider providing some shade for your plants during the hottest part of the day.
If you don’t have natural light to provide sufficient illumination, supplemental lighting is a must-have for dill growth. Consider using LED grow lights with a blue spectrum, which promote leafy greens like dill. Place the lights 6-8 inches above the soil surface and adjust their position as needed to prevent scorching.
In regions with long periods of cloudy weather or during the winter months, maintaining optimal temperatures can be challenging. To combat this, use row covers or cold frames to protect your plants from extreme temperature fluctuations. By providing the right conditions for growth, you’ll be rewarded with a bountiful harvest of fresh and fragrant dill leaves.
Sowing and Caring for Dill Plants
To grow robust dill plants, you’ll want to learn how to sow seeds correctly and provide them with the right care from germination to harvest. This section will walk you through both essential steps.
Sowing Seeds Indoors or Outdoors
When it comes to sowing dill seeds, you have two primary options: indoors and outdoors. Both methods have their advantages and disadvantages. Let’s start with the indoor approach.
To sow dill seeds indoors, you’ll want to begin about 2-3 weeks before the last frost date in your area. This will give the seedlings a head start on the growing season and ensure they’re healthy enough to withstand any potential weather fluctuations. Fill small pots or cell packs with a good quality potting mix, and sow dill seeds about ¼ inch deep. Make sure not to overcrowd the pots, as this can lead to weak and leggy seedlings.
When sowing indoors, it’s essential to provide adequate light for the seedlings. You can use grow lights or place them in a sunny south-facing window. Keep the soil consistently moist but not waterlogged. Transplant the seedlings outdoors when they have 2-3 sets of leaves and the danger of frost has passed.
If you’re sowing directly outdoors, wait until the weather is warm and settled. In most regions, this means late spring to early summer. Sow dill seeds about ¼ inch deep and 1-2 inches apart in rows that are 12-18 inches apart.
Transplanting Seedlings
Transplanting seedlings is a crucial step in growing healthy dill plants. When seedlings have outgrown their initial containers, they need to be transplanted into larger pots or directly into the garden bed. This process allows for more room to develop and promotes healthier growth.
Before transplanting, it’s essential to harden off your seedlings. Hardening off involves gradually acclimating seedlings to outdoor conditions over a period of 7-10 days. Start by moving them to a shaded area outdoors for a few hours each day, then gradually increase the duration and exposure to direct sunlight.
This process helps prevent shock when transplanting and reduces the risk of seedling death. To harden off your dill seedlings, begin by placing them in a sunny spot indoors for 1-2 hours a day. Gradually increase this time over the next week, monitoring their response to outdoor conditions. By following these steps, you’ll be giving your dill seedlings the best chance to thrive and produce an abundance of fresh leaves.
Fertilizing and Pruning Dill Plants
To keep your dill plants healthy and thriving, it’s essential to fertilize them regularly, which we’ll cover in detail below. This also means pruning them at the right time to encourage new growth.
Nutrient Requirements for Healthy Growth
When it comes to growing dill leaves, providing your plants with the right nutrients is essential for healthy growth. Dill requires a balanced diet of macronutrients and micronutrients to thrive.
Dill needs nitrogen (N) to produce lush green foliage and promote healthy plant growth. A typical dill plant requires about 30-50 pounds of nitrogen per season, which can be obtained through the use of a balanced fertilizer like fish emulsion or compost tea. Phosphorus (P), on the other hand, is crucial for root development and flower formation. Dill plants require around 10-20 pounds of phosphorus per season.
Potassium (K) also plays a vital role in dill growth, supporting overall plant health and resistance to disease. Aim for a potassium-rich fertilizer like banana peels or wood ash, providing about 5-10 pounds per season.
Micronutrients such as iron, zinc, and boron are also essential for optimal dill growth. You can obtain these micronutrients by using organic fertilizers or adding them to your soil in the form of crushed eggshells or dolomitic limestone. Regularly test your soil pH levels to ensure it remains between 6.0-7.0, which is ideal for dill plants.
Pinching and Harvesting Dill Leaves
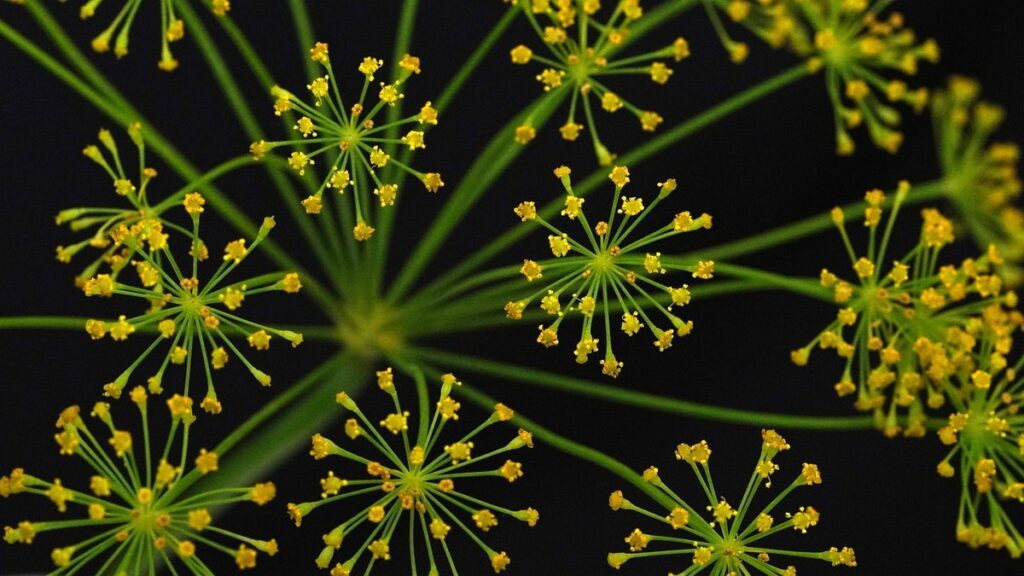
When dill plants start producing flowers, it’s essential to pinch off these buds to direct the plant’s energy towards leaf growth. This process, called “pinching,” encourages the dill plant to focus on developing its foliage rather than seed production. Pinching flower buds also helps prevent self-seeding and promotes bushy growth.
To pinches flower buds effectively:
• Identify the first signs of flowering, usually when the dill plant is around 12-18 inches tall.
• Use your thumb and index finger to pinch off individual buds at the base of the stem. Cut just above a node (where a leaf meets the stem) using scissors or pinch with your fingers.
Harvesting dill leaves requires careful timing and technique. Pinched plants tend to produce more leaves than flowering ones, but you can harvest leaves from both types of plants. For optimal flavor and aroma, pick dill leaves before the plant begins producing seeds. To harvest:
• Use scissors to cut off individual stems or pinch them off with your fingers.
• Harvest dill leaves in the morning after the dew has dried but before the heat of the day sets in.
Maintain healthy plants by harvesting regularly, as this encourages continuous growth and prevents the plant from flowering too quickly.
Pest and Disease Management
To keep your dill leaves healthy and thriving, it’s essential to be aware of common pests and diseases that can affect them, and know how to manage these issues effectively.
Common Pests Affecting Dill Plants
As you tend to your dill plants, it’s essential to be aware of the common pests that can harm them. Aphids, those tiny sap-sucking insects, are often found on dill leaves and stems. They can spread disease and cause curled or distorted growth. To control aphid infestations, use neem oil or insecticidal soap. For severe cases, a pyrethrin spray may be necessary.
Slugs and snails also pose a significant threat to dill plants, especially at night when they’re most active. These slimy pests can cause holes in leaves and stems, weakening the plant. Hand-picking is an effective control method, but if you have a severe infestation, consider using copper tape around the plant or setting out beer traps.
To prevent pest infestations altogether, maintain good garden hygiene by removing weeds and debris that may attract pests. Regularly inspect your plants for signs of damage or pests, and treat promptly to avoid further harm.
Managing Diseases in Dill Plants
Dill plants are susceptible to several diseases that can severely impact their growth and productivity. One of the most common diseases affecting dill leaves is powdery mildew, caused by fungi such as Erysiphe and Oidium. This disease appears as a white, powdery coating on the leaves, causing them to become distorted and eventually die. To prevent powdery mildew, ensure good air circulation around your dill plants and avoid overwatering.
Downy mildew is another significant threat to dill crops, characterized by yellowish patches on the leaves that turn into a fuzzy growth. This disease thrives in humid conditions, making it essential to maintain proper soil drainage and reduce watering during peak humidity periods. Root rot is often caused by excess moisture, which leads to fungal infections that destroy the roots.
To manage these diseases using integrated pest management strategies, adopt crop rotation practices, use resistant cultivars, and implement biological control measures such as introducing beneficial fungi like Trichoderma harzianum into the soil. By taking proactive steps, you can minimize the occurrence of these diseases and promote healthy growth in your dill plants. Regularly inspect your plants for early signs of disease and take prompt action to prevent its spread.
Preserving and Storing Fresh Dill Leaves
Now that you’ve harvested your fresh dill leaves, it’s essential to learn how to preserve them for future use, so we’ll go over the best methods for storing and keeping them fresh.
Methods for Storing Fresh Dill
Storing fresh dill leaves requires careful consideration to maintain their flavor and aroma. You have several options for storing your harvest, each with its own set of benefits and drawbacks.
For short-term storage, consider refrigeration. Place the dill leaves in an air-tight container or plastic bag and keep them at 32°F (0°C) to slow down decay. This method is ideal for small quantities, as you can store them for up to five days.
Freezing is another popular option for preserving fresh dill. Chop the leaves and spread them on a baking sheet in a single layer. Place the sheet in the freezer until the herbs are frozen solid, then transfer them to an airtight container or freezer bag. Frozen dill will retain its flavor for up to six months.
Air-tight containers can also be used for short-term storage at room temperature. However, this method is not recommended as the dill leaves may lose their flavor and aroma within two days. Dehydrating fresh dill using a food dehydrator or your oven’s lowest temperature setting helps preserve it for up to six months.
When storing fresh dill, make sure to pat the leaves dry with paper towels before placing them in any container to prevent moisture buildup. Regularly check stored dill for signs of spoilage and remove any affected leaves promptly.
Tips for Preserving Fresh Dill Flavor and Aroma
When you’ve spent all that time and effort growing and harvesting your fresh dill leaves, it’s frustrating to have them go bad before you can use them up. To make the most of your homegrown herbs, here are some expert tips for preserving the flavor and aroma of freshly harvested dill leaves.
To start, make a batch of homemade pickles using your dill leaves. This is a great way to preserve their flavor and enjoy them throughout the year. Simply chop the fresh dill leaves, combine them with sliced cucumbers, vinegar, salt, and spices in a jar, and let it sit in the fridge for at least 24 hours.
You can also use your fresh dill leaves to make an infusion that’s perfect for cocktails or as a garnish for soups. Simply place a handful of fresh dill leaves in a clean glass jar, cover them with vodka or gin, and let it infuse for at least 2 weeks. Strain the mixture before using it.
In addition to pickles and infusions, you can also use your fresh dill leaves to make delicious sauces and seasonings. Chop them finely and mix with sour cream or yogurt to create a tasty dip for vegetables or chips. You can also add them to soups, stews, and salads for an extra burst of flavor.
Troubleshooting Common Issues with Growing Dill Leaves
If you’re running into problems growing dill leaves, don’t worry – we’ve got some tips to help you troubleshoot common issues and get your plants back on track. Let’s dive in and find a solution!
Identifying and Solving Common Problems
When you notice that something is amiss with your dill leaves, it’s essential to identify and address the problem promptly. This will not only save you from unnecessary stress but also ensure a healthy and thriving crop. Let’s dive into some common issues affecting dill growth and provide practical solutions.
One of the most frustrating problems gardeners face when growing dill is poor germination rates. If your seeds are taking too long to sprout or failing to germinate altogether, check if they’re fresh and stored properly. Old or stale seeds have lower germination rates, so make sure to replace them with new ones. Ensure that the soil temperature is ideal for germination (around 70-80°F) and provide sufficient moisture.
Slow growth can be caused by inadequate light, waterlogged soil, or insufficient nutrients. Dill requires full sun to partial shade, so if your plants are not receiving enough direct sunlight, consider transplanting them to a brighter location. Waterlogged soil can lead to root rot, so ensure that the soil drains well and avoid overwatering. You can also try adding a balanced fertilizer to provide essential nutrients for healthy growth.
Diseases such as powdery mildew, leaf spot, or downy mildew can be identified by yellowing leaves, white powder on the surface, or fuzzy growth on stems. To prevent these issues, maintain good air circulation around your plants and avoid overhead watering. Regularly inspect your dill for signs of pests like aphids, whiteflies, or spider mites, which can cause stunted growth and discoloration.
By recognizing common problems and taking corrective action, you’ll be well on your way to a thriving dill crop.
Frequently Asked Questions
Can I grow dill leaves indoors if I don’t have a garden?
Yes, you can definitely grow dill leaves indoors. In fact, indoor growing allows for more control over temperature, lighting, and humidity, which are crucial factors for optimal dill growth. Choose a pot with good drainage, use a well-draining potting mix, and provide sufficient light (at least 4-6 hours of direct sunlight) to ensure healthy growth.
How often should I water my dill plants during hot weather?
Dill is a drought-tolerant herb, but it still needs consistent moisture, especially in hot weather. Water your dill plants when the top inch of soil feels dry to the touch. Avoid overwatering, which can lead to root rot and other issues. Water in the morning or early afternoon to allow the plants to absorb the water throughout the day.
Can I grow dill leaves from store-bought bunches?
Unfortunately, it’s not recommended to try to regrow dill leaves from store-bought bunches. Most commercial dill is bred for its foliage and flavor rather than its ability to produce viable seeds or propagate easily. Instead, purchase high-quality dill seeds from a reputable supplier or start with healthy seedlings.
How long does it take for dill plants to mature after sowing seeds?
The time it takes for dill plants to mature after sowing seeds can vary depending on factors like soil quality, temperature, and light exposure. Generally, you can expect to harvest individual leaves in as little as 20-30 days after sowing, while the entire plant is ready to harvest within 40-60 days.
Can I use dill leaves in cooking without washing them first?
While it’s generally safe to consume fresh herbs without washing them, it’s still a good idea to give your dill leaves a quick rinse before using them. This helps remove any dirt, debris, or potential pests that might be present on the leaves. Simply rinse with cold water, pat dry with paper towels, and use as desired.