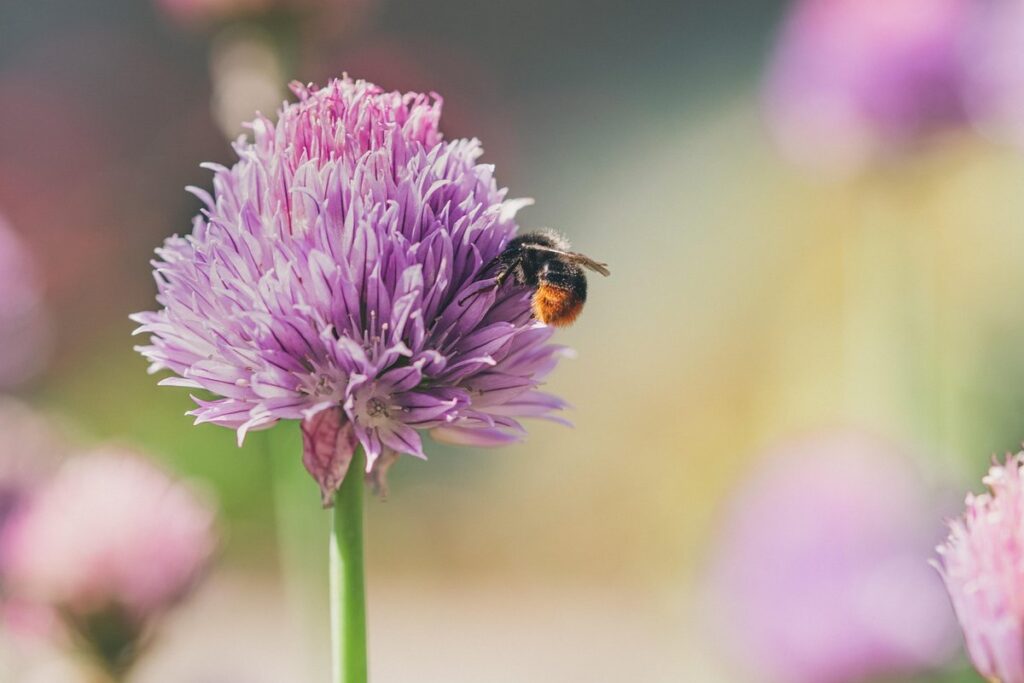
Growing your own herbs in pots can be a game-changer for any home cook or gardener. But, let’s face it, not all herbs are created equal. Chives, with their delicate onion flavor and vibrant purple flowers, can add a pop of color and freshness to any dish. However, growing chives in pots can be a bit more challenging than other herbs due to their specific needs.
In this article, we’ll dive into the world of pot-grown chives and explore the best practices for getting them to thrive. From selecting the right potting mix to overcoming common issues like root bound and pests, we’ve got you covered. We’ll also share tips on harvesting and propagating your chives, as well as how to extend their growing season so you can enjoy them year-round. Whether you’re a seasoned gardener or just starting out, by the end of this article, you’ll be a pro at growing healthy and delicious chives in pots!
Choosing the Right Potting Mix
When growing chives in pots, selecting the right potting mix is crucial for their health and optimal flavor. Let’s dive into what to look for in a great potting mix for your chive plants.
The Importance of Well-Draining Soil
Chives need well-draining potting mix to thrive. This is because chives have a shallow root system and don’t like to sit in waterlogged soil, which can lead to root rot and other problems. To ensure good drainage, you should choose a potting mix that contains perlite, vermiculite, or sand, as these ingredients will help excess moisture escape.
When selecting a potting mix, look for one with a high proportion of organic matter such as peat moss or coconut coir. These ingredients will retain moisture but also allow for air to pass through, which is essential for healthy root growth. Avoid mixes with too much fertilizer, as these can clog up the soil and prevent drainage.
If you’re making your own potting mix at home, aim for a ratio of 2/3 peat moss or coconut coir to 1/3 perlite or vermiculite. This will provide good structure and drainage while retaining enough moisture to support healthy chive growth.
Characteristics of a Good Potting Mix for Chives
A good potting mix for chives should have several key characteristics that support healthy growth. First and foremost, it’s essential to choose a mix with the right pH level for chives, which is slightly acidic to neutral, ranging from 6.0 to 7.0. This pH range allows for optimal nutrient uptake by the plant.
Another critical characteristic of a good potting mix is its nutrient content. Look for a mix that contains balanced levels of nitrogen (N), phosphorus (P), and potassium (K). Chives are heavy feeders, so they require adequate nutrients to produce robust foliage and flavorful leaves. A general-purpose potting mix with 10-20% organic matter will provide sufficient nutrients.
Lastly, the potting mix should retain moisture well but also drain excess water quickly. This is crucial for chives, which prefer moist soil but are susceptible to root rot if the soil becomes waterlogged. Look for a mix that contains perlite or vermiculite, which improve drainage and prevent waterlogging. By selecting a potting mix with these characteristics, you’ll create an ideal environment for your chives to thrive in pots.
Selecting Healthy Chive Plants
When selecting healthy chive plants for your pot, look for ones with vibrant green stems and fresh, perky foliage to ensure a thriving crop. A good rule of thumb is to choose plants that are compact and robust.
Where to Buy Chives for Container Gardening
When it comes to finding healthy chive plants suitable for container gardening, you have both online and offline options. Let’s start with the latter. Your local nurseries, garden centers, and home improvement stores like Home Depot or Lowe’s usually carry a variety of herbs, including chives. These brick-and-mortar stores offer the advantage of being able to inspect the plants in person before purchasing.
If you prefer shopping from the comfort of your own home, online retailers are an excellent choice. Amazon, Burpee, and Pro-Mix are just a few examples of online stores that sell high-quality chive plants. When buying online, make sure to check the plant’s description for details on its pot size, height, and growth habits. This will ensure you choose a variety suitable for your container.
Some nurseries also offer delivery or curbside pickup services, which can be convenient if you’re short on time. Whatever option you choose, be sure to inspect the plants carefully before making a purchase, checking for any signs of pests or disease. With a little research and planning, you’ll find the perfect chive plant for your container garden in no time.
Signs of Healthy vs. Unhealthy Chives
When inspecting your chive plants, it’s essential to recognize the signs of a healthy versus an unhealthy plant. A thriving chive plant should display vibrant green foliage with firm, upright stalks that are free from wilted or yellowed leaves. The color should be a deep, rich green, not pale or washed out.
To assess the overall health of your chives, gently grasp the stalk near the base and give it a gentle tug. A healthy plant will have robust root growth, making it difficult to move the stalk without breaking it. On the other hand, if the stalk comes away easily, it may be a sign that the roots are weak.
In contrast, an unhealthy chive plant may exhibit signs of stress such as wilted leaves, yellowing foliage, or blackened stems. This can often be attributed to overwatering, poor drainage, or inadequate light exposure. Regularly inspecting your plants and addressing any potential issues promptly will help you identify and correct problems before they become severe.
To ensure optimal growth, maintain a consistent watering schedule, provide at least four hours of direct sunlight per day, and fertilize your chives regularly.
Planting Chives in Containers
To plant chives in containers, you’ll need a pot that’s at least 6-8 inches deep and has good drainage holes to prevent waterlogged soil. Let’s dive into the specifics of container planting for healthy chive growth.
Preparing the Container Before Planting
Before you start planting chives in your container, it’s essential to prepare the pot for optimal growth. This involves adding the right fertilizer and possibly repotting if necessary.
Start by filling the pot with a well-draining potting mix specifically designed for herbs like chives. Chives prefer a slightly acidic soil pH, so choose a mix that’s formulated to meet this requirement. If you’re using a standard potting mix, you can also add some perlite or vermiculite to improve drainage.
Next, inspect the container and remove any old plant matter or debris from previous plantings. This will prevent the spread of pests and diseases that might harm your new chives. Now, it’s time to fertilize! Use a balanced, water-soluble fertilizer (20-20-20) at half the recommended strength for the first application. You can also mix in some compost or worm casting to provide essential nutrients.
If you’re repotting an existing pot, gently remove the chives from their old container and inspect the roots for any damage. Trim off any circling or tangled roots with a sterile tool before transferring them to the new pot. This will help promote healthy growth and prevent the roots from becoming waterlogged.
Planting Chives: Depth and Spacing Guidelines
When planting chives in containers, it’s essential to consider the right depth and spacing for optimal growth. Chives are a hardy perennial herb that can thrive in well-draining soil with plenty of sunlight.
As a general rule, plant chive bulbs 1-2 inches deep in the potting mix, depending on their size. If you’re using individual chive plants, space them about 6-8 inches apart to allow for proper air circulation and growth. This spacing will also make it easier to harvest your chives without damaging the surrounding plants.
For container gardens with multiple chive plants, a good rule of thumb is to plant them in clusters of three to four, spaced evenly apart. This will create a beautiful display of greenery while preventing overcrowding. Keep in mind that chives are a natural air purifier and can help eliminate odors from nearby plants.
Remember to firm the soil gently around the roots after planting and water thoroughly. With proper care and attention, your chive plants should thrive in their container home. By following these depth and spacing guidelines, you’ll be on your way to harvesting fresh, flavorful chives in no time!
Caring for Chives in Pots
To keep your chive plants thriving in pots, make sure you’re providing them with enough light and water to meet their needs. Here are some essential tips to follow.
Watering Requirements for Container-Grown Chives
When it comes to watering container-grown chives, it’s essential to get it just right. Chives need consistent moisture, especially during their first few weeks of growth. Aim to water them when the top inch of soil feels dry to the touch, which is usually every 2-3 days in warm weather.
However, be cautious not to overwater, as this can lead to root rot and other problems. Check the soil by sticking your finger into it up to the first knuckle; if it’s dry, it’s time for a drink. Water thoroughly until water starts to seep out of the drainage holes, making sure not to let the pot sit in water.
A good rule of thumb is to provide about 1-2 cups of water per week during the growing season (spring and summer). During the winter months when chives are dormant, you can reduce watering to once a month. Keep an eye on your chives’ leaves; if they start to wilt or turn yellow, it’s likely due to underwatering.
Monitor your chive plant’s specific needs based on its environment and climate. For example, if you live in a hot, dry region, you may need to water every day or two. Conversely, if you’re growing chives in a cooler, shadier spot, they might require less frequent watering.
Fertilizing Chives for Optimal Growth
When it comes to fertilizing chives grown in pots, you’ll want to choose a fertilizer that’s specifically designed for container gardens. A balanced, water-soluble fertilizer (20-20-20) will provide the necessary nutrients for optimal growth. You can also consider using an organic fertilizer like fish emulsion or compost tea, which are rich in micronutrients and beneficial microorganisms.
For indoor chives, a fertilizer with higher phosphorus content (such as 10-20-10) may be beneficial to promote blooming. However, if you’re growing your chives outdoors, a balanced fertilizer will suffice. As for application frequency, fertilize your chives once a month during the growing season (spring-fall). For indoor chives, you can fertilize every two weeks.
Some key things to keep in mind: avoid overfertilizing, as this can lead to weak growth and reduced flavor. Also, be sure to dilute your fertilizer according to the manufacturer’s instructions to prevent burning your chives’ roots. With proper fertilization, your container-grown chives should thrive and provide a steady supply of fresh herbs for cooking.
Common Issues When Growing Chives in Pots
Growing chives in pots can be a delightful hobby, but it’s not without its challenges. In this next part, we’ll explore some common issues that may arise and how to overcome them.
Recognizing Signs of Overwatering or Underwatering
When growing chives in pots, it’s essential to recognize the signs of overwatering and underwatering to ensure these hardy herbs thrive. Overwatering is a common issue that can be detrimental to your chive plants.
Look out for yellow leaves and wilted stalks as the first warning signs of overwatering. When the soil is consistently waterlogged, it deprives the roots of oxygen, causing stress to the plant. If you notice your chives are more prone to pest infestations or diseases due to excess moisture, it’s likely a result of overwatering.
On the other hand, underwatering can cause the leaves to turn yellow and the stalks to wilt as well. However, this time it’s due to lack of water. Check the soil moisture by inserting your finger into the soil up to the first knuckle. If it feels dry, it’s time to water. If you notice your chives are consistently struggling to grow or have a sparse appearance, underwatering might be the culprit.
To avoid these issues, make sure to water your chives when the top inch of soil feels dry to the touch and provide them with good drainage to prevent waterlogged soil.
Dealing with Pest Infestations on Chives
When growing chives in pots, you may encounter common pests that can damage your crop. Identifying these infestations early on is crucial to preventing them from spreading and causing significant harm.
Some of the most common pests affecting chives include aphids, spider mites, and thrips. Aphids are small, soft-bodied insects that feed on plant sap, causing curled or distorted leaves. Spider mites are tiny, eight-legged arachnids that suck plant juices, leaving behind a fine web-like residue. Thrips, on the other hand, are slender, insects with fringed wings that feed on plant sap, causing stunted growth and discoloration.
To control these pests, inspect your chives regularly for signs of infestation. Use neem oil or insecticidal soap to control aphid populations. For spider mites, treat your plants with a mild dish soap solution or a systemic insecticide. Thrips can be managed by introducing natural predators like ladybugs and lacewings, which feed on thrip eggs and larvae.
Regularly cleaning and disinfecting your potting mix and containers can also help prevent pest infestations from occurring in the first place.
Harvesting and Propagating Chives
Now that you’ve grown a healthy batch of chives, let’s dive into how to harvest them sustainably and propagate new plants for future use. We’ll cover all you need to know.
Timing and Techniques for Harvesting Chive Leaves
When it comes to harvesting chive leaves from your potted plant, timing is everything. You want to snip off the leaves at the right moment to encourage new growth and prevent the plant from flowering prematurely. The best time to harvest chives is when they’re about 6-8 inches tall, with the top set of leaves being the most flavorful.
To harvest individual leaves, simply pinch or cut them off using scissors or a sharp knife just above the node (where the leaf meets the stem). Make sure to leave at least an inch of stem intact to promote continued growth. This technique is called “pinching,” and it’s perfect for maintaining a neat and tidy appearance while also encouraging bushy growth.
Alternatively, you can harvest entire stems by cutting them off at the base with scissors or a knife. This method is ideal when you need a larger quantity of leaves, such as for cooking purposes. Either way, make sure to harvest chives in the morning after the dew has dried but before the heat of the day sets in, when the leaves are at their most fragrant and flavorful.
Methods for Propagating Chives
Propagating chives can be done through various methods, allowing you to multiply this versatile herb and share it with friends. One of the most popular and successful methods is division. This involves carefully digging up the entire pot of chives, gently separating the clumps into individual plants. Make sure each plant has a small amount of roots attached for optimal growth.
Cuttings are another effective method for propagating chives. You can take 2-3 inch stem cuttings from mature plants and remove lower leaves to prevent them from rotting in water or soil. Plant the cut end directly into a pot filled with well-draining compost, making sure the node (the joint where the leaf meets the stem) is buried under the soil.
If you’re looking for a more hands-off approach, seed is an excellent option. Chive seeds can be started indoors 4-6 weeks before the last frost date in your area and transplanted outside when they have 2-3 sets of leaves. Alternatively, direct sow them into a pot or garden bed at the same depth as recommended on the package.
To increase your chances of success with seed, ensure the soil temperature is around 70°F to 80°F (21°C to 27°C), and provide adequate moisture until germination occurs.
Tips for Extending the Growing Season
To get the most out of your chive harvest, let’s explore some clever ways to extend the growing season and keep your pot-fresh chives thriving year-round.
Protecting Chives from Frost Damage
As winter months approach, it’s essential to protect your chives from frost damage. Chives are relatively hardy plants, but prolonged exposure to freezing temperatures can still cause significant damage. If you live in an area with harsh winters, taking steps to safeguard your chives will ensure they survive the cold weather and come back strong in spring.
To begin, bring your pots indoors during periods of extreme cold snaps. Move them away from windows and doors to prevent any potential chill or drafts that may affect the plants’ health. If you can’t bring the pots inside, move them to a sheltered location like a garage or under a covered patio. This will protect your chives from wind-borne moisture that can cause damage during frosty nights.
Another approach is to mulch around the base of your potted chives. A thick layer (around 2-3 inches) of straw, bark chips, or even shredded newspaper can help insulate the roots and keep them at a stable temperature. This method also retains moisture in the soil, which can aid in protecting your chives from frost.
If you prefer not to bring your pots indoors or mulch around their base, consider using row covers or frost blankets specifically designed for plants. These lightweight fabrics allow air and light to reach your chives while keeping cold air out. You can also use individual covers or sheet-like materials wrapped around each pot to provide extra protection.
Finally, take note of the temperature forecast before bringing your pots indoors or applying mulch. Wait until the first frost warning is issued in your area, then act accordingly. This will prevent you from unnecessarily exposing your chives to cold temperatures.
Frequently Asked Questions
Can I use regular potting mix for growing chives, or do I really need a specialized mix?
While you can use regular potting mix, it’s not the best choice for growing chives. Chives have specific needs that a standard potting mix may not meet. A mix specifically designed for herbs will contain ingredients like perlite and vermiculite to ensure good drainage and prevent waterlogged soil. This is especially important because chives are prone to root rot if their roots sit in excess moisture.
What happens if I accidentally underwater my chives? Can they recover from drought?
Yes, chives can recover from underwatering, but it may take some time for them to bounce back. If you notice your chives starting to wilt or turn yellow due to lack of water, increase the frequency of watering and make sure the pot has good drainage holes. However, if your chives have been consistently under-watered for an extended period, they may experience stunted growth or reduced flavor.
How do I know when my chives are ready for harvest? Are there any specific signs to look out for?
Your chives are ready to be harvested when the leaves are around 6-8 inches tall and have a nice, even color. You can also check by gently tugging on the stem – if it comes off easily, it’s time to harvest! Harvesting regularly will encourage your chive plant to produce more new growth, so try to pick some leaves every few days.
Can I grow multiple varieties of chives together in the same pot? Will they compete with each other for resources?
While it’s technically possible to grow multiple varieties of chives in the same pot, it may not be the best idea. Chives are relatively shallow-rooted and can become crowded if you have too many plants competing for space and resources. This can lead to reduced growth rates and increased susceptibility to pests and diseases.
How do I propagate my favorite chive variety? Can I take cuttings from the mother plant?
Yes, you can propagate your favorite chive variety through division or cuttings! To take cuttings, simply snip off a few healthy stems from the mother plant, removing any lower leaves that might be submerged in water. Then, pot them up in some fresh potting mix and keep them consistently moist until roots develop. You can also divide established clumps of chives to create new plants – just make sure each division has at least one growing eye or crown.