Growing your own herbs can be one of the most rewarding experiences in gardening. Chives are a popular choice for many gardeners, but knowing where to start when growing chives from seed can be daunting. With so many varieties to choose from and specific growing requirements, it’s easy to get overwhelmed. But don’t worry, we’ve got you covered with our comprehensive guide on how to grow chives from seed successfully. In this article, we’ll walk you through the process of choosing the right variety for your needs, preparing the perfect growing environment, and providing tips for successful germination and growth. By the end of this guide, you’ll be well on your way to harvesting fresh, fragrant chives straight from your own garden.
Choosing the Right Variety
When growing chives from seed, selecting the right variety is crucial for achieving optimal flavor and performance. With so many options to choose from, let’s explore the key factors to consider.
Understanding Chive Types
When it comes to growing chives from seed, understanding the different types available is crucial for selecting the right variety for your needs. There are three primary types of chives: common, garlic, and ornamental.
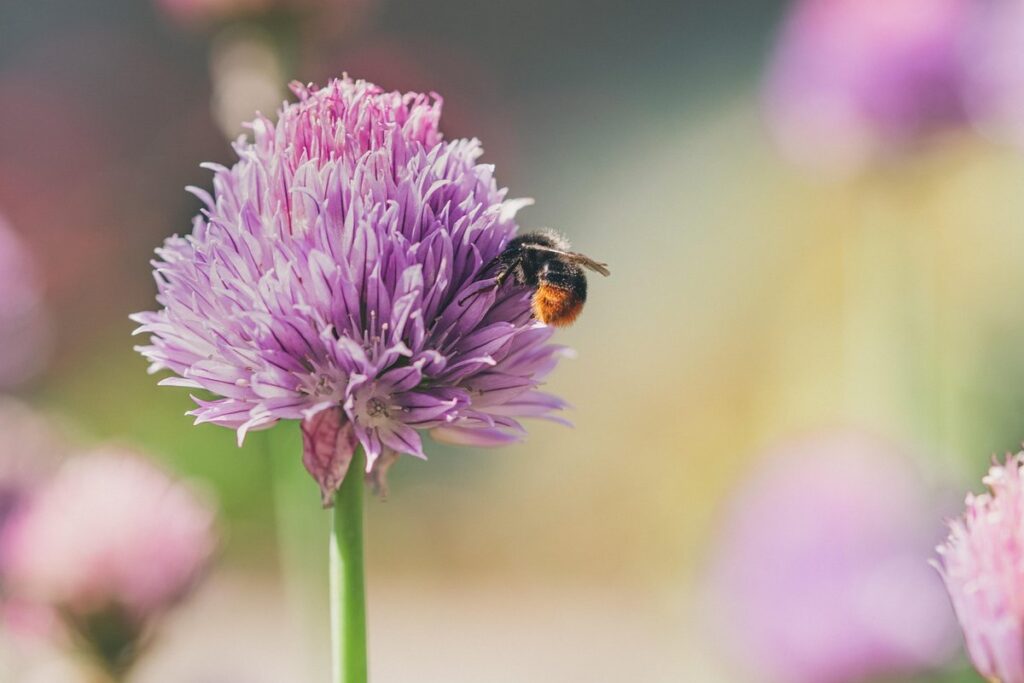
Common chives (Allium schoenoprasum) are the most widely cultivated and used type in cooking. They have a mild onion flavor and can be harvested continuously throughout the growing season. Garlic chives, on the other hand, have a more pronounced garlic flavor and are often used as a garnish or added to sauces. Ornamental chives (Allium giganteum) have large, showy flowers that add a pop of color to gardens and can be grown for their ornamental value.
When choosing which type of chive to grow from seed, consider your culinary needs and the desired appearance in your garden. If you’re looking for a versatile herb with a mild onion flavor, common chives may be the best choice. If you want to add a more robust flavor to your dishes, garlic chives are worth considering.
Selecting a Seed Source
When it comes to growing chives from seed, selecting high-quality seeds is crucial for achieving success. Reputable seed suppliers ensure that their seeds are fresh, disease-free, and properly stored. To identify trustworthy seed suppliers, look for companies that specialize in herb or vegetable seeds and have a good reputation among gardeners.
Check online reviews, ask fellow gardening enthusiasts, or check with local nurseries to find out which seed suppliers are reliable. Some popular options include Seed Savers Exchange, High Mowing Seeds, and Renee’s Garden Seeds. These companies not only offer high-quality chive seeds but also provide detailed growing instructions and customer support.
Before purchasing seeds, inspect the packet for signs of moisture, mold, or other damage. Also, check the seed’s expiration date to ensure it’s fresh. While it may be tempting to buy cheaper seeds from unknown sources, investing in quality seeds can make a significant difference in your harvest. By choosing reputable seed suppliers and carefully selecting high-quality seeds, you’ll be well on your way to growing robust and flavorful chives from seed.
Preparing the Growing Environment
Before you start sowing chive seeds, it’s essential to prepare a suitable environment that will give them the best chance of success. This includes selecting a location and creating optimal growing conditions.
Understanding Chive Plant Requirements
To grow chives successfully, you’ll need to provide them with the right environment. Chives require a minimum of 12-14 hours of indirect sunlight per day. Direct sunlight can be beneficial, but it’s essential to avoid exposing them to intense heat during the hottest part of the day. A south-facing window or a spot near an east-west exposure is ideal.
Temperature-wise, chives thrive in cooler temperatures between 60°F and 70°F (15°C and 21°C). They can tolerate temperatures as low as 40°F (4°C) but may bolt at higher temperatures above 80°F (27°C). Soil conditions play a crucial role too. Chives prefer well-draining, fertile soil with a pH between 6.0 and 7.0. You can start chives indoors in pots filled with a mix of perlite and vermiculite for optimal drainage.
When transplanting seedlings outdoors, ensure the soil is moist but not waterlogged. Avoid planting in areas with standing water or where water tends to collect. By providing your chives with the right light, temperature, and soil conditions, you’ll be well on your way to growing healthy and flavorful plants.
Creating an Optimal Soil Mix
When growing chives from seed, it’s essential to create an optimal soil mix that promotes healthy root development and ensures the plant receives adequate water and nutrients. A well-draining potting mix specifically designed for chives can make all the difference in their growth.
To create a suitable mix, you’ll want to combine ingredients with different textures and properties. Start by mixing 40-50% peat moss or coconut coir, which helps retain moisture while allowing excess water to drain. Add 20-30% perlite or vermiculite for improved drainage and aeration. This will prevent waterlogged soil conditions that can lead to root rot.
Next, incorporate 10-20% composted organic matter, such as worm castings or well-rotted manure, which provides essential nutrients and beneficial microorganisms. Finally, add a small amount (5-10%) of fine-grained sand or grit to improve soil structure and prevent compaction.
When combining these ingredients, aim for a mix that’s loose, yet holds moisture well. Avoid using regular garden soil, as it can be too dense and may contain weed seeds or pests that can harm your chives. By creating an optimal potting mix specifically designed for chives, you’ll set the stage for healthy growth and successful harvests.
Sowing Chive Seeds
When it comes to growing chives from seed, sowing them at the right time and depth is crucial for a successful harvest. Let’s dive into the step-by-step process of sowing chive seeds.
Preparing the Seed Starting Medium
Preparing the seed starting medium is a crucial step in growing chives from seed. Before sowing, ensure that the medium is suitable for chive seeds. You can use a seed tray with individual cells, cell packs, or even direct sow into the garden bed.
When using seed trays or cell packs, fill them with a well-draining seed starting mix. This type of mix is specifically designed to retain moisture but drain excess water quickly. Avoid using regular potting soil as it can be too dense for young chive seeds. For direct sowing, create a shallow furrow in the garden bed about ¼ inch deep and 1-2 inches apart.
Regardless of the method you choose, ensure that the medium is consistently moist but not waterlogged. Chive seeds are sensitive to overwatering, which can lead to rot and poor germination rates. If sowing indoors, place the seed tray under grow lights or in a sunny windowsill, keeping the temperature between 65-75°F (18-24°C). This will help promote healthy germination and subsequent growth of your chive plants.
Sowing Seeds Correctly
To sow chive seeds correctly, start by preparing the soil. Fill a seed tray or small pots with a good quality potting mix, and moisten it gently but thoroughly. Now, take the chive seeds and place them on the surface of the soil, about 1/8 inch deep. This is a critical step – sowing the seeds too deeply can lead to poor germination rates.
Once you’ve placed the seeds in position, cover them with a thin layer of potting mix. Make sure not to bury the seeds too deeply, as this will prevent them from getting enough light to germinate. The ideal spacing for chive seeds is about 1/4 inch apart – this allows each seedling to develop freely without competing for resources.
After covering the seeds, gently water the soil again to settle it in place. Make sure not to overwater – the goal is to keep the soil consistently moist but not waterlogged. With proper care and attention, your chive seeds should start germinating within 1-2 weeks. Keep the soil warm (around 70°F to 80°F) during this time to promote healthy growth.
Caring for Chive Seedlings
Now that you’ve successfully sown your chive seeds, it’s time to give them the TLC they need to thrive. In this crucial stage, proper care is essential to ensure healthy growth and development.
Providing Adequate Light and Temperature
Chive seedlings require adequate light to undergo photosynthesis and grow strong. Place them in a spot with bright, indirect light, such as an east- or west-facing window. Avoid direct sunlight, which can cause scorching and weaken the seedling. If you’re growing indoors, consider using grow lights to provide supplemental illumination.
Maintain optimal temperature conditions between 65°F to 75°F (18°C to 24°C). Chives are sensitive to extreme temperatures, so keep them away from heating vents or drafty areas. Consistent temperatures promote healthy growth and prevent shock. Avoid placing seedlings near air conditioning units or radiators, as this can cause fluctuations in temperature.
Monitor your seedlings’ response to light and temperature. Check for signs of stress, such as yellowing leaves or stunted growth. Adjust their placement accordingly. By providing the right amount of light and maintaining optimal temperatures, you’ll be on track to growing healthy, robust chive plants from seed.
Watering and Humidity Control
Proper watering and humidity control are critical for young chive seedlings. Overwatering can lead to root rot, while underwatering may cause the seedlings to dry out and become susceptible to pests. To establish a healthy watering schedule, check the soil daily by inserting your finger into the soil up to the first knuckle. Water when the top inch of soil feels dry.
For optimal growth, maintain a humidity level between 50-70%. You can achieve this using a humidifier or by placing the seedlings on a tray filled with water and pebbles. Mist the leaves regularly to maintain moisture and prevent spider mites and other pests.
Monitor your seedlings closely during the first few weeks after germination, as they require consistent watering and humidity levels. Once established, you can gradually reduce watering frequency. Aim for about 1-2 inches of water per week, either from rainfall or irrigation. By maintaining a proper balance between watering and humidity control, you’ll be on your way to raising healthy, robust chive seedlings.
Transplanting Chives
Transplanting chives can be a delicate process, but don’t worry, we’ll walk you through it step by step. Learn how to successfully transplant your chive seedlings into their forever home outside.
Timing and Preparing Soil for Transplantation
When transplanting chive seedlings into larger containers or directly into the garden, timing is crucial. It’s essential to wait until the seedlings have at least two sets of leaves and are about 2-3 inches tall. This allows them to establish a robust root system before being transplanted.
Soil preparation is also vital for successful chive growth. Choose a well-draining potting mix or garden soil with a pH between 6.0 and 7.0. Test your soil pH if you’re unsure, as chives can tolerate slightly acidic to neutral soil conditions. Remove any debris or weeds from the transplant site, and loosen the soil to a depth of about 8-10 inches.
When transplanting directly into the garden, space seedlings 6-8 inches apart in a location with full sun to partial shade. Water thoroughly after transplanting and keep the soil consistently moist during the first few weeks. If transplanting into larger containers, use pots at least 6-8 inches deep and provide adequate drainage holes.
Remember, chives are sensitive to frost, so wait until the danger of frost has passed before transplanting outdoors in your area. Transplant seedlings in the morning or evening when the sun is not intense, reducing stress on the plants.
Handling Seedling Shock
When transplanting chive seedlings into individual pots or their final growing location, it’s common to encounter “seedling shock.” This occurs when the young plant’s delicate root system is disturbed, causing stress that can be detrimental to its growth. To minimize this risk, it’s essential to harden off your chives before transplanting them.
Harden off by gradually acclimating the seedlings to outdoor conditions over the course of 7-10 days. Begin by moving them to a shaded area outdoors for a few hours a day, then gradually increase their time spent outside as they become more resilient. This process will help prevent shock when transplanting them into their final location.
Another crucial aspect is adjusting your watering schedule. Seedlings that have been indoors or under cover may not be accustomed to the varying moisture levels found in outdoor environments. Make sure to check the soil daily, and only water when it feels dry to the touch. This will help prevent overwatering, which can exacerbate transplant shock and lead to root rot. By following these simple steps, you’ll be well on your way to successfully transplanting your chive seedlings with minimal stress.
Harvesting and Maintaining Chives
Once your chive plants are thriving, it’s time to learn how to harvest their fresh leaves and flowers, as well as maintain them for a healthy crop. We’ll walk you through both essential steps.
Understanding Chive Growth Cycles
Chives are hardy, perennial herbs that follow a predictable growth pattern. Understanding these cycles is essential to optimize harvests and maintain healthy plants.
As chive seeds germinate, they produce small, delicate leaves that emerge from the soil within 7-10 days. These initial shoots will grow rapidly, developing into mature stems with flat, leafy tops after about 4 weeks. During this period, chives require consistent moisture, temperature between 65°F to 75°F (18°C to 24°C), and partial shade.
As your chive plants reach maturity, typically within 6-8 weeks of sowing seeds, the stems will begin to flower, signaling the end of the vegetative growth phase. This is when you can expect the most flavorful, tender leaves for harvest. Regularly prune or cut back spent flowers to encourage new stem growth and prevent seed set.
To ensure continuous chive production throughout the growing season, divide established clumps in spring or fall, replanting them 12-18 inches apart to allow room for new roots development.
Tips for Prolific Harvests
To achieve prolific harvests of chives, it’s essential to adopt a regular pruning routine. Prune your chive plants every 1-2 weeks by snipping off the flower stalks and removing any dead or dying leaves. This encourages the plant to focus its energy on producing new growth and prevents seed production, which can lead to flowering.
Fertilization also plays a crucial role in promoting continuous chive production. Feed your chives with a balanced fertilizer (10-10-10 NPK) once a month during the growing season. You can also side-dress with a high-phosphorus fertilizer (10-20-10 NPK) to promote root development and overall plant health.
Effective pest management is another critical aspect of maintaining healthy, productive chive plants. Regularly inspect your plants for signs of aphids, spider mites, and other pests, and treat promptly if necessary. To prevent infestations, maintain a clean growing area, avoid overwatering, and introduce beneficial insects like ladybugs or lacewings to your garden.
By following these tips and maintaining a consistent care routine, you’ll be able to enjoy an abundance of fresh chives all season long. Remember, regular pruning, fertilization, and pest management are key to keeping your chive plants healthy and productive.
Frequently Asked Questions
Can I grow chives from seed indoors, or do they require direct sunlight?
Yes, you can grow chives from seed indoors, but ensure adequate light is provided using grow lights. Direct sunlight can be beneficial for outdoor growth, but indoor conditions may require supplementing with artificial lighting to mimic natural conditions.
How long does it take for chive seeds to germinate, and what are the common signs of success?
Chive seeds typically take 1-2 weeks to germinate. Successful germination is indicated by small green shoots emerging from the soil, usually within a week after sowing. Monitor your seedlings closely, as overwatering can be detrimental to early growth.
Can I grow multiple varieties of chives together in the same container, or will they cross-pollinate?
Yes, you can grow multiple varieties of chives together, but it’s essential to ensure that the varieties do not cross-pollinate and compromise their unique characteristics. Some common chive varieties are bred for specific traits and may not tolerate cross-pollination.
What if I notice seedlings developing yellow or wilted leaves – is this a sign of nutrient deficiency?
No, yellow or wilted leaves in young chive plants can be caused by overwatering or underwatering. Check your soil moisture levels regularly to ensure the optimal balance for healthy growth. Avoid fertilizing too early, as this can also contribute to weakened seedlings.
Can I propagate chives from stem cuttings instead of growing them from seed?
Yes, you can propagate chives through division and cutting. Chive plants have a natural ability to produce new growth from their rhizome system, making it possible to divide mature plants for propagation. Cut a section with at least two sets of leaves attached to the rhizome, and replant the cut area in well-draining soil.