Are you struggling to grow this delicate yet flavorful herb? Don’t worry, we’ve got you covered! Chervil is a versatile herb that adds a subtle sweetness and freshness to various dishes, but it can be finicky to cultivate. Whether you’re a seasoned gardener or a beginner, knowing the right techniques for growing chervil will make all the difference in your kitchen.
In this article, we’ll share expert tips on how to grow chervil from preparing the perfect soil to harvesting and preserving this valuable herb. We’ll also cover common challenges like pests, diseases, and overwatering, and provide practical solutions to overcome them. By following these simple yet effective growing tips, you’ll be enjoying fresh chervil flavor in no time, adding a boost of nutrition and taste to your meals. Let’s get started on the journey to growing this wonderful herb!
Understanding Chervil
Before you start growing chervil, it’s essential to understand its unique characteristics and requirements, which can be quite different from other herbs. In this part of our guide, we’ll explore what makes chervil special.
What is Chervil?
Chervil is a delicate and aromatic herb that has been prized for centuries in French cuisine. Botanically known as Anthriscus cerefolium, it belongs to the parsley family and boasts a unique flavor profile characterized by notes of anise, mint, and lemon. This versatile herb is not only a staple in haute cuisine but also makes a lovely addition to soups, salads, sauces, and marinades.
In French cooking, chervil plays a crucial role as a garnish, adding a fresh and subtle flavor to dishes like bouillabaisse, ratatouille, and Coq au Vin. Its delicate leaves are often used in combination with other herbs like parsley, tarragon, and thyme to create complex and nuanced flavors.
Beyond its culinary applications, chervil has also been used in traditional medicine for centuries. It is rich in antioxidants and contains compounds that have anti-inflammatory properties, making it a popular ingredient in herbal remedies. Whether you’re an experienced chef or a gardening enthusiast, growing your own chervil can be a rewarding experience, and we’ll explore the tips and techniques to do so in the following sections of this guide.
Benefits and Uses of Chervil
Chervil is not just a delicate and lacy herb with a fresh flavor profile, but it also boasts impressive medicinal properties. Its antioxidant and anti-inflammatory compounds have been shown to aid digestion, ease menstrual cramps, and even help manage stress levels.
In terms of its flavor profile, chervil has a light, slightly bitter taste reminiscent of parsley, but with an earthier undertone. It pairs particularly well with fish, salads, and creamy sauces, making it a versatile addition to various dishes.
Some popular recipes that feature chervil as a key ingredient include the French classic ‘Soupe à l’Oignon’ (Onion Soup) and the more modern Chervil and Cream Cheese Stuffed Salmon. When using fresh chervil in cooking, be sure to chop it finely just before serving, as its flavor can quickly become overpowering.
When growing your own chervil, you’ll have access to this versatile herb year-round. To make the most of its medicinal properties, consider infusing fresh chervil leaves into olive oil or vinegar for use in marinades and salad dressings.
Preparing the Soil for Chervil
To grow healthy and flavorful chervil, you’ll need to create a suitable environment, which starts with preparing the soil to its optimal pH range. This section will walk you through that essential step.
Choosing the Right Location
When selecting a location for growing chervil, it’s essential to consider two key factors: sunlight and soil conditions. Chervil is a light-loving herb that thrives in areas with partial shade to full sun, especially during the hottest part of the day. Aim for at least 4-6 hours of direct sunlight per day, but be mindful of intense midday sun, which can cause leaf scorch.
The ideal location should also have well-draining soil with a pH between 6.0 and 7.0. Chervil prefers moist, rich soil that’s not prone to waterlogging. If your garden has heavy clay or sandy soils, consider creating a raised bed with a mix of compost and perlite for better drainage.
Avoid planting chervil in low-lying areas where water tends to collect, as this can lead to root rot. Also, keep in mind that chervil is a cool-season crop, so it prefers the cooler temperatures of spring or fall. By choosing a location with optimal sunlight and soil conditions, you’ll be well on your way to growing healthy, fragrant chervil.
Soil pH and Nutrient Requirements
When it comes to growing chervil, soil pH and nutrient requirements are crucial factors to consider. Chervil prefers a slightly acidic to neutral soil pH, ranging from 6.0 to 7.0. If your soil’s pH is too high or too low, it can lead to nutrient deficiencies that affect growth.
One common nutrient deficiency in chervil is magnesium (Mg) deficiency, which causes symptoms such as yellowing leaves and stunted growth. Chervil also requires adequate potassium (K) levels to produce healthy foliage. A magnesium-rich fertilizer can help alleviate Mg deficiency, while a balanced fertilizer with potassium content will promote overall plant health.
To adjust your soil composition, you can add elemental sulfur or aluminum sulfate to lower the pH, or dolomitic limestone to raise it. For nutrient deficiencies, incorporate compost or well-rotted manure into the soil to provide essential micronutrients. Regular soil testing can help you identify nutrient imbalances and make targeted adjustments for optimal chervil growth. By getting your soil’s pH and nutrient levels just right, you’ll be on track to growing healthy, robust chervil plants.
Sowing Chervil Seeds
To successfully grow chervil, you’ll need to sow its seeds at the right time and in a location that provides optimal growing conditions for the delicate herb. Sow chervil seeds indoors 2-4 weeks before transplanting outside when the weather warms up.
Seed Selection and Storage
When it comes to growing chervil successfully, selecting high-quality seeds is the first crucial step. Look for seeds from reputable suppliers that specialize in herbs or are known for their quality and germination rates. Check the seed packaging for a clear expiration date or “sow by” date to ensure you’re using fresh seeds.
Proper storage of your chervil seeds is equally important. Store them in an airtight container, such as a glass jar with a tight-fitting lid, in a cool and dark place like a pantry or cupboard. Avoid storing seeds near direct sunlight, moisture, or heat sources like ovens or radiators. A consistent refrigerator temperature between 35°F to 45°F (2°C to 7°C) is also suitable for short-term storage.
To sow your chervil seeds, prepare the soil by loosening it to a depth of about 8-10 inches and mixing in a balanced fertilizer. Sow the seeds on the surface or just below it, depending on their size, and gently press them into the soil using a rake or your fingers. Cover the seeds with a thin layer of fine compost or vermiculite to maintain moisture and promote even germination. Keep the soil consistently moist during the first few weeks after sowing, but avoid overwatering.
Spacing and Depth for Optimal Growth
When sowing chervil seeds, it’s essential to get the spacing and depth just right. If you’re new to growing chervil, you might be wondering why this matters. The truth is, overcrowding or planting too deeply can lead to reduced germination rates and weaker plants.
For optimal growth, space your rows 12-15 inches apart. This allows each plant to receive sufficient light and air circulation, which are crucial for healthy development. If you’re growing chervil in a container, use shallow trays or individual pots with at least 1-inch depth of well-draining soil. Plant the seeds about 1/8 inch deep, just below the surface.
Keep in mind that chervil seeds require light to germinate, so don’t cover them too deeply. If you’re planting directly into the ground, create a shallow trench and scatter the seeds evenly along it. Water gently but thoroughly after sowing, and maintain consistent moisture levels until the seedlings emerge. By getting the spacing and depth right, you’ll be rewarded with faster germination rates and healthier chervil plants that are more likely to thrive in your garden or container.
Caring for Chervil Plants
To keep your chervil plants happy and thriving, learn how to care for them properly by providing optimal light, water, and temperature conditions. With good care, you’ll be enjoying fresh chervil in no time!
Watering and Irrigation Practices
Watering chervil plants requires a delicate balance to ensure their optimal growth. Consistent moisture levels are crucial, especially during the first few weeks after planting. Overwatering can be detrimental, leading to root rot and a host of other problems.
To maintain the right moisture level, it’s essential to water your chervil plants thoroughly but infrequently. This means allowing the soil to dry slightly between waterings. Drip irrigation systems are ideal for chervil, as they deliver water directly to the roots while minimizing evaporation and runoff.
Signs of overwatering include yellowing leaves, droopy stems, and a soft, mushy texture to the plants’ tissues. If you notice any of these symptoms, it’s time to reduce watering frequency or switch to a different irrigation method. On the other hand, if your chervil plants are looking parched or wilted, it may be necessary to increase water intake – but do so gradually to avoid shocking the roots.
By paying attention to moisture levels and adjusting irrigation methods as needed, you can help your chervil plants thrive in even the most challenging growing conditions.
Pruning and Training Techniques
Pruning and training techniques are essential for maintaining healthy, bushy chervil plants. Regular pruning encourages new growth, promotes a fuller appearance, and helps prevent the plant from flowering and going to seed. To prune your chervil, simply pinch off the terminal bud of each stem to encourage branching. This will also help maintain the plant’s shape and promote even growth.
If you prefer a more vertical growth habit, train your chervil plant using a trellis or stake. Tie the stems gently to the support using twine or soft wire, making sure not to constrict the plant. As the plant grows, remove any weak or spindly growths to direct the energy towards the main stem.
When it comes to harvesting, pinch off individual leaves as needed, or cut back the entire plant to about one inch from the base after flowering has finished. This will encourage new growth and prevent the plant from becoming leggy.
Common Chervil Growing Problems and Solutions
If you’re experiencing difficulties getting your chervil crop off the ground, don’t worry – we’ve got some practical solutions to common growing problems right here.
Identifying Pests and Diseases
As you tend to your chervil crop, it’s essential to stay vigilant for common pests and diseases that can quickly spread and compromise its quality. One of the most prevalent issues is aphids, tiny sap-sucking insects that feed on plant sap, causing curled or distorted leaves. Look out for clusters of small, soft-bodied insects on stems and leaves, as well as a sticky honeydew substance on surfaces.
Powdery mildew is another common disease affecting chervil, characterized by a white powdery coating on leaves and stems. It thrives in humid environments and can be spread through water splash or contaminated tools. To control aphids, introduce natural predators like ladybugs or lacewings to your garden, or spray with neem oil. For powdery mildew, practice good air circulation by pruning nearby plants, and treat affected areas with a fungicide.
Regularly inspect your chervil plants for signs of pests or diseases, such as holes in leaves, black spots, or yellowing foliage. Catching these issues early on will make it easier to implement control measures and prevent their spread.
Soil-Borne Issues and Nutrient Deficiencies
Soil-borne issues and nutrient deficiencies can significantly impact chervil growth. Compaction is one major concern, often caused by heavy foot traffic or improper tillage. This can lead to reduced drainage, aeration, and water infiltration, ultimately affecting the plant’s root system. To address compaction, loosen the soil with a fork or spade to a depth of at least 8-10 inches before planting.
Nutrient deficiencies are another common issue, typically resulting from poor soil quality or inadequate fertilization. Chervil requires adequate nitrogen (N), phosphorus (P), and potassium (K) for optimal growth. A lack of these essential macronutrients can manifest as stunted growth, pale leaves, or reduced yields. To prevent deficiencies, test your soil pH and nutrient levels before planting. Based on the results, apply a balanced fertilizer according to the manufacturer’s instructions.
Some common nutrient deficiencies in chervil include:
• Nitrogen deficiency: leads to yellowing or browning of older leaves
• Phosphorus deficiency: impairs root development and plant growth
• Potassium deficiency: causes leaf scorch and reduced fruit set
By understanding the causes and effects of soil-borne issues, you can take corrective actions to create a suitable environment for your chervil plants. Regularly monitoring soil health and adjusting fertilization strategies as needed will help ensure optimal growth and yields.
Harvesting and Storing Chervil
Once you’ve harvested your chervil, it’s essential to store it properly to maintain its flavor and fragrance. Learn how to dry, freeze, and preserve this delicate herb for future use.
Timing for Optimal Flavor and Texture
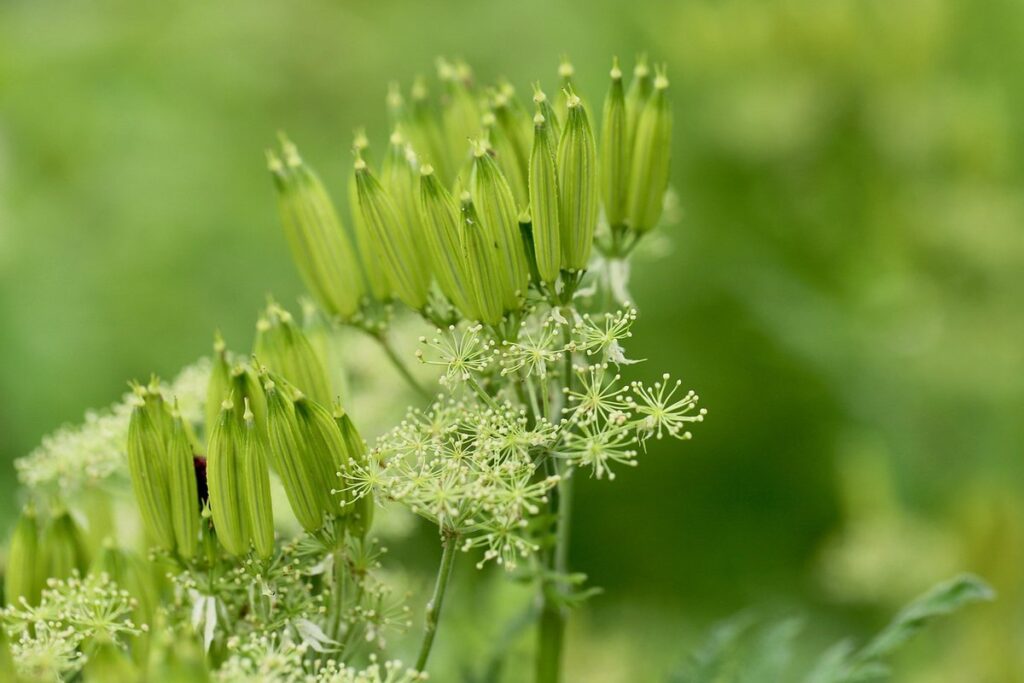
Determining the ideal harvesting time for chervil is crucial to ensure optimal flavor, texture, and aroma. This delicate herb has a fleeting shelf life, so timing is everything. Chervil’s flavor profile intensifies just before flowering, making it an excellent addition to dishes when its fragrance and taste are at their peak.
To determine the ideal harvesting time for chervil, look for a slight yellowing of the stems and leaves. This color change indicates that the herb is nearing its optimal ripeness. Check for moisture levels by gently squeezing a leaf between your fingers; if it feels limp, it’s ready to be harvested. For best flavor, harvest chervil in the morning after the dew has evaporated but before the heat of the day intensifies its oils.
Consider using scissors or pinch off individual leaves and stems rather than pulling out the entire plant. This approach will encourage the chervil to regrow, extending its harvest period. Regular harvesting also promotes bushy growth, which in turn enhances flavor and aroma.
Drying and Preserving Methods
Preserving chervil’s delicate flavor and aroma can be a challenge, but there are several effective methods to consider. One popular approach is drying, which helps retain the herb’s potency. To dry chervil, tie stems together in small bunches and hang them upside down in a warm, dark place with good air circulation. Alternatively, you can use a food dehydrator set at 95°F (35°C) for 1-2 hours.
Freezing is another excellent method to preserve chervil’s flavor. Chop the herb finely and place it in an airtight container or freezer bag. Store it in the freezer at 0°F (-18°C) or below. Frozen chervil is perfect for soups, sauces, and marinades. When using frozen chervil, simply thaw it in the refrigerator overnight before adding to your recipe.
To maintain quality and flavor when preserving chervil, it’s essential to harvest the herb at its peak freshness. Avoid drying or freezing wilted or older leaves, as they may lose their potency. Also, be sure to label and date containers or bags for easy identification later on.
Frequently Asked Questions
Can I grow chervil indoors year-round?
Yes, with proper care, you can enjoy fresh chervil leaves throughout the year by growing it indoors. Choose a bright location with filtered sunlight and maintain a consistent temperature between 60-70°F (15-21°C). Water carefully to prevent overwatering, which is more common in indoor conditions.
How do I preserve fresh chervil for longer periods?
To keep your fresh chervil flavorful and fragrant, store it in the refrigerator with the stems trimmed. You can also dry or freeze chervil leaves to use throughout the year. For drying, tie small bunches of chervil and hang them upside down; for freezing, place the leaves on a baking sheet and transfer them to an airtight container once frozen.
What are some common pests that target chervil plants?
Aphids, spider mites, and whiteflies often infest chervil plants. Regularly inspect your plants for signs of these pests, such as yellowing leaves or sticky honeydew on the leaves. Use neem oil or insecticidal soap to control infestations; introduce beneficial insects like ladybugs or lacewings to help maintain a balanced ecosystem.
Can I grow multiple varieties of chervil together?
While it’s possible to grow different varieties of chervil alongside each other, they may have competing requirements. Choose varieties with similar growth habits and care needs for optimal results. Some popular chervil varieties include ‘Fine Leaf’, ‘Sambrette’, and ‘Dark Opal’.
How do I know if my chervil plant is receiving too much water?
Overwatering can lead to root rot and kill your chervil plant. Check the soil moisture by inserting a finger into the soil up to the first knuckle; if it feels wet, wait another day before watering again. Also, inspect the leaves for signs of yellowing or drooping, which can indicate too much water.
What are some companion plants that benefit from growing alongside chervil?
Chervil pairs well with other herbs like parsley, basil, and cilantro, as they repel pests and add nutrients to the soil. For a diverse herb garden, combine chervil with marigold or nasturtiums for additional pest control and added color.
Can I harvest chervil leaves when they’re still young?
Yes, chervil is best harvested at the younger stage of growth for optimal flavor. Use scissors to snip off individual leaves as needed, or pinch off small bunches to encourage bushy growth and prevent flowering.