Growing your own cabbage crop can be a rewarding experience, but it requires careful planning and attention to detail. Not only is cabbage a versatile ingredient in many recipes, but it’s also packed with nutrients that make it a healthy addition to any meal. However, growing cabbages from seed to harvest can be intimidating for beginners, especially when it comes to choosing the right variety and preparing the soil. That’s why we’ve put together this comprehensive guide on how to grow cabbages. In this article, we’ll walk you through the essential steps of selecting a cabbage variety, preparing your soil, watering, and more. Whether you’re a seasoned gardener or just starting out, our expert tips will help you grow healthy and tasty cabbage crops that will thrive in any garden.
Choosing the Right Variety
When selecting a cabbage variety, you’ll want to consider factors such as climate tolerance, growth habits, and intended use for your harvest.
Understanding Cabbage Types
When it comes to growing cabbages, understanding the different types available is crucial for selecting the right variety for your garden. There are several main types of cabbages, each with its unique characteristics, growth habits, and uses in cooking.
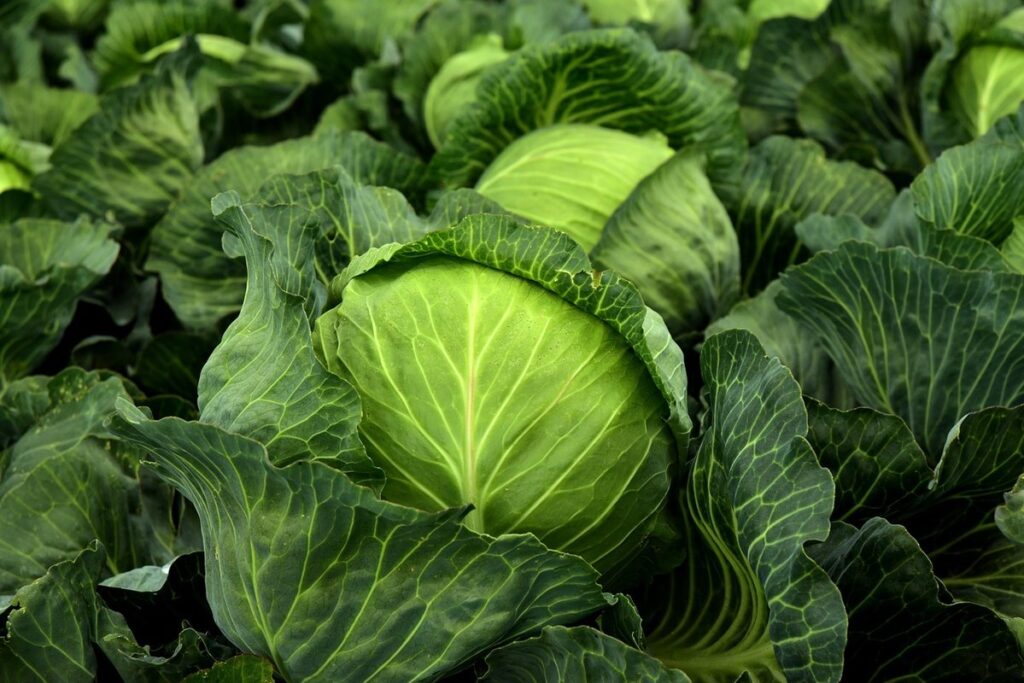
Green cabbage, also known as heading cabbage, is one of the most widely grown varieties. It has dense, compact leaves that form a tight head and can be used in a wide range of dishes, from soups to salads. Savoy cabbage, on the other hand, has loose, crinkled leaves and a milder flavor than green cabbage. It’s perfect for adding to salads or sautéing as a side dish.
Red cabbage is another popular variety, known for its striking red color and sweeter flavor than green cabbage. It’s often used in Asian-style dishes and can be pickled or fermented for a tangy taste. Napa cabbage is a more delicate variety with loose leaves that are ideal for salads and slaws.
When choosing a cabbage type, consider your climate, available space, and cooking preferences. Some varieties are better suited to warmer or cooler temperatures, while others require more maintenance in terms of watering and fertilization. By selecting the right cabbage type for your needs, you can enjoy a bountiful harvest and add some delicious variety to your meals.
Selecting the Best Cabbage for Your Climate
Choosing the right cabbage variety for your climate is crucial for a bountiful harvest. Before selecting a type, consider your region’s temperature range, soil type, and sunlight conditions. If you live in an area with cool winters and warm summers, opt for varieties like ‘Early Jersey Wakefield’ or ‘Savoy King’. These are bred specifically for temperate climates and can tolerate light frosts.
In regions with hot summers, look for heat-tolerant varieties such as ‘Southern Star’ or ‘Danver’s Half-Red’. These can withstand temperatures up to 90°F (32°C) and still produce crunchy heads. If your climate is characterized by dry spells, choose cabbage types that are more resistant to drought, like ‘Copenhagen Market’ or ‘Raven’.
In areas with mild winters, consider ‘January King’ or ‘Winterkeeper’, which can be planted as early as February in zones with moderate winters. When selecting a variety, also think about the soil type and sunlight conditions on your land. Some cabbage varieties prefer well-drained soil, while others tolerate wetter conditions. Check the specific growing requirements for each variety to ensure you’re giving them the best chance to thrive.
Preparing the Soil
Before planting your cabbage seeds, it’s essential to prepare the soil by loosening and aerating it to a depth of 8-10 inches. This will give your cabbages the best chance at healthy growth.
Testing and Amending Your Soil
Testing and Amending Your Soil is a Crucial Step for Growing Healthy Cabbages
Before planting cabbages, it’s essential to test your soil pH and nutrient levels. Cabbages prefer a slightly acidic to neutral soil pH, ranging from 6.0 to 7.0. If your soil tests show a pH outside this range, you’ll need to amend it before planting. This is because extreme soil pH can limit nutrient availability, affecting cabbage growth.
To test your soil pH, purchase a DIY testing kit or send a sample to a lab for analysis. Once you have the results, you can take corrective action by adding lime to raise the pH or sulfur to lower it. For example, if your soil tests show high pH (above 7.0), add elemental sulfur at a rate of 1-2 pounds per 100 square feet.
In addition to pH testing, also check your soil nutrient levels for nitrogen, phosphorus, and potassium. Cabbages require moderate levels of these nutrients, especially nitrogen during the growth stage. Apply organic fertilizers like compost or manure at planting time to avoid over-fertilization. For instance, a 2-inch layer of compost spread over the entire bed will provide sufficient nutrients throughout the growing season.
Keep in mind that it’s always better to err on the side of caution and test your soil before making any amendments. This ensures you’re creating an optimal growing environment for healthy cabbage growth.
Creating a Cabbage-Friendly Garden Bed
When creating a cabbage-friendly garden bed, it’s essential to focus on preparing the soil for optimal growth. Start by adding organic matter such as compost or well-rotted manure to improve the soil’s structure and fertility. This will help loosen compacted soil, retain moisture, and provide essential nutrients for your cabbages.
Remove weeds from the garden bed thoroughly, making sure to remove any roots to prevent regrowth. Weeds can compete with your cabbages for water and nutrients, so it’s crucial to get rid of them before planting. Consider using a hoe or hand weeder to gently loosen and remove weeds without damaging the soil.
To ensure proper drainage, create a well-draining system by mixing in organic matter such as perlite or vermiculite with the top 6-8 inches of soil. This will help prevent waterlogging and root rot, two common issues that can plague cabbage plants. Aim for a mix that is approximately 20% organic matter to achieve optimal drainage and fertility. By following these steps, you’ll be creating a healthy environment for your cabbages to thrive in.
Planting Cabbage Seeds or Seedlings
When planting cabbage seeds or seedlings, it’s essential to choose a location with well-draining soil and full sun, allowing for optimal growth. Follow these steps to get your cabbage crop off to a great start.
Sowing Seeds at the Right Time
When it comes to growing delicious cabbages, timing is everything. The last thing you want is to plant those beautiful seeds too early and have them get frost-bitten before they even have a chance to thrive. That’s why it’s essential to consider your region’s last frost date when deciding when to sow your cabbage seeds.
In general, most regions with a moderate climate can start sowing cabbage seeds indoors 4-6 weeks before the last frost date. This allows the seedlings to get a head start on the growing season and gives them time to harden off before being transplanted outside. If you’re in an area with a longer growing season, you can sow seeds directly into the garden as soon as the soil can be worked.
For example, if your last frost date is around April 15th, you can start sowing cabbage seeds indoors in late February or early March. Just make sure to check the specific climate and weather conditions in your area before making a decision. In warmer climates, like California or Florida, you can sow seeds directly into the garden as soon as the soil temperature reaches 40°F (4°C).
Transplanting Seedlings with Care
When you’re ready to move your cabbage seedlings into larger containers or directly into the garden bed, it’s essential to do so with care. This process is called transplanting, and if not done correctly, can be stressful for the young plants.
To begin, make sure the seedling has developed at least two sets of leaves before transplanting. This ensures a healthy root system has formed, allowing the plant to recover more easily from the shock of being moved. Next, inspect the roots of the seedling and gently tease them apart with your fingers or a soft-bristled brush. This helps prevent the roots from becoming tangled and promotes new growth.
When transplanting into larger containers, choose a container that’s at least 6-8 inches deep to give the roots room to expand. If transplanting directly into the garden bed, space the seedlings about 12-18 inches apart to allow for proper air circulation and growth. Water the seedling thoroughly after transplanting to help it settle in its new home. With a little care and attention, your cabbage seedlings will quickly adapt to their new environment and thrive.
Caring for Your Cabbage Crop
As you watch your cabbage crop grow, it’s essential to provide proper care to ensure a healthy harvest. Here, we’ll share our top tips on how to keep your cabbages thriving.
Watering Techniques for Optimal Growth
When it comes to watering your cabbage crop, getting it just right is crucial. Cabbages need consistent moisture, especially during their first few weeks of growth. Aim to water them deeply about 1-2 times a week, depending on weather conditions. But don’t overdo it – too much water can lead to disease and root rot.
To avoid overwatering, check the soil by inserting your finger into the ground up to the knuckle. If the soil feels dry, it’s time to water. Water at the base of the plant, keeping the leaves dry to prevent fungal diseases from taking hold. A good rule of thumb is to provide about 1-2 gallons of water per plant, depending on its size.
You can also take cues from your cabbage plants themselves – if they’re wilting or their leaves are droopy, it’s likely they need a drink. Water them in the morning so the plants have the entire day to absorb the moisture. And remember, less is often more when it comes to watering cabbages – err on the side of caution and check the soil frequently to avoid overwatering.
Managing Pests and Diseases
As you tend to your cabbage crop, it’s essential to keep an eye out for common pests and diseases that can affect its growth. Aphids, slugs, and caterpillars are some of the most notorious culprits when it comes to cabbage crops.
To prevent infestations, practice crop rotation by planting a different type of vegetable in the same spot where your cabbage crop was previously growing. This will break the life cycle of pests that thrive on specific types of plants. Companion planting is another effective method – for example, planting marigolds or nasturtiums alongside cabbages can deter nematodes and other pests.
Organic pest control methods are also a viable option when dealing with infestations. Neem oil and insecticidal soap can be used to kill soft-bodied pests like aphids and whiteflies, while diatomaceous earth can dehydrate slugs and snails. Be sure to read the labels carefully and follow instructions for application rates.
By implementing these prevention strategies, you’ll significantly reduce the risk of pest and disease issues in your cabbage crop. Regularly inspecting your plants will also help you catch any problems early on, allowing you to take prompt action before the infestation gets out of hand.
Encouraging Healthy Growth
To promote healthy growth, ensure your cabbage plants receive adequate light and maintain a consistent moisture level to prevent shock. This balance will encourage robust development.
Fertilizing Your Cabbage Crop
Fertilizing your cabbage crop is a crucial step in promoting healthy growth and maximizing yields. Cabbages are heavy feeders, requiring adequate nutrients to develop robust leaves and heads. The right fertilization strategy will vary depending on the stage of growth.
At planting time, use a balanced starter fertilizer (e.g., 10-10-10 N-P-K) to provide initial nutrients for seedlings. As your cabbage plants grow, they’ll require more nitrogen to support leaf development. Side-dress with a high-nitrogen fertilizer (e.g., 20-5-5 N-P-K) when the first true leaves emerge.
For natural, chemical-free options, consider compost or manure tea. These alternatives will provide essential micronutrients without exposing your plants to harsh chemicals. Additionally, mulching around your cabbage beds can help retain moisture and reduce weed competition, further supporting healthy growth.
It’s also essential to keep in mind that over-fertilization can be detrimental to your crop. Monitor your soil pH and nutrient levels regularly to avoid overloading your plants with excess nutrients. By striking the right balance, you’ll be well on your way to growing robust, flavorful cabbages.
Pruning and Support Techniques
As your cabbage plants continue to grow, it’s essential to prune them regularly to promote optimal growth and prevent damage. Overcrowding can lead to disease and pests taking hold, so make sure to give each plant enough space to mature. Remove any weak or damaged leaves to direct the plant’s energy towards producing a robust head.
To control height, cut off the top inch of the plant when it reaches about 12 inches tall. This will encourage branching and prevent the plant from becoming leggy. If you notice any signs of stress or damage, such as yellowing leaves or splits in the stem, prune those areas immediately to prevent further issues.
When it comes to supporting your cabbage plants, stakes or cages are effective solutions for preventing wind or weight-related damage. Drive a stake about 1-2 inches away from the plant, making sure not to damage any roots. Alternatively, use a wire cage that’s at least 24 inches tall and place it around the plant when it reaches about 6 inches in height. This will provide structural support as the plant grows.
Regular pruning and support can make all the difference in producing healthy, disease-free cabbages.
Harvesting and Storage
Now that you’ve nurtured your cabbages to maturity, it’s time to harvest them at the right moment. Learn how to cut, store, and preserve these delicious greens for a longer shelf life.
Knowing When Your Cabbage is Ready
Knowing when to harvest your cabbages can be a bit tricky, but don’t worry, we’ve got you covered. Different cabbage varieties mature at different rates, so it’s essential to check for the right signs of maturity.
For most cabbage varieties, a good time to harvest is when the head is firm and compact. Check for a solid crunch by gently squeezing the head. If it yields to pressure but still feels slightly springy, it’s ready to go. Some varieties like ‘Early Jersey Wakefield’ are ready in as little as 50 days, while others like ‘Red Express’ take up to 70 days.
Check for color changes too – some cabbage varieties develop a beautiful purple or red tint as they mature. Harvest your cabbages during the cooler part of the day when the plant is at its lowest water content. This will help prevent bruising and make them easier to store. Avoid pulling on the leaves, as this can damage the delicate stem. Instead, use a sharp knife to cut the head from the plant, leaving about an inch of stem attached.
Storing Cabbages for Long-Term Use
Proper storage is crucial to extend the shelf life of cabbages. When it comes to refrigeration, you can store them at a consistent temperature between 32°F and 40°F (0°C and 4°C). It’s essential to keep them away from direct sunlight and heat sources.
For short-term storage, consider using a breathable container or bag to maintain humidity levels. This will help prevent moisture loss and reduce the risk of spoilage. You can store cabbages in the crisper drawer of your refrigerator with high humidity settings.
Keep in mind that whole heads of cabbage are more difficult to store than loose leaves or shredded cabbage. To maximize storage space, separate the leaves by placing a paper towel between each layer. This will prevent moisture from accumulating and promote even ripening.
Another effective method is to wrap cabbages individually in plastic bags or wrap them in aluminum foil. Store these wrapped heads in the refrigerator’s vegetable crisper drawer. By following these steps, you can enjoy your homegrown cabbages for several weeks after harvesting.
Frequently Asked Questions
Can I grow cabbages in containers or do they require a lot of space?
Yes, you can grow cabbages in containers, but make sure the container is at least 6-8 inches deep and has good drainage holes. This will provide enough room for the roots to grow and help prevent waterlogged soil.
What happens if I plant my cabbage seeds too close together? Will they compete with each other for resources?
Yes, planting cabbages too close together can lead to competition for light, water, and nutrients, which may result in smaller heads or weakened plants. To avoid this, space your cabbage seedlings 12-18 inches apart.
How often should I fertilize my cabbage crop? Will regular fertilizer application ensure optimal growth?
Cabbage crops typically require a balanced fertilizer application once a month. However, it’s essential to also consider soil pH and nutrient levels before applying fertilizer, as excessive application can harm your plants.
Can I grow cabbages in areas with intense sunlight or will they burn from too much sun exposure?
While cabbage plants generally prefer partial shade, especially during extreme heat, some varieties are more tolerant of full sun than others. Be sure to research the specific variety you’re growing and take necessary precautions such as providing afternoon shade.
Can I harvest cabbages year-round in warmer climates or will they be affected by seasonal changes?
Yes, in warmer climates with a long growing season, it’s possible to have multiple cabbage crops throughout the year. However, temperatures above 80°F (27°C) can lead to premature bolting and reduced yields. To extend your harvest period, consider selecting varieties bred for summer production.