Are you tired of harvesting puny potatoes from your garden? Do you want to unlock the secret to growing massive, bountiful spuds that’ll make your friends green with envy? Growing bigger potatoes isn’t just about chance – it’s a science. By choosing the right variety for your climate and soil conditions, preparing the perfect soil mix, and using tried-and-true planting techniques, you can coax those tubers into record-breaking sizes.
In this article, we’ll take you by the hand through every step of growing bigger potatoes, from selecting the ideal variety to maximizing yields. We’ll cover the importance of proper soil preparation, how to plant for maximum growth, and provide expert tips on how to promote healthy, disease-resistant potato plants. By the end of this guide, you’ll be well on your way to harvesting massive potatoes in no time!
Choosing the Right Variety
When it comes to growing bigger potatoes, selecting the right variety is crucial. Let’s explore the factors to consider when choosing a potato variety that will yield impressive results.
Understanding Potato Types
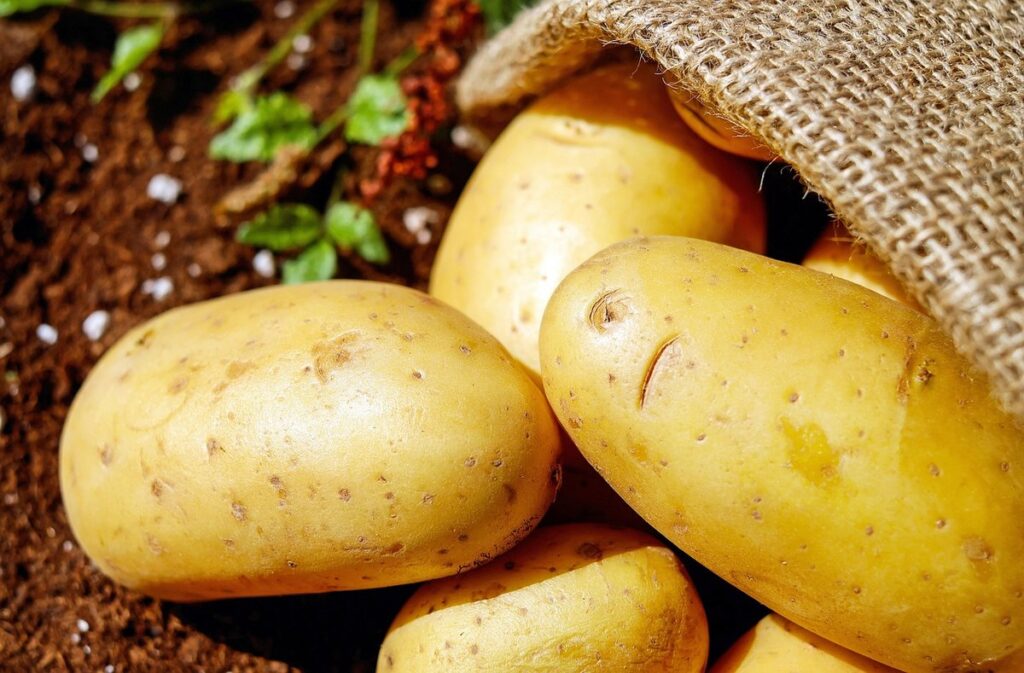
When it comes to growing bigger potatoes, understanding the different types of potatoes is crucial. There are several popular varieties, each with its unique characteristics and growth habits. One of the most widely cultivated potato types is the Russet potato. These potatoes have a thick, brown skin and a fluffy white interior, making them ideal for baking and mashing.
Another popular variety is the Yukon Gold potato, which has a thinner skin than Russets and a buttery, yellow flesh. They’re perfect for boiling, roasting, or sautéing. Sweet potatoes, on the other hand, are not technically true potatoes but belong to the Ipomoea family. They have a softer, sweeter flesh and a thicker skin.
When selecting potato varieties for maximum growth, consider factors such as climate, soil type, and desired use. For example, if you’re growing in cooler climates, choose a variety like Russet or Yukon Gold that’s more resistant to frost. If you’re looking for a higher yield, opt for disease-resistant varieties like ‘Rescue’ or ‘Nicola’. Keep in mind that each variety has its own growth rate and maturity period, so plan accordingly to ensure optimal results.
Selecting Varieties for Maximum Yield
When selecting varieties for maximum yield, it’s essential to consider your climate, soil type, and desired harvest size. This will help you narrow down the options and choose a variety that thrives in your specific conditions.
First, think about your climate. If you live in an area with cool summers, look for varieties like ‘Katahdin’ or ‘Nicola’, which mature early and are less susceptible to heat stress. In warmer climates, opt for heat-tolerant varieties like ‘Desiree’ or ‘Shetland Black’. Consider factors like frost tolerance if you live in an area prone to late-season frosts.
Next, assess your soil type. If you have heavy clay or sandy soils, choose a variety that’s specifically bred for those conditions. For example, ‘Maris Piper’ excels in clay soils, while ‘Pentland Javelin’ performs well in sandy loams.
Lastly, consider the size of harvest you’re aiming for. Larger potatoes often come from smaller varieties like ‘Red Thumb’ or ‘French Fingerling’. Smaller varieties typically produce more tubers than larger ones, so if you want a bountiful harvest, choose a compact variety that’s packed with multiple small spuds.
Soil Preparation and Selection
Now that we’ve covered the basics, let’s dive into preparing your soil for potato growth. This is where you’ll learn how to create a nutrient-rich environment.
Preparing the Perfect Soil
When it comes to growing bigger potatoes, the quality of your soil plays a crucial role. A well-prepared and balanced soil will not only ensure better yields but also promote healthy root development and resistance to diseases. So, what makes perfect soil for potato cultivation?
First and foremost, consider the pH levels in your soil. Potatoes prefer a slightly acidic to neutral soil pH, ranging from 4.5 to 7.0. If your soil is too alkaline or acidic, it can lead to nutrient deficiencies and affect plant growth. Test your soil’s pH level using a DIY kit or consult with a local nursery for guidance.
Next, ensure that your soil has adequate nutrient content. Potatoes require a balanced mix of nitrogen, phosphorus, potassium (NPK), as well as micronutrients like magnesium and sulfur. Add compost or well-rotted manure to enrich the soil’s fertility. Proper drainage is also essential; potatoes don’t thrive in waterlogged conditions.
To achieve optimal results, create a soil blend that mimics potato-growing conditions. Mix 2 parts of topsoil with 1 part of peat moss and 1 part of perlite or vermiculite. This mix will provide the necessary structure, aeration, and moisture retention for your spuds to grow big and healthy.
Adding Organic Matter and Nutrients
When it comes to growing bigger potatoes, one of the most critical steps is preparing the soil for optimal conditions. Adding organic matter and nutrients is essential to improve soil fertility and structure, which in turn will help your potato plants grow strong and healthy.
One of the best ways to add organic matter is by incorporating compost into your soil. Compost is a rich source of nutrients that will feed your potatoes throughout their growth cycle. Aim to mix 2-3 inches of compost into the top 6-8 inches of soil, making sure it’s evenly distributed. You can also use manure from herbivores like cows or horses, as they are high in nitrogen and phosphorus, two essential nutrients for potato growth.
In addition to organic matter, you’ll also want to add a balanced fertilizer that provides essential micronutrients. A 10-10-10 NPK (nitrogen-phosphorus-potassium) ratio is a good starting point, but be sure to follow the package instructions and adjust according to your soil type and test results.
Remember, the key is to maintain a delicate balance between adding too much or too little nutrients. Over-fertilizing can lead to weak and spindly growth, while under-fertilizing can result in stunted potatoes.
Planting Techniques for Maximum Growth
To grow bigger potatoes, you need to understand how to plant them effectively. Let’s dive into the specific planting techniques that will help your spuds reach their full potential.
Planning Your Spacing and Layout
When it comes to growing bigger potatoes, planning your spacing and layout is crucial. You want to ensure that each potato has enough room to spread out its tubers without overcrowding the bed. A good rule of thumb is to plant seed potatoes 12-15 inches apart in rows that are 2-3 feet apart. This allows for adequate air circulation, which helps prevent diseases like scab and powdery scab.
When deciding on row orientation, consider the sunlight patterns in your garden. If possible, orient your rows east-west to maximize sunlight exposure throughout the day. This will help promote even growth and development of your potatoes. You can also plant multiple rows close together, but be sure to stagger them slightly to create a “saw-tooth” effect. This will make it easier to harvest the tubers without damaging them.
Remember, proper spacing and layout are essential for maximizing yields. By giving each potato enough room to grow, you’ll be rewarded with bigger, healthier spuds come harvest time.
Planting Seed Potatoes with Care
When planting seed potatoes, it’s essential to handle them carefully to prevent damage and encourage healthy growth. Start by choosing high-quality seed potatoes that are certified disease-free and suitable for your region. Gently wash the seed potatoes to remove any dirt or debris, but avoid soaking them in water, which can cause rot.
To plant, dig trenches 6-8 inches deep, spacing them 2-3 feet apart. Place one or two “eyes” (the small buds on the potato) into each trench, making sure the “eye” is facing upwards. Cover with a thin layer of soil, about an inch deep, and firm it gently to prevent settling. As you plant, be mindful of overcrowding, which can lead to poor air circulation and increased risk of disease.
For optimal growth, ensure the seed potatoes are planted at the right depth – about 2-3 inches below the surface. This allows for a strong stem to develop, supporting the emergence of new shoots.
Growing Conditions for Optimal Bigger Potatoes
To grow bigger potatoes, you’ll want to focus on creating a specific set of growing conditions that will encourage your spuds to reach their full potential. This includes providing adequate light, water, and nutrients.
Providing Adequate Sunlight and Water
When it comes to growing bigger potatoes, providing adequate sunlight and water is crucial for their optimal growth. Sunlight plays a vital role in photosynthesis, which helps potatoes produce the energy they need to grow. Aim to provide your potato plants with at least six hours of direct sunlight per day. If you’re growing in a shaded area or during winter months when daylight hours are shorter, consider using grow lights to supplement natural light.
Watering is also essential for potato growth. But it’s not just about providing enough water; it’s also about managing irrigation effectively. A general rule of thumb is to provide 1-2 inches of water per week, either from rainfall or irrigation. It’s best to water deeply but infrequently to encourage deep root growth and prevent rot. Aim to water your potatoes when the top 4-6 inches of soil feel dry to the touch. This will help you avoid overwatering, which can lead to disease and reduced yields.
Be mindful of the soil moisture levels during different stages of potato growth. For example, during tuber formation, reduce watering to prevent the tubers from rotting. By striking a balance between sunlight and water, you’ll be well on your way to growing bigger, healthier potatoes.
Managing Temperature and Moisture Stress
Temperature fluctuations and moisture stress can be detrimental to potato growth. When temperatures soar above 75°F (24°C), potatoes may experience heat stress, leading to reduced yields and smaller tubers. On the other hand, prolonged exposure to cold temperatures below 40°F (4°C) can cause stunted growth and increased disease susceptibility.
To mitigate temperature-related issues, ensure your potatoes are planted in a location that receives full sun but also provides some shade during the hottest part of the day. You can use row covers or shade cloth to filter intense sunlight. When planting, choose varieties resistant to heat stress, such as ‘Russet’ or ‘Yukon Gold’.
Moisture stress is another significant concern for potato growers. Consistent moisture levels are essential for optimal growth. Aim for about 1-2 inches of water per week through rainfall or irrigation. Avoid overwatering, which can lead to rot and other diseases. Mulching around the plants helps retain soil moisture and regulate temperature. By carefully managing temperature fluctuations and maintaining consistent moisture levels, you’ll be well on your way to growing bigger, healthier potatoes.
Common Challenges and Solutions
Growing bigger potatoes can be a challenge, but don’t worry, we’ve got you covered. This next part of our guide tackles common obstacles to help you achieve your desired yields.
Dealing with Pests and Diseases
As you work towards growing bigger potatoes, it’s essential to be aware of common pests and diseases that can affect your crop. Aphids, for instance, are small, soft-bodied insects that feed on plant sap, causing curled or distorted leaves. To prevent aphid infestations, inspect your plants regularly and look for signs of eggs or live aphids on the underside of leaves. Use neem oil or insecticidal soap to control outbreaks.
Slugs, on the other hand, can cause significant damage to potato tubers by feeding on them at night. Encourage natural predators like hedgehogs or toads by creating a slug-friendly habitat in your garden. Alternatively, set up copper tape around your plants, as slugs don’t like to cross over it.
As for diseases, late blight and scab are two common threats to potato crops. Late blight can spread quickly through the plant, causing lesions on leaves and tubers. Inspect your plants regularly for signs of infection, such as black spots or a white, powdery coating on leaves. Remove infected areas promptly to prevent further damage.
To avoid disease-prone varieties, choose resistant types like ‘Katahdin’ or ‘Nicola’. When handling plants, wash your hands thoroughly to prevent transferring spores and spread diseases.
Troubleshooting Growth Issues
When it comes to growing bigger potatoes, you may encounter some common growth issues that can hinder your progress. One of the most frustrating problems is misshapen tubers. This can be caused by a lack of space between the potatoes or uneven soil conditions.
Another issue you might face is reduced yield, which could be due to factors such as inadequate sunlight, poor drainage, or insufficient water supply. To overcome these challenges, it’s essential to identify the root cause and take corrective measures.
For misshapen tubers, try planting seed potatoes at a deeper depth (about 2-3 inches) to allow for more room to grow. You can also rotate your potato beds every season to maintain soil health and prevent nutrient depletion.
To boost yields, ensure that your potato plants receive full sun and well-draining soil with consistent moisture levels. Consider using raised beds or containers to improve soil quality and provide better drainage.
Harvesting and Storing Bigger Potatoes
Now that you’ve successfully grown bigger potatoes, it’s time to harvest and store them properly to ensure they remain fresh for months to come. We’ll walk you through the steps to do this effectively.
Knowing When to Harvest
Knowing when to harvest your potatoes is crucial for ensuring they reach their full size and flavor potential. As you approach harvest time, keep an eye on the tubers’ size, color, and texture. Check for a few key signs: the skin should be rough and dry, with no green patches or sprouts growing from it. The eyes (small buds on the tuber) should be closed, indicating that the potato is mature.
Check your potatoes regularly over the next 2-3 weeks leading up to harvest time. This will give you a sense of how quickly they’re growing and when they’ll be ready. A good rule of thumb is to wait until the tops of the plants start to yellow and die back, which signals that the tubers have finished growing.
For larger potatoes, aim for a minimum diameter of 3-4 inches (7-10 cm) or more. Some varieties can grow even bigger, up to 5-6 inches (13-15 cm) in diameter. Harvest too early and you’ll end up with small, underdeveloped tubers; wait too long and the potatoes may rot before they’re fully mature. By monitoring their growth and checking for these signs, you should be able to harvest your bigger potatoes at the optimal time.
Storage Tips for Long-Term Preservation
Proper storage is crucial for preserving your bigger potatoes for an extended period. Once you’ve harvested them, it’s essential to store them correctly to maintain their quality and shelf life.
To start, choose a ventilated container that allows for airflow around the potatoes. This will help prevent moisture buildup and reduce the risk of rot and mold. A breathable material like paper bags or mesh sacks is ideal, as they allow for air circulation while keeping dust out.
Store your bigger potatoes in a cool place with temperatures between 40°F to 50°F (4°C to 10°C). Avoid storing them near heat sources, such as radiators or heaters, as this can cause the starches to convert into sugars, leading to an unpalatable sweet flavor. The ideal storage location is a dark, dry spot with consistent humidity levels.
Check on your stored potatoes regularly to ensure they’re not developing any signs of decay. By following these simple storage tips, you’ll be able to enjoy your bigger potatoes for months to come, and even replant some of the “eyes” for next year’s crop.
Frequently Asked Questions
Can I grow bigger potatoes in containers or small spaces?
Growing bigger potatoes requires a lot of space, but you can still achieve impressive results with container gardening. Choose a large pot (at least 12-18 inches deep) with good drainage and fill it with the right mix of soil, compost, and nutrients.
To maximize growth, use a variety that’s specifically bred for container growing and follow proper planting techniques. Be prepared to harvest smaller tubers, as containers can limit root growth.
How often should I water my potato plants during hot weather?
Watering is crucial for potato plants, especially when the weather is scorching. Water your potatoes deeply once or twice a week, depending on soil moisture and temperature. Aim to keep the top 6-8 inches of soil consistently moist but not waterlogged.
Yes, you can also use mulch to retain moisture and regulate soil temperature. Monitor your plants closely for signs of stress, such as yellowing leaves or stunted growth, and adjust your watering schedule accordingly.
What are some common mistakes to avoid when planting potatoes?
When planting potatoes, it’s easy to overlook crucial details that can impact yields. One common mistake is using too much compost, which can lead to over-fertilization and poor tuber formation.
Avoid compacting the soil around seed potatoes, as this can also stunt growth. Use certified disease-free seed potatoes and follow proper spacing guidelines to ensure healthy plants.
Can I use store-bought potato varieties for growing bigger potatoes?
While store-bought potatoes may look like they’ll yield big results, they’re often not bred specifically for size or optimal growing conditions. For maximum yields, choose heirloom or specialty varieties that are designed for big growth potential.
Yes, using the right variety is a crucial step in growing bigger potatoes, and it’s worth taking the time to research and select the best ones for your climate and region.
How do I know when my potato plants have reached optimal size?
While there’s no one-size-fits-all answer, here are some signs of healthy growth: lush green foliage, robust stem development, and a few early tubers forming. Monitor your plant’s progress closely, taking note of its growth rate and any changes in leaf color or shape.
When you see these indicators, it’s time to start thinking about harvesting. Regularly inspect your plants for signs of maturity, such as the top leaves dying back or tubers growing near the surface.