Are you ready to enjoy the tender shoots of your very own homegrown asparagus? Growing this delicious and nutritious vegetable is easier than you think, but it does require some planning and attention to detail. With so many varieties to choose from, selecting the right one can be a bit overwhelming. And let’s not forget about soil preparation – getting the conditions just right will make all the difference in your asparagus’s success.
In this comprehensive guide, we’ll take you through every step of growing healthy and delicious asparagus, from selecting the perfect variety to planting and maintenance. We’ll cover topics like soil preparation, how to choose the best spot for your asparagus bed, and some valuable tips on how to keep them thriving throughout the season. By following our expert advice, you’ll be enjoying fresh homegrown asparagus in no time!
Choosing the Right Variety
When it comes to growing asparagus, selecting the right variety is crucial for success. Let’s dive into the key factors to consider when choosing your perfect spears.
Selecting a Disease-Resistant Variety
When selecting an asparagus variety for your garden, disease resistance is a crucial factor to consider. Asparagus is prone to several diseases that can be devastating if left unchecked, including crown rot and fusarium wilt. These diseases can weaken the plant, reduce yields, and even kill it altogether.
To avoid these issues, look for varieties that have been bred specifically for their disease-resistant properties. Some popular options include ‘Jersey Giant’, ‘Mary Washington’, and ‘UC 157’. These varieties have undergone rigorous testing to ensure they possess a high level of resistance to crown rot and fusarium wilt.
When shopping for asparagus crowns, check the label or consult with the supplier to determine which varieties are available. You can also ask other gardeners in your area about their experiences with different varieties. By choosing a disease-resistant variety, you’ll be well on your way to growing healthy, productive asparagus that will bring joy and flavor to your table for years to come.
In addition to selecting resistant varieties, it’s essential to maintain good cultural practices, such as providing adequate spacing, watering carefully, and monitoring for pests. By combining the right variety with proper care, you’ll be able to enjoy a thriving and disease-free asparagus crop.
Understanding Climatic Requirements
As you plan to grow asparagus, understanding its climatic requirements is crucial for success. Asparagus is a temperate crop that thrives in regions with moderate temperatures and adequate sunlight. Ideally, it prefers a cool winter and a warm spring season.
In terms of temperature, asparagus grows best when the soil temperature is between 40°F (4°C) and 70°F (21°C). Avoid planting in areas where winters are extremely cold or hot, as this can lead to poor germination or reduced yields. Conversely, temperatures above 80°F (27°C) can cause spears to become tough and fibrous.
Sunlight also plays a significant role in asparagus growth. Aim for at least six hours of direct sunlight per day, although some varieties may tolerate partial shade. In regions with intense sunlight, provide adequate shading to prevent sunburn and stress on the plants. By understanding these temperature and sunlight requirements, you’ll be well-prepared to create an optimal growing environment for your asparagus crop.
Preparing the Soil
Before planting asparagus, it’s essential to prepare your soil properly. This step will help create a healthy foundation for your asparagus bed and promote optimal growth.
Testing and Amending the Soil
Before planting asparagus, it’s essential to test the soil pH and nutrient levels. You can use a DIY kit or send a sample to a lab for analysis. A pH between 6.5 and 7.0 is ideal for asparagus growth, but it’s not uncommon for soil to be too alkaline or acidic.
If your soil test reveals low nutrient levels, you’ll need to amend the soil accordingly. Adding organic matter like compost or well-rotted manure can help improve soil fertility and structure. For example, if your soil lacks potassium (K), you can add green sand or potassium sulfate according to the manufacturer’s instructions.
Remember that asparagus is a heavy feeder and requires regular fertilization. You may also want to consider adding lime to adjust the pH, but be cautious not to overdo it – too much lime can cause more harm than good. A general rule of thumb is to apply 1-2 inches of compost or well-rotted manure in the spring, followed by a balanced fertilizer once a month during the growing season. This will ensure your asparagus plants receive the nutrients they need to thrive.
Incorporating Organic Matter
When preparing to grow asparagus, incorporating organic matter into the soil is a crucial step. Organic matter such as compost or well-rotted manure provides numerous benefits that will improve drainage and fertility of the soil.
To start with, compost adds essential nutrients to the soil, which are released slowly over time as microorganisms break them down. This natural process prevents nutrient deficiencies and promotes healthy plant growth. Compost also has a high water-holding capacity, helping to reduce soil compaction and prevent waterlogging that can lead to root rot in asparagus.
Manure from herbivores such as cows or horses is another valuable resource for adding organic matter to the soil. It’s rich in nitrogen, phosphorus, and potassium (NPK), making it an excellent natural fertilizer. However, make sure you use aged manure that has been fully composted, as fresh manure can be too hot for plants.
When incorporating organic matter into your soil mix, aim for a 2-3 inch layer of compost or manure at the bottom of the bed before planting. This will give the microorganisms enough time to break down the nutrients and make them available to the asparagus.
Planting Asparagus Crowns
When planting asparagus crowns, it’s essential to follow a few key steps to ensure they establish a strong root system and begin producing spears in their first growing season. Follow these easy-to-follow instructions for success.
Preparing the Bed
Before planting asparagus crowns, it’s essential to prepare the bed properly. This involves tilling and leveling the soil to create a conducive environment for healthy growth. Start by removing any debris, rocks, or weeds from the area using a fork or spade.
Next, till the soil to a depth of about 12-15 inches using a garden fork or tiller. This will loosen the soil, allowing it to breathe and drain properly. Be sure to break up any clods and remove any existing weed roots that could compete with your asparagus for water and nutrients.
Once the soil is tilled, level it out to create an even surface. This ensures that the asparagus crowns are planted at the same depth and won’t be subject to erosion or waterlogging. You can use a rake or garden hoe to smooth out the soil and achieve a uniform height.
Keep in mind that asparagus prefers well-draining, fertile soil with a pH between 6.5 and 7.0. If your soil lacks these conditions, consider amending it before planting. With a properly prepared bed, you’ll be setting your asparagus crowns up for success and a bountiful harvest.
Planting the Crowns
When planting asparagus crowns, it’s essential to get them off to the right start. The first step is to choose a location with well-draining soil and full sun. Asparagus prefers a slightly acidic to neutral soil pH between 6.5 and 7.0.
Dig a trench about 12-18 inches deep, depending on the root system of your crowns. For each crown, place the roots spread out evenly in the trench, making sure they are not too crowded or tangled. Cover the roots with a layer of soil, leaving only the crown (the thick stem) exposed.
Space asparagus crowns 12-18 inches apart, depending on the variety you’re growing. Some varieties can be planted closer together, while others need more space to mature properly. Make sure not to overcrowd your bed, as this can lead to disease and pest problems down the line.
After planting, water the soil well to settle it around the roots. Mulch around the plants to retain moisture and suppress weeds, which will help reduce maintenance and promote healthy growth.
Caring for Your Asparagus
Now that your asparagus is growing, it’s essential to care for it properly to ensure a bountiful harvest and healthy plant for years to come. This section will cover vital tips for maintaining your asparagus spears.
Watering and Mulching
Proper watering and mulching are crucial for asparagus plants to thrive. Asparagus requires consistent moisture, especially during its first year of growth when it’s establishing its roots. Water your asparagus bed regularly, providing about 1-2 inches of water per week. However, be cautious not to overwater, which can lead to root rot and other problems.
Aim to water deeply but infrequently to encourage deep root growth. Check the soil moisture by inserting your finger into the soil up to the first knuckle. If the soil feels dry, it’s time to water. Avoid getting the crowns (the thick underground stems) wet, as this can cause rot. Mulch around the plants to retain moisture and suppress weeds.
Use organic mulch like straw or wood chips, keeping a 2-3 inch layer around the plants. This will also help regulate soil temperature and reduce evaporation. Keep the mulch layer thin in the first year to prevent it from matting down the spears. As the bed matures, you can add more mulch to maintain moisture levels throughout the growing season.
Fertilizing and Pruning
As you continue to care for your asparagus plants, it’s essential to remember that regular fertilization and pruning are crucial for their growth and productivity. Fertilizing your asparagus beds should be done annually, typically in early spring when new growth begins. Use a balanced fertilizer with an N-P-K ratio of 10-10-10, following the manufacturer’s instructions for application rates.
Pruning is another critical aspect of asparagus maintenance. Cut back the previous year’s foliage to about 2 inches from the ground after it has turned yellow and died off in late spring or early summer. This process helps promote healthy new growth and encourages the development of next season’s spears. Be sure to remove any dead or damaged stalks, as they can harbor disease and attract pests.
Regular pruning also helps maintain the plant’s shape and promotes air circulation around the spears, reducing the risk of disease.
Pest and Disease Management
As you tend to your asparagus bed, it’s essential to keep an eye out for common pests and diseases that can threaten your crop’s health and productivity. Effective management is key to a bountiful harvest.
Identifying Common Pests
As you tend to your asparagus bed, it’s essential to keep an eye out for common pests that can damage your crop. Aphids are one of the most prevalent issues, especially during spring and summer months. These tiny, soft-bodied insects feed on plant sap, causing curled or distorted leaves. To control aphid populations, use neem oil or insecticidal soap sprays, making sure to cover all surfaces of the plants.
Spider mites are another common pest that can be problematic for asparagus growers. These microscopic arachnids spin fine webs on the underside of leaves and feed on plant sap, causing yellowing or bronzing of foliage. Inspect your plants regularly for signs of spider mite infestations and treat promptly with a mild detergent or neem oil spray.
Keep in mind that prevention is key to managing pests effectively. Encourage beneficial insects like ladybugs and lacewings by introducing them to your garden, and practice good sanitation techniques, such as removing weeds and debris that can harbor pests. By staying vigilant and taking proactive measures, you can minimize the risk of pest infestations and enjoy a healthy, thriving asparagus crop.
Managing Diseases
As you nurture your asparagus bed, it’s essential to be aware of common diseases that can affect this delicate crop. Two prevalent threats are crown rot and fusarium wilt, which can cause significant damage if left unchecked.
Preventative measures are key to minimizing the risk of disease. For instance, ensure excellent soil drainage by adding organic matter like compost or manure to improve the structure and fertility of your asparagus bed. This will encourage healthy root growth and help prevent waterlogged conditions that foster fungal diseases.
Regular monitoring is also crucial – inspect your plants regularly for signs of infection, such as yellowing or browning of spears, lesions on the crown, or a general decline in plant vigor. If you notice any issues, act promptly to contain the problem.
When it comes to treating infected plants, choose targeted solutions that address specific pathogens. For example, fungicides can help control fusarium wilt, while bacterial treatments may be more effective against crown rot. It’s also vital to maintain good hygiene practices in your asparagus bed, including proper disposal of infected plant material and strict rotation protocols to prevent disease buildup.
By staying vigilant and taking proactive steps, you’ll be better equipped to manage these diseases and enjoy a healthy, thriving asparagus crop.
Harvesting and Storage
Once you’ve harvested your asparagus, proper storage is crucial to maintaining its quality for cooking and future plant growth. We’ll walk you through the best methods for storing fresh and dried asparagus.
Timing the Harvest
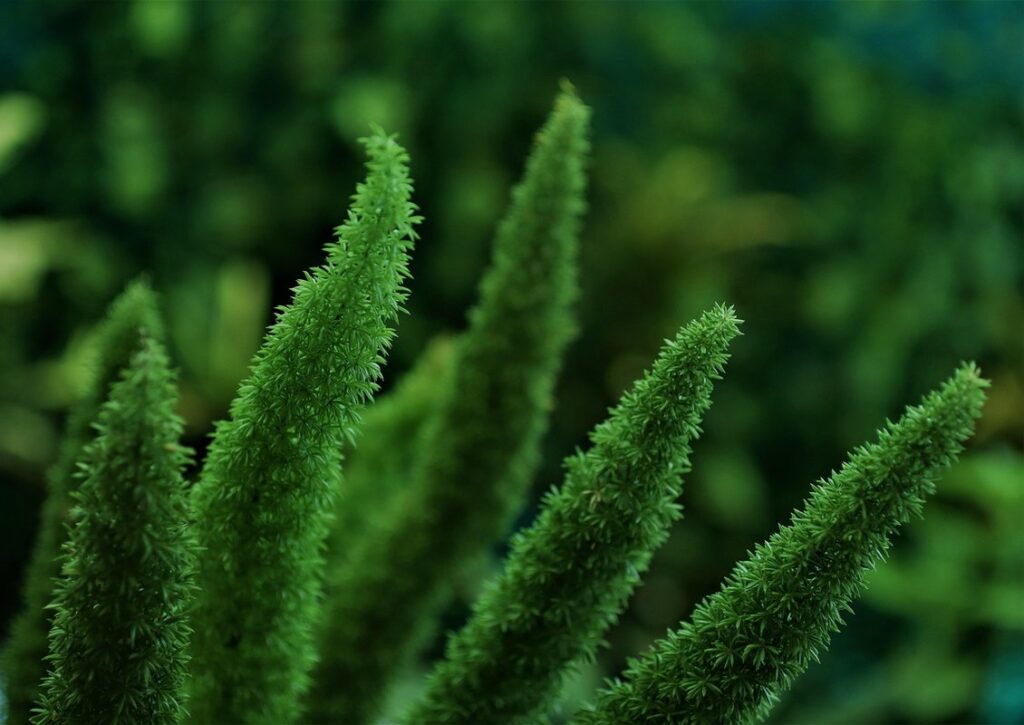
When it’s time to harvest your asparagus spears, timing is everything. The ideal time for harvesting depends on the type of asparagus you’re growing and the weather conditions. In general, most asparagus varieties are ready to harvest around 6-8 weeks after planting.
To determine if your asparagus is ripe, check for a few key signs: the spear should be at least 1/4 inch in diameter, with tightly closed tips. The color will also change from a deep green to a lighter, more vibrant green. Avoid harvesting when the weather is too hot or dry, as this can cause the spears to become woody and tough.
A good rule of thumb is to harvest your asparagus in the morning, after the dew has evaporated but before the heat of the day sets in. Use a sharp knife or tool to cut the spear at the base, leaving about an inch of stem intact to promote new growth. Be sure to only harvest what you need, as over-harvesting can weaken the plant and reduce future yields.
By timing your harvest correctly, you’ll be able to enjoy a bountiful crop of delicious, tender asparagus spears all season long.
Storing Fresh Asparagus
When it’s time to harvest fresh asparagus from your garden, you’ll want to make sure it stays crisp and delicious for as long as possible. Proper storage is key to maintaining the quality of your homegrown spears.
To store fresh asparagus, start by trimming the ends just before storing. This helps prevent moisture loss and keeps the spears looking their best. Store them in a cool, dry place with good air circulation – ideally between 32°F (0°C) and 40°F (4°C). A ventilated container or plastic bag will work well, but make sure it’s not too airtight.
Keep the asparagus away from direct sunlight and heat sources, which can cause spoilage. If you won’t be using your fresh asparagus within a few days, consider storing it in the refrigerator at 32°F (0°C). Be gentle when handling to avoid bruising or snapping the delicate spears.
To keep the moisture level consistent, wrap the container with a damp paper towel or cloth. This will help maintain humidity and prevent drying out. With proper storage techniques, you can enjoy your homegrown asparagus for up to two weeks after harvesting!
Frequently Asked Questions
What if I have limited space for an asparagus bed?
Asparagus is a perennial crop that can be grown in containers or small spaces, making it perfect for gardeners with limited room. When planting in containers, choose a variety that’s compact and bred for container growing. Make sure the pot has good drainage holes to prevent waterlogged soil.
How often should I fertilize my asparagus bed?
Asparagus is a heavy feeder and requires regular fertilization to promote healthy growth and high yields. Fertilize your asparagus bed in early spring, about 6 weeks after planting, with a balanced fertilizer (10-10-10 NPK). Follow up with another application of compost or well-rotted manure in late summer.
Can I grow asparagus in areas with poor soil?
While asparagus prefers well-draining, fertile soil, it can be grown in poorer soils with some extra care. Before planting, test your soil pH and amend it if necessary. Add organic matter like compost or well-rotted manure to improve soil structure and fertility.
How do I know when my asparagus is ready for harvest?
Asparagus spears are ready to harvest when they’re 6-8 inches tall and the tips are still tightly closed. Harvest them in the morning, using a sharp knife or asparagus snips to cut just above the soil line. Harvesting regularly will encourage the plant to produce more spears throughout the season.
Can I grow multiple varieties of asparagus together?
Yes! As long as you’re growing different varieties that are resistant to the same diseases, you can interplant them in your bed. This will create a diverse and resilient crop, reducing the risk of disease outbreaks.