Growing a healthy hedge can be a rewarding experience for any homeowner or gardener. Not only does it provide a natural barrier, but it also adds aesthetic value to your outdoor space. However, choosing and maintaining a thriving hedge requires careful consideration of several factors, including climate, soil quality, and species selection.
In this step-by-step guide, we’ll walk you through the process of growing a successful hedge, covering essential topics such as selecting the right plants for your area, preparing the soil, and providing optimal care. Whether you’re looking to block unwanted views or create a beautiful landscape feature, our expert advice will help you achieve your goals and enjoy a lush, vibrant hedge that adds value to your property.
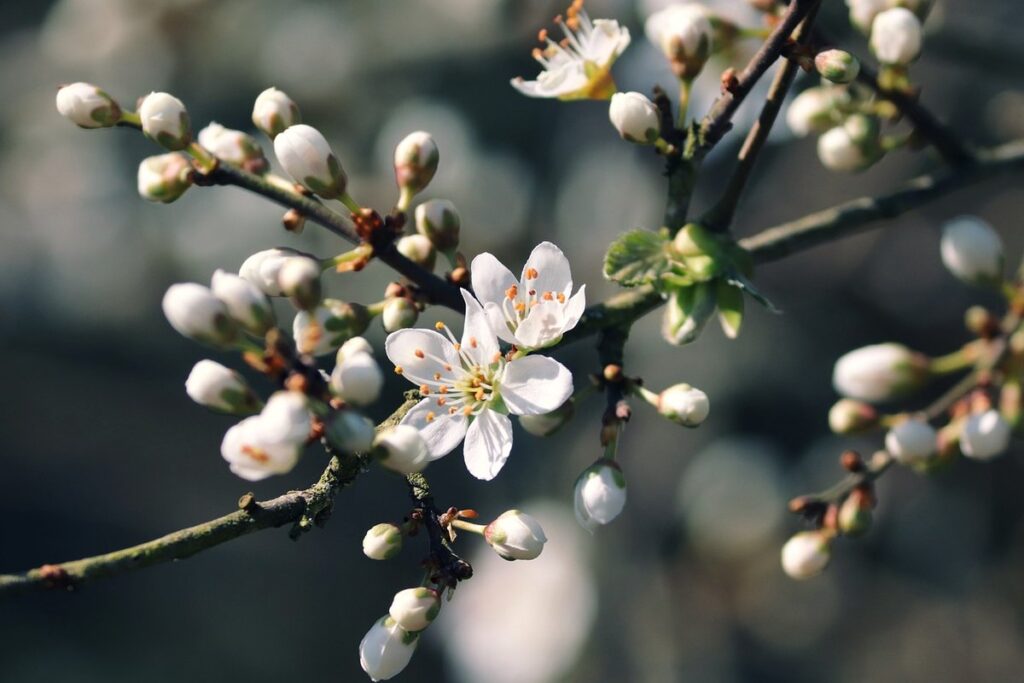
Choosing the Right Hedge Plant
When it comes to growing a hedge, selecting the right plant is crucial for its success. In this next part of our guide, we’ll walk you through the key factors to consider when choosing a hedge plant.
Considering Climate and Soil Conditions
When choosing a hedge plant, it’s essential to consider the local climate and soil conditions where you live. This will ensure that your new hedge not only looks great but also stays healthy and requires minimal maintenance.
First, think about the temperature range in your area. Some hedge plants are sensitive to extreme temperatures, while others can thrive in hot or cold climates. For example, if you live in an area with very cold winters, choose a hedge plant that is tolerant of frost and freezing temperatures, such as boxwood (Buxus sempervirens) or holly (Ilex aquifolium). On the other hand, if you live in a hot and dry region, select a drought-tolerant species like lavender (Lavandula spp.) or rosemary (Rosmarinus officinalis).
Next, consider the humidity levels in your area. Some hedge plants prefer high humidity, while others can tolerate dry conditions. Be sure to choose a plant that suits your local climate. For instance, if you live in a humid region like the southeast United States, choose a plant like rhododendron (Rhododendron spp.) or azalea (Rhododendron spp.), which thrive in moist environments.
Don’t forget about sunlight requirements when selecting a hedge plant. Some plants prefer full sun, while others prefer partial shade. Choose a plant that receives the right amount of sunlight for your area. For example, if you have a south-facing wall or a spot with direct sunlight, choose a plant like yew (Taxus spp.) or privet (Ligustrum spp.), which can tolerate full sun.
Additionally, consider the soil type in your area. Some hedge plants prefer well-drained soils, while others can thrive in wetter conditions. Be sure to choose a plant that suits your local soil type. For instance, if you have heavy clay or sandy soil, choose a plant like rose (Rosa spp.) or hawthorn (Crataegus spp.), which are adaptable to different soil types.
When selecting a hedge plant, take into account the microclimate of your area as well. This includes factors like wind direction, topography, and nearby buildings that may affect the temperature and humidity levels in your garden.
Selecting the Right Species for Your Purpose
When it comes to selecting the right species for your purpose, you’ll want to consider the type of hedge plant that will best serve your needs. There are several options to choose from, each with its own unique characteristics and benefits.
Evergreen hedges, such as boxwood or holly, are perfect for year-round screening and can be trimmed to maintain a formal shape. They’re also low-maintenance and can thrive in a variety of conditions. If you’re looking to create a wildlife habitat, consider using native plants like cedar or spruce, which provide food and shelter for local birds and insects.
Deciduous hedges, on the other hand, offer a seasonal change with leaves that fall in autumn and regrow in spring. They’re often used as ornamental borders or screens, adding visual interest to your garden. Flowering hedges like roses or lavender are great for adding color and fragrance to your outdoor space.
When selecting a species, think about factors such as climate, soil type, and intended use. Consider what you want to achieve with your hedge – do you need screening, wildlife habitat, or simply a beautiful ornamental feature? By choosing the right species for your purpose, you’ll be able to create a thriving and functional hedge that meets your needs.
Preparing the Soil and Planting Site
Before you start planting your hedge, let’s get down to basics by preparing the soil and selecting a suitable planting site that will give your new hedge the best chance to thrive.
Loosening and Amending the Soil
Loosening and amending the soil is a crucial step in preparing your site for growing hedges. This process not only helps to improve drainage but also increases the fertility of the soil. Start by removing any debris, such as rocks or weeds, that may be obstructing water flow or competing with your hedge plants for nutrients.
To loosen the soil, use a garden fork to gently aerate it to a depth of about 8-10 inches. This will help to break up any compacted soil and allow roots to grow more easily. Remove any weeds that come out in the process, making sure to dig them up as deep as possible to prevent regrowth.
Add a layer of compost or well-rotted manure to improve the soil’s fertility. A general rule of thumb is to add 2-3 inches of compost and mix it into the top 6-8 inches of soil. This will help to retain moisture, suppress weeds, and provide essential nutrients for your hedge plants.
Digging the Right Size Hole for Your Hedge Plants
When planting hedge plants, digging the right size hole is crucial for their long-term health and success. This involves considering not just the size of the plant itself but also its root system. A good rule of thumb is to dig a hole that’s at least 2-3 times wider than the root ball of your plant. For example, if you’re planting a 1-gallon shrub with a 12-inch root ball, you’ll want to create a hole that’s around 24-36 inches wide.
You should also consider the tree root depth when digging your holes. Research the mature size and growth habits of your specific hedge plant species to determine how deep its roots will extend. Some plants, like topiaries or hedges with dense foliage, may require deeper planting to accommodate their extensive root systems. Aim to dig holes that are 2-3 times deeper than the root ball as well.
Remember, it’s better to err on the side of caution and create a slightly larger hole initially, rather than risking your plant’s roots becoming constricted or damaged over time.
Planting Your Hedge
Now that you have a healthy hedge to plant, it’s time to get started on creating a beautiful border for your garden. In this next step, we’ll cover how to plant your hedge successfully.
Spacing and Arrangement
When planting a hedge, it’s essential to consider the optimal spacing and arrangement techniques to ensure a healthy, dense growth. This means taking into account not only the mature plant width but also its growth habits.
A general rule of thumb is to space plants 12-18 inches apart for small shrubs, and 24-36 inches for larger ones. However, this can vary depending on the specific species’ growth rate and mature size. For example, a dense evergreen like boxwood or yew may require tighter spacing, while a fast-growing deciduous like privet or ligustrum may need more space.
It’s also crucial to consider the growth habit of each plant variety. Some plants will grow upright and maintain their shape, while others will spread outwards or trail downwards. Planting companion plants that complement your hedge can help create a balanced arrangement. For instance, planting taller shrubs towards the back and shorter ones in front creates a visually appealing layered effect.
Ultimately, the right spacing and arrangement will depend on the specific needs of your hedge. Take note of the mature plant width and growth habits, and adjust your plan accordingly to ensure a lush, thriving hedge that requires minimal maintenance.
Watering and Mulching After Planting
Proper watering and mulching are crucial steps after planting your hedge to ensure its health and survival. When it comes to watering, it’s essential to strike the right balance between giving your hedge enough moisture to establish itself and not overwatering, which can lead to root rot and other problems.
A good rule of thumb is to water your newly planted hedge deeply but infrequently. This encourages deep root growth and makes the plants more drought-resistant in the long run. Aim for about 1-2 inches of water per week, either from rain or irrigation. It’s also a good idea to avoid getting water on the leaves to prevent fungal diseases.
Mulch plays a vital role in retaining moisture, suppressing weeds, and regulating soil temperature. Organic mulches such as wood chips or bark are ideal as they improve soil fertility and structure over time. Apply a 2-3 inch layer of mulch around your hedge, keeping it a few inches away from the base of the plants to prevent rotting. This will help retain moisture, suppress weeds that compete for water and nutrients, and regulate soil temperature to promote healthy growth.
Post-Planting Care and Maintenance
Now that you’ve planted your hedge, it’s essential to provide regular care and maintenance to ensure its health, stability, and desired shape. Here are some crucial steps to take after planting.
Regular Watering and Fertilization Schedule
To maintain the health and vibrancy of your newly planted hedge, it’s essential to establish a regular watering and fertilization schedule. A consistent routine will help your plants develop strong root systems, promote healthy growth, and ensure they thrive throughout the year.
As a general rule, hedges require more water during their first growing season than in subsequent years. During hot summer months, aim to provide about 1-2 inches of water per week through either rain or irrigation. Be cautious not to overwater, as this can lead to root rot and other issues.
Fertilization should be carried out according to the specific needs of your hedge type. Typically, a balanced fertilizer (10-10-10 NPK) is applied in early spring when new growth begins. Repeat applications may be necessary every 6-8 weeks throughout the growing season. Adjust your fertilization schedule as needed based on factors such as temperature fluctuations and seasonal changes.
It’s also crucial to consider adapting your watering and fertilization schedules to accommodate different seasons:
* In the spring, increase frequency of waterings and fertilizers to support new growth.
* During summer months, maintain consistent moisture levels while reducing fertilizer applications due to increased temperatures.
* In autumn, slow down waterings as plants prepare for dormancy and reduce fertilizer applications by half.
Pruning and Training Techniques
Pruning and training are essential aspects of maintaining a healthy and aesthetically pleasing hedge. When done correctly, these techniques promote balanced growth, encourage desirable characteristics such as flowering or fruiting, and prevent the hedge from becoming leggy or overgrown.
To maintain shape, prune your hedge regularly to remove any dead or damaged branches. This not only enhances its appearance but also prevents the spread of diseases. For example, pruning shears can be used to trim back tips of branches by one-third in late winter or early spring.
Training techniques help guide the direction of growth and encourage lateral branching, which fosters a dense, uniform shape. You can use stakes or trellises to support plants with weak stems, allowing them to grow upright without becoming distorted. By pruning and training your hedge regularly, you’ll be rewarded with a lush, vibrant display that adds visual appeal to your garden.
When training a hedge, consider the mature size of the plant and prune accordingly to prevent overgrowth. For instance, if planting a fast-growing variety, it’s best to prune more frequently to keep its growth in check.
Troubleshooting Common Hedge Problems
We’ve all been there – a struggling hedge can be frustrating and disappointing. This section helps you tackle common issues so your hedge thrives again.
Identifying and Addressing Pests and Diseases
Identifying and addressing pests and diseases is an essential part of hedge maintenance. Common issues include aphids, spider mites, scale insects, slugs, snails, powdery mildew, root rot, and leaf spot diseases.
Recognizing symptoms can be the first step in managing these problems. For instance, aphid infestations often appear as curled or distorted leaves, while spider mite damage looks like fine webbing on the underside of leaves. Slugs and snails leave behind silvery trails on foliage and holes in plant tissues.
To address pests and diseases using integrated pest management (IPM) strategies, consider inspecting your hedge regularly for signs of stress, disease, or insect infestation. Remove weeds that may harbor pests, maintain good hygiene, and provide optimal growing conditions. For organic control methods, use neem oil, horticultural soap, or pyrethrin sprays to manage aphids, spider mites, and scale insects.
Chemical controls can be used as a last resort for severe infestations. However, always read product labels carefully and follow application instructions closely to avoid harming beneficial insects, pets, or humans.
Dealing with Environmental Stressors
When dealing with environmental stressors like drought, extreme temperatures, and wind, it’s essential to take proactive measures to protect your hedge. Drought can be particularly challenging for hedges, so make sure to water them regularly during dry spells. However, overwatering can also lead to root rot and other issues, so monitor soil moisture levels closely.
Extreme temperatures can cause stress on your hedge, especially if it’s not adapted to the local climate. Young or newly planted hedges are particularly vulnerable. To mitigate this, consider using shade cloth or mulch to regulate soil temperature and retain moisture. For hot weather, choose hedges with drought-tolerant species, such as boxwood or lavender.
Wind can also be a significant stressor for your hedge, causing damage to branches and leaves. Prune your hedge regularly to maintain its natural shape and prevent wind damage. Consider planting windbreaks like shrubs or trees to provide additional protection. Regular monitoring of your hedge’s health and taking swift action when necessary will help minimize the impact of environmental stressors.
By taking these steps, you can create a more resilient hedge that can withstand various environmental challenges.
Conclusion
Now that you’ve learned the ins and outs of growing hedges, it’s time to summarize what we’ve covered. By choosing the right plant species for your climate and soil type, providing adequate sunlight and watering, and pruning regularly, you’ll be well on your way to creating a lush and beautiful hedge. Don’t forget to consider factors like maintenance costs and long-term durability when selecting a hedge type. Remember, growing hedges can also provide a natural screen for noise pollution or unwanted views.
As you put these tips into practice, keep in mind that patience is key – it may take some time for your hedge to grow in and mature. With consistent care and attention, however, the end result will be well worth the effort.
Frequently Asked Questions
Can I plant multiple hedge species together to create a diverse landscape?
Yes, mixing different hedge species can be beneficial for creating a diverse and resilient landscape. However, it’s essential to choose species that have similar growing conditions and climate tolerance to ensure their compatibility. Research the specific needs of each plant and consider factors like growth rate, mature size, and flowering times to achieve a harmonious coexistence.
How do I determine the ideal spacing for my hedge plants?
The ideal spacing for your hedge plants depends on the species’ mature width and growth habit. As a general rule, space plants 12-18 inches apart for slower-growing hedges and 3-6 feet apart for faster-growing ones. Keep in mind that over-crowding can lead to reduced air circulation, increased disease susceptibility, and decreased overall health.
What are some common pests and diseases I should be aware of when growing a hedge?
Some common pests and diseases affecting hedges include aphids, whiteflies, spider mites, root rot, and fungal infections like powdery mildew. Regularly inspect your plants for signs of infestation or infection, and implement integrated pest management strategies that combine physical barriers, cultural controls, and targeted treatments as needed.
How often should I water my newly planted hedge during its first growing season?
During the first year after planting, aim to provide your hedge with consistent moisture, especially during hot or dry spells. Water your plants deeply once or twice a week, depending on weather conditions, until they establish a robust root system. Reduce watering frequency once they reach maturity and adapt to local climate patterns.
Can I use regular garden mulch for my hedge, or do I need specialized products?
While regular garden mulch can provide some benefits like retaining moisture and suppressing weeds, it may not offer the same level of performance as specially designed hedging mulches. These products often contain ingredients that help prevent soil-borne diseases, regulate soil pH, and promote healthy root growth specifically for hedges. Consider investing in a high-quality hedging mulch to optimize your hedge’s health and appearance.