Are you excited to learn how to take your garden hive to the next level? Grafting queen bees is an essential skill that can significantly improve the health and productivity of your hives. Not only does it allow for a more controlled environment, but it also gives you the ability to ensure that your queen bee is healthy and thriving. In this article, we’ll guide you through the process of grafting queen bees for your garden hives, covering the benefits of grafting, the necessary equipment, and post-grafting care. Whether you’re a seasoned beekeeper or just starting out, our expert advice will walk you through each step, helping you to successfully graft your own queen bees and enjoy a strong, healthy hive all season long.
Understanding the Importance of Grafted Queens
When it comes to building a strong, healthy garden hive, grafted queens are a crucial component. In this next part, we’ll explore why they’re so essential and how they benefit your bees’ overall well-being.
Benefits of Using Grafted Queens in Small-Scale Beekeeping
Using grafted queens in small-scale beekeeping offers numerous benefits that can significantly improve the health and productivity of your garden hives. One major advantage is increased disease resistance. Grafting allows you to select for specific traits, including improved immune systems, making it easier to maintain a healthy colony.
This is particularly important in small-scale beekeeping where resources may be limited, and diseases can quickly spread. By introducing grafted queens with enhanced resistance, you’ll be better equipped to manage disease outbreaks. Another benefit of using grafted queens is improved colony performance. Grafting enables you to choose from a wide range of genetic material, allowing you to select for desirable traits such as high honey production or gentleness.
This can lead to increased yields and a more harmonious beekeeping experience. Furthermore, grafted queens tend to have a longer lifespan than naturally mated queens, reducing the need for frequent replacements and saving time and resources in the process. By incorporating grafted queens into your small-scale beekeeping operation, you’ll be taking a proactive approach to maintaining healthy, thriving colonies.
Common Challenges Associated with Purchasing Nucleus Colonies or Queens
When purchasing nucleus colonies or queens, beekeepers often face common challenges that can have long-term consequences for their apiary’s health. One of the primary concerns is the risk of introducing pests or diseases to your colony. If a supplier has not properly isolated their queens and colonies from disease-prone areas, they may unknowingly transfer unwanted pathogens to your bees.
Another challenge is the possibility of importing invasive species that can wreak havoc on local ecosystems. For example, the Small Hive Beetle (Aethina tumida) and the Varroa mite are two notorious pests that can decimate a colony if not managed properly. Buying from reputable suppliers who practice strict biosecurity measures can minimize this risk.
To mitigate these challenges, it’s essential to research potential suppliers thoroughly and ask about their pest management practices. Look for breeders who use Integrated Pest Management (IPM) strategies and have a track record of producing healthy, disease-free stock. By being vigilant in your supplier selection, you can protect the integrity of your apiary and maintain a thriving colony. Regular inspections and monitoring are also crucial to detecting any potential issues early on.
Preparing for Grafting: Equipment and Supplies
To graft queen bees successfully, you’ll need some essential equipment and supplies on hand to ensure a smooth process from start to finish. Let’s take a look at what you’ll need.
Essential Tools for Successful Grafting
When it comes to successful grafting, having the right tools for the job is essential. To get started, you’ll need a few key pieces of equipment that will help you prepare and execute the grafting process with precision.
First and foremost, you’ll need grafting cells. These small plastic or foam containers are specifically designed to hold the delicate comb and queen larvae, providing them with a safe and stable environment during the grafting process. It’s essential to choose cells that fit snugly into your grafting tray, allowing for easy handling and monitoring of the young queens.
A warming chamber is also crucial for successful grafting. This specialized incubator provides a controlled temperature environment that mimics the natural conditions found in an apiary, ensuring that the queen larvae develop properly. A microscope will come in handy as you inspect the cells to ensure the larvae are healthy and developing correctly.
When selecting your equipment, consider investing in a grafting tray with individual cells to make handling and monitoring easier. Remember to calibrate your warming chamber according to the manufacturer’s instructions to ensure optimal results.
Recommended Materials for Grafting Bees
When it comes to grafting queen bees for your garden hives, the quality of materials used can significantly impact the success of your grafts. This is particularly true when it comes to grafting cells and cell paper, which are crucial components in the grafting process.
You’ll want to invest in high-quality grafting cells that are designed specifically for beekeeping. These cells typically have a small opening at one end, allowing you to carefully place the larva inside without damaging them. Look for cells made from durable materials like plastic or metal, which will withstand repeated use and cleaning.
Cell paper is another essential material for successful grafts. This specialized paper is designed to mimic the natural wax cells found in a beehive, providing a nurturing environment for the developing queen bee. When selecting cell paper, choose a brand that offers a high-quality, pH-balanced product that won’t harm your bees. Always handle cell paper gently to avoid creasing or tearing it.
When selecting grafting materials, remember that a small investment upfront can save you time and hassle in the long run. Cheap or low-quality cells and cell paper may not provide adequate protection for your delicate grafts, leading to failed attempts and wasted resources. By choosing high-quality materials from reputable suppliers, you’ll be well on your way to successful queen bee grafting.
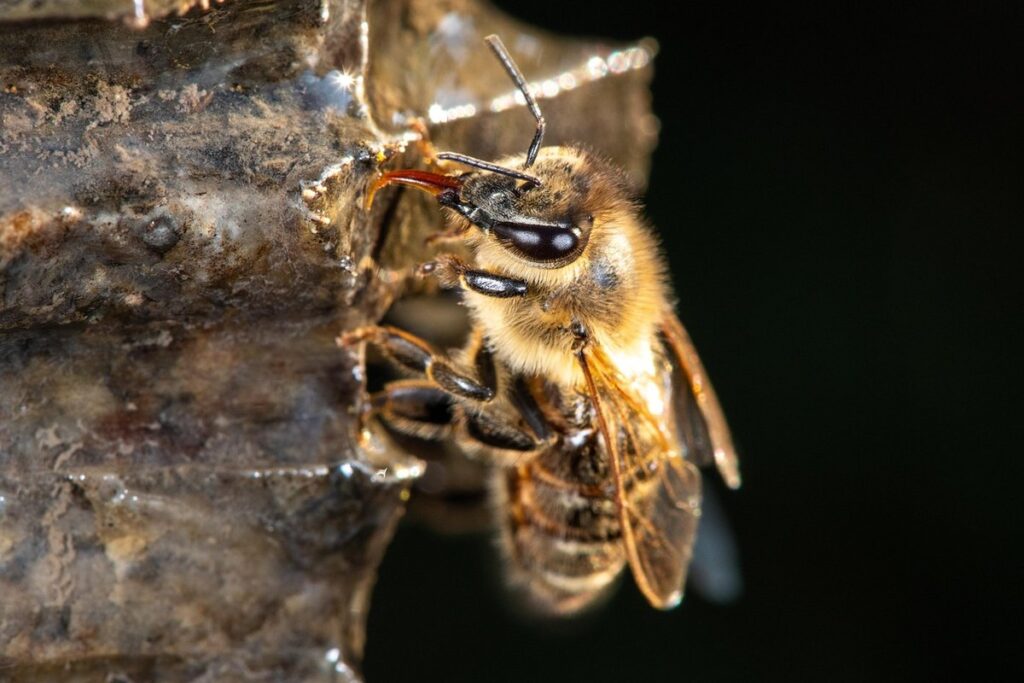
Selecting Healthy Donor Bees for Grafting
When selecting donor bees for grafting, it’s crucial to choose individuals that are strong, healthy, and free of diseases to ensure a successful queen bee replacement process. Look for signs of vitality in your chosen donors.
Identifying Suitable Queens and Drones for Grafting
When it comes to grafting queen bees, selecting strong and healthy donor queens and drones is crucial for the success of your grafted bees. You want to choose individuals that possess desirable traits such as high egg-laying capacity, disease resistance, and a docile temperament.
To identify suitable donors, inspect their overall health and appearance. Look for well-nourished bodies with shiny exoskeletons, active movement, and clean habits. Avoid selecting bees with visible signs of illness or injury. Consider the genetics of your existing colony when choosing donor queens; if you’re looking to improve a particular trait, select a queen that possesses those characteristics.
It’s also essential to assess the drones’ quality and fertility. Select drones with well-developed bodies, strong wings, and an active mating behavior. When evaluating potential donors, consider factors such as their age, experience, and overall performance in the colony. By carefully selecting your donor bees, you can increase the chances of success for your grafted queens and ensure a thriving hive.
Understanding the Importance of Lineage and Genetics in Queen Selection
When it comes to grafting queen bees for your garden hive, understanding the importance of lineage and genetics is crucial. The quality and performance of a grafted queen are directly tied to her genetic makeup, which determines her ability to thrive and reproduce successfully.
Genetic diversity within a colony is essential for its overall health and adaptability. A queen with a strong lineage will pass on desirable traits such as disease resistance, temperature tolerance, and brood production efficiency to her offspring. Conversely, a queen with a weak lineage may struggle to maintain a healthy population and produce high-quality offspring.
To ensure the success of your grafted queens, it’s essential to consider the genetic background of your donor bees. This can be achieved by:
* Maintaining a diverse gene pool within your colony
* Selecting donors with proven track records of strong brood production and disease resistance
* Considering the geographic origin of your bees and how this may impact their adaptation to your local climate
By understanding and prioritizing the importance of lineage and genetics, you can significantly improve the chances of success for your grafted queens.
The Grafting Process: A Step-by-Step Guide
Grafting queen bees is a delicate process, but by following these simple steps, you’ll be well on your way to successfully raising healthy queens for your garden hives. Let’s walk through each step together.
Preparing the Donor Bees for Grafting
Before you can start grafting queen bees, it’s essential to prepare the donor bees. This involves timing and temperature control, as these factors significantly impact the success of the grafting process.
Timing is crucial when selecting donor bees. You’ll want to choose a frame with open brood, where the cells are slightly apart and the young larvae (typically 2-3 days old) are visible through the cell wall. Grafting too early can result in weak or deformed queens, while grafting too late may not give them enough time to develop properly.
Temperature is also critical during this stage. The ideal temperature for grafting is between 82°F and 87°F (28°C to 31°C), as this allows the larvae to remain calm and minimizes the risk of damage. Maintain a consistent temperature in your grafting area to ensure optimal results.
Keep in mind that donor bees from strong, healthy colonies tend to produce better-quality queens than those from weak or stressed colonies. Select frames with a diverse range of larvae to increase the chances of successful queen development.
Grafting the Embryos into Cells
Grafting the embryos into cells is a delicate process that requires precision and care to avoid causing unnecessary stress and damage to the developing bees. To begin, make sure you have all the necessary equipment within reach, including the egg-laying cell cups, grafting tool, and a magnifying glass or microscope.
Gently place the egg-laying cell cup under your microscope or magnifying glass, taking care not to touch the surface of the cell with the instrument. Using your grafting tool, carefully lift an embryo from the donor queen’s cells, trying not to disturb any other developing eggs in the process.
Once you have successfully removed the embryo, gently place it into the egg-laying cell cup, positioning it as close to the bottom as possible without touching the surface of the cell. Make sure the embryo is securely seated and level within the cell, taking care not to leave any air pockets or bubbles that could affect its development.
To minimize stress on the developing bee, handle the embryo as little as possible, avoiding any unnecessary manipulation that could cause it harm. Keep the grafting area clean and well-ventilated to prevent contamination and maintain a stable temperature between 80°F to 90°F (27°C to 32°C).
Post-Grafting Care: Establishing and Rearing the New Queens
Now that your new queens have settled, it’s time to focus on their care. This essential guidance will walk you through establishing a strong, healthy colony from these newly grafted queens.
Providing Optimal Conditions for the Grafted Queens
Maintaining a consistent environment is crucial for the newly grafted queens to thrive. A stable temperature range between 85°F and 90°F (29°C to 32°C) will help them adjust to their new surroundings without stress. You can achieve this by placing the grafting cells in a well-ventilated area, away from direct sunlight and drafts.
Humidity is also vital for the queens’ development. A relative humidity of around 50% to 60% will prevent moisture loss and ensure proper cell growth. You can maintain the desired humidity level by covering the grafting cells with a damp cloth or placing them on a tray filled with water and pebbles.
A consistent feeding schedule is equally important. Provide a sugar-water solution (1:1 ratio) every 3 to 4 days, making sure each queen has access to an adequate supply. Avoid overfeeding, as this can lead to fermentation and compromise the health of your queens.
Monitor your grafting cells regularly to ensure the environment remains optimal for growth and development.
Monitoring and Managing the New Colonies
As you monitor the new colonies, it’s essential to keep an eye out for potential issues that could arise. One of the most common problems is queen failure, which can be due to various reasons such as poor grafting technique, inadequate food and water supply, or insufficient ventilation.
To identify potential issues early on, inspect the brood nest regularly, looking for signs of stress such as a decrease in brood production, excessive bee traffic, or an unusual odor. Check the queen’s activity, ensuring she is laying eggs at a steady rate and has enough space to move around.
Developing strategies to address these issues involves maintaining optimal colony conditions, including proper ventilation, adequate nutrition, and sufficient water supply. Regularly inspect the queen’s health, replacing her if necessary. Monitor the colony’s overall growth and adjust your care accordingly.
Keep in mind that every hive is unique, so be prepared to adapt your approach based on specific needs. With close monitoring and prompt intervention when needed, you can minimize risks and ensure the success of your grafted queens.
Integrating the New Queens into Your Apiary: Tips and Best Practices
Grafting a new queen can be an exciting addition to your apiary, but integrating her successfully requires careful planning and execution. In this section, we’ll share expert tips for a seamless transition.
Ensuring a Smooth Transition for Both Old and New Colonies
When introducing new queens to your apiary, it’s essential to consider the impact on both old and new colonies. To minimize disruption, make sure to select a suitable time for grafting, ideally during the fall or early spring when populations are relatively stable. This allows you to introduce new queens without causing a surge in growth that may lead to overcrowding.
Before introducing a new queen to an existing colony, inspect it for signs of disease or pests. A healthy established colony will be better equipped to accept a new queen and less likely to conflict with her. Introduce the new queen at dusk or early morning when the bees are most relaxed, reducing aggression and stress.
When creating multiple splits from a single parent colony, prioritize one split as the “nucleus” for introducing the new queen. This ensures that any issues related to queen introduction do not compromise the entire operation. Regularly inspect your colonies post-introduction to monitor progress and make adjustments as necessary to maintain balance and promote optimal growth.
Monitoring Performance and Adjusting as Necessary
As you integrate the new grafted queens into your apiary, it’s crucial to continuously monitor their performance and make adjustments as needed. This ongoing process will ensure that your queens are thriving and producing high-quality honey for your garden hives.
Start by regularly inspecting the queen cells to check for signs of distress or disease. Look for any unusual odors, discoloration, or structural issues. If you notice any problems, take immediate action to correct the issue before it spreads. For example, if you detect a fungal infection, isolate the affected cell and treat the rest of the hive with a suitable medication.
Keep track of your queens’ performance by monitoring their brood patterns, honey production, and overall colony health. A thriving queen should have a robust brood nest, with many eggs and larvae present. If you notice a decline in these indicators, reassess your grafting techniques or environmental factors that may be impacting the queen’s success.
As necessary, make adjustments to your grafting process, such as tweaking your grafting tools or revisiting your cell preparation procedures. Remember, every colony is unique, and what works for one queen may not work for another.
Frequently Asked Questions
Can I graft queen bees from a single-frame hive?
Yes, it’s possible to graft queen bees from a single-frame hive, but it’s essential to ensure the donor colony has a sufficient population of young, vigorous workers and a healthy queen. This will increase the chances of successful grafting and reduce stress on the colony.
How do I maintain a consistent supply of grafted queens?
To maintain a consistent supply of grafted queens, consider establishing a nucleus colony program where you regularly split and requeen existing colonies. This approach allows for continuous production and selection of high-quality queens.
What are the optimal conditions for grafted queen cells during the first few days after grafting?
The optimal temperature range for grafted queen cells is between 82°F to 90°F (28°C to 32°C) during the first few days after grafting. Maintaining a consistent environment and ensuring proper ventilation will promote healthy development of the new queens.
Can I use grafted queens in apiaries with existing mite infestations?
It’s recommended to address any mite infestations before introducing grafted queens into your apiary. This ensures the new queens have a clean environment to establish themselves, reducing the risk of disease transmission and stress on the colony.
How do I evaluate the performance of my newly established colonies with grafted queens?
Monitor population growth, honey production, and overall health indicators such as brood patterns and queen activity. Regular inspections will help you identify any issues early on, allowing for timely adjustments to ensure the success of your grafted queens.