Germinating rose seeds can be a fascinating yet challenging process for many gardening enthusiasts. If you’re looking to grow your own roses from scratch, understanding how to germinate these delicate seeds is crucial for a successful harvest. Not all rose seeds are created equal, and selecting the right ones can make a huge difference in their ability to thrive.
In this comprehensive guide, we’ll walk you through the essential steps of germinating rose seeds, including choosing the perfect variety, storing them properly, and creating the optimal growing conditions for them to flourish. From seed selection to soil preparation, we’ll cover everything you need to know to give your rose seeds the best chance at sprouting and eventually blooming into beautiful flowers. Whether you’re a seasoned gardener or just starting out, this guide is perfect for anyone looking to grow their own roses from seed.
Preparing the Seeds
Before moving on to germination, it’s crucial to prepare your rose seeds properly. This involves cleaning and treating them to ensure optimal growth potential.
Choosing the Right Variety
When it comes to germinating rose seeds, choosing the right variety is crucial for success. Not all rose varieties are created equal when it comes to seed germination, and some are more suitable than others.
First and foremost, look for disease-resistant varieties. Many modern rose hybrids have been bred to be more resistant to common diseases such as black spot and powdery mildew, making them a better choice for seed germination. Check the plant label or consult with a local nursery to determine which varieties are known to perform well in your area.
Hardiness is also an important consideration. Make sure the variety you choose is suitable for your climate zone and can withstand extreme temperatures. For example, some rose varieties are bred specifically for warmer climates, while others are more tolerant of cold winters.
Some popular disease-resistant rose varieties include ‘Knock Out’ and ‘Drift’. These varieties are not only resistant to disease but also require minimal maintenance, making them perfect for beginners or those short on time. When selecting a variety, be sure to read the plant label carefully and do your research before making a purchase.
Storing Seed Properly
Storing rose seeds properly is crucial to maintaining their viability and ensuring they germinate successfully. To store rose seeds, you’ll need a cool, dry place with minimal temperature fluctuations. The ideal storage location is airtight containers or envelopes stored in a refrigerator set between 32°F (0°C) and 40°F (4°C). This temperature range slows down the seed’s metabolic process, reducing the risk of premature germination.
Maintain low moisture levels by storing seeds away from direct sunlight and humidity. Moisture can cause seeds to mold, leading to loss of viability. A good rule of thumb is to store seeds in a location with a relative humidity below 50%. To further preserve seed quality, minimize handling and exposure to air.
When storing rose seeds, it’s essential to label the containers or envelopes with the date stored, the type of rose, and any relevant notes about the seed’s origin. This information will help you keep track of your seed stock and ensure you’re using the oldest seeds first. With proper storage, you can maintain the viability of your rose seeds for up to five years or longer, depending on factors like seed quality and storage conditions.
Step 1: Stripping and Soaking
To start germinating your rose seeds, begin by stripping any debris from the seed coat and then soak them overnight to kickstart the process. This crucial first step sets the stage for successful growth.
Removing the Outer Layer
When handling rose seeds, it’s essential to remove the outer layer carefully, as it can significantly impact germination rates. The outer layer is usually a thin coat of saponin, which serves as a natural defense mechanism against pathogens and insects.
To remove this outer layer, start by gently rubbing the seed between your thumb and index finger in a circular motion. This will help loosen the outer coating without damaging the delicate embryo inside. You can also try soaking the seeds in a small amount of water for about 24 hours to soften the saponin. Then, carefully pinch the seed with your fingers or use a sterile tool to gently remove the outer layer.
Some rose varieties are more prone to developing thicker outer layers than others. For example, hybrid tea and floribunda roses tend to have a harder coat than grandiflora or miniature roses. Be patient and gentle when removing the outer layer, as rough handling can cause damage to the seed.
It’s also important to note that not all rose seeds require this step, especially those from certain varieties or hybridizers who may have already removed the outer layer. Always research specific instructions for your particular rose variety before attempting to remove the outer layer.
Creating a Soaking Solution
When it comes to creating an optimal soaking solution for rose seeds, the type of water and additional ingredients can make all the difference. Start by filling a cup with room temperature distilled water – yes, you read that right, distilled water! This may seem counterintuitive, but it’s essential for preventing bacterial growth and contamination.
You can also add a teaspoon of Epsom salt to the solution, which will help reduce stress on the seedling and encourage root development. However, be cautious not to overdo it – too much Epsom salt can actually harm your seeds.
Some gardeners swear by adding a small amount of liquid seaweed extract or fish emulsion to their soaking solution, as these products contain beneficial nutrients that promote healthy growth. But remember, only use a very small amount (about 1-2 drops per cup) – too much can cause more harm than good.
Always check the pH level of your water before using it for soaking. Aim for a slightly acidic environment, around pH 6.5, to mimic the natural conditions rose seeds would experience in nature. By paying attention to these details, you’ll be well on your way to creating an optimal soaking solution that sets your rose seeds up for success.
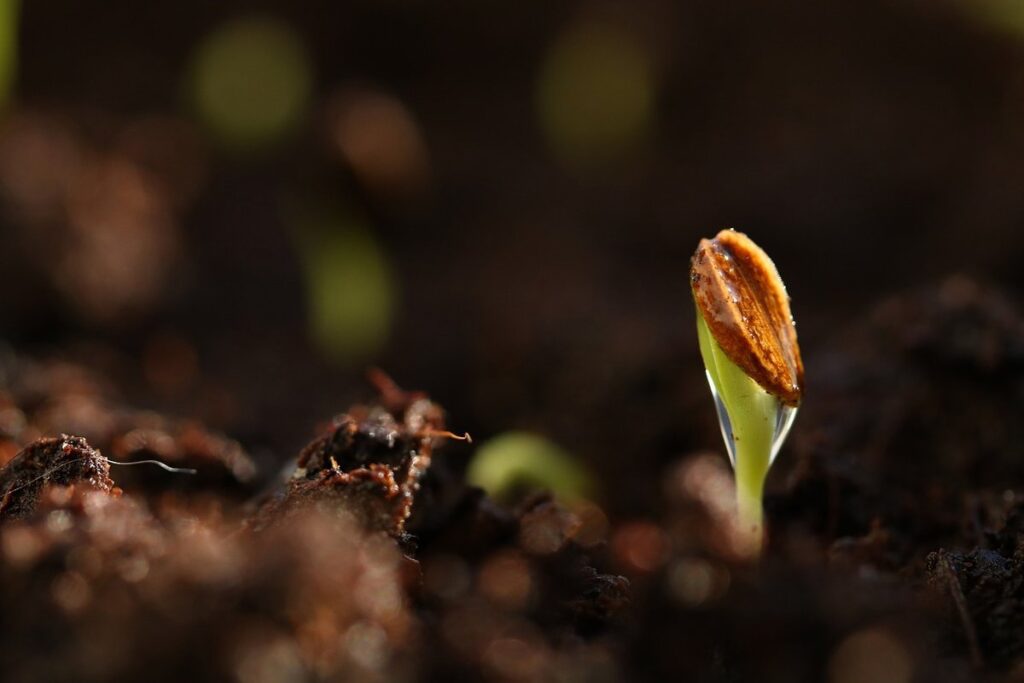
Step 2: Sowing Seeds
Now that you’ve prepared your rose seeds, it’s time to sow them into a pot filled with a well-draining seed starting mix. This is where patience and gentle care come into play.
Preparing the Seed Tray or Cell Pack
When it comes to sowing rose seeds, using a sterile seed tray or cell pack is crucial to prevent contamination and ensure successful germination. Contaminated trays can lead to mold, fungus, and other problems that will hinder the growth of your delicate seeds.
To prepare your seed tray or cell pack, start by washing it thoroughly with mild soap and warm water. This will remove any residual debris or bacteria that may be present. Next, sanitize the tray using a 10% bleach solution or a commercial sterilization product specifically designed for plant propagation. Make sure to rinse the tray thoroughly after sanitizing to remove any remaining bleach residue.
Once your seed tray is clean and sanitized, you’re ready to fill it with a well-draining seed starting mix. Avoid using regular potting soil as it can be too dense and may cause waterlogged conditions that are detrimental to seeds. Your seed mix should have excellent drainage properties to prevent the roots from rotting. By following these steps, you’ll create an ideal environment for your rose seeds to germinate and grow into healthy seedlings.
Planting Seeds at the Correct Depth
When planting rose seeds, it’s essential to get the depth just right. Rose seeds are relatively large and have a hard outer coat, which can make them more challenging to sow than other types of seeds.
As a general rule of thumb, plant rose seeds about 1/4 inch (6-8 mm) deep in well-draining seed starting mix. This allows for adequate moisture retention while preventing the seed from rotting. However, some rose varieties have specific requirements.
For instance, hybrid tea and grandiflora roses typically require a slightly deeper sowing depth of 1/2 inch (12-15 mm), as their seeds are often larger and more robust. On the other hand, miniature and floribunda roses can be sown shallower, around 1/8 inch (3-4 mm).
To avoid damaging the delicate seed coat, use a gentle touch when planting rose seeds. Cover the seeds with a thin layer of soil, then water gently but thoroughly. Make sure not to compact the soil too much, as this can prevent proper germination.
Step 3: Providing Optimal Conditions
Now that you’ve prepared your rose seeds, it’s time to give them the right environment to thrive. This next step focuses on creating optimal conditions for germination to occur successfully.
Temperature Control
When it comes to germinating rose seeds, temperature control is crucial for successful seed germination. The ideal temperature range for germinating rose seeds is between 70°F (21°C) and 80°F (27°C). This temperature range allows the embryo to break dormancy and begin growing.
If you’re germinating rose seeds in a region with high humidity or warm temperatures, such as in a greenhouse or indoors during summer months, it’s essential to maintain a slightly cooler temperature. On the other hand, if you’re germinating rose seeds in a cooler climate or during winter months, you may need to provide bottom heat using a heating mat or warm water.
To ensure optimal conditions for your rose seedlings, check the temperature regularly and adjust as needed. A temperature fluctuation of 1-2°C can make a significant difference in germination rates and seedling growth. For example, if you’re germinating rose seeds indoors during winter, aim for a consistent temperature of around 75°F (24°C) to promote healthy seed germination.
Keep in mind that some rose varieties are more sensitive to temperature fluctuations than others. Research the specific needs of your rose variety to provide the best conditions for success.
Light and Water Requirements
Rose seedlings require precise light and water conditions to develop strong roots and healthy growth. In the first few weeks after germination, seeds need bright, indirect light to undergo photosynthesis. Placing them near a sunny window or under grow lights with 12-14 hours of light per day is ideal. However, be cautious not to expose them directly to intense sunlight, which can cause scorching.
To provide sufficient moisture without overwatering, check the soil daily by inserting your finger into the soil up to the first knuckle. If the soil feels dry, it’s time for watering. Water gently but thoroughly until water drains from the bottom of the pot. Aim to maintain a consistent level of moisture, but avoid getting water on the leaves to prevent fungal diseases.
Monitor the temperature and humidity levels in your germination environment as well. A humid microclimate can help retain moisture in the soil, reducing the need for frequent watering. However, be aware that excessive humidity can lead to fungal growth, so ensure good air circulation around the seedlings.
Troubleshooting Common Issues
If you’re having trouble getting your rose seeds to germinate, don’t worry – we’ve got you covered. This section will walk you through common issues and their easy-to-fix solutions.
Poor Germination Rates
If you’re experiencing poor germination rates with rose seeds, don’t worry – it’s not uncommon. There are several potential causes to consider, and addressing these issues can make all the difference.
Firstly, let’s talk about storage. Rose seeds have a specific temperature requirement to remain viable. If they’re stored at temperatures above 32°F (0°C), their viability decreases significantly. Ideally, store your rose seeds in an airtight container or envelope at around 40°F (4°C). Also, be mindful of humidity levels – high moisture can lead to mold and fungal growth.
Another crucial factor is sowing depth. Rose seeds need light to germinate, so avoid burying them too deeply. Plant them about 1/8 inch deep in a good quality seed starting mix. Too much soil pressure can also hinder germination.
Check your water quality as well – tap water can contain chemicals that inhibit growth. Use filtered or distilled water instead. Finally, examine the seeds themselves for any visible damage or contamination before sowing.
By paying attention to these details and making adjustments accordingly, you should see an improvement in germination rates over time.
Seedling Care Challenges
As your rose seedlings grow from tiny germinated seeds to small plants, they may encounter some challenges. One common issue is pests, such as aphids and whiteflies, which can feed on the sap of the plant, causing damage and stunted growth. To prevent infestations, make sure to inspect your seedlings regularly for signs of pests, and use neem oil or insecticidal soap to control any outbreaks.
Another challenge rose seedlings may face is diseases such as powdery mildew and root rot. These can be caused by overwatering, poor air circulation, and high humidity. To prevent disease, ensure good air circulation around your seedlings and avoid getting water on the leaves or crown of the plant. If you notice any signs of disease, treat with a fungicide specifically designed for roses.
Nutrient deficiencies are also common in rose seedlings. Symptoms include yellowing leaves, stunted growth, and poor flowering. To prevent deficiencies, use a balanced fertilizer at half strength to avoid burning the roots. Also, ensure your soil has a pH between 6.0 and 6.5, which is optimal for roses.
Keep an eye out for these common issues and take action early to prevent them from causing lasting damage to your rose seedlings. By being proactive, you can ensure healthy growth and development of your plants.
Advanced Techniques for Success
Now that you’ve got a solid foundation, it’s time to dive into some advanced techniques that will take your rose seed germination to the next level and ensure healthy seedlings.
Cold Stratification
Cold stratification is a technique that can significantly improve germination rates for certain rose varieties. This process involves exposing the seeds to a period of cold temperatures, typically between 35°F to 45°F (2°C to 7°C), which mimics the natural winter conditions that rose seeds would experience in their native habitats.
During this time, the seed’s embryo goes through a series of physiological changes that help break dormancy and prepare it for germination. The exact duration of cold stratification varies depending on the specific rose variety, but as a general rule, 30 to 60 days at temperatures around 40°F (4°C) is often effective.
For example, some popular rose varieties such as hybrid tea and floribunda roses require 90 to 120 days of cold stratification before they can be successfully germinated. On the other hand, species roses like Rosa rugosa may only need a short period of around 30 days.
To implement cold stratification, place your rose seeds in a plastic bag or airtight container with moist peat moss or vermiculite and store it in a refrigerator at the specified temperature.
Alternative Sowing Methods
When it comes to germinating rose seeds, you may be looking for ways to give them an extra boost. Traditional sowing methods can take weeks, but there are alternative approaches that can speed up the process without sacrificing quality.
One popular method is using a warm water bath. Fill a cup or container with warm water (around 70-80°F), and gently place the rose seeds on its surface. Seal the container to maintain humidity, then let it sit in a warm, dark location for several days. This technique can reduce germination time by up to half. Be cautious not to overheat the water, as this can damage the delicate seeds.
Another method is utilizing a heating mat specifically designed for seed starting. These mats provide gentle heat (around 80-90°F) that promotes healthy germination without scorching the seeds. Simply place the rose seeds on the mat, and set it according to the manufacturer’s instructions. Some growers even use a combination of both methods – placing the seeds on the heating mat for a few days before transferring them to the warm water bath.
Frequently Asked Questions
Can I use old rose seeds for germination?
Yes, you can use old rose seeds for germination, but the success rate may be lower due to seed degradation over time. It’s essential to store seeds properly (as mentioned in “Storing Seed Properly”) and follow the same preparation steps as fresh seeds.
What if I notice no signs of germination after 2-3 weeks?
If you don’t see any signs of germination after 2-3 weeks, it may indicate that your seeds are not viable or that the conditions aren’t optimal. Check your temperature control (covered in “Temperature Control”) and ensure that you’re providing enough light (as mentioned in “Light and Water Requirements”).
Can I use a general-purpose potting mix for rose seed germination?
While a good-quality potting mix is essential, a general-purpose mix may not provide the specific needs of rose seeds. Look for a mix specifically designed for seed starting or propagation to ensure optimal results.
How often should I check on the temperature and humidity levels in my growing environment?
Checking your temperature and humidity levels regularly (every 2-3 days) is crucial to maintain optimal conditions for germination. This will help you make any necessary adjustments to the environment, ensuring a healthy start for your rose seeds.
Can I use LED grow lights for rose seed germination, or do I need specialized lighting?
LED grow lights can be used for rose seed germination, but it’s essential to provide a spectrum that promotes growth and development. Look for LED grow lights specifically designed for seed starting or propagation, as they will provide the necessary spectrum for optimal results.