Are you growing garden sage but struggling to keep it thriving? With its fragrant leaves and versatility in cooking, it’s no wonder this herb is a staple in many gardens. However, proper care is crucial for it to reach its full potential. This comprehensive guide will walk you through the ins and outs of garden sage care, covering everything from choosing the right variety to harvesting its fresh leaves.
In this article, we’ll delve into the best practices for growing garden sage, including soil preparation, watering techniques, and pruning tips. You’ll also learn how to identify different varieties and when to expect a bountiful harvest. Whether you’re a seasoned gardener or just starting out, our guide will provide you with the knowledge you need to grow healthy, productive plants that bring joy to your cooking and garden alike.
Choosing the Right Variety
When selecting a sage plant for your garden, it’s essential to choose a variety that thrives in your local climate and meets your cooking needs. This is where research comes into play.
Understanding Garden Sage Types
When it comes to choosing the right garden sage for your outdoor space, understanding the different types can be just as important as knowing their care requirements. Let’s take a look at some of the most popular varieties and what sets them apart.
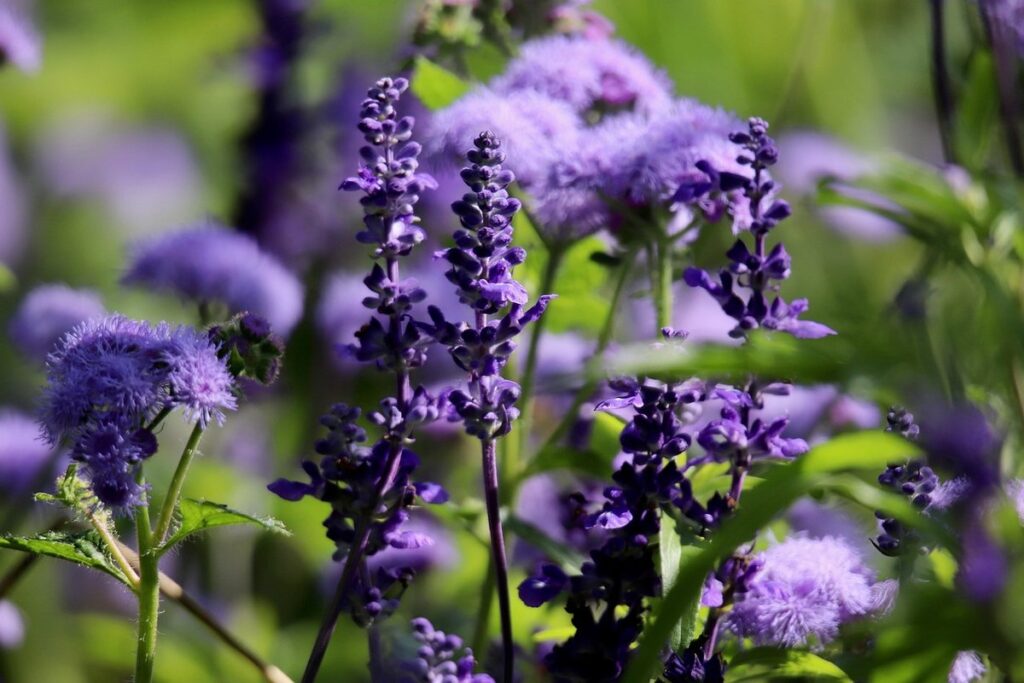
Common Sage (Salvia officinalis) is one of the most widely available types and is known for its blue-gray foliage and purple flowers. It’s a hardy perennial that can tolerate dry spells, making it perfect for gardeners in areas with low rainfall. Purple Sage (Salvia leucophylla), on the other hand, boasts stunning purple stems and leaves, adding a pop of color to any garden bed.
White Sage (Salvia apiana) is prized for its silvery-gray foliage and white flowers, often used in herbal remedies and rituals. This drought-tolerant variety thrives in well-draining soil and full sun conditions. Understanding the unique characteristics of each type will help you choose a sage that suits your garden’s specific needs.
It’s worth noting that some varieties are more resistant to pests and diseases than others. For example, Common Sage is known for its resistance to rust, while Purple Sage can be more susceptible to root rot if not properly cared for. By considering the needs of each type, you can create a thriving sage garden that brings beauty and function to your outdoor space.
Selecting a Hardy Variety
When selecting a hardy variety of garden sage, it’s essential to consider your specific climate and growing conditions. This will ensure that your plant thrives and remains healthy throughout the seasons.
To begin, check the USDA Hardiness Zone Map for your area. This will give you an idea of the average minimum temperature in your region, which is crucial for selecting a hardy variety of garden sage. For example, if you live in a zone with harsh winters or frost-prone conditions, look for a variety that can tolerate temperatures as low as 10-20°F (-12 to -7°C).
Consider factors like sunlight and moisture levels when choosing your hardy variety. Some garden sages are more tolerant of shade and wet conditions than others. For instance, ‘Tri-color’ and ‘Purpurea’ varieties tend to perform well in shadier spots, while ‘Tricolor’ and ‘Berggarten’ varieties prefer full sun.
Ultimately, choose a variety that aligns with your specific climate and growing conditions for the best results.
Planting and Soil Preparation
Before planting new sage, it’s essential to prepare the soil correctly to give your herb a strong start. Let’s dive into the specifics of preparing your garden bed for sage.
Preparing the Perfect Soil
When it comes to planting garden sage, preparing the perfect soil is crucial for its growth and success. As a low-maintenance herb, garden sage can thrive in well-draining soil with a slightly acidic pH between 6.0 and 7.0. However, it’s essential to note that garden sage can tolerate a wide range of pH levels, making it an excellent choice for gardeners with varying soil conditions.
One common issue to watch out for is compacted soil, which can prevent roots from growing properly. To avoid this, make sure to loosen the top 6-8 inches of soil before planting your garden sage. You can use a fork or a spade to gently aerate the soil and improve drainage.
In terms of nutrient needs, garden sage requires a balanced fertilizer mix with equal amounts of nitrogen, phosphorus, and potassium (NPK). A general-purpose fertilizer will suffice, but make sure to follow the instructions on the label for optimal results. If your soil is particularly poor in nutrients, consider adding a 2-inch layer of compost or well-rotted manure to enrich it.
Planting Techniques and Spacing
When planting garden sage, it’s essential to get it right from the start to ensure optimal growth and prevent common issues like overcrowding. Start by choosing a location with full sun and well-drained soil, as garden sage prefers these conditions.
Dig holes that are about 12-18 inches deep and 6-8 inches wide, depending on the size of your plants. Space them 12-18 inches apart in rows that are 24-36 inches apart to allow for good air circulation and prevent moisture from accumulating around the base of the plants. This will also make it easier to access the plants for pruning and harvesting.
If you’re planting multiple rows, stagger the plants slightly to create a more balanced appearance and prevent any one plant from dominating the space. Water your newly planted sage thoroughly after transplanting, then keep the soil consistently moist during the first few weeks after planting. Once established, garden sage is relatively drought-tolerant but will perform best with regular watering and fertilization.
Watering and Humidity
To keep your garden sage healthy, it’s essential to understand how much water and humidity it needs, as both can have a significant impact on its well-being. Let’s dive into the specifics of watering and maintaining optimal humidity levels.
Adequate Moisture Levels
Garden sage requires adequate moisture levels to thrive, but overwatering can be detrimental to its health. When deciding on watering needs, climate and soil type play crucial roles.
In hot, dry climates, garden sage needs regular watering to prevent scorching of leaves and stunted growth. As a general rule, water your sage plants deeply once or twice a week during peak summer months. However, avoid getting water on the leaves themselves to prevent fungal diseases from taking hold. Instead, water at soil level.
Soil type also affects moisture needs. Well-draining soils require more frequent watering than heavy clay soils that tend to retain too much water. If your garden sage is planted in a pot, ensure the container has proper drainage holes to prevent root rot.
Monitor your plants’ response to watering by checking their leaves and stems for signs of drought stress or overwatering. Wilting leaves or yellowing foliage can indicate insufficient moisture, while droopy leaves or soft stems might suggest too much water. Adjust your watering schedule accordingly to provide the right balance for healthy garden sage growth.
Managing Humidity and Air Circulation
When it comes to garden sage care, maintaining a healthy balance between humidity and air circulation is crucial. Sage plants prefer well-ventilated areas with moderate humidity levels. If the air is too dry, they may develop leaf drop or become susceptible to pests.
To manage humidity around your sage plants, you can place the pot on a tray filled with water and pebbles. As the water evaporates, it will increase the surrounding humidity without overwatering the plant. Alternatively, you can use a humidifier nearby, but be cautious not to create an overly humid environment that fosters fungal growth.
Air circulation is equally important for healthy sage growth. Make sure to provide at least 1-2 feet of space between plants and keep them away from drafty areas or air conditioning vents. You can also gently rotate the pot every few days to promote even growth and prevent any one side from becoming too leggy. By striking a balance between humidity and air circulation, you’ll be able to enjoy a thriving and fragrant garden sage all season long.
Pruning and Maintenance
To keep your garden sage healthy and thriving, it’s essential to prune it regularly and perform regular maintenance tasks to ensure optimal growth. Let’s dive into these crucial steps together!
Regular Pruning Practices
Regular pruning is an essential part of garden sage care that can make all the difference in promoting bushy growth, encouraging new flowers, and preventing woody stems. By regularly trimming back your sage plant, you’re allowing it to redirect its energy towards producing lush foliage and vibrant blooms.
To achieve this, focus on cutting back about one-third of the plant’s old growth each spring, making clean cuts just above a leaf node using sharp pruning shears or scissors. This will help control the plant’s height and encourage new stems to emerge from the base. Don’t worry if it looks a bit bare at first – it’ll soon fill out with fresh growth.
Additionally, prune any dead or damaged leaves throughout the growing season to prevent disease and pests from taking hold. Remove flower stalks after they’ve finished blooming to redirect energy towards leaf production. By incorporating these regular pruning practices into your garden sage care routine, you’ll be rewarded with a healthy, productive plant that will continue to thrive for years to come.
Some signs of needing more frequent pruning include: excessive height, weak or leggy growth, and sparse flowering. Keep an eye out for these telltale signs and adjust your pruning schedule accordingly.
Dealing with Pests and Diseases
Dealing with pests and diseases is an unfortunate reality for many gardeners. As your sage plant grows, it becomes more susceptible to common issues like spider mites and aphids. These tiny insects can cause significant damage by sucking the sap from leaves, leaving them discolored and distorted.
To prevent infestations, inspect your plants regularly, and remove any affected areas. For spider mites, use a mild soap solution or neem oil to control their populations. Aphid infestations are often treated with insecticidal soap or pyrethrin spray.
Diseases like root rot and leaf spot can also plague your sage plant if it’s not properly cared for. Root rot is typically caused by overwatering, while leaf spot is a result of fungal infections. To prevent these issues, ensure good air circulation around your plants and avoid watering at night. If you do notice any signs of disease, treat the affected areas with fungicides or remove infected leaves.
Some gardeners also swear by natural remedies like garlic spray to repel pests and improve plant health. Experiment with different methods to find what works best for your specific situation.
Harvesting and Propagation
To successfully grow and maintain a thriving garden sage, it’s essential to know how to harvest its leaves and propagate new plants. We’ll walk you through both processes in this section.
Timing the Perfect Harvest
When it comes to harvesting garden sage leaves for optimal flavor and aroma, timing is everything. You’ll want to pick them at the right moment to ensure they’re bursting with their signature savory goodness. Generally, you can start harvesting individual leaves or sprigs from your garden sage plant as soon as it’s about 6-8 inches tall.
For maximum flavor, aim to harvest sage leaves in the morning after the dew has dried but before the heat of the day sets in. This is usually around mid-to-late summer when the plants are at their peak growth stage. Simply snip off the desired number of leaves with scissors or pinch them between your thumb and index finger.
To prepare garden sage for cooking, give it a quick rinse under cold running water to remove any dirt or debris. Pat the leaves dry with a paper towel to prevent excess moisture from affecting the texture during cooking. Now you’re ready to chop, dice, or use whole leaves as desired in a variety of recipes – from roasted meats and vegetables to soups and herb butters.
Propagating Garden Sage
Propagating garden sage is an excellent way to share your beloved plant with friends and family, or to simply multiply its bounty. You can propagate garden sage through stem cuttings, division, or layering. To take a successful cutting, choose healthy stems with plenty of new growth, typically around 3-4 inches long. Remove lower leaves, dip the base in rooting hormone powder, and plant it about an inch deep in moistened potting mix.
Keep the soil consistently moist but not waterlogged. Roots should develop within two to three weeks, after which you can gradually increase watering as needed. For division, carefully dig up the entire plant, gently separating roots with a fork or knife. Replant divisions immediately, making sure each section has at least one growth bud. This method is best done in spring or early fall when plants are more vigorous.
Some gardeners find layering to be an effective way to propagate sage. This involves bending a long stem down to the ground and securing it with a U-shaped wire or stone. Roots will form where the stem meets the soil, which can then be cut from the parent plant once they’re established.
Common Issues and Troubleshooting
As you tend to your garden sage, you may encounter a few common issues that can stump even the most experienced growers. Let’s troubleshoot some of these problems together.
Addressing Common Problems
Yellow or droopy leaves can be a frustrating issue in garden sage care. If you notice this problem, it’s essential to assess whether it’s due to overwatering, underwatering, or a nutrient deficiency. Typically, yellow leaves indicate an excess of moisture in the soil, which can lead to root rot and other problems. To resolve this, ensure good drainage around your plants and check that the potting mix is well-aerated.
Another common issue with garden sage is poor growth. This could be due to inadequate light or inadequate nutrients in the soil. If your plants are not receiving enough sunlight (at least 4-6 hours of direct sun), consider relocating them to a brighter spot. On the other hand, if you suspect nutrient deficiency, fertilize your plants with a balanced fertilizer during the growing season.
Lastly, some gardeners struggle with a lack of flowers on their sage plants. To encourage blooming, prune your plants regularly and ensure they receive sufficient sunlight. Also, remove any weak or spindly growth to promote healthy growth and flowering.
Preventive Measures
Regularly inspecting your garden sage plants for signs of stress and disease can help you catch issues early on. Make it a habit to gently remove any debris or weeds that may be competing with the plant’s roots for water and nutrients. This simple practice helps prevent pests like aphids, whiteflies, and spider mites from taking hold.
Watering your sage plants deeply but infrequently encourages deep root growth, making them more resistant to drought and heat stress. Water at the base of the plant, avoiding overhead watering that can lead to fungal diseases.
Additionally, maintain a balanced fertilizer routine, providing essential nutrients like nitrogen, phosphorus, and potassium to support healthy growth. Avoid over-fertilizing, as this can cause an overabundance of foliage but weaken the plant’s overall health.
Regular pruning not only maintains shape but also promotes air circulation around the leaves, reducing the likelihood of fungal diseases. Pinch off flower buds when you notice them forming to direct energy towards leaf growth and prevent the plant from flowering too early.
Frequently Asked Questions
Can I grow garden sage indoors, even if it’s not suitable for outdoor conditions?
Yes, with proper care and attention to humidity levels, you can successfully grow garden sage indoors. However, keep in mind that indoor growth may be slower due to reduced sunlight and air circulation.
How often should I prune my garden sage to maintain its shape and promote healthy growth?
Regular pruning is essential for maintaining your garden sage’s shape and promoting healthy growth. Prune your plants every 1-2 weeks during the growing season, removing any woody stems and trimming back new growth to encourage bushy development.
What are some common pests that target garden sage, and how can I prevent infestations?
Aphids, whiteflies, and spider mites are common pests that target garden sage. To prevent infestations, ensure your plants receive adequate air circulation, water them properly, and use organic pest control methods whenever possible.
Can I propagate garden sage from cuttings or only through division?
Both cuttings and division can be effective for propagating garden sage, but stem cuttings are generally easier to work with. Take 3-4 inch stem cuttings in the spring, remove lower leaves, and plant them in a well-draining potting mix. Water regularly until roots develop.
How do I know when my garden sage is ready for harvest, and what’s the best way to preserve its fresh leaves?
Your garden sage is ready for harvest when it reaches 6-8 inches tall, has developed a robust stem, and produces plenty of fragrant leaves. To preserve its fresh leaves, tie them in small bunches and hang upside down in a dry, dark place or store them in an airtight container in the refrigerator.