If you’re an avid gardener or a beekeeper looking to establish a thriving colony, you know that proper bee hive placement is crucial for their health and productivity. But have you ever wondered how to choose the perfect spot for your garden bee hive? With so many factors at play, from site selection to soil type and space considerations, it’s easy to get overwhelmed. That’s why we’ve put together this comprehensive guide to help you optimize your garden bee hive placement. In this article, we’ll delve into the key considerations for a healthy and productive colony, covering topics such as selecting the right location, preparing the site, and ensuring safety precautions are in place. Whether you’re just starting out or looking to improve your existing setup, our guide will walk you through everything you need to know about garden bee hive placement.
Understanding Garden Bee Hive Needs
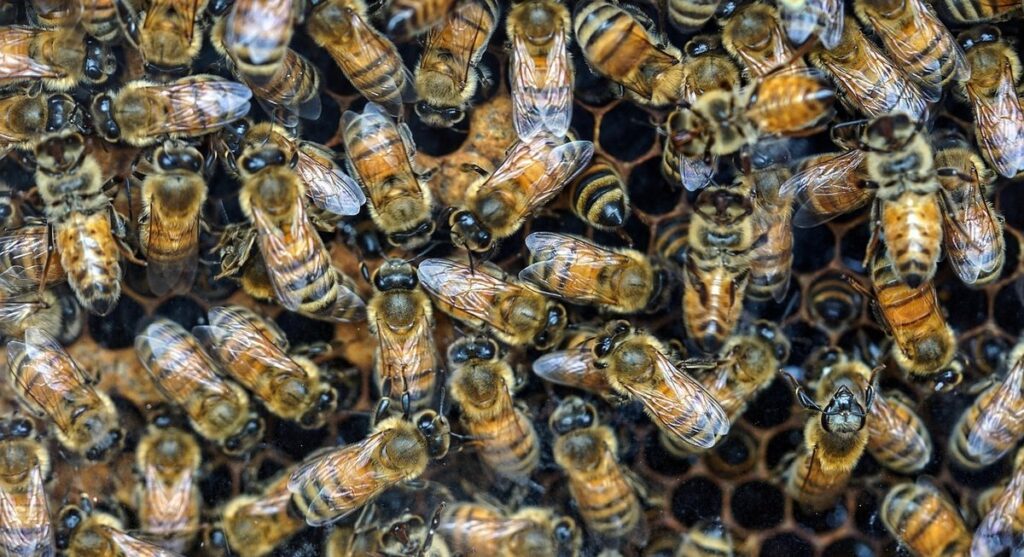
When it comes to setting up a garden bee hive, understanding their needs is crucial for a thriving colony and a healthy ecosystem. In this section, we’ll break down what your bees require to stay happy and productive.
Choosing a Suitable Location
When choosing a location for your garden bee hive, it’s essential to consider the needs of your bees. One of the most critical factors is sunlight. Bees need direct sunlight to regulate their body temperature and promote healthy growth. A south-facing spot with at least six hours of direct sunlight per day is ideal.
Another crucial consideration is wind protection. Strong winds can damage the hive or disrupt the bees’ delicate social structure. Look for a location that provides some natural shelter, such as a fence row or a group of trees. If you live in an area with frequent strong winds, consider installing a windbreak or trellis to protect your hive.
Proximity to water sources is also vital. Bees need access to fresh water for drinking and cooling the hive. A nearby pond, stream, or birdbath will make it easier for them to collect water without having to fly far. Keep in mind that bees prefer shallow water with a surface area large enough for them to land on.
By selecting a location that meets these needs, you’ll be providing your bees with the best possible start to a healthy and thriving colony.
Considering Soil Type and Drainage
When it comes to placing your garden bee hive, it’s essential to consider the soil type and drainage pattern of the area. Different soils can impact the hive’s health and productivity in various ways.
For instance, if you have a sandy soil, water may drain too quickly, leaving the hive without enough moisture for the bees to collect. On the other hand, clay soil can retain too much water, potentially leading to root rot and other issues. Loamy soils, which are well-balanced, are generally ideal for bee hives.
To mitigate any negative impacts, ensure good drainage by creating a slight slope around the hive or installing a French drain. You can also mulch around the hive to retain moisture while preventing water from accumulating. Another approach is to use a raised platform or stand for your hive, which allows air and water to circulate freely underneath.
Keep in mind that soil pH levels should also be suitable for bees, ideally between 6.0 and 7.0. If you’re unsure about the soil type or drainage pattern of your garden, consult with a local expert or conduct some DIY tests to determine the best placement strategy for your bee hive.
Ensuring Adequate Space and Safety
When it comes to setting up a bee hive in your garden, providing adequate space and ensuring safety are crucial considerations. Bees need room to fly around the hive without feeling crowded or threatened, which can lead to stress and disease issues within the colony.
Think of the bees’ flight paths like traffic patterns – if there’s not enough room for them to move freely, they’ll become agitated and more likely to defend their territory aggressively. A good rule of thumb is to place the bee hive at least 10 feet away from any neighboring structures or plants that could potentially be disturbed by the bees.
Additionally, consider the area around the hive as a “bee-free zone.” Keep it free from pesticides, herbicides, and other chemicals that can harm the bees. You should also be aware of potential predators like raccoons, mice, and birds, which may see your bee hive as an easy target. Use protective measures such as mesh or netting to secure the hive and prevent unwanted visitors.
Factors Influencing Hive Placement
When choosing a spot for your garden bee hive, several key factors come into play that can impact both the bees’ health and your own enjoyment of the space. Let’s explore these considerations together.
Proximity to Water Sources
When it comes to placing your bee hive, one of the most important factors to consider is its proximity to water sources. Having a reliable source of water nearby can be beneficial for several reasons. For one, bees need water to cool their bodies and regulate their temperature, especially on hot days. A nearby pond or stream can provide them with this essential resource.
However, placing your hive near water also comes with some drawbacks. Water quality is a major concern – if the water source is polluted or contaminated, it can harm both the bees and the surrounding environment. For example, if there are chemicals or fertilizers in the water, they can seep into the soil and contaminate it.
When choosing a location for your hive near a water source, consider accessibility as well. Ensure that the water source is easily accessible to the bees, but also take steps to protect them from potential predators that may be attracted to water sources. A good rule of thumb is to place the hive at least 10-15 feet away from the water’s edge to prevent flooding and ensure easy maintenance.
Wind Direction and Protection
When choosing a location for your bee hive, wind direction is an essential consideration. Wind can have a significant impact on the temperature regulation and ventilation needs of your bees. Bees communicate through dance to maintain a consistent temperature within their hive, but strong winds can disrupt this process.
In areas with harsh winters, north-facing slopes or locations that receive partial shade from trees can provide natural wind protection. Alternatively, you can create a sheltered location by planting native shrubs or small trees around the perimeter of your hive site. This not only protects against strong winds but also provides additional benefits such as improved soil health and increased biodiversity.
When assessing wind direction, consider the prevailing winds in your area. Research local weather patterns to determine which direction is typically calmest. Orienting your hive in this direction can help minimize exposure to harsh winds.
Nearby Vegetation and Forage Availability
When placing a bee hive in your garden, it’s essential to consider the nearby vegetation and forage availability. Bees rely heavily on these resources for food, water, and shelter, so choosing a location with an abundance of plant life is crucial.
Native plants are particularly beneficial for bees as they provide nectar-rich flowers that are perfectly suited to their dietary needs. Incorporating native species into your garden layout can be as simple as planting wildflowers or shrubs native to your region. For example, if you live in a sunny area with dry soil, consider planting bee-friendly species like coneflower or black-eyed Susan.
In addition to native plants, other factors to consider when selecting nearby vegetation include the variety of flowers and their bloom times. A diverse array of flowers that bloom at different times will provide a constant source of nectar for your bees throughout the growing season. This can be achieved by incorporating a mix of annuals and perennials into your garden layout.
When planning your garden, remember to leave some areas untouched to allow the natural vegetation to grow. A meadow or “bee hotel” area with a variety of wildflowers will provide a haven for beneficial insects like bees and butterflies.
Best Practices for Hive Installation
When it comes to installing a beehive, proper placement is crucial to ensure your bees’ health and happiness. Here are some key best practices to keep in mind when setting up your hive.
Preparing the Site
Before installing your bee hive, it’s essential to prepare the site properly. This involves clearing any debris or obstructions that might interfere with the hive’s structure or hinder the bees’ movement.
Start by inspecting the area where you plan to install the hive. Remove any loose rocks, twigs, or weeds that could create a tripping hazard or obstruct the hive’s entrance. If you have an existing garden bed nearby, consider relocating it to ensure easy access to the hive for maintenance and inspections.
Next, level the ground to prevent water from accumulating around the hive. This can be done using a spirit level or by creating a slight incline away from the hive. You should also ensure that the site is free from any overhanging branches or nearby structures that could damage the hive or disturb the bees during strong winds.
Clearing the site may seem like an extra step, but it’s crucial for maintaining the health and safety of your bee colony. A well-prepared site will make a big difference in the long run and help you enjoy a thriving and productive beehive.
Installing the Hive Stand or Support
When it comes to installing the hive stand or support, one of the most crucial aspects is ensuring that the base provides a sturdy and level surface for your bee hive. A stable foundation is essential for several reasons. Firstly, it helps prevent damage from settling or flooding, which can compromise the integrity of the hive and put the bees at risk.
To achieve this, consider using a hive stand made of durable materials such as wood or metal. These stands should have adjustable legs to ensure the hive remains level even on uneven terrain. When installing the hive, check that it’s securely fastened to the stand and that there’s adequate clearance between the hive floor and the ground.
It’s also vital to consider drainage when selecting a location for your bee hive. Avoid areas prone to waterlogging or where rainwater may collect near the hive entrance. By providing a level and stable base, you’ll help ensure the health and safety of your bees, as well as make maintenance tasks much easier.
Setting Up the Hive Entrance and Guard
When it comes to setting up the hive entrance and guard, several factors come into play. First, consider the size of the entrance. A general rule of thumb is to provide a minimum of 1 square inch (6.45 cm²) per 1000 bees. This will help prevent overcrowding and ensure easy passage for the bees.
The orientation of the entrance also matters. Typically, it’s best to face the hive entrance towards the north or east to minimize direct sunlight exposure during peak summer months. Avoid placing the entrance directly under eaves or overhangs, as this can trap moisture and create an ideal environment for pests.
Regular maintenance is crucial when it comes to the guard. Check on it regularly for signs of wear or damage, and replace it as needed. Consider using a removable guard to make cleaning easier. Additionally, ensure that the surrounding area is free from debris and obstructions to prevent damage to the hive entrance.
Remember, proper setup and maintenance will help keep your bees healthy and thriving throughout the season.
Managing the Bee Hive’s Microclimate
When it comes to placing your bee hive, creating a healthy microclimate is crucial for your bees’ well-being. In this next part, we’ll explore how to manage the air temperature and humidity around your hive.
Temperature Regulation
Maintaining a stable temperature within the bee hive is crucial for the health and productivity of your bees. A temperature range between 92°F to 95°F (33°C to 35°C) is ideal, with temperatures above or below this range potentially leading to issues such as disease, pest infestations, or even colony collapse.
To regulate heat, consider using light-colored roofs for your hive, which allow sunlight in and reflect heat away. You can also use ventilation techniques like the “honeycomb” system, where a network of tubes connects the hive to an external air source, promoting airflow and cooling the hive naturally.
In colder temperatures, bees cluster together to generate heat, but this can be taxing for the colony if sustained over an extended period. To mitigate this, ensure your hive is facing south or southeast to maximize sunlight exposure during winter months. You can also use a windbreak, like a fence or a screen, to protect your hive from harsh winds that might further chill the bees.
By implementing these strategies, you’ll be creating a more stable and resilient microclimate within your bee hive, better suited for the long-term health of your colony.
Humidity Control
Maintaining optimal humidity levels within the bee hive is crucial for the health and well-being of your bees. A humid environment can lead to mold growth, which can be detrimental to the colony’s health. On the other hand, a dry environment can cause dehydration in the bees.
To maintain a healthy balance, consider installing a ventilation system that allows for airflow while preventing moisture from escaping. This can be achieved by installing vents or using screen mesh to filter out debris while allowing air to circulate. It’s also essential to ensure proper insulation around the hive to prevent cold temperatures from entering and causing condensation.
Aim for a relative humidity level between 30-60% within the hive. This range allows for optimal nectar absorption by the bees while preventing mold growth. You can monitor humidity levels using a hygrometer, and adjust your ventilation system accordingly. By maintaining a stable and moderate humidity environment, you’ll create an ideal space for your bees to thrive.
Be mindful of seasonal changes in temperature and humidity when adjusting your hive’s microclimate. In regions with high temperatures and humidity, consider adding shading or evaporative cooling systems to prevent heat stress in the colony.
Air Circulation and Ventilation
When it comes to maintaining a healthy bee hive, air circulation and ventilation play a crucial role. A well-ventilated hive ensures that the bees have a stable and comfortable environment, which is essential for their productivity and overall health.
Proper air circulation helps to regulate the temperature within the hive, preventing overheating during hot summer days. When bees cluster together in high temperatures, they can generate excessive heat, leading to the breakdown of brood and even colony collapse. Adequate ventilation allows for a gentle exchange of air, helping to dissipate excess heat and maintain a stable temperature range.
Additionally, good ventilation prevents moisture buildup within the hive, which can lead to fungal growth and disease transmission among the bees. Ensure that your beehive is placed in an area with sufficient airflow, such as an open field or near a forest edge, where natural breezes can circulate through. When building or purchasing a beehive, consider one with built-in ventilation features, like screened sides or top entrance holes, to facilitate air exchange and keep the hive dry and cool.
Monitoring and Maintaining the Hive
Regular inspections are crucial to ensure your hive is healthy, so let’s dive into how to monitor its progress and maintain a thriving colony. This includes recognizing signs of disease and pests.
Regular Inspection Schedule
When it comes to monitoring and maintaining a healthy bee hive, regular inspections are crucial. The frequency of these inspections will depend on various factors such as the time of year, weather conditions, and the specific needs of your bees.
A general rule of thumb is to inspect the hive every 7-10 days during peak season (spring and summer) when the colony is actively growing. This allows you to identify potential issues early on, such as disease, pests, or imbalances in the colony’s population.
During each inspection, look for signs of problems like abnormal odors, excessive propolis buildup, or unusual patterns of bee activity. Check for any visible signs of pests or diseases, and take notes on the overall health and vitality of the bees.
It’s also essential to keep an eye out for changes in honey production, brood pattern, and queen performance. If you notice any issues during your inspections, make adjustments to the hive as needed to maintain a healthy balance within the colony. Regular inspections will help ensure that your bees stay happy and productive throughout the growing season.
Recording Keeping and Data Collection
Accurate record keeping is crucial when it comes to monitoring and maintaining a healthy bee hive. By tracking key metrics, you’ll be able to identify trends and make informed decisions about the care of your colony.
Start by establishing a routine for recording data on honey production. This can include daily checks on the number of frames filled with honey, as well as regular measurements of the overall weight of the frames. You may also want to keep track of the amount of nectar and pollen being brought into the hive, as this can give you insight into the colony’s foraging habits.
In addition to tracking honey production, it’s also essential to collect data on colony health. This can include monitoring the number of dead bees found in the hive, as well as checking for signs of disease or pests. By keeping a record of these metrics, you’ll be able to identify potential problems early on and take steps to address them before they become major issues.
Consider using a beekeeping journal or spreadsheet to keep track of your data. This will allow you to easily access and review your records, making it simpler to make informed decisions about the care of your colony.
Integrated Pest Management (IPM) Strategies
When it comes to maintaining a healthy bee hive, Integrated Pest Management (IPM) strategies are crucial for preventing pest infestations and protecting your colony. IPM involves monitoring the hive regularly to identify potential issues before they become severe.
To develop an effective IPM strategy, start by understanding the common pests that can affect your beehive, such as varroa mites, small hive beetles, and American foulbrood spores. Regularly inspect the hive for signs of pest activity, including damaged brood cells, dead bees, or unusual odors.
Once you’ve identified a potential issue, take immediate action by treating the affected area with an appropriate pesticide or natural remedy. For example, you can use formic acid to control varroa mites or diatomaceous earth to repel small hive beetles.
Some key elements of IPM strategies include:
• Monitoring for pests on a regular basis
• Using a combination of methods (chemical and non-chemical) to manage pest populations
• Implementing preventative measures, such as installing mouse guards or using screened bottom boards
• Keeping accurate records of your monitoring efforts and treatment plans
By following these steps and staying vigilant, you can effectively manage pests within your beehive and maintain a healthy, thriving colony.
Frequently Asked Questions
Can I place my garden bee hive near a water source, such as a pond or lake?
Yes, having a nearby water source can be beneficial for your bees, but it’s essential to ensure the area is not prone to flooding and the water does not pose any health risks to the colony. A general rule of thumb is to maintain a safe distance of at least 10-15 feet between the hive and the water’s edge.
How do I manage temperature fluctuations in my garden bee hive, especially during extreme weather conditions?
Temperature regulation is crucial for your bees’ well-being. To mitigate temperature fluctuations, consider using a ventilated roof or a screened top to allow for airflow while keeping pests out. You can also use shading materials like shade cloth or tarps to block direct sunlight and reduce heat gain.
Can I move my garden bee hive during the growing season, and if so, how do I minimize disruption to the colony?
Yes, it is possible to relocate your beehive during the growing season, but it’s recommended to do so with caution. To minimize disruption, aim for a cooler part of the day (early morning or late afternoon) when the bees are less active. Make sure to inspect the hive before and after relocation to ensure the bees have settled in properly.
How can I integrate pest management strategies into my garden bee hive’s maintenance routine?
Integrated Pest Management (IPM) is an essential aspect of maintaining a healthy colony. To incorporate IPM strategies, regularly inspect your hive for signs of pests or diseases, and take action promptly if you notice any issues. Use natural deterrents like diatomaceous earth, sugar syrup traps, or essential oils to control unwanted visitors.
Are there specific considerations I should keep in mind when preparing the site for my garden bee hive’s installation?
Yes, ensure the area is clear of debris, weeds, and any obstructions that could interfere with the hive’s integrity. Level the ground to prevent water from accumulating around the hive, and apply a barrier like weed fabric or mulch to prevent unwanted growth.