Are you ready to give your outdoor space some TLC? Preparing your garden bed is an essential step in creating a thriving and beautiful oasis. But where do you start? With so many factors to consider, from selecting the perfect location to designing a layout that showcases your favorite plants, it’s easy to feel overwhelmed.
That’s why we’ve put together this comprehensive guide to help you prepare your garden bed like a pro. In this article, we’ll delve into the importance of location selection, provide expert tips on soil testing and amending, and share design considerations to ensure your outdoor space is both functional and stunning. By the end of this guide, you’ll be equipped with the knowledge to create a garden bed that’s tailored to your needs and climate. Whether you’re a seasoned green thumb or just starting out, our guide has got you covered!
Choosing the Right Location
When it comes to garden bed prep, the location of your new bed is crucial. Will you choose a spot that gets plenty of sunlight or one with dappled shade?
Understanding Sunlight Requirements
When it comes to creating an ideal garden bed, understanding the sunlight requirements of your plants is crucial. Different plants have varying needs when it comes to sun exposure, and getting this right can make all the difference between a lush, thriving garden and one that’s struggling to survive.
First, identify the specific sunlight needs of each plant in your garden bed. Some plants require full sun, which means they need at least six hours of direct sunlight per day. Others prefer partial shade, which is anywhere from four to six hours of indirect sunlight. If you have a garden bed with plants that need full shade, it’s best to place them under a tree or on the north side of your property.
Consider the time of year and season when planning your garden bed layout. In warmer months, plants may require more shade, especially during peak sun hours. Conversely, in colder months, they may need more sunlight to stay healthy. Be sure to assess your garden bed’s specific conditions and adjust accordingly.
To get a better sense of the sunlight patterns in your yard, observe the way different areas receive direct versus indirect light throughout the day. Note the time of year and how this changes over the seasons. With this information, you’ll be able to create a garden bed that meets the unique needs of each plant, leading to a healthier and more productive garden overall.
Assessing Soil Conditions
When evaluating soil conditions, it’s essential to consider three critical factors: soil type, pH levels, and nutrient content. Start by digging a small test pit in the area you’ve chosen for your garden bed. Scoop out a handful of soil and examine its texture. Is it dense and sticky (clay), coarse and well-draining (sand), or somewhere in between (loam)? Knowing your soil type will help you choose plants that thrive in those conditions.
Next, test the pH level using a DIY kit or by sending a sample to a lab for analysis. Most vegetables prefer a slightly acidic to neutral soil pH (between 6.0 and 7.0). If your soil is too alkaline or acidic, amend it with organic matter like compost or peat moss.
Finally, assess the nutrient content by examining the color and odor of the soil. Rich, dark soil often indicates high levels of organic matter, which supports healthy plant growth. Check for deficiencies in essential nutrients like nitrogen, phosphorus, and potassium using a soil test kit or consulting with a local nursery expert. This information will help you select a suitable location that caters to your plants’ specific needs.
Preparing the Site
Before you start planting, it’s essential to prepare your garden bed by removing debris and loosening compacted soil. This step will ensure a healthy foundation for your plants.
Clearing the Area
Before you can start building and planting your garden bed, it’s essential to clear the area of weeds, debris, and obstructions. This might seem like a daunting task, but with the right tools and techniques, you’ll be done in no time.
Start by removing any large debris, such as rocks or branches, from the garden bed. Use a rake to collect these items and set them aside for composting or disposal. Next, turn your attention to weeds. Use a hoe to slice through their roots, making it easier to remove them entirely. Be sure to wear gloves and work in a comfortable position to avoid straining your back.
For smaller areas of debris or weeds, a weeding fork can be just as effective. This tool allows you to gently loosen the soil without damaging nearby plants. Use it to carefully dig up weeds and debris, working from one end of the bed to the other. By taking the time to clear the area thoroughly, you’ll create a clean slate for your garden bed, ready for planting.
Testing and Conditioning the Soil
Collecting and analyzing soil samples is an essential step in preparing your garden bed for optimal growth. You can collect a sample by digging a small hole about 6-8 inches deep in different areas of the bed, then combine the soil from each spot into a bucket or container. Take a representative sample of about one cup of soil to submit for analysis.
This will help you identify potential nutrient deficiencies and provide recommendations for amending your soil. A lab test can reveal details such as pH levels, nitrogen, phosphorus, potassium, and micronutrient content. Based on the results, you may need to add organic matter like compost or manure to improve fertility.
To assess your soil structure, perform a simple texture test by rolling a small amount of moist soil between your hands. If it crumbles easily, it’s likely sandy; if it forms a tight ball that holds its shape when cut, it’s clay-rich. Mix in some organic matter to enhance drainage and water retention.
When analyzing the results, consider adding compost or other natural fertilizers to improve nutrient levels.
Designing Your Garden Bed
When designing your garden bed, it’s essential to consider factors such as sunlight, drainage, and accessibility to ensure a thriving and enjoyable outdoor space. Let’s dive into these crucial considerations!
Selecting a Shape and Size
When it comes to designing your garden bed, choosing the right shape and size is crucial. It’s essential to consider your available space, plant selection, and accessibility needs before making a decision.
Let’s start with shape options: rectangular, square, and circular. Rectangular beds are ideal for long, narrow spaces, allowing you to fit more plants in a smaller area. Square beds, on the other hand, provide equal access from all sides, making them perfect for smaller gardens or areas with limited mobility. Circular beds offer a unique aesthetic appeal and can be used in tight spaces.
Consider your plant selection when choosing bed size. For example, if you’re growing vegetables that require frequent harvesting, a narrower bed (around 3-4 feet wide) will make it easier to reach the center without stepping on the soil. A larger bed (6-8 feet wide) is better suited for plants like perennials or trees that don’t need as much maintenance.
Remember to also think about accessibility when selecting your bed size and shape. If you have mobility issues, a wider bed with a smooth path will make it easier to move around without straining yourself. Consider incorporating raised beds or accessible ramps to create a more inclusive garden space.
Incorporating Features and Accessories
When it comes to designing your garden bed, incorporating features and accessories can elevate both its functionality and aesthetic appeal. Let’s start with paths – meandering pathways made from materials like brick, stone, or wood not only add visual interest but also provide easy access for maintenance and harvesting.
For irrigation systems, consider installing a drip irrigation system, which delivers water directly to the roots of plants, reducing evaporation and runoff. This is especially beneficial in areas with limited water resources. You can also incorporate a rain barrel or two to collect and store rainwater for further use.
Trellises and supports are essential for climbing plants like peas, beans, and tomatoes. Install them strategically near these varieties to maximize space and promote healthy growth. When selecting materials, consider durable options like cedar or recycled plastic that withstand the elements while being gentle on the environment.
Lastly, add a decorative element with garden benches, statues, or sundials to create inviting spaces for relaxation and contemplation within your garden bed design.
Building and Mulching
Now that we’ve got our soil tested, it’s time to start building your garden bed from scratch. This is where you’ll learn how to create a sturdy base and add a layer of mulch for optimal growth.
Creating a Bed Edge
When it comes to building a garden bed, creating a stable edge is crucial for maintaining soil integrity and preventing erosion. The type of material you choose will depend on the style and durability you’re aiming for.
For a rustic look, consider using wood planks or logs as your bed edge. These can be secured with nails or screws and should be placed close together to prevent gaps. However, keep in mind that wood can rot over time if not properly maintained. Consider adding a layer of gravel or stone behind the wood to improve drainage.
If you prefer a more durable option, consider using stone or brick for your bed edge. These materials are easy to clean and can withstand heavy rainfall without deteriorating. To ensure proper drainage with stone or brick edging, create a slight incline towards the bottom of the garden bed. This will allow excess water to flow freely away from the plants.
When building your bed edge, also consider accessibility features such as raised edges for seated gardening or gentle slopes for wheelchairs.
Mulch Selection and Application
When it comes to mulch selection and application, there are numerous options to choose from. Organic mulches, such as wood chips, bark, and leaves, provide several benefits. They help retain moisture in the soil, suppress weeds by blocking light, and regulate soil temperature. On the other hand, inorganic mulches like gravel or stone don’t break down over time but can be effective at suppressing weeds.
For optimal performance, it’s essential to apply mulch correctly. A 2-3 inch layer is typically recommended, with organic mulches applied around plants rather than directly against their stems. This helps prevent moisture from accumulating and promoting root rot. Additionally, leave a small gap between the mulch and any nearby structures to allow for air circulation.
When selecting a mulch type, consider factors like durability, color retention, and environmental impact. For example, hardwood bark tends to last longer than softwood chips but may not be as attractive. Aesthetics aside, choose a mulch that suits your garden’s climate and specific needs.
Planting and Maintenance
Now that you’ve prepared your garden bed, it’s time to think about planting and maintaining the perfect mix of flowers, herbs, and vegetables. This next step is crucial for a thriving and beautiful outdoor space.
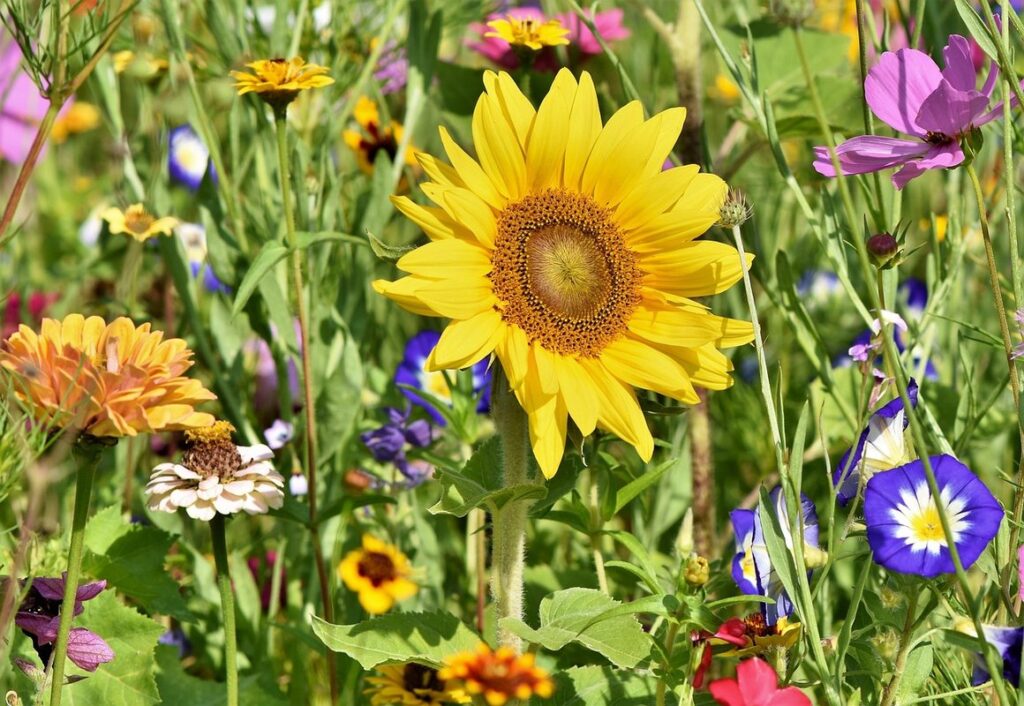
Selecting the Right Plants
When selecting plants for your garden bed, it’s essential to consider the unique conditions of your space. Climate plays a significant role in determining which plants will thrive. For example, if you live in a hot and dry region, choose plants that are drought-tolerant, such as succulents or cacti. In contrast, areas with high humidity require plants that can handle excess moisture, like ferns or peace lilies.
Soil type is another crucial factor to consider. If your soil is heavy clay or sandy, opt for plants that can adapt to these conditions. For instance, plants like coneflowers and black-eyed Susans are suitable for dry, sandy soils. On the other hand, if you have rich loam or well-draining soil, consider adding perennials like hostas or daylilies.
Light requirements are also essential in plant selection. If your garden bed receives full sun (six hours of direct sunlight), choose plants that can handle high heat and light intensity, such as tomatoes or basil. Partial shade, on the other hand, is perfect for plants like impatiens or coleus. By considering these factors, you can create a harmonious plant combination that will not only survive but thrive in your garden bed.
Some popular plant combinations to consider include:
• Succulents and creeping thyme for low-maintenance groundcover
• Peonies and hostas for a lush, shade-loving display
• Tomatoes and basil for a productive and fragrant herb garden
Ongoing Care and Upkeep
To keep your garden bed thriving, it’s essential to prioritize ongoing care and upkeep. This includes regular tasks like watering, pruning, fertilizing, and pest control. Watering is crucial, especially during hot weather when plants need consistent moisture. Check the soil daily, and water when the top inch feels dry to the touch.
Pruning helps maintain plant shape, encourages new growth, and removes diseased or damaged areas. For example, deadheading spent blooms promotes flowering and prevents seed production in perennials like roses and coneflowers. Fertilizing provides essential nutrients for healthy development; use a balanced fertilizer in spring and summer, but avoid over-fertilizing.
Pest control is also vital to prevent damage from pests like aphids, whiteflies, and slugs. Use physical barriers or traps for severe infestations, and consider introducing beneficial insects like ladybugs or lacewings to prey on unwanted pests. Regularly inspect your plants for signs of disease or pest issues, and address them promptly to prevent further damage.
By incorporating these tasks into your routine, you’ll be able to identify potential problems early and take corrective action to ensure optimal growth and a bountiful harvest.
Troubleshooting Common Issues
Even the most well-planned garden bed prep can go awry, so we’re here to help you troubleshoot common problems and get your garden back on track. Let’s tackle those pesky issues together!
Dealing with Pests and Diseases
As you tend to your garden bed, it’s not uncommon to encounter pests and diseases that can harm your plants. Identifying these issues early on is crucial to preventing them from spreading and causing damage. Common pests include aphids, whiteflies, and slugs, while fungal diseases like powdery mildew and leaf spot are also prevalent.
To manage these problems effectively, it’s essential to use integrated pest management (IPM) strategies. This approach combines physical, cultural, biological, and chemical controls to minimize harm to the environment and your plants. For example, if you notice aphids on your roses, try spraying them with a mixture of soap and water first before resorting to insecticides.
Some effective IPM tactics include:
• Inspecting your plants regularly for signs of pests or diseases
• Keeping your garden bed clean and free of debris
• Using physical barriers like row covers to prevent pests from reaching your plants
• Encouraging beneficial insects like ladybugs, which prey on aphids
• Avoiding overwatering, which can contribute to fungal diseases
By being proactive and using these strategies, you can keep your garden bed healthy and thriving.
Correcting Soil-Related Problems
When it comes to garden bed prep, correcting soil-related problems is an essential step in creating a thriving and healthy garden. One common issue is soil compaction, which occurs when the soil is repeatedly walked on or compacted by heavy machinery. This can prevent roots from growing deep into the soil, leading to weak and shallow-rooted plants.
To address soil compaction, try incorporating organic matter like compost or well-rotted manure into your soil. These amendments improve drainage, aeration, and structure, allowing water and air to penetrate more easily. You can also use tools like garden forks or spades to gently loosen compacted areas, being careful not to damage underlying roots.
Nutrient deficiencies are another common issue. Regular soil tests will help you identify any imbalances, but in the meantime, consider adding a balanced fertilizer or organic amendments like fish emulsion or kelp meal. These can provide essential nutrients for healthy plant growth.
Frequently Asked Questions
What if I don’t have access to a plot of land for my garden bed, but I still want to create a thriving outdoor space?
You can consider container gardening or vertical gardening as alternatives. These options allow you to grow plants on balconies, patios, or even indoors using pots and trellises. Make sure to choose containers that are at least 5-7 gallons in size to provide enough room for the soil and roots.
How often should I test my soil to ensure it’s suitable for planting?
It’s a good idea to test your soil every 1-2 years, especially if you’ve added amendments or have changed the type of plants you’re growing. This will help you identify any pH level changes or nutrient deficiencies that may affect plant growth.
Can I still create a beautiful garden bed with poor soil quality?
While it’s ideal to start with good soil quality, it’s not impossible to create a thriving garden bed with poor soil. You can try adding organic matter like compost or well-rotted manure to improve the soil structure and fertility. However, if your soil is severely degraded, it may be better to consider starting fresh in a new location.
How do I know which plants are suitable for my local climate and conditions?
Research the specific sunlight, temperature, and moisture requirements of each plant you want to grow. Check the USDA Hardiness Zone Map to determine your local climate zone and choose plants that are adapted to it. You can also consult with local nurseries or gardening experts for more specific advice.
Can I use recycled materials like old pallets or bricks to create my garden bed?
Yes, using recycled materials is a great way to be eco-friendly and add character to your garden bed. However, make sure the materials you choose are safe for use around plants and won’t leach chemicals into the soil. Clean and disinfect any materials before using them in your garden bed.