Forcing bulb setsy can be a game-changer for gardeners who want to enjoy their favorite flowers out of season. By forcing bulbs, you can coax your plants into blooming weeks or even months ahead of schedule, extending the gardening season and adding some much-needed color to your indoor space.
But forcing bulb setsy isn’t just about timing – it’s an art that requires careful planning, precise execution, and a bit of patience. With the right preparation and care, you can successfully force bulbs into bloom and enjoy their beautiful flowers in the midst of winter or early spring. In this comprehensive guide, we’ll walk you through the steps to force bulb setsy, covering everything from preparation and care to troubleshooting common issues. Whether you’re a seasoned gardener or just starting out, our expert tips will help you achieve successful results and bring some much-needed beauty into your life.
Understanding Bulb Sety and Its Importance
To successfully force bulb setsy, it’s essential to grasp its unique characteristics and needs. Understanding these specifics will help you tailor your care routine for optimal results.
What is Bulb Sety?
Bulb sety refers to a specific process in plant cultivation where bulbs are forced into growth during a period of dormancy. This technique is used to induce early flowering and increase yields for growers who want to get ahead of the natural growing season. In simple terms, bulb sety involves manipulating the environment around the bulb to trick it into thinking spring has arrived, even if it’s still winter.
The purpose of bulb sety is to give growers a head start on the growing season. By forcing bulbs to grow earlier than they would naturally, you can enjoy a longer blooming period and increase your chances of getting multiple harvests from a single crop. This technique is particularly useful for growers who want to get ahead of pests and diseases that typically thrive in warmer weather.
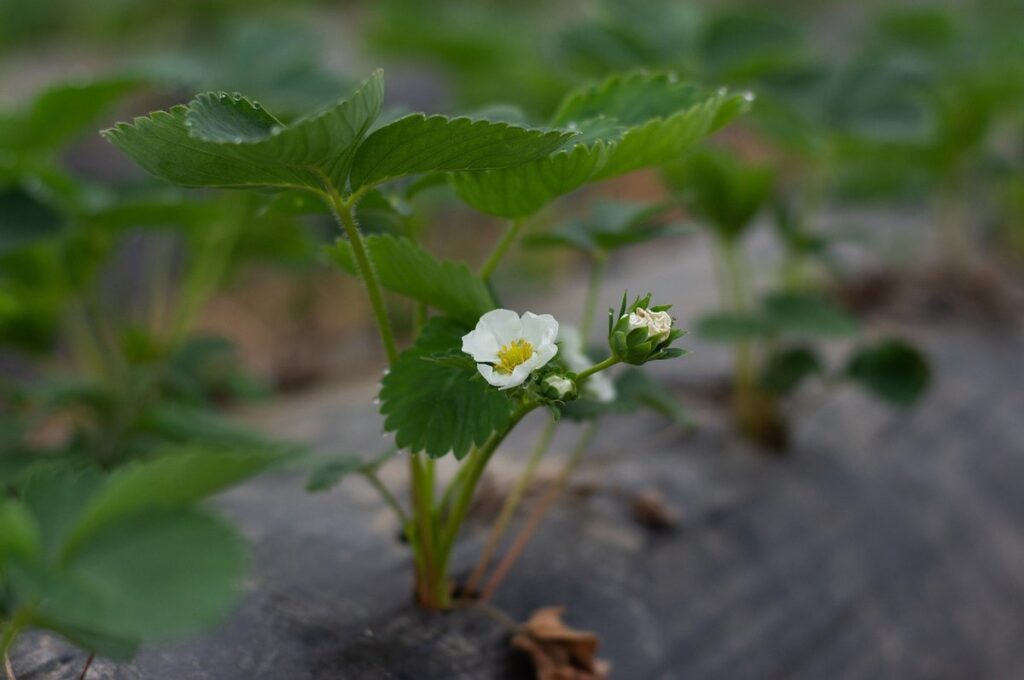
For example, if you’re growing tulips, you can force them into growth using bulb sety techniques as early as 12-14 weeks before the last frost date in your area. By doing so, you’ll be able to enjoy beautiful blooms in late winter or early spring, often when other plants are still dormant.
Types of Bulb Sety
When it comes to forcing bulb setsy, understanding the different types of bulbs is crucial for achieving successful results. There are several popular varieties, each with its unique characteristics and growing requirements.
Tulip bulb setsy, for instance, thrive in cooler temperatures between 40°F to 50°F (4°C to 10°C). They require a 12-14 week cold stratification period, followed by a warm period of around 6-8 weeks. Tulips are one of the most popular forcing options due to their wide range of colors and varieties.
Daffodil bulb setsy, on the other hand, prefer warmer temperatures between 50°F to 60°F (10°C to 15°C). They require a shorter cold stratification period of around 6-8 weeks. Daffodils are known for their bright yellow trumpet-shaped blooms and are often used as a symbol of spring.
Hyacinth bulb setsy also require cooler temperatures between 40°F to 50°F (4°C to 10°C). They need a 12-week cold stratification period, followed by a warm period of around 6 weeks. Hyacinths are known for their fragrant bell-shaped blooms and come in a range of colors.
When selecting bulb setsy, it’s essential to choose varieties that are specifically bred for forcing or are naturally inclined to produce multiple flowers on a stem. This will increase your chances of success and ensure a bountiful harvest.
The Role of Soil and Nutrients
When it comes to forcing bulb setsy, the role of soil and nutrients cannot be overstated. The right soil composition and nutrient availability can make all the difference in promoting healthy growth and successful cultivation.
Think of soil as the foundation upon which your bulb setsy will grow. A well-draining potting mix with a pH between 6.0 and 7.0 is ideal for most bulb varieties. However, some bulbs like rhubarb and camellia prefer more acidic conditions. Be sure to research the specific needs of your chosen variety.
In terms of nutrients, it’s essential to provide your bulb setsy with a balanced diet. A general-purpose fertilizer with a 10-10-10 NPK ratio (nitrogen-phosphorus-potassium) will suffice for most varieties. However, if you want to promote more vibrant colors or encourage blooming, consider using a high-phosphorus fertilizer.
To prepare suitable soil for successful bulb setsy cultivation, start by mixing in compost or well-rotted manure to improve drainage and fertility. Avoid over-fertilizing, as this can lead to weak growth and poor flowering. By getting the soil right, you’ll be giving your bulb setsy the best chance of thriving under forced conditions.
Preparing the Ground for Forcing Bulb Setsy
Before you start forcing your bulb sets, it’s essential to prepare the ground properly. This involves selecting a suitable location and ensuring your soil is ready to support the growth of your prized bulbs.
Choosing the Right Location
When it comes to forcing bulb setsy, choosing the right location is crucial for success. As you prepare your bulbs for indoor growth, consider the following factors to ensure optimal conditions.
Sunlight is a top priority when selecting a location for forcing bulb setsy. Most bulbs require bright, indirect light to thrive, so avoid placing them in low-lit areas or direct sunlight. A south-facing window with sheer curtains is ideal, as it provides gentle warmth and prevents scorching. Aim for 4-6 hours of direct sunlight per day, but be mindful of intense heat that can damage delicate bulbs.
Temperature control is also vital, as bulbs are sensitive to extreme temperatures. Keep the area between 65°F (18°C) and 75°F (24°C), with a slight drop in temperature at night to simulate natural conditions. Ensure good air circulation around the bulbs to prevent moisture buildup, which can lead to rot and disease.
Moisture levels should also be monitored closely, as overwatering is common when forcing bulb setsy. Water sparingly until you notice new growth, then increase watering frequency accordingly. By considering these factors and selecting a suitable location, you’ll set your bulbs up for success in their forced environment.
Soil Preparation Techniques
Before planting bulb setsy, it’s essential to prepare the soil to provide the necessary conditions for healthy growth and optimal flowering. One of the most effective methods is incorporating organic matter into the soil. This can be done by adding compost or well-rotted manure to the potting mix. Not only does this improve soil structure and fertility, but it also helps to regulate moisture levels and suppress diseases.
Another crucial aspect is adjusting pH levels. Most bulb setsy varieties prefer a slightly acidic to neutral soil pH, ranging from 6.0 to 7.0. If your soil is too alkaline or acidic, you may need to add lime or sulfur accordingly. However, be cautious not to over-correct, as this can lead to nutrient deficiencies.
When working with bulb setsy, it’s often beneficial to use specialized potting mixes specifically designed for forcing bulbs. These mixes are formulated to provide the right balance of nutrients and moisture retention, while also preventing waterlogged conditions that can cause rot. Choose a mix that contains a balanced fertilizer blend, perlite or vermiculite for improved drainage, and some organic matter for long-term fertility.
Incorporating these techniques will help create an optimal environment for your bulb setsy to thrive in, setting the stage for successful forcing results.
Timing and Scheduling
Determine the ideal time for forcing bulb setsy by considering your region and climate. In warmer climates, where spring arrives early, it’s best to force bulbs around February or March. On the other hand, in cooler regions with late springs, forcing can begin as late as April.
Plan ahead by keeping a record of previous forcing experiences. This will help you identify optimal timing for your specific region and climate. Make note of weather patterns, temperature fluctuations, and how they affected bulb growth.
Forcing success relies heavily on accurate timing. A one-week delay or advance in forcing can significantly impact results. To ensure optimal growth, choose a week with moderate temperatures between 60-70°F (15-21°C). Avoid sudden changes in temperature, as this can stress the bulbs and compromise their chances of blooming.
Start by checking local weather forecasts for any predicted temperature fluctuations before beginning your forcing process. This will help you plan accordingly and make adjustments to ensure a successful outcome.
Planting and Caring for Bulb Setsy
To successfully force bulb setsy, you need to know how to plant them correctly and provide the right conditions for growth. Let’s dive into the specifics of planting and caring for these beautiful flowers.
Planting Techniques and Tips
When planting bulb setsy, proper technique is essential for optimal growth and blooming. Start by digging a hole that’s about 2-3 times the height of the bulb sety. This will give the roots room to spread out and establish themselves. Place the base of the bulb sety at a depth of around 1-2 inches, making sure the eyes (small buds on the top of the bulb) are facing upwards.
The general rule of thumb for spacing is to plant them about 3-4 inches apart from each other. This will allow for good air circulation and prevent overcrowding, which can lead to fungal diseases. If you’re planting a larger number of bulb setsy, consider staggering their rows to ensure adequate space between each set.
When handling the root systems, gently spread out the roots without bending or damaging them. You can also add some organic matter like compost or well-rotted manure to improve drainage and fertility. Water thoroughly after planting and keep the soil consistently moist during the forcing period.
Watering and Moisture Management
Maintaining proper moisture levels is crucial during the forcing process to prevent bulb setsy from becoming waterlogged and developing rot. Overwatering can also lead to the growth of mold and mildew, which can be detrimental to the bulbs.
To avoid these issues, it’s essential to use a well-draining potting mix and ensure that the container has adequate drainage holes. Water your bulb setsy sparingly but thoroughly, allowing the top 1-2 inches of soil to dry out between waterings. This will help prevent root rot and encourage healthy growth.
Some common irrigation techniques for forcing bulb setsy include watering from the bottom up by placing the pot in a saucer filled with water or using a moisture meter to monitor soil levels. Monitor your plants closely, as different varieties may require varying amounts of moisture depending on factors like temperature, humidity, and light exposure.
Pruning and Support
As you continue to care for your forced bulb setsy plants, it’s essential to prune and provide support to promote healthy growth and maximize blooms. Pruning helps control the plant’s shape, encourages new growth, and directs energy towards flowering.
When to prune: Prune your bulb setsy plants 2-3 weeks after they have finished blooming in their first flush. This will help prevent seed production and encourage a second bloom. Remove any dead or dying flower stems, as well as weak or spindly growth. Cut back the foliage to about half its height, making clean cuts just above a leaf node.
Providing support: As bulb setsy plants grow, they can become top-heavy and require staking to prevent them from falling over. Use bamboo stakes or trellises to provide support, gently tying the stems to the stake using soft materials like twine or clips. This will help maintain the plant’s upright growth habit and promote even blooming.
Monitor your plants regularly for signs of stress or damage, adjusting support as needed to ensure optimal growing conditions. By pruning and providing support at the right times, you’ll be rewarded with a more vigorous and productive bulb setsy plant.
Troubleshooting Common Issues with Forcing Bulb Setsy
Don’t worry if you’re encountering problems while forcing bulb setsy – this section tackles common issues and provides practical solutions to get your plants back on track. We’ll walk through potential roadblocks together.
Identifying and Addressing Pests and Diseases
When forcing bulb setsy, it’s essential to be aware of common pests and diseases that can affect the plants. These issues can quickly spread and damage the entire set, leading to disappointing results. Some common pests include aphids, whiteflies, and spider mites, which can be identified by sticky honeydew droplets on the leaves or tiny eggs on the stems.
Diseases like powdery mildew and botrytis can also occur, causing white, powdery patches or grayish-black spores to form on the leaves. Regularly inspect your bulb setsy for signs of infestation or infection, and take action promptly if you notice any issues. To control pests, use neem oil or insecticidal soap, and quarantine infected plants to prevent spreading. For diseases, remove affected areas and treat with fungicides.
Prevention is also key; ensure good air circulation, maintain optimal temperature and humidity levels, and avoid overwatering. By being vigilant and taking action quickly, you can minimize the impact of pests and diseases on your forced bulb setsy.
Managing Nutrient Deficiencies
Recognizing nutrient deficiencies in forced bulb setsy can be challenging, but there are telltale signs to look out for. If your bulbs are not producing flowers or have weak, spindly growth, it may indicate a lack of essential nutrients. Inspect the leaves and stems carefully for yellowing or browning, as this can signal a deficiency in nitrogen, iron, or magnesium.
Corrective actions depend on the specific nutrient deficiency identified. For instance, if your bulbs are lacking in potassium, they may require more frequent watering to replenish lost salts. Alternatively, a nitrogen deficiency can be addressed by adjusting the fertilizer schedule to provide a balanced diet of nutrients.
To prevent nutrient deficiencies altogether, it’s essential to use high-quality potting mix and fertilizers specifically designed for bulb setsy. Regular monitoring of your plants’ health and adjusting their care accordingly will also help ensure optimal growth and flowering. By taking proactive steps to address potential issues, you can enjoy a successful forcing experience with healthy, vibrant bulbs.
Overcoming Environmental Challenges
When forcing bulb setsy, environmental stressors can quickly throw off even the best-laid plans. Extreme temperatures, humidity fluctuations, and inadequate light are just a few common culprits that can lead to disappointment. To overcome these challenges, it’s essential to be aware of the specific needs of your bulbs.
Start by understanding the ideal temperature range for your bulb set. Most spring-flowering bulbs thrive between 40°F and 70°F (4°C and 21°C), while summer-blooming bulbs prefer warmer temperatures between 65°F and 75°F (18°C and 24°C). Avoid placing your bulbs near heating vents, fireplaces, or drafty windows that can cause temperature fluctuations.
Monitor humidity levels as well. Some bulb sets require a more humid environment to bloom, so adjust the placement accordingly. Ensure good air circulation around your bulb set by keeping them at least 6-8 inches away from any walls or obstacles.
Lastly, provide adequate light for your bulbs. Aim for indirect sunlight or use grow lights that mimic natural daylight conditions. By adapting to these environmental stressors and providing optimal conditions, you can minimize the risk of setbacks and enjoy a thriving bulb setsy.
Harvesting and Storage of Forcing Bulb Setsy
Now that your bulb sets have reached full bloom, it’s time to focus on harvesting and storing them properly to enjoy their beauty for weeks to come. Let’s dive into the best practices for handling these delicate flowers.
Timing for Harvest
When it comes to harvesting forced bulb setsy flowers, timing is everything. You’ll want to pick them when they’re at their peak freshness and beauty. Here are the signs of readiness and optimal picking times to look out for:
Look for buds that have started to swell and show a slight coloration. This usually occurs 2-3 weeks after forcing has begun, depending on factors like temperature and light exposure. Check your bulbs regularly during this period, as they can quickly go from being perfect to overripe.
Check the flowers’ color, shape, and texture. They should be fully colored, with no green or unopened areas remaining. The blooms should also be firm but not stiff, indicating optimal ripeness. Cut the stems at an angle using a sharp tool, making sure not to damage any leaves or stems in the process.
Timing-wise, most forcing bulb setsy flowers are ready for harvest between 4-6 weeks after forcing has begun. However, this can vary depending on your specific environment and the type of bulbs you’re working with. Keep an eye out for these signs, and pick them when they’re at their best to ensure maximum beauty and longevity in your arrangements.
Storing Cut Flowers and Bulbs
When it comes to extending the lifespan of your cut flowers and promoting future growth, proper storage is crucial. Immediately after harvesting, make sure to trim the stems of your cut flowers at an angle, using a clean knife or pruning tool. This helps to prevent the stem from sitting flat on the surface and promotes better water uptake.
For cut flowers, store them in a cool, dry place away from direct sunlight and heat sources. The ideal storage temperature is between 35°F to 45°F (2°C to 7°C). You can also use a refrigerator to prolong their vase life. Keep the stems hydrated by placing them in a container with water or floral foam.
As for bulbs, it’s essential to dry them completely before storing to prevent rot and mold. Tie the bulbs together with twine or paper bags and store them in a cool, dark place. The ideal storage temperature for bulbs is between 40°F to 50°F (4°C to 10°C). By following these simple steps, you’ll be able to enjoy your cut flowers for longer and promote healthy growth of your bulbs for future forcing.
Conclusion: Achieving Success with Forcing Bulb Setsy
By now, you should have a good understanding of the process involved in forcing bulb setsy. Remember, patience is key when it comes to achieving success with this method. Don’t be discouraged if some bulbs don’t respond as expected – it’s all part of the learning process.
To ensure successful results, make sure to monitor your forced bulbs regularly for signs of growth and flowering. Keep them in a bright, cool location until they’re ready to bloom, then move them to a warmer spot with plenty of natural light. Be prepared for an explosion of color when your bulbs finally burst into flower – it’s a truly magical experience.
With practice and persistence, you’ll be well on your way to becoming a master bulb forcer. Keep experimenting with different varieties and techniques until you find what works best for you.
Frequently Asked Questions
Can I force bulb setsy with any type of flower or plant?
No, not all bulbs are suitable for forcing. Certain varieties like tulips, daffodils, and hyacinths respond well to this process, but others may not produce desirable results. Research the specific needs of your chosen flowers before attempting to force them.
How do I prevent overwatering when forcing bulb setsy?
Yes. Overwatering is a common mistake when forcing bulbs indoors. To avoid it, ensure good air circulation around your plants and monitor soil moisture closely. Water only when the top inch of soil feels dry, and use a well-draining potting mix to reduce water retention.
What if my forced bulb setsy doesn’t bloom as expected?
Yes. Don’t be discouraged if your bulbs don’t produce flowers immediately. This can happen due to various factors like insufficient light or inadequate care. Review the main article for troubleshooting tips, and adjust your approach based on your specific situation. Be patient, as some varieties take longer to respond.
Can I force bulb setsy outdoors during warmer months?
While it’s technically possible, forcing bulb setsy outdoors may not yield the same results as indoor forcing. Extreme temperatures, direct sunlight, and other environmental factors can impact flower quality and timing. For best results, replicate the controlled environment described in the main article or consult with an expert for outdoor-specific guidance.
How long do forced bulbs typically last after harvesting?
Typically, cut flowers from forced bulb setsy will remain fresh for 3-5 days when properly cared for. Bulbs can be stored for later use, but their longevity depends on factors like storage conditions and handling practices. To maximize the lifespan of your cut flowers, follow the post-harvest care instructions outlined in the main article.