Fermenting vegetables is an ancient technique that’s making a comeback in modern kitchens. Not only does lacto-fermentation add depth and complexity to your favorite veggies, but it also preserves them for months, saving you money and reducing food waste. With the right recipes and techniques, fermenting can be a fun and rewarding process, yielding delicious results like tangy sauerkraut and crunchy kimchi.
In this comprehensive guide, we’ll take you through the basics of fermenting vegetables safely and successfully. We’ll cover essential tips on creating the perfect environment for lacto-fermentation, including choosing the right containers and monitoring temperature and pH levels. Plus, we’ll share a variety of mouth-watering recipes to get you started, from classic pickling to more adventurous fermented flavors. Whether you’re a seasoned foodie or just starting out in the kitchen, this guide will equip you with everything you need to become a confident fermenter.
Understanding Fermentation Basics
Before we dive into specific recipes, it’s essential to understand the basics of fermentation, which will help you troubleshoot any issues that arise during the process. This fundamental knowledge will also enhance your overall success.
What is Fermentation?
Fermentation is an ancient process that has been used for centuries to preserve food and enhance its nutritional value. At its core, fermentation involves allowing microorganisms such as bacteria or yeast to break down the sugars present in food, resulting in the production of lactic acid and other beneficial compounds.
This process not only helps to extend the shelf life of vegetables but also increases their bioavailability, making their nutrients more easily absorbed by our bodies. The benefits of fermentation are numerous – it can preserve vitamins, minerals, and antioxidants, while also creating new ones that wouldn’t be present in raw or cooked food.
For example, fermented cabbage (sauerkraut) contains a higher amount of vitamin C than its fresh counterpart. Similarly, kimchi, a Korean fermented vegetable dish, is rich in probiotics, which can aid digestion and boost the immune system. By understanding the basics of fermentation, you’ll be able to unlock the full potential of your vegetables and create delicious, nutritious recipes that are perfect for any meal or occasion.
Fermentation also allows for the creation of unique flavors and textures that add depth and variety to dishes. With a little patience and practice, you can start experimenting with various fermented vegetable recipes in your own kitchen, exploring new flavors and benefits each time.
Types of Fermentation Methods
When it comes to fermenting vegetables, there are several methods you can use to achieve delicious and nutritious results. One of the most popular methods is lacto-fermentation, which involves allowing natural bacteria on the vegetables to break down their sugars and create lactic acid. This process is often used for vegetables like sauerkraut, kimchi, and cucumbers.
Another common method is pickling, where vegetables are soaked in a brine solution (usually vinegar-based) to inhibit the growth of unwanted bacteria and preserve the vegetables. While pickling can be done with or without fermentation, it’s often used as a way to extend shelf life.
Cold storage is another method that involves storing fermented vegetables at low temperatures to slow down the fermentation process. This is useful for larger batches or when you want to enjoy your fermented veggies over an extended period. For example, you can store fermented carrots in the refrigerator to keep them fresh for several weeks.
Regardless of which method you choose, it’s essential to understand the basics of sanitation and handling to ensure safe and successful fermentation.
Choosing the Right Vegetables for Fermentation
When it comes to fermenting vegetables, not all options are created equal. Some veggies are naturally more suited for fermentation due to their texture, pH level, and water content. On the other hand, some may not be ideal because they can harbor bacteria or produce off-flavors.
Vegetables high in water content, such as cucumbers and bell peppers, ferment beautifully because the brine helps to create an anaerobic environment that fosters lactic acid production. Cruciferous veggies like broccoli, cauliflower, and cabbage are also great choices due to their relatively low pH levels and firm textures.
Avoid vegetables with high moisture levels or those that tend to be very soft, such as leafy greens, sprouts, and tomatoes. These can lead to an overproduction of lactic acid, resulting in a sour taste or unpleasant texture. Additionally, veggies with strong flavors like onions, garlic, and chili peppers may overpower the other ingredients in your fermented vegetable mix.
For a successful fermentation process, choose vegetables that balance out their flavors and textures, allowing each component to shine while complementing the others.
Preparing Vegetables for Fermentation
Before you start fermenting, it’s essential to prepare your vegetables properly. This involves cleaning, chopping, and sometimes massaging them to remove excess water and stimulate lactic acid production.
Cleaning and Sanitizing
Cleaning and sanitizing are crucial steps that often get overlooked in the fermentation process. However, this is an area where attention to detail can make all the difference between a successful batch of fermented vegetables and a spoiled one. Contamination from unwanted bacteria or yeast can ruin an entire batch of ferments, so it’s essential to take the time to properly clean and sanitize your equipment and ingredients.
Start by washing your hands thoroughly before handling any ingredients or equipment. Next, scrub all utensils, containers, and surfaces with soap and warm water, making sure to remove any residual food particles or debris. Then, sanitize these items using a solution of 1 tablespoon of unscented chlorine bleach per gallon of water. Allow the items to air dry, as heat can damage some materials.
For ingredients like vegetables, fruits, and herbs, it’s essential to clean them thoroughly before fermentation. Scrub them under running water, making sure to remove any dirt or debris. Then, submerge them in a brine solution (water with salt) for 10-15 minutes to help loosen any remaining impurities.
Vegetable Preparation Techniques
When it comes to fermenting vegetables, proper preparation is key. Different techniques can yield varying results, so let’s explore some popular methods for preparing vegetables.
Slicing and dicing are common practices that allow for even fermentation. For example, thinly slicing carrots or beets enables them to break down quickly, resulting in a sweeter, more palatable flavor. On the other hand, cubing or chopping larger vegetables like cabbages or cauliflower creates a more textured finish.
Chopping is another effective method, especially when working with tougher leaves like kale or collard greens. By breaking these fibers down into smaller pieces, you enhance their ability to ferment and blend seamlessly with surrounding flavors.
It’s essential to note that the size and shape of your vegetable preparation can significantly impact fermentation time and quality. A general rule is to aim for uniform cuts, ensuring each piece has a similar surface area exposed to the brine. This promotes consistent pickling and minimizes the risk of over-fermentation or under-fermented areas within the same batch.
Creating a Brine Solution
Creating a brine solution is an essential step in fermenting vegetables. The brine serves as a protective environment for the vegetables to thrive in during the fermentation process. It helps to maintain the ideal acidity level, preventing unwanted bacteria from growing and spoiling the fermentation.
To create a brine solution, you’ll need to mix water with salt and sometimes additional ingredients like sugar or flavorings. A general rule of thumb is to use 1-2% salt by weight of the vegetables being fermented. For example, if you’re fermenting one pound of cabbage, you would use 0.5-1 teaspoon of salt. You can also add a pinch of potassium chloride for better flavor and preservation.
The brine solution should be at room temperature or slightly warmer when mixed with the vegetables. This helps to activate the natural enzymes in the vegetables, kick-starting the fermentation process. It’s essential to use clean equipment and sanitized containers to avoid contamination during this step. With a well-made brine solution, you’ll be able to create delicious fermented vegetables that are full of flavor and nutrition.
Lacto-Fermentation Recipes
Now that you’ve mastered the basics of fermentation, let’s dive into some delicious and easy-to-make lacto-fermented recipes to add to your repertoire. Get ready to ferment your way to tasty condiments!
Simple Sauerkraut Recipe
To make sauerkraut, you’ll need just a few ingredients and some basic equipment. Start by shredding 1-2 pounds of cabbage into thin strips. You can use either green or red cabbage, or a combination of both for added color.
Next, massage the shredded cabbage with your hands for about 5 minutes to release its juices and help break down the cell walls. This will make it easier for the beneficial bacteria to penetrate and ferment the cabbage.
In a large bowl, mix 1 tablespoon of salt with the cabbage and continue to massage until the cabbage is evenly coated with salt. The salt will draw out moisture from the cabbage, creating an environment conducive to fermentation.
Transfer the cabbage mixture to a jar or container with a wide mouth, pressing down on the cabbage to remove any air pockets. Leave about 1-2 inches of space at the top and cover the jar with a lid or cloth to keep dust and other contaminants out.
Fermented Carrot and Ginger Slaw
This fermented carrot and ginger slaw is a delicious and healthy twist on traditional coleslaw. It’s made by combining grated carrots and ginger with a brine solution, allowing the natural bacteria on the vegetables to ferment and create lactic acid.
The benefits of this recipe are numerous: it increases the bioavailability of the nutrients in the carrots, enhances their digestibility, and creates a probiotic-rich food that can support gut health. The addition of fresh ginger adds anti-inflammatory properties and aids in digestion.
To make this slaw, start by grating 2-3 medium-sized carrots and 1-inch piece of fresh ginger. In a separate bowl, mix 1 cup of water with 1 tablespoon of salt until dissolved. Combine the grated carrot-ginger mixture with the brine solution and let it ferment at room temperature for 24-48 hours. Store it in the refrigerator once it reaches your desired level of sourness.
You can use this fermented slaw as a topping for sandwiches, salads, or as a side dish on its own. Experiment with different spices and herbs to give it your own unique flavor profile.
Kimchi-Style Fermented Vegetables
Making kimchi-style fermented vegetables is a fun and rewarding process that requires just a few simple ingredients. Start by selecting a variety of colorful vegetables such as cabbage, carrots, cucumbers, or radishes. Next, create a brine by mixing water, salt, and Korean chili flakes (gochugaru) in a bowl. The ratio of water to salt is crucial: aim for 1-2% salt concentration.
To customize your kimchi-style fermented vegetables, experiment with different spice levels by adjusting the amount of gochugaru or adding other seasonings like garlic, ginger, or fish sauce. For added depth, try using a combination of Korean chili paste (gochujang) and soy sauce. Pack the prepared vegetables into a jar, pour the brine over them, and weigh down the contents to ensure everything is submerged.
Allow 1-5 days for fermentation, depending on your desired level of sourness and texture. Afterward, refrigerate the kimchi-style fermented vegetables to slow down fermentation and preserve their flavor. Be patient and enjoy the tangy, slightly effervescent results – your taste buds will thank you!
Pickling Recipes
Get creative with our pickling recipes, from tangy sauerkraut to crunchy cucumber slices, and discover the perfect way to preserve your favorite vegetables.
Quick-Pickled Cucumbers Recipe
Quick-pickled cucumbers are a staple in many cuisines, and for good reason. They add a tangy crunch to sandwiches, salads, and snacks. This simple recipe uses a basic brine solution that’s easy to make and requires minimal equipment.
To start, you’ll need 1 cup of thinly sliced cucumbers. You can use either English or Kirby cucumbers – the choice is up to personal preference. Next, combine 1 cup of water with 1 tablespoon of salt in a saucepan and bring to a boil. Remove from heat and let cool slightly.
Pack the cucumber slices into a clean glass jar, leaving about 1 inch of space at the top. Pour the cooled brine solution over the cucumbers, making sure they’re completely submerged. If necessary, weight down the cucumbers with a lid or plate to keep them under the liquid.
Let the pickles sit at room temperature for 2-3 hours before refrigerating them. They’ll be ready to eat in as little as 30 minutes, but the longer you let them sit, the more pronounced the flavor will become. You can store them in the fridge for up to a week.
Fermented Beets with Garlic and Dill
When it comes to fermented beets with garlic and dill, you’re in for a treat. This recipe combines the natural sweetness of beets with the pungency of garlic and the freshness of dill, resulting in a flavor profile that’s both earthy and bright.
To make this recipe, start by selecting 2-3 large beets, peeled and chopped into 1-inch pieces. In a separate bowl, mix together 4 cloves of minced garlic, 1/4 cup of fresh dill, and a pinch of salt. Pack the beet mixture into a jar, leaving about an inch of space at the top. Add the garlic-dill mixture on top, followed by a brine made from 1 tablespoon of sea salt, 1 tablespoon of water, and a splash of apple cider vinegar.
As the beets ferment, you’ll notice a beautiful pink color develop, along with a depth of flavor that’s hard to resist. The garlic will mellow out slightly, while the dill adds a bright, herbal note. This recipe is perfect for using up a batch of freshly harvested beets or adding some excitement to your winter meals.
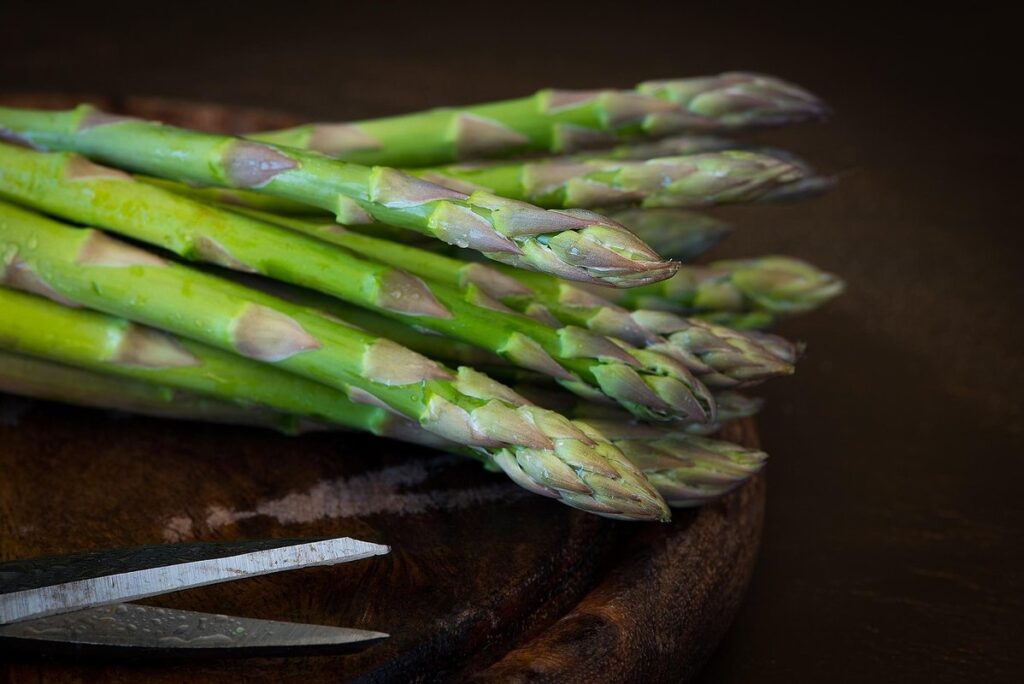
Pickled Asparagus with Vinegar and Sugar
Making pickled asparagus with vinegar and sugar is a straightforward process that requires just a few ingredients. To begin, start by preparing your asparagus spears by trimming the ends and washing them under cold running water to remove any dirt or debris.
Next, create a brine mixture by combining 1 cup of white wine vinegar, 1/2 cup of granulated sugar, and 1 tablespoon of salt in a saucepan. Bring this mixture to a boil over medium heat, stirring occasionally, until the sugar dissolves completely. Remove from heat once boiling has ceased.
While the brine is cooling slightly, pack a clean glass jar with your prepared asparagus spears, leaving about an inch at the top for the liquid. Pour the cooled brine over the asparagus, making sure that all the spears are fully submerged. Seal the jar tightly and store it in the refrigerator to chill.
It’s essential to note that pickling is a quick process, so you won’t need to wait long before enjoying your tangy and sweet pickled asparagus. This recipe makes an excellent side dish or can be used as a topping for salads or sandwiches.
Tips for Successful Fermentation
Now that you’ve mastered the basics of fermenting vegetables, let’s dive into some valuable tips to ensure your ferments turn out perfectly every time. These expert advice will save you from common mistakes.
Monitoring Temperature and Humidity
Monitoring temperature and humidity levels during fermentation is crucial to ensure that your fermented vegetables turn out right. Temperature fluctuations can lead to uneven fermentation rates, while excessive moisture can cause spoilage. To achieve optimal results, you’ll want to create an environment with the perfect balance of warmth and dryness.
A general rule of thumb for vegetable fermentation is to maintain a temperature between 64°F (18°C) and 72°F (22°C). Temperatures above or below this range can lead to off-flavors, texture changes, or even mold growth. Similarly, maintaining humidity levels between 60% and 80% will help prevent drying out of the vegetables while allowing them to ferment evenly.
Use a thermometer and hygrometer to monitor temperature and humidity levels in your fermentation area. If possible, place these devices near the container holding your fermented vegetables for accurate readings. Adjust your environment as needed to ensure optimal conditions for successful fermentation.
Recognizing Signs of Fermentation Failure
When fermentation doesn’t go as planned, it can be frustrating and lead to spoilage. Identifying common signs of failure early on is crucial to salvage the batch. One of the most obvious indicators is an unpleasant odor or slimy texture during the second or third day of fermentation. This could mean your brine’s acidity levels are off, or the vegetables aren’t submerged under liquid.
Another sign is mold growth – a white or greenish fuzz often appears on the surface before spreading throughout the jar. Check for these signs daily and take action immediately to prevent spoilage. If you notice any of these issues, it’s best to stop fermentation and re-start with a new batch using corrected parameters.
Other potential causes include incorrect temperature control (fermentation thrives between 64°F-75°F), contamination from utensils or surrounding environment, or insufficient salt content in the brine. To troubleshoot, ensure your equipment is clean and sanitized regularly. Regularly taste and check the fermentation’s progress to catch any off-flavors early on, allowing you to adjust parameters as needed before spoilage occurs.
Storing Fermented Vegetables
Storing fermented vegetables properly is crucial to maintain their nutritional value and flavor. When stored correctly, fermented veggies can stay fresh for several months, providing a steady supply of healthy probiotics and vitamins.
To store fermented vegetables, start by transferring them to the refrigerator. This will slow down the fermentation process and prevent over-fermentation. Store them in airtight containers, such as glass jars or plastic containers with tight-fitting lids. Make sure to leave about 1 inch of space between the veggies and the lid to allow for expansion.
It’s also essential to keep your fermented vegetables away from direct sunlight and heat sources. Direct sunlight can cause the fermentation process to speed up, leading to over-fermentation and a loss of nutrients. Similarly, heat sources can encourage mold growth and spoilage.
When storing large quantities of fermented veggies, consider investing in a root cellar or a dedicated fermentation fridge. These environments maintain a consistent temperature between 32°F and 40°F (0°C and 4°C), ideal for long-term storage.
Advanced Techniques for Fermenting Vegetables
Now that you’ve mastered the basics of fermenting vegetables, it’s time to take your skills to the next level with advanced techniques to create unique and delicious ferments. We’ll walk you through some expert methods to experiment with.
Using a Fermentation Crock or Jar
Using a fermentation crock or jar is an excellent way to ferment vegetables, and it offers several benefits that make the process easier and more accessible. One of the main advantages of using a fermentation crock or jar is its ease of use. These containers are specifically designed for fermentation, making it simple to create a healthy environment for your vegetables to thrive.
A fermentation crock or jar is also space-saving, perfect for small kitchens or apartments where counter space is limited. They usually come with a wide mouth and a narrow neck, which allows you to easily add and remove vegetables without creating a mess. Additionally, the weight of the crock or jar helps to keep the container stable, preventing it from toppling over during fermentation.
When choosing a fermentation crock or jar, consider one made from ceramic or glass as they are non-reactive and easy to clean. Make sure to select a vessel with a wide mouth for easy access and a lid that fits snugly to prevent contamination.
Creating Customized Fermentation Blends
Creating customized blends of vegetables for fermentation allows you to tailor flavors and textures to suit your taste preferences. To start, think about what types of flavors and nutrients you want to emphasize in your blend. For example, do you prefer the crunch of fresh carrots or the earthiness of beets? Consider combining these with other vegetables like cabbage, onions, or garlic for added depth.
When creating a customized blend, consider the “flavor family” concept. This involves grouping vegetables based on their flavor profiles: sweet (carrots, beets), pungent (garlic, onions), and bitter (cabbage, kale). Experiment with different combinations to find what works best for you. For instance, pairing sweet carrots with pungent garlic creates a well-rounded flavor profile.
Don’t forget about texture when crafting your blend. A mix of crunchy, soft, and chewy vegetables will provide a satisfying eating experience. Feel free to experiment with different ratios of vegetables to suit your taste preferences. Remember, there’s no one “right” way to create a customized fermentation blend – it’s all about what you enjoy!
Frequently Asked Questions
How do I know if my fermentation environment is suitable for lacto-fermentation?
Ensure that your environment maintains a consistent temperature between 64°F to 75°F (18°C to 24°C) and humidity levels between 50% to 90%. Avoid direct sunlight, moisture-rich areas, or extreme temperatures, which can hinder the fermentation process.
What are common signs of over-fermentation or under-fermentation?
Watch for bubbles in the brine, a tangy smell, or a slightly effervescent taste. Over-fermentation might lead to an unpleasantly sour taste, while under-fermentation results in vegetables that are not properly preserved. Monitor your temperature and pH levels regularly.
Can I ferment any type of vegetable, or are some better suited for fermentation?
Some vegetables, like leafy greens, are ideal for lacto-fermentation due to their high water content. Others, such as cucumbers and carrots, work well too. However, crunchy or starchy vegetables might require additional preparation before fermentation.
How do I handle mold growth during the fermentation process?
Remove any visible mold by scraping it off with a clean utensil. Discard any affected areas to prevent spoilage. Check your recipe’s pH level and temperature settings; if necessary, adjust them for optimal fermentation conditions.
Can I ferment vegetables in smaller batches or is it better to make large quantities at once?
Fermentation can be done in both small and large batches, depending on your needs and storage space. Small batches are ideal for beginners or when experimenting with new recipes, while larger quantities can save time and reduce waste in the long run.
What’s a safe way to store fermented vegetables after they’re ready?
Store them in an airtight container in the refrigerator, ensuring that the brine completely covers the vegetables. Use glass jars or crocks specifically designed for fermentation and keep them away from direct sunlight. Check on your stored vegetables regularly for any signs of spoilage.