Are you ready to unlock the secrets of growing your very own elderberry plants? With their stunning purple flowers and delicious berries, it’s no wonder these beautiful shrubs are gaining popularity among gardeners. But, let’s face it – caring for an elderberry plant can be a bit tricky, especially if you’re new to cultivating these lovelies.
In this comprehensive guide, we’ll walk you through the essential steps of growing and caring for your own elderberries, from choosing the perfect variety to pruning and pest management. Whether you’re looking to harvest the berries for jams and jellies or enjoy their medicinal properties, our expert advice will cover all aspects of elderberry cultivation. By following our simple tips and tricks, you’ll be well on your way to enjoying a bountiful harvest of these amazing plants.
Understanding Elderberry Plants
To really thrive, you need a solid understanding of your elderberry plant’s unique needs and characteristics. Let’s dive into what makes these plants tick.
Characteristics and Benefits of Elderberry
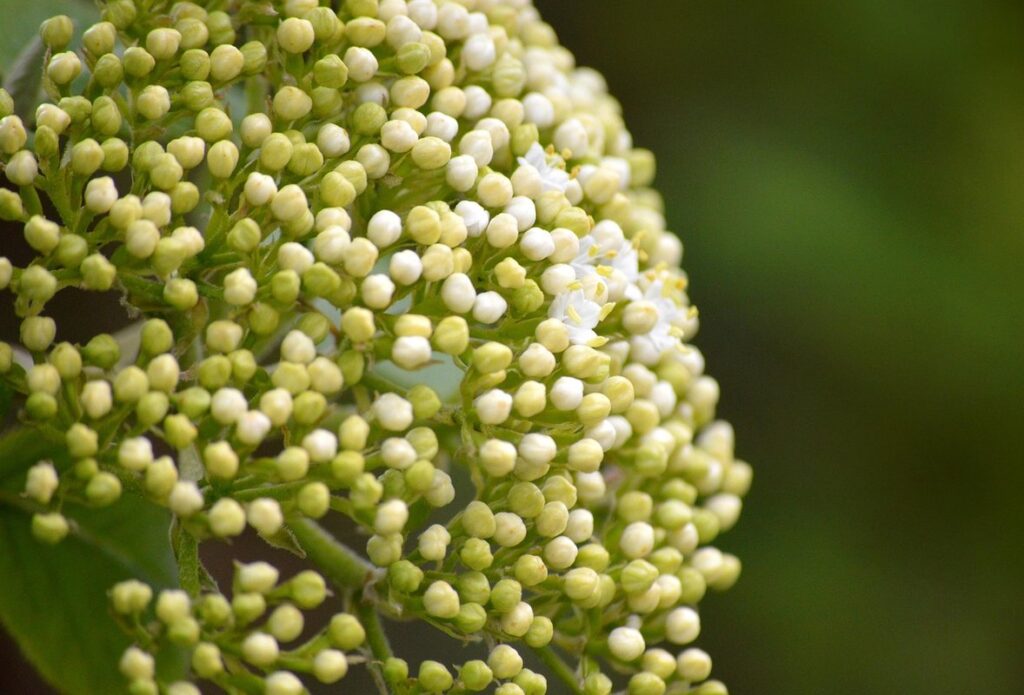
Elderberry plants are easily recognizable by their distinctive physical characteristics and numerous benefits. Upon close inspection, you’ll notice that elderberries have clusters of small, fragrant flowers that bloom in the spring, followed by clusters of purple berries that ripen in the fall. The leaves of the plant are a vibrant green color with 5-7 leaflets, arranged oppositely on the stem.
One of the most significant benefits of elderberry plants is their medicinal properties. The berries, bark, and leaves have been used for centuries to treat various ailments, including fever, coughs, and colds. Elderberry contains anthocyanins, powerful antioxidants that help protect against oxidative stress and inflammation in the body. Studies have shown that consuming elderberry supplements can reduce the severity of flu symptoms and even help prevent the virus from replicating.
To reap the benefits of elderberries, you can use them fresh or dried in teas, tinctures, and syrups. You can also add the berries to jams, jellies, and sauces for a delicious and nutritious twist on traditional recipes. As an added bonus, elderberry plants are also an excellent source of food for wildlife, attracting birds, bees, and butterflies to your garden.
When harvesting elderberries, be sure to only pick the ripe berries, as unripe ones can cause digestive issues. Also, never eat raw or uncooked elderberries, as they contain a toxic compound called amygdalin that can release cyanide when ingested. Always cook or dry the berries before consuming them to ensure maximum safety and nutritional value.
Choosing the Right Variety for Your Needs
When it comes to choosing the right variety of elderberry plant for your needs, you have several options to consider. Two of the most popular species are Sambucus canadensis and Sambucus nigra.
Sambucus canadensis, also known as American elderberry, is a native North American species that thrives in moist environments with full sun to partial shade. It’s an excellent choice for gardeners who want a low-maintenance plant that attracts pollinators and wildlife. Sambucus canadensis has small, fragrant flowers and produces clusters of dark purple berries that are rich in antioxidants.
Sambucus nigra, on the other hand, is native to Europe and Western Asia. It’s known for its larger leaves and more abundant berry production. This variety prefers well-drained soil and full sun to partial shade. Sambucus nigra is often used as a medicinal herb due to its high anthocyanin content.
Consider your climate, available space, and intended use for the plant when deciding between these two species. For example, if you live in a wetter region, Sambucus canadensis may be a better choice. If you’re looking for a plant with higher medicinal value, Sambucus nigra might be the way to go. Researching the specific needs and uses of each variety will help you make an informed decision that suits your gardening goals.
Planting and Propagation Methods
When growing elderberry, learning how to plant and propagate these beautiful plants is crucial for their health and success. In the following sections, we’ll cover various methods for achieving healthy new growth.
Direct Seed sowing vs. Nursery-Bought Plants
When it comes to establishing an elderberry garden, one of the first decisions you’ll need to make is whether to direct seed sow or purchase nursery-grown plants. Both methods have their advantages and disadvantages.
Direct seed sowing allows for a more cost-effective approach, as seeds are often cheaper than purchasing established plants. This method also promotes biodiversity, as multiple varieties can be grown at once. However, it requires patience and dedication, as germination rates may vary and seedlings can take longer to mature. Additionally, direct seeding can be challenging in areas with poor soil quality or extreme weather conditions.
On the other hand, purchasing nursery-grown plants offers a faster establishment time and a higher success rate. These plants are often disease-resistant and have been grown under optimal conditions, reducing the risk of complications. However, this method can be more expensive, and you’ll need to consider space requirements for the mature plant size. Consider your available time and resources before making a decision; direct seed sowing may require a longer commitment, but nursery-grown plants can get established quickly with proper care.
Propagation Methods: Cuttings, Layering, and Division
When it comes to propagating elderberry plants, you have three main methods at your disposal: cuttings, layering, and division. Each method has its own set of advantages and challenges.
Cuttings are one of the most popular propagation methods for elderberry plants. This involves taking a stem cutting from an existing plant, typically in late spring or early summer when the plant is actively growing. The cutting should be around 6-8 inches long, with at least two nodes (the joint where a leaf meets the stem). To increase your chances of success, make sure the cutting is taken from a healthy section of the plant and remove any lower leaves. Dip the cut end in rooting hormone powder or liquid to stimulate root growth.
Layering involves bending a branch of an existing elderberry plant down to the ground, securing it with a rock or U-shaped wire, and allowing it to take root. This method is especially effective for older plants that are already established.
Soil and Climate Requirements
When growing elderberries, it’s crucial to understand their specific needs for soil and climate. This means finding a location that provides optimal moisture levels and suitable temperatures.
Optimal Soil Conditions for Elderberry Growth
When it comes to cultivating healthy elderberry plants, providing optimal soil conditions is crucial for their growth and productivity. The ideal pH range for elderberry plants is between 6.0 and 7.5, with a slightly acidic to neutral preference. If your soil tests outside of this range, consider adding lime to raise the pH or elemental sulfur to lower it.
In terms of nutrient requirements, elderberries are moderate feeders that thrive in well-drained soils rich in organic matter. To promote healthy growth, incorporate compost or aged manure into the soil during planting or as a side dressing after blooming. This will provide essential nutrients like nitrogen, phosphorus, and potassium while improving soil structure.
Proper moisture levels are also vital for elderberry growth. The plants prefer consistently moist soils but can tolerate some drought once established. Avoid overwatering, which can lead to root rot and other problems. Mulch around the plants to retain moisture, suppress weeds, and regulate soil temperature.
Hardiness Zones and Climate Considerations
When choosing an elderberry variety, it’s essential to consider the hardiness zones and climate factors of your region. Elderberries are typically hardy in USDA zones 3-8, but some varieties can tolerate cooler or warmer temperatures. In areas with mild winters, such as USDA zone 9, you may be able to grow varieties that aren’t suitable for colder climates.
To determine which variety will thrive in your area, look at the specific hardiness rating of each plant. For example, ‘York’ and ‘Adams’ are both good choices for cooler climates, while ‘African American’ is more tolerant of heat. If you live in a region with extreme temperatures or high winds, consider planting elderberries in a protected location.
When selecting an elderberry variety, also think about the climate conditions specific to your area. For instance, if you live in an area with wet summers, choose a variety that’s resistant to powdery mildew. Similarly, if you have dry summers, select a drought-tolerant variety. By considering both hardiness zones and climate factors, you can ensure the long-term survival of your elderberry plant.
Watering and Fertilization Techniques
Proper watering and fertilizing are essential for promoting healthy growth and a bountiful harvest from your elderberry plant. In this next part, we’ll cover some valuable techniques to get it right.
Proper Watering Habits for Elderberry Plants
When it comes to watering your elderberry plants, frequency and quantity are crucial to prevent waterlogged soil or drought stress. It’s essential to remember that elderberries prefer well-drained soil and can be sensitive to overwatering. A good rule of thumb is to water your plants when the top 2-3 inches of soil feel dry to the touch.
In terms of frequency, it’s recommended to water your elderberry plants every 7-10 days during the growing season (spring-fall). However, this can vary depending on weather conditions. If you’re experiencing a hot and dry spell, you may need to water more frequently. Conversely, if it’s been raining consistently, you can skip a watering session.
To ensure you’re not overwatering your plants, check the soil moisture by inserting your finger into the soil up to the knuckle. If the soil feels dry, it’s time to water. As for quantity, avoid using too much water at once, as this can lead to root rot and other problems. Instead, water slowly and deeply to encourage deep root growth.
Also, consider the timing of watering sessions. Water your plants in the morning or early afternoon to give them the entire day to absorb the moisture. Avoid watering during peak sun hours when the water may evaporate quickly, leaving the soil dry again.
Nutrient-Rich Fertilizers for Healthy Growth
When it comes to fertilizing your elderberry plants, providing them with nutrient-rich fertilizers is crucial for healthy growth and development. Fertilizers act as a food source for your plants, promoting strong root systems, vibrant foliage, and abundant fruit production.
Organic options like compost tea are an excellent choice for fertilizing your elderberry plants. Compost tea is made by steeping finished compost in water, which releases beneficial microbes that stimulate plant growth. This liquid fertilizer is rich in nutrients, easy to apply, and gentler on the soil than synthetic fertilizers. You can brew a batch of compost tea every few weeks and use it as a foliar spray or soak for your plants.
Another option is balanced blends, such as 10-10-10 NPK (nitrogen-phosphorus-potassium) fertilizers that provide an equal amount of each essential nutrient. These blends are readily available at most gardening stores and are easy to apply according to the package instructions.
Pruning and Training Techniques
To get the most out of your elderberry plant, mastering pruning and training techniques is essential to promote healthy growth, encourage fruiting, and maintain a beautiful shape.
Why Prune Elderberry Plants and When to Do It
Pruning elderberry plants may seem intimidating at first, but it’s an essential step in maintaining their health and promoting a bountiful harvest. By pruning regularly, you’ll encourage bushy growth, which means more flowers and ultimately, more fruit.
Pruning also helps to control the plant’s size, making it easier to manage and maintain. When left unpruned, elderberry plants can grow quite tall and unruly, which can lead to a loss of productivity. By pruning them back, you’ll encourage new growth from the base of the plant, resulting in a more compact and productive shrub.
To promote fruiting, prune your elderberry plants in late winter or early spring, removing any dead, diseased, or damaged branches. This will help to direct the plant’s energy towards producing new flowers and berries. Make clean cuts just above a bud, using sharp pruning tools to minimize damage to the plant. Aim for a balanced look, removing no more than one-third of the plant’s total growth at any given time.
Training Methods for a Supportive Structure
When training your elderberry plant onto a trellis or stake, it’s essential to consider both sunlight exposure and air circulation. These factors are crucial for the health and productivity of your plant.
To begin, choose a sturdy trellis or stake that can support the weight of your mature elderberry plant. Drive the stake into the ground at least 12 inches deep, about 6-8 feet from the plant’s base, making sure it’s secure enough to withstand strong winds. If using a trellis, attach it to the stake for added stability.
Gently tie the stems to the support using soft ties or twine, taking care not to damage the bark. For optimal sunlight exposure, position the support in a spot where direct sunlight hits at least 6 hours a day. Prune any weak growth or branches that are rubbing against each other to promote air circulation and prevent disease.
By providing your elderberry plant with proper training and support, you’ll be able to enjoy a thriving, productive shrub for years to come.
Pest and Disease Management
To keep your elderberry plants thriving, it’s essential to stay on top of pest and disease management, which can be a challenge even for experienced gardeners. Effective strategies will help you protect your plants from common issues.
Common Pests Affecting Elderberry Plants
When it comes to elderberry plant care, pests can be a significant concern. Some common pests that affect elderberry plants include aphids, spider mites, and scale. These tiny insects feed on the sap of the plant, weakening its defenses and making it more susceptible to disease.
Aphids are small, soft-bodied insects that can reproduce quickly, causing infestations in a short amount of time. They often appear on the stems and leaves of elderberry plants, sucking out nutrients and leaving behind sticky honeydew. To control aphid populations, use neem oil as an organic treatment. Mix it with water according to the label instructions and spray it directly on the affected areas.
Spider mites are another common pest that targets elderberry plants. These tiny arachnids spin fine webs on the underside of leaves and feed on sap, causing yellowing or bronzing of the foliage. Insecticidal soap can be used to control spider mite infestations. Spray it on the affected areas, making sure to cover all surfaces evenly.
Scale insects are also a problem for elderberry plants. They secrete a sticky substance called honeydew that attracts ants and promotes the growth of sooty mold. To control scale infestations, use sticky traps or neem oil as mentioned earlier.
Recognizing and Managing Fungal Diseases
Elderberry plants are susceptible to various fungal diseases that can weaken their defenses and lead to unsightly damage. To address this issue effectively, it’s essential to recognize the signs and symptoms of these diseases early on.
Common indicators of fungal infections in elderberry plants include yellowing leaves, black spots or patches on stems and leaves, and white powdery coatings. In severe cases, infected areas may turn soft and mushy. Prevention measures can be taken by maintaining good air circulation around your plants, avoiding overhead watering, and ensuring that the soil drains properly.
Early detection is crucial for successful treatment. Monitor your elderberry plants regularly during the growing season for signs of fungal diseases. When you notice any unusual symptoms, treat the affected area with a fungicide or organic alternative such as neem oil or baking soda solution.
For severe infections, consider pruning infected areas to prevent further damage and promote healthy growth. Regularly inspecting your plants will also help identify potential issues before they spread.
Frequently Asked Questions
How do I know if my elderberry plant is receiving the right amount of sunlight?
Make sure to place your elderberry plant in a location that receives full sun to partial shade, depending on your climate and soil type. In warmer climates, provide some afternoon shade to prevent scorching. Monitor your plant’s growth and adjust its position accordingly.
What are the signs of an overwatered or underwatered elderberry plant?
Keep an eye out for droopy leaves, yellowing foliage, or brown tips on your elderberry plant, which can indicate too much water. Conversely, if the soil feels dry to the touch, it’s time to water your plant. Check the moisture levels regularly and adjust your watering schedule accordingly.
Can I propagate elderberries from seeds, and how successful is this method?
Yes, you can propagate elderberries from seeds, but it’s a more challenging and less reliable method compared to using cuttings or layering. Seed propagation may take several years to produce viable plants, and the resulting seedlings may not retain their parent plant’s characteristics.
How often should I fertilize my elderberry plant for optimal growth?
Fertilize your elderberry plant annually with a balanced, slow-release fertilizer in early spring when new growth begins. You can also side-dress with a high-phosphorus fertilizer during the growing season to promote fruiting and flowering. Avoid overfertilizing, as this can damage your plant.
Are there any specific tools or equipment I need to prune my elderberry plant effectively?
To prune your elderberry plant safely and efficiently, use long-handled pruning shears, loppers, or a pole saw for hard-to-reach areas. Wear protective gloves and eyewear when working with thorny plants like elderberries. Regularly clean and disinfect your tools to prevent the spread of diseases.