Elderberries are a fascinating fruit to grow in your own backyard, offering numerous health benefits, beautiful flowers, and delicious berries. With so many varieties to choose from, including the popular American Elderberry and European Elderberry, you’ll want to know which one suits your climate and needs best. But growing elderberries requires more than just planting seeds or cuttings – it demands attention to detail when it comes to soil conditions, sunlight, and pest management. In this comprehensive guide, we’ll walk you through the entire process of growing, caring for, and harvesting elderberries, covering essential topics like propagation, pruning, and pest control. Whether you’re a seasoned gardener or just starting out, our expert tips will help you cultivate these amazing plants and enjoy their many rewards.
Choosing the Right Variety
With hundreds of elderberry varieties to choose from, selecting the right one for your climate and desired uses can be a bit overwhelming. Let’s break down the key factors to consider when making your selection.
Understanding Elderberry Types
When it comes to choosing the right elderberry variety for your garden, understanding the different types is crucial. There are two main species of elderberries: American (Sambucus canadensis) and European (Sambucus nigra). While they share many similarities, they also have distinct characteristics that set them apart.
American elderberries are native to North America and tend to thrive in warmer climates with moist soils. They produce large clusters of small berries and can grow up to 15 feet tall. On the other hand, European elderberries prefer cooler temperatures and well-drained soils. They produce smaller clusters of larger berries and typically reach heights of around 10-12 feet.
When selecting an elderberry variety, consider your climate and purpose. If you live in a colder region, European elderberries may be a better choice. However, if you have warmer winters and want to grow for medicinal purposes, American elderberries could be the way to go. Some popular varieties include ‘Adams’ and ‘York’, which are known for their high berry yields and disease resistance.
It’s essential to choose a variety that is well-suited to your specific climate and needs. Research local nurseries or online resources to find the best option for you.
Key Considerations for Selection
When selecting an elderberry variety for your garden, there are several key considerations to keep in mind. Disease resistance is one of the most critical factors, as some varieties are more prone to diseases like powdery mildew and anthracnose. Look for varieties that have built-in resistance or are bred specifically to combat common elderberry diseases.
Fruit quality is also an essential consideration. Some varieties produce larger, sweeter berries while others may be smaller but still flavorful. If you plan on using your elderberries for jams, jellies, or wine-making, you’ll want to choose a variety known for its high-quality fruit.
Another important factor is cold hardiness, especially if you live in an area with harsh winters. Some elderberry varieties can tolerate temperatures as low as -20°F while others may only survive down to 0°F. Research the specific climate requirements of each variety and select one that’s suitable for your region. By considering these factors and doing some research, you’ll be able to find the perfect elderberry variety for your garden.
Planting and Care
To successfully grow elderberries, you’ll need to understand the basics of planting and care, from choosing the right soil to pruning for optimal health. Let’s dive into these essential details together.
Preparing the Soil
When it comes to growing elderberries, preparing the soil is just as crucial as selecting the right variety. Elderberries prefer well-draining, rich soil that’s fertile and slightly acidic. Aim for a pH level between 5.5 and 6.5, as this will allow your plants to absorb essential nutrients efficiently.
To improve soil fertility, start by testing its pH levels and nutrient content. Based on the results, amend the soil with organic matter like compost or manure. You can also incorporate aged pine needles, which are naturally acidic and rich in micronutrients. For optimal growth, elderberries require a balanced diet of nitrogen, phosphorus, and potassium (NPK). A 10-10-10 NPK fertilizer is an excellent starting point.
In addition to these measures, consider incorporating cover crops like clover or rye into your rotation plan. These plants help replenish soil nutrients, suppress weeds, and attract beneficial insects – all while enriching the soil for future elderberry plantings.
Watering and Irrigation
Watering and irrigation are crucial aspects of elderberry plant care. Elderberries require consistent moisture, especially during their first year after planting. Aim to water them deeply once or twice a week, depending on weather conditions. A good rule of thumb is to provide about 1-2 inches of water per week.
To achieve optimal watering, use drip irrigation systems or soaker hoses, which deliver water directly to the roots, minimizing evaporation and runoff. These methods also help prevent fungal diseases that thrive in moist environments. When using a sprinkler system, try to avoid overhead watering during peak sun hours, as this can lead to excessive evaporation.
Underwatering can cause elderberry leaves to wilt, while overwatering can encourage root rot and other problems. To avoid these issues, check the soil’s moisture level by inserting your finger into it up to the first knuckle. If the soil feels dry, it’s time to water. If you’re unsure about the right amount of watering for your specific climate or location, consult local nurseries, gardening experts, or your county cooperative extension office for guidance.
Propagation and Pruning
To grow a healthy and thriving elderberry bush, it’s essential to understand how to properly propagate new plants and prune existing ones to maintain their shape. In this section, we’ll cover the basics of propagation and pruning.
Propagation Methods
When it comes to propagating elderberries, you have several methods to choose from, each with its own set of advantages and disadvantages. One popular method is seed germination, but be aware that this process can be slow and unpredictable. Elderberry seeds typically take 1-3 months to germinate, and the resulting plants may not retain the same characteristics as the parent plant.
Another approach is layering, which involves bending a stem of an existing elderberry bush down to the ground and securing it with soil or a rock. This method allows for rooting without disturbing the parent plant, but it can be time-consuming and labor-intensive. Cuttings are also an option, where you take healthy stems from the current season’s growth, remove lower leaves, and pot them up in a well-draining mix.
The key to success with cuttings is to use fresh material and keep the soil consistently moist until roots develop. Layering can be done at any time of year when new growth is present, but seed germination is best attempted during the spring or fall months.
Pruning Techniques
Pruning is an essential aspect of elderberry care, as it promotes healthy growth, encourages fruit production, and maintains the overall shape of the plant. When done correctly, pruning can even help extend the life of your elderberry bush.
There are several pruning techniques to choose from, depending on the age and health of your plant. Tip-pruning involves removing the terminal bud of a shoot to encourage branching and promote a fuller growth habit. This technique is ideal for young plants or those that need to be shaped.
Renewal pruning is used on older plants to remove up to one-third of the oldest canes, making way for new growth. This process helps maintain the plant’s vigor and prevents it from becoming leggy. Prune your elderberry bush in late winter or early spring, before new growth begins. Cut back any dead, diseased, or damaged wood first, then proceed with tip-pruning or renewal pruning as needed. By incorporating regular pruning into your care routine, you’ll enjoy a more productive and healthy elderberry plant.
Pest and Disease Management
As you tend to your elderberry plants, it’s essential to know how to identify and manage common pests and diseases that can impact their health and productivity. This includes fungal infections, insect infestations, and more.
Common Pests Affecting Elderberries
Elderberries are susceptible to various pests that can cause significant damage if left unchecked. One of the most common pests affecting elderberries is aphids, which feed on plant sap and secrete sticky honeydew that attracts ants and promotes fungal growth. Aphid infestations can be identified by curled or distorted leaves, stunted growth, and a sticky substance on the stems.
Spider mites are another common pest that targets elderberry plants, especially in dry conditions. These tiny arachnids suck plant sap, causing yellowing or bronzing of leaves and fine webbing on the undersides of leaves.
Borers, such as the European corn borer, can also harm elderberries by tunneling into stems and creating entry points for diseases.
To manage these pests organically, you can use neem oil to control aphid and spider mite populations. Mix neem oil with water according to label instructions and spray it on the undersides of leaves and stems. Integrated pest management strategies include maintaining good garden hygiene, introducing beneficial insects such as ladybugs or lacewings that prey on pests, and practicing crop rotation to break disease cycles.
By monitoring your elderberry plants regularly and using these organic control methods, you can minimize the risk of pest infestations and ensure a healthy harvest.
Managing Diseases in Elderberry Plants
As an elderberry grower, it’s essential to be aware of common diseases that can affect your plants. One of the most prevalent issues is powdery mildew, which causes a white, powdery coating on leaves and stems. Leaf spot is another common problem, characterized by small, circular lesions on leaves.
To identify these diseases, look for symptoms such as discolored or distorted leaves, reduced growth, and a general decline in plant health. When managing disease outbreaks, it’s crucial to use fungicides correctly. Copper-based products are a popular natural alternative to synthetic chemicals. Apply these treatments according to the manufacturer’s instructions, making sure to cover all affected areas.
Preventing disease spread is also vital. Practice good hygiene by removing and disposing of infected plants, disinfecting pruning tools, and avoiding overhead watering, which can splash spores onto leaves. Regularly inspect your plants for signs of disease, and take action promptly if you notice any issues.
Harvesting and Utilization
Now that you’ve cultivated a thriving elderberry bush, it’s time to reap what you’ve sown, harvesting the berries at their peak ripeness. We’ll walk you through the best ways to utilize your bounty.
Timing the Harvest
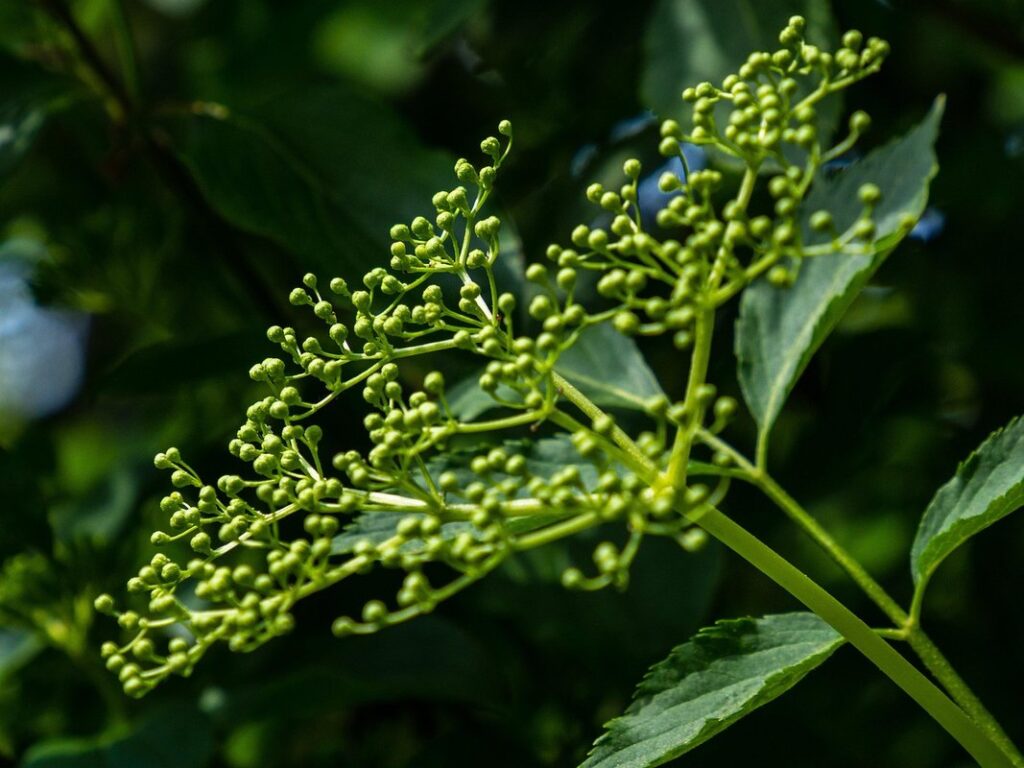
When it comes to harvesting elderberries, timing is everything. You want to pick them at the optimal stage of ripeness for the best flavor and quality. So, how do you know when they’re ready?
First, take a look at their color. Ripe elderberries are a deep purple or black color, depending on the variety. If they’re not yet ripe, they’ll be more of a pale green or yellowish tint. Berry texture is also important – choose berries that are plump and firm to the touch.
Another key indicator is acidity levels. As the berries ripen, their pH level decreases, making them sweeter and less tart. You can check this with a pH meter or use a simpler method: taste one! If it’s still too tart, wait a few more days for the sugars to develop.
In general, elderberries are ready to harvest when they’re fully ripe. This is usually around late summer to early fall, depending on your climate and specific variety. Be sure to check on them regularly towards the end of the season, as this is when they’re most tender and flavorful.
Preserving Elderberry Fruit
Preserving elderberry fruit is an exciting process that allows you to enjoy these delicious berries throughout the year. There are several methods to choose from, and the right one for you will depend on your personal preferences and storage space constraints.
Freezing is a great option if you want to preserve large quantities of elderberries without taking up too much space. Simply rinse the berries, remove any stems or debris, and spread them out in a single layer on a baking sheet. Once frozen, transfer them to an airtight container or freezer bag for later use. You can also freeze elderberry jam or syrup made from fresh or frozen berries.
Jam-making is another popular method that allows you to create delicious homemade preserves using fresh elderberries. To make jam, simply cook the berries with sugar and pectin (optional) in a saucepan until they reach your desired consistency. Dehydrating is also an excellent way to preserve elderberries, but it requires more equipment and expertise.
When choosing a preservation method, consider how you plan to use the preserved fruit. If you want to make smoothies or add fresh flavor to recipes, freezing or dehydrating might be best. However, if you prefer homemade preserves for toast or yogurt, jam-making is the way to go. Ultimately, experiment with different methods and find what works best for your lifestyle and taste preferences.
Additional Considerations
As you prepare to grow elderberries, there are a few more factors to consider that will help ensure your plants thrive and produce a bountiful harvest each year. These additional considerations can be just as important as proper planting and care.
Elderberry Varieties for Different Regions
When choosing an elderberry variety for your garden, it’s essential to consider the climate and region you’re growing in. Different regions face unique challenges such as extreme temperatures, humidity, and disease pressure that can impact the plant’s health.
For colder climates (USDA zones 3-5), varieties with high cold hardiness are necessary. Some popular options include ‘York’ and ‘Maryland Giant’, which can tolerate temperatures as low as -20°F (-29°C). These varieties also tend to be more resistant to disease, making them ideal for regions prone to wet conditions.
In hotter climates (USDA zones 6-8), heat-tolerant varieties like ‘Adapta’ and ‘Nordic’ are recommended. These plants have a higher ability to withstand temperature fluctuations and can thrive in areas with prolonged summers.
It’s also worth noting that some varieties, such as ‘Nova’ and ‘Riviera’, exhibit improved disease resistance and are suitable for regions with moderate temperatures (USDA zones 4-7). Consider factors like soil type, moisture levels, and local pest issues when selecting the right variety for your region. Researching the specific needs of your area will help ensure the health and productivity of your elderberry plants.
Elderberry Growing as a Business or Hobby
Whether you’re interested in growing elderberries as a business venture or an enjoyable hobby, there are numerous opportunities to explore. With the rise of local food movements and the demand for unique products, elderberry growing can be a profitable endeavor.
To start an elderberry business, research your market and identify potential customers, such as health food stores, farmers’ markets, or online platforms. Develop a marketing strategy that highlights the benefits of elderberries, including their high antioxidant content and versatility in culinary applications. When pricing products like jams, wines, or supplements, consider factors like production costs, competition, and target audience willingness to pay.
For hobbyists, growing elderberries can be a fun and rewarding experience. Consider starting with a few plants and experimenting with different recipes or crafts, such as making wine, jam, or dried flower arrangements. Join local gardening groups or online forums to connect with other elderberry enthusiasts and share knowledge and resources. With patience and practice, you can enjoy the fruits of your labor while contributing to your community’s food security and sustainable practices.
Frequently Asked Questions
Can I grow elderberries from seed, or should I start with a nursery-bought plant?
Growing elderberries from seed can be challenging due to the variable quality of seeds and the time it takes for them to mature. It’s recommended to start with a high-quality nursery-bought plant to ensure faster growth and better results.
What are some common mistakes to avoid when planting elderberry cuttings or seedlings in my garden?
Common mistakes include over-watering, under-watering, and not providing enough sunlight. Make sure to research the specific needs of your chosen variety and provide the right conditions for them to thrive.
How often should I prune my elderberry plant, and what are some general pruning techniques to keep in mind?
Pruning is essential for promoting healthy growth and fruit production. Prune your elderberry plant annually, removing dead or diseased branches, and cutting back new growth by about one-third to encourage branching.
Can I grow elderberries in containers, or do they require a lot of space in the ground?
Elderberries can be grown in containers, but make sure it’s at least 12-18 inches deep to accommodate the plant’s root system. This option is ideal for smaller spaces or for controlling soil conditions and pests.
What are some natural methods for managing pests and diseases on my elderberry plants, aside from using chemical pesticides?
Natural methods include introducing beneficial insects, practicing good sanitation and hygiene, and using neem oil or other organic pest control products. Regular monitoring and prompt action can also help prevent infestations and outbreaks.