Are you ready to unlock the secrets of growing your own delicious and nutritious elderberries? With their rich history, versatility in cooking, and impressive health benefits, it’s no wonder why many gardeners are eager to cultivate these amazing plants. However, growing elderberries can be a bit challenging, especially for beginners. That’s why we’ve put together this comprehensive guide, covering everything from selecting the perfect variety to harvesting your bounty.
In this article, you’ll learn how to choose the right climate and soil conditions, propagate your elderberry bushes with confidence, and keep pests at bay. We’ll also dive into pruning techniques and show you how to harvest and handle your post-harvest elderberries like a pro. By following these expert tips, you’ll be well on your way to enjoying homegrown elderberries all year round!
Choosing the Right Variety
When it comes to growing elderberries, selecting a variety that suits your climate and desired uses is crucial. Here’s how to choose an elderberry variety that will thrive in your garden.
Understanding Elderberry Types
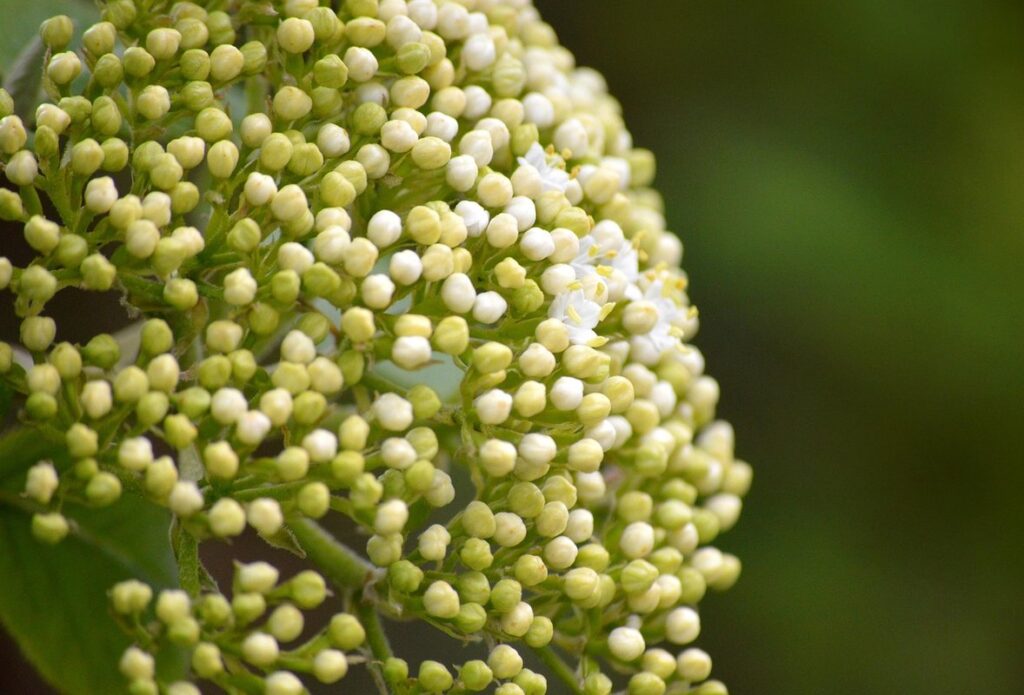
When it comes to choosing the right variety of elderberry for your garden, understanding the different types is crucial. There are three primary categories: American (Sambucus canadensis), European (Sambucus nigra), and hybrids.
American elderberries are native to North America and tend to grow taller (up to 20 feet) with a more upright habit. They prefer moist soils and full sun, making them ideal for woodland edges or along streams. In contrast, European elderberries are shorter (around 10-15 feet) with a more spreading habit and require drier soils.
Hybrid varieties offer the best of both worlds: they’re often compact (around 6-12 feet), disease-resistant, and produce high-quality berries. Some popular hybrids include ‘Adams’ and ‘York’. When selecting an elderberry variety, consider your climate, soil type, and available space. If you live in a region with limited sunlight or dry soils, a hybrid or European elderberry might be the better choice.
Ultimately, research local nurseries and talk to fellow gardeners to determine which variety thrives in your specific region. With some trial and error, you’ll find the perfect elderberry for your needs.
Climate and Soil Requirements
When it comes to growing elderberries successfully, understanding the ideal climate conditions and soil requirements is crucial. First, let’s talk about temperature – elderberries prefer a temperate climate with warm summers and cold winters, typically between 30°F (-1°C) and 80°F (27°C). They thrive in USDA Hardiness Zones 3-8, where temperatures rarely drop below -40°F (-40°C).
In terms of sunlight, elderberries require full sun to partial shade, with at least six hours of direct sunlight per day. As for humidity, they prefer moist but well-drained soils, making them adaptable to a range of environments.
Regarding soil requirements, elderberries prefer slightly acidic to neutral soil pH (5.5-7.0). The ideal soil should also have good nutrient content, particularly nitrogen, phosphorus, and potassium. To achieve this, incorporate compost or well-rotted manure into the soil before planting. A general rule of thumb is to add 2-3 inches of organic matter per year to maintain fertility. Regular soil testing will help you determine if adjustments are needed.
Planting and Propagation
To successfully grow a thriving elderberry bush, you’ll want to start by learning how to properly plant and propagate your new tree from seed or stem cuttings. This is where things can get really exciting!
Best Time to Plant
When it comes to planting elderberries, timing is everything. The optimal time to plant will vary depending on your region’s climate and weather patterns. In general, spring and fall are the best times to plant elderberries.
In regions with mild winters, such as zones 6-8, you can plant in early spring, usually around late March to early April, when the soil can be worked and the threat of frost has passed. This allows the plants to establish themselves before the hot summer months.
For areas with harsher winters, planting in the fall, about 6-8 weeks before the first frost date, is a better option. This gives the roots time to settle in before winter sets in, making them more resilient to cold temperatures. It’s essential to check your local frost dates and adjust your planting schedule accordingly.
Keep in mind that elderberries are not ideal for areas with extremely hot summers or wet winters. If you’re unsure about the best time to plant in your area, consult with a local nursery or gardening expert for guidance.
Propagation Methods
Elderberry plants can be propagated using various methods, each with its own advantages and disadvantages. One popular method is stem cuttings, which involves cutting a section of stem from the parent plant and rooting it in a propagation medium. This method is relatively easy and fast, but the success rate can be low due to factors like humidity and temperature control.
Another method is layering, where a portion of the stem is buried under soil while still attached to the parent plant. This encourages roots to form, which can then be severed from the parent plant once they reach a certain length. Layering has a higher success rate than stem cuttings but requires more time and patience.
Division involves separating established elderberry plants to create new ones. This method is suitable for mature plants with multiple stems, as it allows you to separate and replant individual sections. Grafting is another option, where a piece of stem from one plant (scion) is joined to the root system of another (rootstock). This method is often used in commercial settings due to its high success rate and ability to combine desirable traits.
Each propagation method has its unique requirements and challenges. It’s essential to research and choose the most suitable approach for your specific situation, taking into account factors like climate, soil quality, and desired outcomes.
Soil Preparation and Fertilization
Before you start planting your elderberry bushes, it’s essential to prepare the soil for optimal growth. This includes testing and fertilizing the soil to ensure it has the right balance of nutrients.
Preparing the Soil
When it comes to growing healthy and thriving elderberry plants, preparing the soil is one of the most crucial steps. Elderberries prefer well-draining, fertile soil with a pH between 5.5 and 6.5. If your soil falls short on these parameters, don’t worry – there are ways to amend it.
Start by testing your soil’s pH level using a DIY kit or sending a sample to a lab for analysis. Based on the results, you can add lime to raise the pH or sulfur to lower it. Another essential step is removing weeds and debris from the area. This will prevent competition for nutrients and make it easier to spot potential pests or diseases.
Improving drainage is also vital, as elderberries don’t tolerate waterlogged soil well. You can achieve this by incorporating organic matter like compost or well-rotted manure into your soil. Aim for a mix of 10-20% composted material and the rest regular topsoil.
Nutrient Requirements
When it comes to growing healthy and productive elderberry bushes, providing them with the right nutrients is crucial. Elderberries require a balanced diet of essential macronutrients, including nitrogen (N), phosphorus (P), and potassium (K).
Nitrogen promotes leaf growth and development, while phosphorus supports root growth, flower, and fruit production. Potassium helps to maintain overall plant health by regulating water balance and defending against diseases. A general rule of thumb is to apply a balanced fertilizer with an NPK ratio of 10-10-10 in the early growing season, followed by a bloom-specific fertilizer with a higher phosphorus content (e.g., 15-30-15) when your elderberries begin producing flowers.
For example, you can use a slow-release fertilizer that provides a steady supply of nutrients throughout the growing season. Aim to fertilize your elderberries at planting time, again in early spring, and once more after they’ve finished blooming. This will help promote healthy growth, encourage fruiting, and support overall plant vigor.
Pest and Disease Management
Effective pest and disease management is crucial for a healthy and productive elderberry harvest, so let’s dive into some practical tips to keep your plants thriving. We’ll cover common issues and organic solutions to get you started.
Common Pests and Diseases
As an elderberry grower, it’s essential to be aware of the potential pests and diseases that can affect your plants. Some common issues include aphids, spider mites, powdery mildew, and root rot.
Aphids are small, soft-bodied insects that feed on plant sap, causing curled or distorted leaves. To control aphid infestations, use a strong jet of water to dislodge them from the plants, followed by a neem oil spray to prevent re-infestation. You can also introduce natural predators like ladybugs or lacewings into your garden.
Spider mites are tiny, eight-legged arachnids that feed on plant sap, causing yellowing or bronzing of leaves. Control spider mite populations with insecticidal soap or horticultural oil sprays. Regularly inspect plants for signs of infestation and maintain good air circulation to prevent the spread of these pests.
Powdery mildew is a fungal disease that causes white powdery patches on leaves, while root rot is caused by overwatering or poor drainage, leading to soft, mushy stems. To prevent these issues, ensure your plants receive well-draining soil and adequate air circulation. Regularly inspect for signs of disease and treat promptly with fungicides if necessary.
Organic Control Methods
When it comes to managing pests and diseases on your elderberry farm without harming the environment, you have plenty of eco-friendly options. One of the most popular alternatives is neem oil, a natural pesticide derived from the seeds of the neem tree. Neem oil works by disrupting the insect’s hormone system, preventing them from reproducing or feeding.
To use neem oil effectively, mix it with water according to the product label and spray it on your plants during the early morning or evening when the sun is not intense. This method can help control aphids, whiteflies, spider mites, and other pests that commonly affect elderberry plants.
Another organic solution for managing pests is garlic spray. Garlic has natural insecticidal properties that repel pests and prevent them from feeding on your plants. To make a homemade garlic spray, blend 3 cloves of minced garlic with 1 quart of water and let it sit for 24 hours before straining the mixture and spraying it on your elderberry plants.
Remember to always read the label and follow the instructions when using any new product to avoid harming your plants or the environment.
Pruning and Training Techniques
To get the most out of your elderberry plants, you’ll want to learn how to prune and train them effectively, which we’ll cover in detail next. This will help promote healthy growth and a bountiful harvest.
When to Prune
When to Prune is a critical aspect of elderberry cultivation. Regular pruning not only promotes healthy growth but also encourages fruiting and maintains shape. This process helps to control the plant’s size, remove dead or diseased branches, and allow sunlight to penetrate deeper into the plant.
Pruning should be done at different stages of the plant’s life cycle. For young plants (1-2 years old), prune back the tips by about one-third in late winter or early spring to encourage branching and prevent legginess. This will also help to promote a strong root system.
For established plants, prune in late winter or early spring, removing any dead, diseased, or damaged branches. Cut back vigorous shoots to about one-quarter of their length to control the plant’s size and promote fruiting. Prune again after harvesting to maintain shape and encourage new growth.
Timing is crucial when it comes to pruning. Prune during the dormant season (winter) to minimize stress on the plant. Avoid pruning in the spring, as this can stimulate new growth that may not have enough time to harden off before winter.
Training Systems
When it comes to training elderberry plants, there are several systems you can use to support their growth, increase yields, and add visual interest to your garden. Espalier is a popular method that involves pruning the plant to grow flat against a wall or fence. This technique not only saves space but also showcases the plant’s delicate flowers and berries.
Trellises provide another option for supporting elderberry plants, allowing them to climb upwards while keeping their roots anchored. You can use a single trellis or create an obelisk-style support system to give your plant more structure. Make sure to choose a sturdy material that will withstand the weight of mature branches and fruit.
Another benefit of training systems is that they help control the size and shape of your elderberry plants, promoting healthy growth and reducing maintenance needs. For example, by pruning regularly and training the plant onto a trellis, you can direct its energy towards producing more berries rather than sprawling outwards. This results in a bountiful harvest with minimal effort required on your part.
Harvesting and Post-Harvest Care
Proper harvesting techniques are crucial for the health and flavor of your elderberries, which is why we’ll be diving into the details of how to pick them at the right time. Let’s take a look!
Timing the Harvest
When to harvest elderberries is crucial for optimal flavor, color, and nutritional content. The timing depends on the specific variety, climate, and intended use of the berries. Generally, elderberries are ready to be picked 7-10 days after they reach full color, usually in late summer or early fall.
For culinary purposes, such as jams, jellies, and pies, it’s best to harvest elderberries when they’re fully ripe but still firm to the touch. This will ensure maximum flavor and texture. For wine-making and medicinal purposes, however, berries that are slightly unripe or green can be used, as they’ll ripen during processing.
In warmer climates, elderberries may be ready for harvest in mid-August, while cooler areas may need to wait until September or October. It’s essential to monitor the berries regularly, checking for color, texture, and sweetness levels. Harvesting at the right time will result in a bountiful crop with superior quality and flavor. Be sure to harvest gently to avoid bruising the delicate stems and leaves.
Harvesting elderberries at the optimal time can make all the difference in the final product’s taste, nutritional value, and overall quality.
Post-Harvest Handling
Proper post-harvest handling is crucial to maintaining the quality and shelf life of your elderberries. Once you’ve harvested your berries, it’s essential to store them properly to prevent spoilage and preserve their flavor and nutritional content.
To start, sort through your harvest and remove any damaged or rotting berries. This will help prevent mold and decay from spreading to the rest of the crop. Next, dry the elderberries thoroughly, either by air-drying them on paper towels or using a food dehydrator set at 135°F (57°C). Remove any stems and leaves, as these can harbor bacteria that cause spoilage.
For longer-term storage, you can freeze your dried elderberries in airtight containers. Make sure to label the containers with the date and contents, so you know what you have stored away. Alternatively, you can process the berries into various products like jams, jellies, or syrups, which can be canned or frozen for later use.
By following these steps, you’ll be able to enjoy your homegrown elderberries throughout the year while maintaining their quality and nutritional value.
Frequently Asked Questions
Can I grow elderberries in containers if I don’t have a lot of space?
Yes, elderberry bushes can thrive in large containers with at least 12-18 inches of root depth and well-draining soil mix. Make sure the container is at least 24 inches deep to accommodate the bush’s mature size. Keep in mind that container-grown elderberries will require more frequent watering.
How often should I water my newly planted elderberry bushes?
Water your elderberry bushes regularly during their first year of growth, keeping the soil consistently moist but not waterlogged. Once established, they can tolerate some drought, but consistent moisture will promote healthy growth and fruiting.
Can I use organic control methods to manage pests and diseases on my elderberries?
Yes, using integrated pest management (IPM) techniques that incorporate organic methods can be an effective way to manage common pests and diseases without harming the environment. This might include introducing beneficial insects, practicing good sanitation, and using natural fungicides or insecticidal soap.
How long does it take for an elderberry bush to mature and produce fruit?
Elderberries typically take 2-3 years to mature after planting, with some varieties producing flowers and berries sooner. Factors such as climate, soil quality, and pruning practices can influence the time to maturity.
Can I propagate new plants from cuttings taken during harvest time?
While it’s technically possible to root elderberry cuttings at any time, taking cuttings in late summer or early fall (after harvesting) is often best for propagation. Cut back a mature branch about 6-8 inches from the tip, remove lower leaves, and plant the cutting in well-draining soil with a rooting hormone treatment.