As a gardener, you know that a well-defined border around your vegetable bed is more than just a cosmetic touch – it’s a crucial element in maintaining soil health, preventing erosion, and keeping weeds at bay. But edging isn’t just about function; it can also add visual appeal to your garden, creating a clear distinction between beds and pathways. However, choosing the right material, installing it correctly, and ensuring its durability can be overwhelming. In this comprehensive guide, we’ll walk you through the process of planning, installing, and maintaining edging for your vegetable bed. From selecting the perfect material to repairing damaged edges, we’ve got you covered with expert tips and tricks to create a beautiful, functional garden bed that will thrive for years to come.
Understanding the Importance of Edging
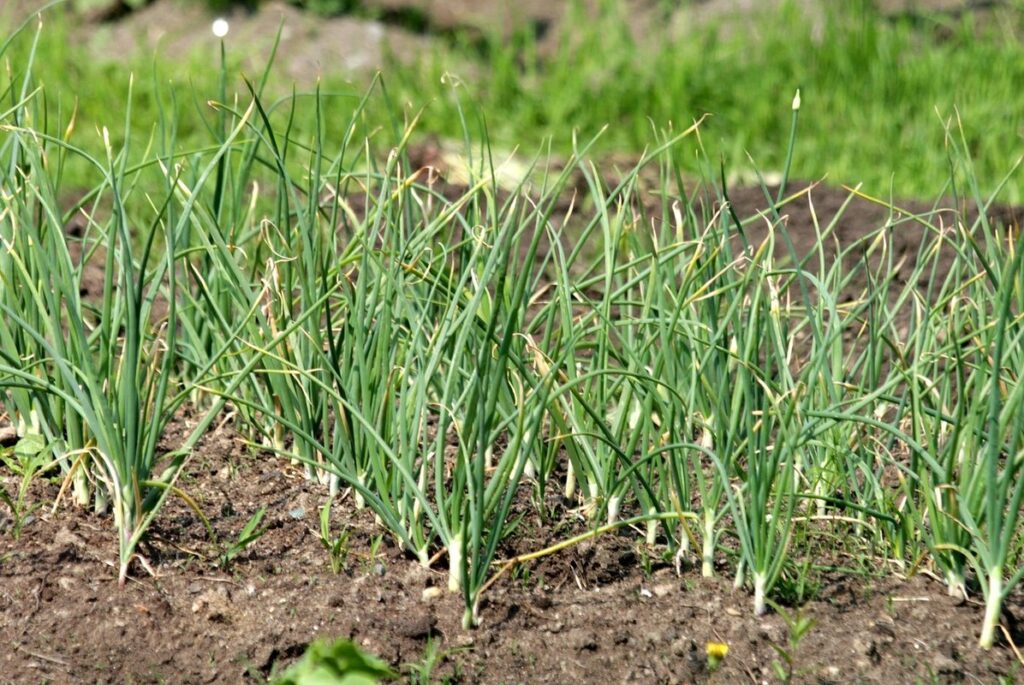
Understanding the importance of edging is crucial for any vegetable bed, as it not only adds a professional finish but also protects your plants from damage.
Benefits of Edging Your Vegetable Bed
When you take the time to edge your vegetable bed, you’re not just creating a visually appealing space – you’re also investing in its long-term health and functionality. Let’s face it: edging is more than just a cosmetic touch; it has tangible benefits that can make a big difference to your gardening experience.
For one, a well-defined border gives your garden a polished look and feel, which is especially important if you have a small plot or want to create a visually appealing display. But beyond aesthetics, edging also helps to prevent soil erosion – a common problem in gardens where water tends to collect or wash away topsoil. By creating a barrier between the bed and surrounding areas, you can keep your soil in place and reduce the risk of nutrient loss.
In addition to these benefits, edging can also increase accessibility within your garden. A defined border makes it easier to navigate the space, especially if you’re working with raised beds or have limited mobility. Plus, a clean edge provides a clear visual distinction between different areas of your garden, helping you to stay organized and focused on specific tasks. By incorporating edging into your gardening routine, you can create a more efficient, effective, and visually pleasing space that’s tailored to your needs.
Types of Edging Materials Available
When it comes to edging vegetable beds, you have a variety of materials to choose from. Each type has its own set of benefits and drawbacks that can impact the overall look and durability of your garden bed.
Plastic edging is a popular choice for beginners due to its affordability and ease of installation. It’s also lightweight and can be cut with a utility knife, making it simple to shape around curves or corners. However, plastic edging can become brittle over time and may crack in extreme temperatures. Additionally, it may not provide the same level of weed suppression as other materials.
Metal edging is another option that offers excellent durability and resistance to weeds. It’s available in various styles, including aluminum, steel, and copper. While metal edging can be more expensive than plastic, its strength and long lifespan make it a worthwhile investment for gardeners who plan to maintain their beds for years to come.
Wooden edging is a more natural option that blends seamlessly with the surrounding landscape. It’s also relatively inexpensive compared to other materials. However, wooden edging may require more maintenance over time as it can rot or decay if not properly sealed.
Stone edging provides an attractive, long-lasting finish that complements most garden styles. It’s available in various colors and textures and can be used to create a seamless transition between beds and pathways. While stone edging is generally more expensive than other materials, its durability and low maintenance requirements make it a popular choice among experienced gardeners.
Ultimately, the type of edging material you choose will depend on your specific needs and preferences. Consider factors such as budget, climate, and desired level of maintenance when making your decision.
Factors to Consider When Choosing an Edging Material
When selecting an edging material for your vegetable beds, there are several key factors to consider. First and foremost, think about your budget. While it’s tempting to opt for the cheapest option, keep in mind that a higher-quality edging material will last longer and require less maintenance in the long run.
Consider the durability of the edging material as well. Will it withstand the elements and heavy use? For example, plastic edging is lightweight and easy to install but may not be suitable for areas with high foot traffic or extreme weather conditions. On the other hand, metal edging is more durable and can withstand rough handling, but may require more maintenance.
Aesthetics also play a significant role in choosing an edging material. Think about the overall look and feel you want to achieve in your garden. For example, if you’re going for a rustic, natural look, consider using reclaimed wood or bamboo edging. If you prefer a more modern, sleek appearance, metal or plastic edging might be the way to go.
It’s also worth considering the environmental impact of your chosen edging material. Look for options that are sustainable and eco-friendly, such as recycled plastic or biodegradable materials.
Planning Your Edging Project
Now that you’ve decided on a material for your edging, it’s time to think about the logistics of your project. Consider your bed size and design complexity when planning your work.
Measuring and Marking Out the Bed Area
When measuring and marking out the bed area for edging vegetable beds, precision is key to ensure a professional finish. Start by walking around the bed area and noting down its dimensions, including the length, width, and any irregular shapes or angles.
Next, use a tape measure or hose pipe to mark out the bed’s perimeter with stakes and twine. This will give you a clear visual representation of the edging area. Make sure to take into account any obstructions such as trees, garden features, or existing paths that may affect your edging placement.
As you mark out the area, consider the type of edging material you’re using and its specific requirements. For example, if you’re installing plastic edging, make sure it’s aligned with any nearby surfaces to ensure a seamless joint.
Use a level to double-check the alignment of your stakes and twine, ensuring that they’re perfectly straight and even. Once marked out, take note of any potential issues or challenges that may arise during installation, such as uneven terrain or overhanging branches.
Choosing the Right Edging Style and Pattern
When it comes to choosing the right edging style and pattern for your vegetable beds, there are several options to consider. A straight edge is a popular choice, as it provides a clean and simple finish that works well with most garden designs. However, if you want to add some visual interest to your beds, consider using curved edges. This can help create a more fluid and natural look in your garden.
If you’re looking for something more decorative, there are plenty of options available. For example, you could use a brick or stone edging to add a touch of elegance to your vegetable beds. Alternatively, you could opt for a plastic or metal edging that comes in a variety of patterns and designs.
When choosing an edging style, consider the overall aesthetic you want to achieve in your garden. Think about the color palette, texture, and style of your existing features, such as paths and planters. By selecting an edging that complements these elements, you can create a cohesive and professional-looking finish.
Considerations for Different Soil Types and Bed Sizes
When planning your edging project, it’s essential to consider the specific needs of different soil types and bed sizes. For example, if you’re working with clay-heavy soil, you’ll need to take extra precautions to prevent water from accumulating behind the edging, which can lead to erosion or root rot.
In such cases, using a permeable edging material like plastic or aluminum is recommended, as it allows for good drainage and prevents water buildup. You may also want to consider incorporating a slope into your design to ensure that excess water runs off freely.
On the other hand, if you’re working with sandy soil, you’ll need to be mindful of stability and prevent the edging from shifting over time. In this case, using a heavier-duty edging material like brick or stone may be a better option, as it provides added weight and resistance to movement.
In addition to considering soil type, bed size also plays a significant role in determining the best edging approach. For small beds (less than 4×4 feet), you can often get away with using simpler edging materials like plastic or wood. However, for larger beds, more substantial materials like brick or stone are often necessary to provide adequate support and stability.
Installing Edging for a Professional Finish
Now that you’ve chosen your edging material, it’s time to install it properly to ensure a professional finish and long-lasting results. We’ll walk you through the installation process step-by-step.
Preparing the Area Before Installation
Before you start installing edging for your vegetable beds, it’s essential to prepare the area properly. This may seem like a no-brainer, but clearing debris and leveling the ground can make all the difference in achieving a professional finish.
Start by removing any weeds, rocks, or other obstructions from the bed. Use a hoe or rake to loosen the soil, making it easier to clear out debris. Don’t forget to remove any old edging or borders that may be existing – this will give you a clean slate to work with. Next, level the ground using a spirit level and a shovel. This ensures your edging is securely anchored and doesn’t shift over time.
Take a moment to inspect the bed for any low spots or uneven areas. Fill in these gaps with a mixture of soil and compost, compacting it gently as you go. A smooth, even surface will make it easier to install your edging and give your vegetables the best possible growing conditions.
Step-by-Step Instructions for Installing Different Types of Edging
When installing edging for a professional finish, it’s essential to choose the right type of material and follow proper installation techniques. Let’s break down the step-by-step instructions for installing different types of edging materials.
For plastic edging, start by measuring the length of your bed and cutting the edging to size using a utility knife or saw. Use a landscape pin to secure the edging to the soil, making sure it’s level and even. For curved areas, use a flexible adhesive to bend the edging into place. For metal edging, use a drill to create holes for screws, then attach the edging to the surrounding material using weather-resistant screws.
When working with wood edging, ensure the material is properly seasoned and resistant to rot. Cut the edging to size using a miter saw or circular saw, then secure it to the soil using landscape pins or nails. For stone edging, use a level to ensure accurate placement, then set the stones in place using a flexible adhesive.
Regardless of the type of material used, make sure to leave space for expansion and contraction, especially during extreme weather conditions.
Tips for Ensuring a Smooth Finish
When it comes to installing edging for a professional finish, achieving a smooth finish is crucial. This involves ensuring that the edging is properly aligned and securely fastened to prevent it from shifting over time. To achieve this, use a spirit level to check the edging’s alignment as you install it. Make adjustments accordingly to ensure the edging remains perfectly horizontal or vertical.
It’s also essential to inspect the edging regularly during installation to catch any potential issues before they become major problems. Check for gaps between the edging and the bed frame, and make sure the edging is securely fastened to prevent it from coming loose over time.
To further ensure a smooth finish, use weather-resistant materials that can withstand outdoor conditions. Regularly inspect your edging after installation and maintenance to address any issues promptly. By following these expert tips, you’ll be able to achieve a professional-looking finish for your vegetable bed that will last season after season.
Maintenance and Repair of Edged Vegetable Beds
Now that you’ve got your edging in place, it’s essential to know how to maintain and repair it so your beds remain looking their best for years to come. We’ll walk through the do’s and don’ts of upkeep.
Regular Maintenance Tasks to Extend Edging Lifespan
Regular maintenance is crucial to extend the lifespan of your edging. A well-maintained edging system can last for years without showing signs of wear and tear. To ensure this, set aside time each season to perform essential tasks.
Start by cleaning your edging using a soft-bristled brush or a garden hose with a spray nozzle. This will remove dirt, debris, and weeds that may have accumulated over time. For more stubborn stains or rust spots, use a mixture of white vinegar and water applied directly to the affected area.
Inspect your edging regularly for signs of damage, such as cracks, dents, or loose sections. Check for any gaps or misalignments between edging pieces. Address these issues promptly by repairing or replacing damaged sections.
When inspecting your edging, also check for any signs of rot or decay, particularly if you’re using wood or composite materials. Remove and replace any affected sections to prevent further damage. By following this simple maintenance routine, you’ll be able to enjoy a professional-looking finish on your vegetable beds for years to come.
Repairing Damaged or Worn-Out Edging Sections
Repairing damaged or worn-out edging sections is an essential part of maintaining a professional-looking vegetable bed. Over time, cracks, breaks, and rust damage can occur due to exposure to the elements, soil settlement, or accidental impact.
To address these issues, you’ll need to assess the extent of the damage and choose the right materials for repair. For minor cracks, you can use an edging adhesive specifically designed for outdoor use. Apply a small amount to both sides of the crack and press them together firmly.
More significant breaks may require replacing the damaged section entirely. Use a saw or pruning tool to remove the broken piece, taking care not to damage surrounding edging. Clean the area thoroughly before installing a new section, ensuring it’s securely fastened with screws or nails. For rust damage, apply a rust converter or sandpaper to smooth out the surface.
When repairing edging sections, remember to work in small areas and maintain even spacing for optimal results.
Preventative Measures for Extending Edging Lifespan
Regular inspections are crucial for identifying potential issues that could compromise the edging lifespan. Check for signs of wear and tear, such as cracks, gaps, or loose joints, after every growing season. Cleaning is also essential to remove dirt, debris, and weeds that can accumulate around the edging, which may cause damage over time.
Apply a protective treatment, like a waterproof sealant or polyurethane coating, to shield the edging from harsh weather conditions, moisture, and chemicals. This can help extend its lifespan by preventing erosion and degradation. For example, if you’re using plastic or vinyl edging, consider applying a UV-resistant spray to prevent discoloration.
Additionally, ensure proper drainage around the bed by sloping the soil slightly away from the edging. This will reduce water accumulation, which can lead to rot and damage. Use gravel or decomposed granite beneath the bed’s surface to facilitate water runoff. By incorporating these preventative measures into your maintenance routine, you’ll be able to enjoy a long-lasting, professional finish for your edged vegetable beds.
Overcoming Common Challenges and Mistakes in Edging
One of the most frustrating aspects of edging is encountering common mistakes that can ruin your hard work. This section tackles these challenges head-on to help you avoid costly errors.
Identifying and Avoiding Common Edging Mistakes
When edging vegetable beds, it’s easy to fall into common mistakes that can compromise the finish and longevity of your garden. One of the most critical areas to focus on is accurate measurement and material selection. Mismeasuring materials can lead to a shortage or surplus of edging, resulting in an uneven and amateurish appearance.
To avoid this mistake, take precise measurements of your vegetable bed’s perimeter, including any curves or corners. Use a tape measure or a laser level to ensure accuracy. When ordering materials, double-check the dimensions against your measurements to avoid any discrepancies.
Another common error is incorrectly calculating the number of edging pieces required. To calculate this accurately, consider the width and length of each piece needed for the bed’s perimeter. A general rule of thumb is to add 10-15% to your total measurement to account for cuts and waste.
Solutions for Overcoming Common Edging Challenges
When working with uneven terrain or unexpected obstacles, it’s essential to think creatively and adapt your edging strategy. One solution is to use a flexible edging material like recycled plastic or composite wood that can be bent or molded to fit the contours of your garden bed. For instance, if you have a sloping lawn, you could install a retaining wall edging system that allows for easy adjustment to accommodate changes in grade.
In areas prone to water runoff, consider installing a French drain system beneath your edging material. This involves placing a perforated pipe along the edge of your garden bed and filling it with gravel or other drainage materials. As water flows through the pipe, it’s redirected away from your plants, preventing erosion and damage. Another option is to use a raised bed design that elevates your vegetables above the surrounding terrain, minimizing runoff issues altogether.
By thinking outside the box and choosing the right edging material for your unique garden conditions, you can create a professional finish despite challenging terrain or unexpected obstacles.
Best Practices for Troubleshooting and Problem-Solving During Edging Projects
When working on an edging project for vegetable beds, it’s not uncommon to encounter problems that can be frustrating and time-consuming. However, by following some best practices, you can minimize the likelihood of these issues arising in the first place.
To start with, make sure to inspect the site thoroughly before beginning your project. Check for any hidden obstacles such as underground pipes or cables that could interfere with your edging. It’s also essential to clear the area of debris and weeds to create a smooth working surface.
Another crucial aspect is having the right tools for the job. Ensure you have high-quality edging material, suitable cutting equipment, and a reliable irrigation system if necessary. Investing in good quality materials can save you time and effort in the long run.
Regularly inspect your work as you go along to catch any potential problems before they become major issues. If you do encounter a problem, try not to panic – simply take a step back, assess the situation, and come up with a plan to rectify it. Stay organized, focused, and patient, and you’ll be on track to achieving a professional finish for your vegetable bed edging project.
Additional Considerations and Conclusion
Now that you’ve learned how to edge your vegetable beds, let’s take a closer look at some additional considerations and what to keep in mind when bringing everything together.
Integration with Other Garden Features and Landscaping Ideas
When you’ve finished edging your vegetable beds, it’s essential to consider how they’ll integrate with other garden features and landscaping ideas. This is where the finishing touches come into play. One way to create a cohesive look is by coordinating the edge material with nearby paths or patios.
For example, if your path is made of brick, you might choose a matching brick edging for your vegetable beds. Conversely, if your patio is paved with stone, opt for a stone edging that complements its texture and color. This attention to detail creates a seamless transition between spaces, making your entire garden feel more polished.
Consider incorporating decorative elements like trellises or arbors to frame your edged beds and add visual interest. Alternatively, you could use edging materials with built-in lights to create ambiance in the evening. By taking these finishing touches into account, you can elevate your garden from a functional space to a beautiful, inviting oasis that showcases your horticultural skills.
Real-Life Examples of Successful Edging Projects
Let’s take a look at some real-life examples of successful edging projects that will inspire you to create a professional finish for your vegetable beds.
One such example is the garden designed by renowned horticulturist, Alan Titchmarsh. He used a combination of wooden and metal edging to separate his raised beds, creating a visually appealing and functional design. The result was a garden that not only looked beautiful but also improved soil drainage and reduced weed growth. By choosing durable materials, Alan ensured that his edging would withstand the elements and last for years to come.
Another example is a community garden project in California that used recycled plastic edging to create separate beds for different crops. This eco-friendly solution not only saved resources but also provided a clean finish that made maintenance easier. The gardeners reported improved crop yields and reduced soil erosion, thanks to the effective separation of the beds.
In both cases, the edging projects not only enhanced the aesthetic appeal of the gardens but also improved their functionality and sustainability. These examples demonstrate how creative thinking and practical planning can lead to successful outcomes in gardening projects.
Conclusion and Final Thoughts on the Benefits of Edging Vegetable Beds
In conclusion, edging vegetable beds is a crucial step in creating a professional finish that elevates your garden’s aesthetic appeal while also providing numerous functional benefits. By incorporating the various techniques and materials discussed throughout this guide, you can ensure a well-maintained and visually appealing space for years to come.
As you reflect on the importance of edging, remember that it’s not just about making your garden look good; it also plays a significant role in maintaining soil health, preventing weeds from encroaching, and preserving moisture. With these benefits in mind, take the time to choose the right materials for your project, considering factors such as durability, ease of installation, and cost-effectiveness.
To ensure long-term success with your edging, remember to inspect it regularly and make any necessary repairs or adjustments. By doing so, you’ll not only extend its lifespan but also maintain a garden that’s both beautiful and productive. With patience and practice, you can achieve professional-grade results in your own backyard.
Frequently Asked Questions
Can I use the same edging material for both large and small beds?
Yes, you can use the same edging material for both large and small beds, but consider factors like durability and ease of installation when choosing a material that suits your needs. For smaller beds, lighter materials like plastic or metal may be sufficient, while larger beds may require more robust options.
How do I ensure my edging material lasts long?
Regular maintenance tasks such as inspecting the edging for damage, cleaning debris from the area, and applying weed barriers can help extend its lifespan. Additionally, preventative measures like using weather-resistant materials and sealing gaps between sections can also contribute to a longer-lasting edging system.
Can I edge my vegetable bed if it has slopes or uneven terrain?
Yes, you can edge your vegetable bed with slopes or uneven terrain. Consider using flexible edging materials that can adapt to irregular surfaces, such as plastic or rubber edging. Additionally, consult local building codes and regulations regarding landscape features on slopes for guidance.
What happens when my edging material becomes damaged over time?
Repairing damaged sections promptly is crucial to maintain the integrity of your edged vegetable bed. Inspect damaged areas regularly, replace worn-out sections with matching materials, and seal gaps between new and existing sections to ensure a seamless finish.
How often should I inspect my edged vegetable bed for maintenance needs?
Regular inspections every 2-3 months can help identify potential issues before they become major problems. Check for signs of wear, damage from weather or pests, and address any concerns promptly to maintain the health and functionality of your garden.