Earthing up potatoes is an essential technique for any gardener looking to promote healthy growth, prevent common issues, and enjoy a bountiful harvest. As you plant your potato seedlings or tubers, it’s natural to wonder if there are ways to ensure their optimal development. With earthing up, you can create the perfect conditions for your potatoes to thrive. But what does this process entail, and how do you avoid common mistakes that might hinder your crop? In this comprehensive guide, we’ll walk you through the steps involved in earthing up potatoes, highlighting the key techniques and best practices to ensure a successful harvest. By the end of this article, you’ll be equipped with the knowledge needed to grow delicious, nutritious potatoes with ease.
Understanding the Importance of Earthing Up
Earthing up potatoes is a simple yet crucial technique that can significantly impact their growth and yield. In this next part, we’ll explore why it’s essential for your spuds to thrive.
What is Earthing Up and Why is it Necessary?
Earthing up is a crucial process in potato cultivation that involves covering the base of the plants with soil or mulch as they grow. This simple yet effective technique serves several purposes: it promotes healthy growth, protects the tubers from sunlight, and helps retain moisture in the soil.
By earthing up your potatoes, you’re essentially creating an environment that encourages the tubers to form closer to the surface of the soil. As a result, you’ll end up with more compact, easier-to-harvest spuds that are also less susceptible to disease and pests. On the other hand, failing to earth up your potatoes can lead to sunscald – a condition where the tubers become scorched by direct sunlight – as well as dryness and moisture loss.
To put this into perspective, a study showed that potatoes grown without earthing up had significantly lower yields compared to those that were properly earthed. With so many benefits to reap, it’s surprising how often gardeners overlook this essential step in potato cultivation. By incorporating earthing up into your routine, you’ll be well on your way to enjoying a bountiful harvest of delicious, healthy potatoes.
How Earthing Up Affects Potato Growth
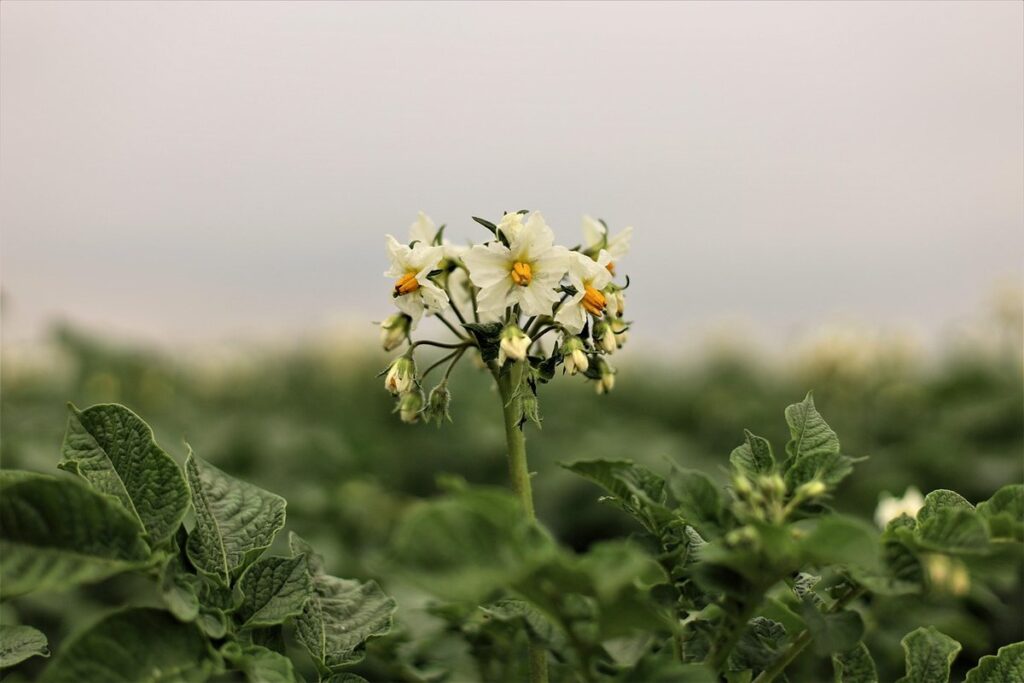
Earthing up is a crucial step in potato cultivation that not only promotes even growth but also ensures that the tubers remain safe from sunlight. When we earth up potatoes, we cover the soil around the base of the plants with more soil or mulch, creating a barrier between the sun and the tubers.
This simple technique has a profound impact on potato growth. Firstly, it encourages the formation of multiple tubers rather than one large one, leading to a higher yield per plant. By burying the stems and leaves under soil, we stimulate the plants to produce more underground tubers as they try to access sunlight and grow upwards.
Furthermore, earthing up prevents sunlight from turning the tubers green and toxic. When exposed to direct sunlight, potatoes can synthesize chlorophyll and become bitter or even poisonous. By covering them with earth, we prevent this process from occurring, ensuring that our harvest remains safe to eat.
Preparing the Soil for Earthing Up
Before you start earthing up your potatoes, it’s essential to prepare the soil by loosening and aerating it to a depth of 8-10 inches to prevent waterlogging. This simple step will make all the difference in promoting healthy growth.
Choosing the Right Soil Conditions for Potatoes
When it comes to growing potatoes, choosing the right soil conditions is crucial for a bountiful harvest. Potatoes prefer well-draining, loose soil with a pH between 4.5 and 7.0. If your soil tends towards being too alkaline or acidic, you may need to adjust it before planting.
In terms of texture, potatoes love a mix of sand, silt, and clay, which provides excellent drainage and aeration. Avoid planting in heavy clay or sandy soils, as these can cause waterlogging or dehydration issues. A mix with around 60% sand and 40% silt is ideal for potato cultivation.
Potatoes also require adequate nutrient levels to grow well. They thrive in soil rich in potassium (K), phosphorus (P), and magnesium (Mg). You can prepare your soil by adding compost or organic matter, which will help retain moisture, suppress weeds, and provide essential nutrients. Before planting, till the soil to a depth of 8-10 inches to loosen it up and remove any debris.
By giving your potatoes the right soil conditions, you’ll be setting them up for success from the very start. Remember, it’s not just about throwing some seeds in the ground – it’s about creating an environment that will help your spuds grow strong and healthy.
Adding Organic Matter and Fertilizers
When it comes to earthing up potatoes, incorporating organic matter and fertilizers is crucial for promoting healthy growth. The right combination of compost and fertilizer can make all the difference between a bountiful harvest and a disappointing one.
Start by adding 2-3 inches of well-composted manure or aged compost to the soil. You can also mix in some worm casting, which is rich in nutrients and beneficial microbes. For fertilizers, look for products that are specifically designed for potatoes. A balanced fertilizer with an NPK ratio of 5-10-10 is ideal.
One popular option is fish bone meal, which is high in nitrogen and phosphorus but low in potassium. This makes it perfect for potatoes, which have high nutrient requirements during tuber formation. Another option is alfalfa meal, which is rich in nitrogen and can help promote healthy foliage growth.
Remember to always follow the instructions on the fertilizer package and apply at the recommended rate. A little goes a long way when it comes to fertilizers, so don’t overdo it!
The Earthing Up Process: A Step-by-Step Guide
To successfully earthing up your potatoes, you’ll need to know exactly when and how to do it. This step-by-step guide will walk you through the process from start to finish.
When to Start Earthing Up Potatoes
When the weather is favorable, with temperatures above 40°F (4°C), and soil moisture levels are around 70-80%, it’s time to start earthing up potatoes. However, this can vary depending on your location and specific growing conditions.
Check the growth stage of your potato plants as well. When the stems reach about 6-8 inches tall, and you see the first set of true leaves emerging, it’s a good indication that they are ready for earthing up. At this point, the soil around the base of the plants should be mulched or covered with straw to retain moisture and suppress weeds.
Keep an eye on your weather forecast and wait for a period of calm weather before starting the process. Avoid earthing up during periods of high rainfall or extreme heat as it can lead to rotting and other problems. It’s also essential to assess the soil moisture levels regularly, so you don’t over- or underwater your potatoes.
By monitoring these factors and timing your earthing up efforts accordingly, you’ll be well on your way to a bountiful potato harvest.
Techniques for Effective Earthing Up
When it comes to earthing up potatoes, having the right technique can make all the difference. One of the most common methods is hand-digging around the base of the plants, creating a 2-3 inch deep trench. This allows for easy access and helps prevent damage to the tubers as they form.
Another technique is using tools like a fork or spade to gently loosen the soil around the base of the plants. This method is particularly useful when dealing with larger beds or when the soil is particularly hard. For smaller plots, you can also create a raised bed specifically for earthing up potatoes. By building a mound 6-8 inches high and 2-3 feet wide, you’ll be able to easily access the tubers without compacting the surrounding soil.
As for how often to perform this task, aim to do it every 7-10 days throughout the growing season. This will help maintain optimal moisture levels and prevent the growth of competing weeds.
Managing Soil Temperature and Moisture During Earthing Up
When earthing up potatoes, it’s essential to maintain a stable soil temperature and moisture level to prevent disease and promote healthy growth. We’ll walk you through how to achieve this balance in the garden.
Maintaining Optimal Soil Temperature
Maintaining optimal soil temperature is crucial during earthing up as it affects potato growth and tuber formation. You can check the soil temperature by inserting a thermometer into the soil, about 4-6 inches deep. Aim for a temperature range of 60°F to 70°F (15°C to 21°C), which is ideal for most potato varieties.
If your soil is too cold, potatoes may grow more slowly or experience reduced tuber formation. Conversely, if it’s too warm, tubers can become misshapen or develop eyes. To adjust the temperature, you can add a layer of mulch or straw to retain moisture and regulate the soil temperature. This is particularly effective for cooler climates.
Another approach is to choose potato varieties that are specifically bred for your region’s climate. These varieties often have built-in resistance to temperature fluctuations and will perform better in challenging conditions.
Watering Strategies After Earthing Up
Watering Strategies After Earthing Up
After earthing up your potato plants, it’s essential to maintain optimal soil moisture levels. This is crucial for preventing waterlogged soil, which can lead to root rot and reduced yields. Here are some effective watering strategies to adopt after earthing up:
When using irrigation systems, adjust the frequency and duration of watering to match your plant’s needs. As the tubers grow, they require less water, but the soil still needs to remain moist. You can achieve this by reducing the watering schedule or adjusting the timing to ensure the plants receive adequate moisture during periods of high demand.
Hand-watering is another effective method for maintaining soil moisture levels after earthing up. For optimal results, water gently but thoroughly around the base of each plant, avoiding the leaves and foliage. Keep an eye on the weather forecast to avoid overwatering in case of expected rain.
Remember, consistent watering practices help prevent waterlogged soil and ensure your potato plants receive the right amount of moisture for healthy growth and development.
Troubleshooting Common Issues with Earthing Up Potatoes
If you’re experiencing problems with your earthed-up potatoes, don’t worry – we’ve got you covered. This section tackles common issues and provides solutions to get your crop back on track.
Common Problems and Their Solutions
One of the most common problems you may encounter when earthing up potatoes is tubers turning green due to excessive sunlight. This can be caused by not providing enough shade for your plants during the day. To prevent this, make sure to use a layer of mulch or straw to block out direct sunlight and retain moisture.
Another issue that may arise is rotting tubers due to excessive moisture. This can happen if you don’t allow the soil to dry slightly between waterings. When earthing up potatoes, it’s essential to strike a balance between providing enough moisture and allowing the soil to breathe. Check for signs of moisture by inserting your finger into the soil; if it feels damp but not soaked, you’re on the right track.
If you do notice rotting tubers, don’t panic – simply remove the affected area with clean scissors or a sharp knife, and discard any badly damaged tubers to prevent the spread of disease.
How to Avoid Over-Earthing Up
When earthing up potatoes, it’s easy to get carried away and add too much soil, which can be detrimental to the crop. Over-earthing up can lead to reduced yields, poor crop quality, and even disease susceptibility. So, how do you know when you’re overdoing it?
Look for signs such as an excessive buildup of soil around the base of the plants, which can cause the stems to rot. If the soil is piled too high, it can create a humid environment that fosters fungal growth and other diseases. You may also notice that the plants are starting to turn yellow or develop brown spots.
To avoid over-earthing up, earthe your potatoes when the foliage reaches about 6-8 inches tall. Add only a thin layer of soil, about 2-3 inches deep, around the base of the plants. Gradually increase the depth as the plants grow, but never let the soil pile exceed 4-5 inches high. By being mindful of your earthing up technique and adjusting it accordingly, you can enjoy a healthy, bountiful harvest of delicious potatoes.
Harvesting Your Earthed-Up Potatoes
Now that you’ve carefully earthed up your potato beds, it’s time to harvest your crop and enjoy the fruits of your labor. We’ll walk you through how to dig up your mature potatoes without damaging them.
Knowing When to Harvest
When it comes to harvesting your earthed-up potatoes, timing is everything. You’ll want to wait until they’re fully mature and ready for digging up. To determine if your potatoes are ripe, look for the following signs.
First, check the size of the tubers. A mature potato will be about 1-2 inches in diameter. If you can’t easily slide a fork into the soil beside the stem without hitting a tuber, it’s likely not yet time to harvest.
Next, inspect the color and texture of the tubers. Mature potatoes will have developed their characteristic sweet, waxy or starchy flavor and will be firm but yielding to pressure. Avoid digging up potatoes that are still green or soft to the touch, as they may not store well.
Finally, pay attention to the soil conditions. If the weather has been dry for an extended period, your potatoes may have shrunk in size or become more concentrated around the base of the plant. This is a good sign that it’s time to start thinking about harvesting. In general, wait until the tops of the plants begin to yellow and die back – this usually signals that the tubers are mature and ready for digging.
Tips for Careful Harvesting
When it’s time to harvest your earthed-up potatoes, you want to do so carefully to avoid damaging the tubers. Minimizing damage is crucial because damaged potatoes can spoil more quickly and be less palatable. Here are some tips for careful harvesting:
Before you start digging up your potatoes, make sure the soil has dried out a bit. This will help prevent the tubers from breaking apart as you dig. Use a fork to gently loosen the soil around each plant, working your way around the perimeter of the bed. Be gentle, as the tubers are fragile and can be easily damaged.
When digging up the potatoes, use a gentle sawing motion with your fork to avoid piercing the tuber. If you encounter any large clumps of dirt, gently tease them apart with your fingers or a small tool. This will help prevent the potatoes from getting crushed.
Another important tip is to harvest in stages, rather than all at once. Start by digging up the smaller potatoes first, and then come back for the larger ones. This will prevent over-harvesting and give you a more even yield.
By following these tips, you should be able to harvest your earthed-up potatoes with minimal damage to the tubers. Remember, patience is key – take your time, and you’ll be rewarded with a bountiful harvest.
Frequently Asked Questions
How Often Should I Check on My Earthed-Up Potatoes for Optimal Growth?
It’s essential to regularly check on your earthed-up potatoes, especially during periods of rapid growth or when you notice significant changes in soil moisture and temperature. Aim to inspect your crop every 7-10 days, gently removing any mulch or covering to ensure the tubers are not rotting due to excess moisture.
Can I Use Compost Tea as an Alternative to Organic Matter for Earthing Up?
While compost tea can be beneficial for potato growth, it’s best used in conjunction with organic matter rather than replacing it entirely. Add a 2-inch layer of compost or well-rotted manure on top of the soil after earthing up, followed by a thin layer of mulch to retain moisture and suppress weeds.
What Happens if I Notice Holes or Gaps in My Mulched Area After Earthing Up?
If you notice holes or gaps in your mulched area, it’s crucial to address them promptly to prevent water loss and potential pest infestations. Reapply a new layer of mulch or organic matter to cover the exposed soil, taking care not to compact the surrounding earth.
Should I Water My Earthed-Up Potatoes More Frequently During Hot Weather?
Yes, earthing up potatoes requires more frequent watering during hot weather to prevent moisture loss and maintain optimal growth conditions. Water your crop deeply but infrequently to encourage deep root development, reducing the risk of water stress and tuber damage.
Can I Use a Different Type of Mulch for Earthing Up Potatoes, Such as Gravel or Bark Chips?
While other mulch types may be suitable for certain garden applications, it’s best to stick with organic matter like compost, well-rotted manure, or straw for earthing up potatoes. These materials retain moisture, suppress weeds, and provide essential nutrients for healthy growth.