Drying garlic at home is a game-changer for any food enthusiast, gardener, or cook. Not only does it preserve the flavor and aroma of this versatile ingredient, but it also makes storing and using garlic so much easier. Whether you’re looking to save space in your pantry or want to enjoy garlic year-round, drying is the way to go. But with so many methods out there – from air-drying to oven-drying and dehydrator techniques – it can be hard to know where to start.
In this comprehensive guide, we’ll walk you through each of these methods, sharing expert tips and tricks for perfect results. We’ll also explore the benefits of using dried garlic in your cooking, from enhanced flavor profiles to increased nutritional value. By the end of this article, you’ll be well on your way to mastering the art of drying garlic at home.
Understanding the Benefits of Dried Garlic
Drying garlic is more than just a preservation method – it also unlocks a wealth of health and culinary benefits. Let’s explore some surprising advantages of incorporating dried garlic into your cooking routine.
Why Dry Garlic Instead of Using Fresh?
When it comes to incorporating garlic into your cooking, you might be wondering why using dried garlic is often preferred over fresh. While fresh garlic has its own unique benefits, the advantages of using dried garlic far outweigh those of its fresh counterpart.
One major benefit of using dried garlic is its longer shelf life. Unlike fresh garlic, which typically lasts for only a week or two before losing its potency and flavor, dried garlic can be stored for up to six months without significant loss of quality. This makes it an ideal choice for cooks who plan ahead and like to have a steady supply of ingredients on hand.
Studies have shown that dried garlic retains many of the same health benefits as fresh garlic, including reducing inflammation and improving cardiovascular health. In fact, one study published in the Journal of Nutrition found that consuming dried garlic was just as effective at lowering cholesterol levels as consuming fresh garlic.
Types of Garlic Suitable for Drying
When it comes to drying garlic, not all types of garlic are created equal. To get the best results, you’ll want to choose a variety that’s specifically suited for drying. There are two main categories of garlic: hardneck and softneck.
Hardneck garlic is a great choice for drying because it has a thicker skin that holds its shape well when dried. It also tends to have a more robust flavor, which is preserved during the drying process. Some popular varieties of hardneck garlic include ‘Rocambole’ and ‘Porcello’. These types of garlic typically yield a higher percentage of usable cloves per bulb, making them an excellent choice for drying.
Softneck garlic, on the other hand, has a softer skin that can become brittle when dried. However, it’s still a viable option if you don’t have access to hardneck varieties. ‘Silverskin’ and ‘Creole’ are two popular softneck types that work well for drying. When using softneck garlic, be sure to trim the stems before drying to prevent them from becoming too fragile.
In general, look for varieties with a higher percentage of solids (about 70-80%) as these will yield more flavorful dried garlic. Avoid ‘Elephant’ or ‘Colossal’ varieties as they have softer skin and may not dry well.
Preparation Methods for Drying Garlic
To dry garlic successfully, you need to understand different preparation methods that work best for your specific type of garlic and desired outcome. Let’s dive into various prep techniques to get you started.
Air-Drying Method: A Step-by-Step Guide
Air-drying garlic is a simple yet effective method for preserving this pungent bulb. To start, choose firm, healthy garlic bulbs with tight, unbroken skin. Allow the bulbs to dry slightly at room temperature before proceeding.
Begin by separating individual cloves and laying them out in a single layer on a wire rack or tray lined with paper towels. This will ensure good airflow around each clove. Next, hang the rack or tray in a well-ventilated area, away from direct sunlight. It’s essential to maintain a consistent temperature between 60°F and 70°F (15°C and 21°C) to prevent mold growth.
Proper airflow is also crucial; if possible, place a fan nearby to gently circulate air around the garlic. This will help speed up the drying process while preventing moisture buildup. Over time, the cloves should turn golden brown and develop a wrinkled appearance, signaling they’re ready for storage.
Oven-Drying Method: A Faster Alternative
Drying garlic in an oven is a faster and more efficient method than air-drying. This technique involves using dry heat to evaporate the water content from the garlic cloves, resulting in crispy, dry bulbs that can be stored for extended periods.
To start, preheat your oven to its lowest temperature setting (usually around 150°F – 200°F). Line a baking sheet with parchment paper or a silicone mat, and spread out the garlic cloves in a single layer. You can also tie them together in small bunches using kitchen twine to facilitate even drying.
Monitor the process closely, checking on the garlic every 2-3 hours. It’s essential to maintain a consistent temperature, as high heat can cause the garlic to burn or develop off-flavors. Once the cloves are dry and brittle, remove them from the oven and let them cool completely before storing in an airtight container.
The key to successful oven-drying is maintaining a low temperature and ensuring even air circulation around the garlic cloves. By following these steps, you can enjoy perfectly dried garlic year-round without the hassle of waiting for weeks or months using traditional air-drying methods.
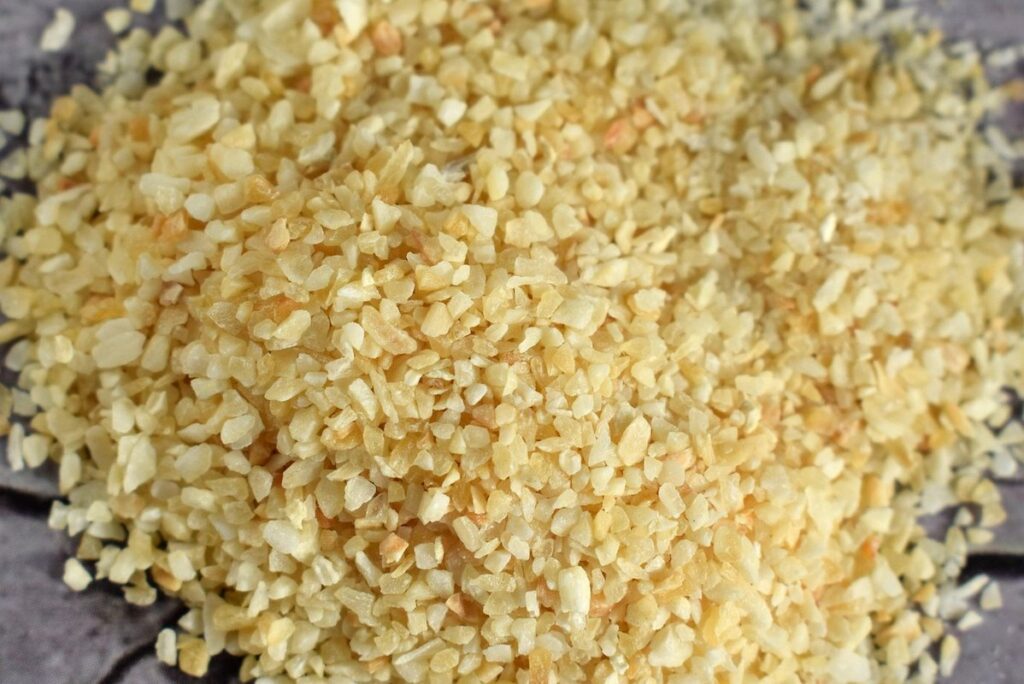
Drying Garlic Using a Dehydrator
To dry garlic using a dehydrator, follow these simple steps and achieve perfectly preserved cloves every time, without any mess or hassle. This method is ideal for large batches and yields excellent results.
Choosing the Right Dehydrator Settings
When it comes to drying garlic using a dehydrator, choosing the right settings is crucial for achieving optimal results. Temperature and time are two key factors that play a significant role in determining the quality of dried garlic.
To start, set your dehydrator between 135°F to 155°F (57°C to 68°C), which is ideal for drying garlic. This temperature range allows for even moisture loss without compromising the flavor or aroma of the garlic. If you’re using a lower-end model, stick to 135°F to avoid overcooking the garlic.
As for time, it’s essential to monitor the dehydration process closely. Typically, garlic will take between 6-12 hours to dry completely, depending on its thickness and the dehydrator’s capacity. To ensure optimal results, start by checking on the garlic every 2-3 hours. You can also use a food thermometer to check for an internal temperature of 140°F (60°C), which is typically considered safe for dried garlic.
Keep in mind that over-drying or under-drying can result in loss of flavor and aroma, so it’s crucial to strike the right balance between moisture levels and drying time.
Tips for Achieving Perfectly Dry Garlic Slices
Achieving perfectly dry garlic slices is crucial for preserving their flavor and nutritional value. To monitor moisture levels effectively, it’s essential to use a food thermometer to check the internal temperature of the garlic. The ideal temperature range for drying garlic is between 135°F (57°C) and 155°F (68°C). If your dehydrator doesn’t have precise temperature control, consider investing in a separate thermometer.
To ensure perfectly dry garlic slices, it’s also crucial to maintain consistent airflow and monitor the dehydration process closely. A good rule of thumb is to check on the garlic every 6-8 hours to avoid over-drying or under-drying. You can do this by removing a few slices from the dehydrator and checking their texture.
When using a dehydrator with precise temperature control, you can set it to 135°F (57°C) for a longer period, typically 12-24 hours. This will help achieve a more even drying process and result in perfectly dry garlic slices that are free of moisture pockets. Regularly monitoring the dehydration process will ensure you get the best results possible.
Storing and Preserving Dried Garlic
Now that you’ve dried your garlic, let’s talk about what comes next: storing it properly to maintain its flavor and aroma for months to come.
Short-Term Storage Methods: Keeping Dried Garlic Fresh
When you’ve dried garlic to perfection, it’s essential to store it properly to maintain its flavor and aroma. For short-term storage, which typically lasts up to 6 months, airtight containers are an excellent choice. Look for glass jars with tight-fitting lids or plastic containers specifically designed for storing spices.
To keep your dried garlic fresh, make sure the container is completely sealed after each use. This prevents moisture and air from entering the jar and causing the garlic to become stale or develop off-flavors. You can also store dried garlic in paper bags or airtight ziplock bags, but be aware that these may not provide the same level of protection as glass containers.
Another option is to store dried garlic in glass jars with a silica gel packet to absorb any moisture that might be present. This method is particularly useful if you live in a humid climate. Whatever storage method you choose, keep the container away from direct sunlight and heat sources to preserve the flavor and aroma of your dried garlic.
Long-Term Preservation Techniques: Freezing and Powdering
If you’re looking for long-term preservation techniques that go beyond air-tight containers and paper bags, consider freezing or powdering your dried garlic. These methods offer a more permanent solution to storing your precious garlic powder.
Freezing Dried Garlic: To freeze dried garlic, place the powder in an airtight container or freezer bag, making sure to remove as much air as possible before sealing. Frozen garlic powder will retain its flavor and aroma for up to 12 months. When you’re ready to use it, simply thaw the desired amount and mix with olive oil or other ingredients.
Powdering Dried Garlic: Powdering dried garlic involves grinding it into a fine powder using a spice grinder or coffee mill. This process removes any lumps and makes it easier to store in airtight containers. You can also blend your powdered garlic with other spices for unique flavor combinations. Keep in mind that powdered garlic will lose some of its potency over time, but it’s still an excellent way to preserve dried garlic.
When using either method, remember to label the container with the date and contents, allowing you to keep track of how long it’s been stored and ensuring you use the oldest product first. This way, you can enjoy your homemade garlic powder or frozen garlic for months to come.
Rehydrating Dried Garlic
Now that you’ve dried and stored your garlic, it’s time to rehydrate and bring back its full flavor. This process is surprisingly simple and requires just a few basic ingredients.
The Best Ways to Rehydrate Dried Garlic
Rehydrating dried garlic is an art that requires some finesse, but don’t worry, we’ve got you covered. The goal is to restore the lost moisture and intensity of flavor, without compromising on texture or taste. There are several methods for rehydrating dried garlic, each with its own unique benefits.
Soaking in water is one of the most straightforward approaches. Place 1-2 tablespoons of dried garlic in a bowl, cover it with cold water, and let it sit for about 30 minutes to an hour. The longer you soak, the more intense the flavor will become. However, be careful not to over-soak, as this can lead to an unpleasant mushy texture.
Alternatively, you can rehydrate dried garlic by soaking it in oil. Mix 1-2 tablespoons of dried garlic with a tablespoon or two of olive oil, and let it sit at room temperature for a few hours or overnight. This method works wonders for infusing the oil with deep, rich flavors. Simply strain the mixture before using the rehydrated garlic in your recipes.
Using Dehydrated Garlic in Recipes
Dehydrated garlic is a game-changer for home cooks and professional chefs alike. Not only does it preserve the flavor and aroma of fresh garlic, but it’s also incredibly versatile in cooking. When you rehydrate dried garlic, you can use it in a variety of dishes to add depth and richness.
One of the best things about dehydrated garlic is its ability to be used in both sweet and savory recipes. Try adding a teaspoon of rehydrated garlic to your favorite marinara sauce for an instant flavor boost or mix it into your homemade salad dressings for added zing. You can also use it as a topping for soups, stews, or roasted vegetables.
Some other creative ways to use dehydrated garlic include making homemade spice blends, like Italian seasoning or garlic powder, and using it as a flavor enhancer in roasted meats and vegetables. Simply rehydrate the dried garlic according to package instructions, then mix it with olive oil, salt, and your choice of herbs for a delicious finishing touch.
Rehydrating dehydrated garlic is easy – simply soak it in water or olive oil for a few minutes, then strain out the solids. With this simple technique, you can unlock a world of flavor possibilities in your kitchen.
Troubleshooting Common Issues with Drying Garlic
If you’re experiencing problems drying garlic, don’t worry – we’ve got solutions! In this crucial section, we’ll tackle common issues and show you how to overcome them.
Common Mistakes to Avoid When Drying Garlic
When drying garlic, it’s easy to get caught up in the process and end up with imperfect results. Two common mistakes to avoid are over-drying and under-drying. Over-drying can cause garlic to become brittle and lose its flavor, while under-drying can leave it moist and prone to spoilage.
To avoid over-drying, it’s essential to check on your garlic regularly during the drying process. This involves monitoring the temperature, humidity levels, and color of the garlic. If you notice any signs of drying too quickly, such as a change in color or brittleness, adjust the drying settings accordingly.
Under-drying is often caused by inadequate air circulation or insufficient time spent drying. To prevent this, ensure that your garlic has enough space to dry evenly and that the drying process isn’t interrupted. A good rule of thumb is to allow at least 24-48 hours for small batches of garlic, depending on the method used.
By being mindful of these common mistakes, you can achieve perfectly dried garlic that retains its flavor and aroma. By paying attention to temperature, humidity levels, air circulation, and time spent drying, you’ll be well on your way to becoming a garlic-drying pro!
Frequently Asked Questions About Drying Garlic
When it comes to drying garlic, you may have some questions about what works best. Here’s a rundown of the most common queries we receive.
What is the ideal humidity level for drying garlic? The optimal humidity range for drying garlic is between 10% and 30%. If it’s too dry, your garlic will become brittle and crumbly; if it’s too humid, mold and mildew can form. To achieve this balance, you can use a dehumidifier or adjust the storage container to maintain an ideal environment.
How do I dry large quantities of garlic? When drying in bulk, it’s essential to ensure even air circulation. You can achieve this by using a fan or a food dryer. Divide your garlic into smaller portions and spread them out on trays or shelves for efficient drying. Regularly check the temperature (around 140°F to 160°F) and humidity levels to prevent spoilage.
What’s the best way to store dried garlic? After drying, transfer the garlic to an airtight container to preserve its flavor and aroma. Label the container with the date and contents to ensure you use the oldest dried garlic first. Store it in a cool, dark place to maintain quality for up to six months.
Frequently Asked Questions
Can I dry garlic if it’s past its prime or has sprouted?
While you can still use dried garlic that’s past its prime, the flavor and aroma may not be as potent. It’s best to start with fresh, high-quality garlic for optimal results.
How do I know if my dehydrator settings are correct for drying garlic?
A general rule of thumb is to set your dehydrator between 95°F to 105°F (35°C to 40°C) and use the “herb” or “low” setting. However, this may vary depending on your specific dehydrator model, so be sure to consult your user manual for guidance.
Can I rehydrate dried garlic in a microwave?
Yes, you can rehydrate dried garlic in a microwave by soaking it in water or broth for 30 seconds to 1 minute. Be cautious not to overheat the garlic, as this can damage its delicate flavor and aroma compounds.
How long does it take to dry garlic using the air-drying method?
The air-drying method can take anywhere from several days to a week or more, depending on factors like humidity, temperature, and the thickness of the garlic slices. It’s essential to monitor your garlic regularly to ensure it doesn’t become too brittle or develop off-flavors.
Can I use dried garlic in place of fresh garlic in recipes?
Yes, you can use dried garlic as a substitute for fresh garlic, but keep in mind that it has a more concentrated flavor and aroma. Start with small amounts (about 1/4 teaspoon per recipe) and adjust to taste, as dried garlic can be quite potent.