Drying flowers for wreaths can be an incredibly rewarding DIY project, but it requires some careful planning to get it just right. Choosing the right blooms is crucial, as not all flowers are created equal when it comes to preservation. Some simply don’t hold their shape or color well after drying, while others become brittle and prone to breakage.
If you’re looking to create beautiful, long-lasting wreaths that will add a touch of elegance to your home decor, then this is the guide for you. We’ll cover everything from selecting the best flowers to prepare them perfectly for preservation. From roses to lavender, we’ll explore the top choices for drying and share expert tips on how to get the most out of your blooms. By the end of this article, you’ll be well-equipped to create stunning wreaths that will last for years to come.
Choosing the Right Flowers
When it comes to creating beautiful and long-lasting wreaths, selecting the right flowers is crucial. In this next part of our guide, we’ll explore the best types of flowers for drying and crafting stunning wreaths.
Considerations for Drying Time
When selecting flowers for drying, it’s essential to consider their individual drying times. Delicate blooms like roses and peonies tend to take longer to dry than hardy varieties like baby’s breath and statice. These differences are crucial to ensure that your wreath is complete within a reasonable timeframe.
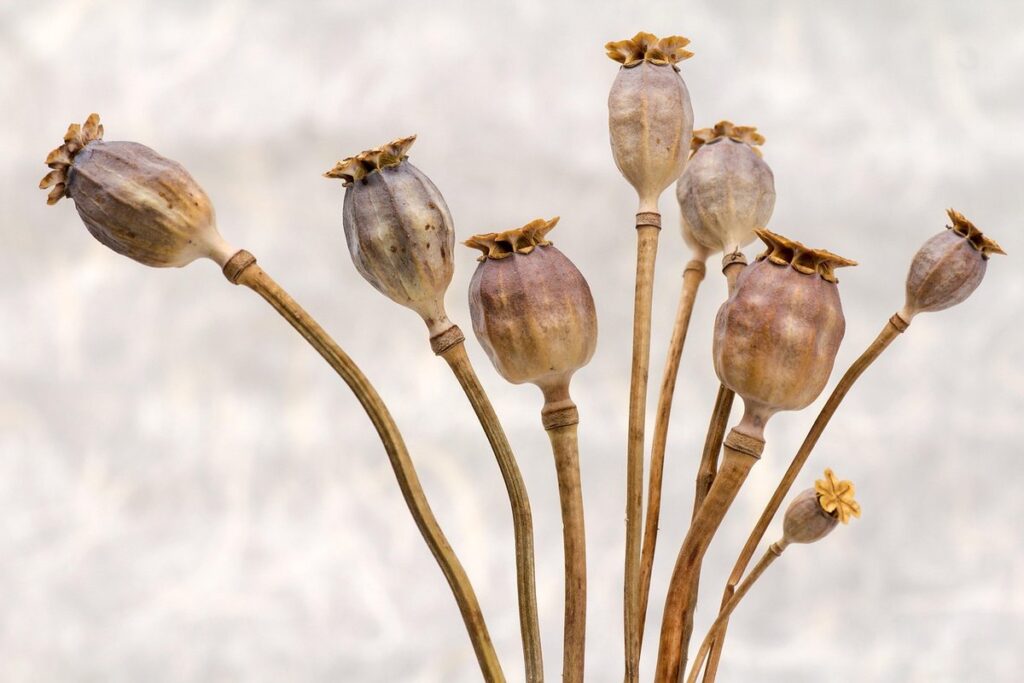
Some flower types dry exceptionally well, making them ideal for wreaths. Sunflowers, for example, retain their shape and color remarkably well after drying. Dahlias also dry well, maintaining much of their original vibrancy. On the other hand, delicate flowers like lavender and baby’s breath often lose some of their natural color during the drying process.
To plan your project effectively, it’s helpful to know that most flowers take anywhere from 2-4 weeks to fully dry. This timeframe may vary depending on factors such as temperature, humidity, and air circulation. To expedite the drying process, you can use silica gel or desiccants to absorb moisture from the flowers.
When working with multiple flower types, it’s a good idea to prepare each variety separately to prevent them from influencing one another’s drying time. This will ensure that your wreath comes together as envisioned, without any unwelcome delays.
Color Palette and Theme
When selecting flowers for your dried wreath, it’s essential to consider the overall color palette and theme you want to achieve. Think about the occasion, season, or style that inspires you – this will help narrow down your flower choices.
To create a visually appealing wreath, you don’t need to stick with just one color. Mixing and matching different shades can add depth and interest. Consider pairing bold, bright flowers like sunflowers or gerbera daisies with more delicate pastel shades like lavender or baby’s breath.
For example, if you’re making a spring-themed wreath, combine vibrant tulips with pale yellow roses for a beautiful contrast. Conversely, pair rich red poppies with soft blush peonies for a romantic look.
To ensure your color palette flows well, start by choosing 2-3 anchor flowers that set the tone. Then, fill in the gaps with complementary flowers in softer shades. Remember, it’s not about matching exact colors but creating harmony through contrasts and textures. Experiment with different combinations to find what works best for you!
Preparing Flowers for Drying
Before you can create stunning wreaths, you need to prepare your flowers for drying. This involves a few simple steps that will help preserve their color and shape.
Harvesting at the Right Stage
When it comes to drying flowers for wreaths, harvesting them at the right stage is crucial. This means cutting the stems at the optimal time to ensure they dry properly and retain their shape. If you cut the stems too early, the flowers may not have developed enough moisture content, leading to a brittle or fragile texture.
To determine when to harvest your flowers, look for signs of maturity, such as fully opened blooms, sturdy stems, and a slight drop in water content. For example, sunflowers are typically ready to harvest when their petals are fully open, and the centers have turned a rich yellow color.
When cutting the stems, make sure to cut them at an angle using sharp, clean scissors or pruning shears. This helps prevent the stem from sitting flat on the surface and promotes better air circulation. Remove any excess foliage, as this can cause moisture to collect and lead to mold or mildew. By harvesting your flowers correctly, you’ll be able to preserve their natural beauty and create stunning wreaths that last for years to come.
Tools and Materials Needed
To get started with drying flowers for wreaths, you’ll need some essential tools and materials. You can use wire racks to dry small bunches of flowers, but be sure to place them in a well-ventilated area or under a fan to speed up the process.
For larger quantities or more delicate blooms, consider using silica gel or a desiccant. These work by absorbing moisture from the air and helping to preserve the flowers’ natural color and texture. You can also use a combination of both wire racks and desiccants for optimal results.
Other tools you may find useful include paper bags, tissue paper, or even coffee filters to wrap individual blooms and prevent them from tangling. Some people also swear by the use of a hair dryer on a low setting to speed up the drying process, but be cautious not to damage the flowers with excessive heat.
It’s also important to note that you can repurpose materials like old hangers, clips, or even clothespins to hang your flower arrangements and keep them off the floor.
Drying Methods
Now that you’ve learned how to prepare and preserve flowers, it’s time to explore the drying methods that will bring your blooms to life in your wreath creations. We’ll walk you through various drying techniques inside and out!
Air Drying
Air drying is one of the simplest and most effective methods for drying flowers. To begin, you’ll want to start by preparing your flowers for air drying. Remove excess moisture from the stems by gently patting them dry with a paper towel. This will help prevent bacterial growth and promote even drying.
There are several ways to hang flowers upside down while they dry. You can use a wire or string to create a makeshift hanger, or invest in a specialized flower drying rack. If you’re short on space, consider using paper bags to dry individual flowers. Simply place the stem end of the flower into the bag and tie the top with a rubber band.
Another creative option is to repurpose an old picture frame as a drying rack. This will not only save you money but also add a decorative touch to your workspace. Whichever method you choose, be sure to hang or store the flowers in a well-ventilated area away from direct sunlight. It can take anywhere from 2-6 weeks for flowers to fully dry depending on their size and moisture content.
Silica Gel and Desiccant Methods
When it comes to drying flowers quickly and efficiently, silica gel is an excellent option. This desiccant method involves placing the flower stems into a container filled with silica gel, which absorbs moisture from the flowers. The result is dried flowers that retain their natural color and texture.
To use silica gel effectively, first prepare your flowers by trimming the stems to about 2-3 inches long. Then, place the stems in a container filled with silica gel, making sure they are completely submerged. Seal the container to prevent moisture from entering. Within a few days to a week, your flowers will be dry and ready for use in wreath-making.
Another benefit of using silica gel is that it helps preserve the natural color and texture of the flowers. This method is particularly useful for delicate blooms like roses and carnations, which can be prone to fading or browning when air-dried.
Preserving and Arranging Wreaths
Now that you’ve dried your beautiful flowers, let’s move on to preserving and arranging them into stunning wreaths for a long-lasting display. This section will guide you through the process of making a gorgeous floral wreath.
Pressing Flowers for Long-Lasting Wreaths
When it comes to creating long-lasting wreaths, pressing flowers is an excellent technique to preserve delicate petals. To flatten and preserve flowers using this method, you’ll need a flower press or a heavy book. A flower press is specifically designed for drying flowers, while a heavy book can serve as a makeshift alternative.
If you have access to a flower press, follow these steps: Place the fresh flowers between two sheets of paper towels in the press, making sure not to overlap them. Close the press and apply even pressure to ensure the flowers are pressed flat. Leave the flowers to dry for 2-4 weeks, or until they’re completely dry and brittle.
If you don’t have a flower press, use a heavy book instead: Place the fresh flowers between two sheets of paper towels and place them on top of a heavy book. Weigh down the book with something heavy, like a cast-iron skillet or a can of soup, to apply even pressure. Leave the flowers to dry for 2-4 weeks, checking on them periodically to ensure they’re not developing mold.
Keep in mind that pressing flowers takes time and patience, but the end result is well worth it: beautiful, long-lasting petals that add a delicate touch to your wreaths.
Assembly and Styling Tips
When it comes to assembling and styling wreaths with dried flowers, the possibilities are endless. To create visually appealing arrangements, you’ll want to balance the blooms with lush greenery, elegant ribbons, and other thoughtful embellishments.
Start by selecting a few statement pieces of dried flower, such as peonies or hydrangeas, and arrange them on your wreath form in a loose, organic shape. Fill in any gaps with smaller flowers like baby’s breath or Queen Anne’s lace. For added texture and depth, incorporate some greenery like eucalyptus, ferns, or lemon leaves.
Don’t forget to add ribbons and bows to tie the look together – try pairing a soft pastel hue with a neutral-toned ribbon for a chic contrast. Consider adding other embellishments like vintage buttons, lace, or even seashells to give your wreath some personality. Experiment with different combinations to find the perfect blend of textures, colors, and shapes that reflects your personal style.
Common Mistakes to Avoid
As you start drying flowers for wreaths, it’s easy to fall into common pitfalls that can ruin your delicate blooms. This section will help you sidestep these mistakes and achieve beautiful, long-lasting dried arrangements.
Over-Drying
When drying flowers for wreaths, it’s easy to get caught up in the excitement of creating a beautiful arrangement and forget that over-drying can be detrimental to their appearance. Over-drying occurs when flowers are left on the drying rack or in the drying container for too long, causing them to become brittle and prone to breaking.
The consequences of over-drying flowers include:
• Loss of texture and softness
• Buds and petals may crack or shatter
• Colors may fade, becoming dull and lifeless
To prevent over-drying, it’s essential to monitor your flowers’ progress regularly. Check on them every few days, gently flexing the stems to assess their flexibility. If you notice they’re starting to become brittle or show signs of drying out too quickly, consider moving them to a more humid environment.
A good rule of thumb is to aim for a dryness level that’s slightly less than completely dry. This will help preserve the flowers’ natural appearance and prevent over-drying. Remember, it’s better to err on the side of caution and take your dried flowers off the rack when they’re still slightly flexible.
Under-Drying or Incorrect Storage
When it comes to drying flowers for wreaths, proper storage conditions are just as crucial as the drying process itself. If not done correctly, dried flowers can become discolored, brittle, and even develop mold or mildew.
One common mistake is under-drying or over-storing flowers. When flowers are not fully dry, they can retain moisture, creating an ideal environment for bacteria and fungi to grow. This can lead to spoilage, causing the flowers to decay quickly. To avoid this, make sure to check your dried flowers regularly and store them in a well-ventilated area.
Another mistake is storing dried flowers in humid or damp environments. Basements, attics, or areas with poor airflow are not suitable for storing dried flowers. Instead, store them in a cool, dry place like a closet or cabinet with good ventilation. Keep them away from direct sunlight and moisture-rich materials like paper or fabric.
To ensure your dried flowers remain fresh-looking for years to come, keep the storage area clean, dry, and well-ventilated. This will help maintain their color, texture, and overall appearance.
Creative Ideas and Inspiration
Now that you’ve learned the basics of drying flowers, let’s dive into some creative ideas for using your beautifully preserved blooms in stunning wreaths.
Using Dried Flowers in Home Decor
When you’ve dried and preserved your beautiful flowers, it’s time to think about showcasing them in your home decor. Dried flower wreaths can add a touch of elegance and whimsy to any room, making for lovely wall hangings, centerpieces, or even thoughtful gifts.
Consider using your dried flower wreath as a statement piece on a bare wall, adding texture and interest to an otherwise blank space. You can also use them as a beautiful centerpiece for your dining table, filling the space with soft colors and gentle scents.
To get creative, try combining different types of dried flowers in one wreath, or mixing them with other natural elements like branches, ribbons, or pinecones. This will add depth and visual interest to your design. For example, pairing delicate baby’s breath with bold sunflowers creates a striking contrast that can’t be missed.
When gifting a dried flower wreath, consider adding a personal touch by attaching a ribbon or a small card with the name of the flowers used. This thoughtful gesture will make it an extra-special present for friends and family.
Seasonal and Themed Wreaths
Creating seasonal and themed wreaths using dried flowers is an excellent way to add a personal touch to your home decor. Whether it’s a holiday, special occasion, or simply adding some everyday flair, the possibilities are endless.
Let’s start with holidays: Christmas, for example, lends itself perfectly to red poinsettias, cranberries, and pinecones, while Easter can be beautifully represented by dried tulips, baby’s breath, and pastel-colored flowers. For a summer wedding, consider using dried roses, hydrangeas, or peonies in soft hues.
For everyday decor, you can create a beautiful monochromatic look with different shades of the same flower, like pale pink roses or blue delphiniums. To give your wreath a pop of color, add some seasonal foliage like eucalyptus or ferns. You can also mix and match different flowers to reflect your personal style.
To take it to the next level, consider incorporating other elements like ribbons, pinecones, or ornaments to add texture and depth to your wreath. Don’t be afraid to experiment and have fun with it – after all, that’s what creating something unique is all about!
Frequently Asked Questions
How can I store dried flowers to maintain their color and texture?
To ensure your dried flowers remain vibrant and intact, store them in a cool, dry place away from direct sunlight. Consider using acid-free paper or tissue to wrap individual blooms, then placing them in an airtight container or bag. This will help preserve their natural hues and prevent fading.
Can I use silk or artificial flowers as alternatives to real dried ones?
Yes, silk or artificial flowers can be excellent alternatives when working with delicate blooms or for those who prefer a more low-maintenance option. These synthetic flowers mimic the look of real dried flowers but require little to no maintenance. They’re ideal for wreaths that will be exposed to heavy use or harsh environments.
How do I determine if my dried flowers have been over-dried or under-dried?
Over-drying can cause flowers to become brittle and prone to breakage, while under-drying leaves them soggy and susceptible to mold. Check the texture of your blooms by gently pinching them between your fingers; they should be slightly flexible but not pliable. If still unsure, consult online resources or consult with a local florist for guidance.
Can I use dried flowers in outdoor wreaths exposed to rain or direct sunlight?
While some dried flowers are more durable than others, it’s generally best to avoid using them outdoors where they’ll be exposed to heavy rain or intense sunlight. For outdoor wreaths, consider using synthetic materials or opt for wreaths that can be easily protected from the elements.
What’s the ideal time frame for assembling and styling a dried flower wreath?
To ensure your wreath looks its best, allow at least 24-48 hours between drying flowers and assembly. This allows excess moisture to dissipate, preventing mold or mildew growth. Once assembled, avoid making adjustments to your wreath for several days to prevent causing irreparable damage.