Drying pumpkin seeds at home is an essential step in preserving their delicate flavor, crunch, and nutritional value. When done correctly, dried pumpkin seeds can be stored for months, making them a convenient snack or ingredient to have on hand. However, improper drying methods can lead to rancidity, reducing the shelf life of these nutritious seeds.
If you’re eager to learn how to dry pumpkin seeds effectively at home, you’ve come to the right place. This comprehensive guide will walk you through preparation, various drying methods, and storage tips for optimal nutrition and shelf life. From understanding the importance of moisture control to discovering the best ways to dry your seeds, we’ll cover everything you need to know to enjoy perfectly preserved pumpkin seeds all year round.
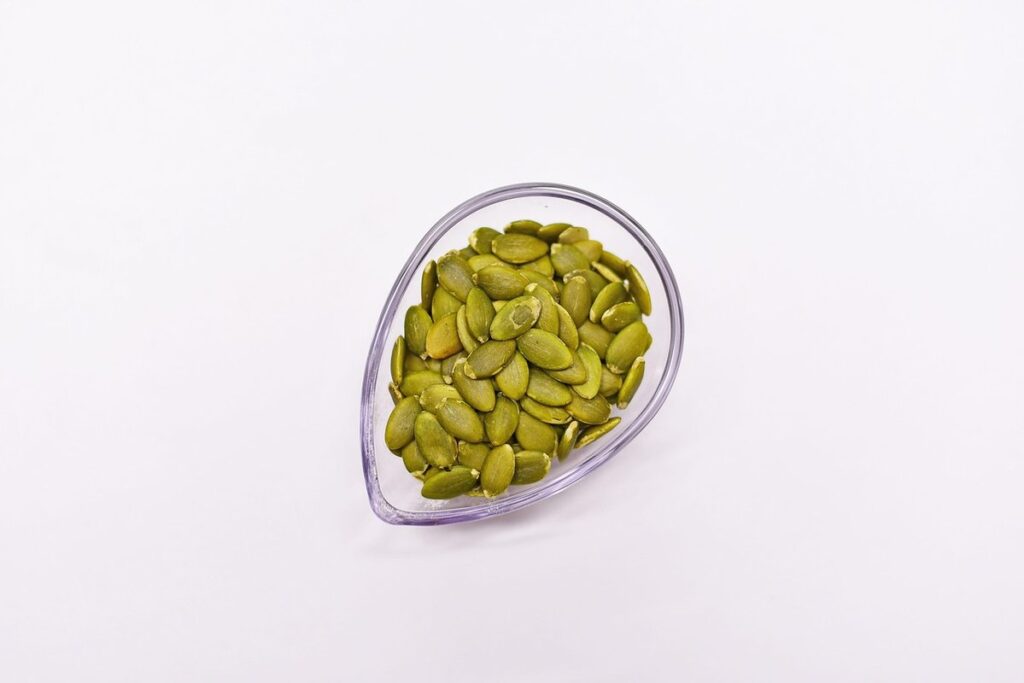
Understanding the Benefits of Dried Pumpkin Seeds
Now that you’ve learned how to dry your pumpkin seeds, it’s time to explore their nutritional benefits and learn why incorporating them into your diet is a great idea. You’ll discover the advantages of snacking on dried pumpkin seeds.
What are the Health Benefits of Dried Pumpkin Seeds?
Dried pumpkin seeds are a nutrient-dense snack that offers numerous health benefits. One of the most significant advantages is their high protein content, making them an excellent option for vegetarians and vegans looking to boost their protein intake. A single ounce of dried pumpkin seeds contains around 7 grams of protein, which can be substantial in a single serving.
In addition to being rich in protein, dried pumpkin seeds are also an excellent source of magnesium. This essential mineral plays a crucial role in muscle function, nerve function, and bone health. In fact, one ounce of dried pumpkin seeds provides over 150 milligrams of magnesium, which is roughly 40% of the recommended daily intake.
Dried pumpkin seeds have also been found to possess anti-inflammatory properties, making them a potential natural remedy for conditions such as arthritis. The unique combination of antioxidants and fatty acids in these seeds may help reduce inflammation and alleviate symptoms associated with various inflammatory diseases. Overall, incorporating dried pumpkin seeds into your diet can have a significant impact on overall health and well-being.
Why Dry Your Own Pumpkin Seeds?
Drying your own pumpkin seeds is not only a fun and rewarding process, but it also offers several benefits over store-bought options. One of the most significant advantages is cost-effectiveness. When you dry your own pumpkin seeds, you can do so in bulk, making each serving much more affordable. For example, if you plan to roast a few pounds of pumpkin seeds at once, you’ll end up with a large quantity that will last you for months.
Another benefit of drying your own pumpkin seeds is quality control. When you dry the seeds yourself, you have complete control over the process, ensuring that they are free from additives and preservatives often found in store-bought varieties. You can also customize the drying process to suit your personal preferences, whether it’s seasoning with herbs or spices or using a specific drying method.
In addition, drying your own pumpkin seeds allows you to preserve the full nutritional value of the seeds. Commercially dried seeds may have undergone high-heat processing that can damage their delicate nutrients. By drying your own seeds at home, you can ensure they retain all their natural goodness.
Preparing Pumpkin Seeds for Drying
Now that you’ve harvested your pumpkin seeds, it’s time to prepare them for drying. This crucial step ensures they dry evenly and preserves their flavor and nutritional value effectively.
Harvesting and Cleaning Pumpkin Seeds
Harvesting and cleaning pumpkin seeds is an essential step before drying them. This process may seem daunting at first, but with a few simple techniques, you can remove excess pulp and debris, leaving you with clean and usable seeds.
To start harvesting, gently scoop out the seeds from your pumpkin using a spoon or specialized tool. Be careful not to damage the seeds as they are delicate. Place the scooped-out seeds in a container or bowl for cleaning.
Next, separate the seeds from any excess pulp by rinsing them under cold running water. This will help loosen and remove any attached fibers. To further clean the seeds, soak them in a large bowl of water for about an hour. The floating debris and pulp will rise to the surface, making it easy to scoop out with a spoon.
After soaking, drain the water and inspect the seeds for any remaining pulp or debris. Use your fingers or a soft-bristled brush to gently remove any excess material.
Roasting or Blanching Pumpkin Seeds: A Necessary Step?
Roasting or blanching pumpkin seeds before drying them may seem like an extra step, but it’s actually a crucial process that enhances flavor and texture. Blanching involves briefly submerging the seeds in boiling water to inactivate enzymes that can cause spoilage, while roasting uses dry heat to enhance flavor.
While neither method is strictly necessary, blanching can be beneficial for smaller batches or delicate varieties. For instance, if you’re working with a particularly tender pumpkin seed, blanching will help preserve its natural flavor and prevent it from becoming overcooked during the drying process. On the other hand, roasting brings out a rich, nutty flavor that many people prefer.
To roast pumpkin seeds effectively, preheat your oven to 350°F (175°C). Toss the seeds with a small amount of oil and your preferred seasonings, then spread them in a single layer on a baking sheet. Roast for about 30 minutes or until fragrant and lightly browned. For blanching, submerge the seeds in boiling water for just 2-3 minutes to prevent overcooking.
Keep in mind that both methods are optional, and you can still achieve good results without either. However, taking this extra step can make a noticeable difference in the final product’s flavor and texture.
Drying Methods for Pumpkin Seeds
Now that you’ve harvested and cleaned your pumpkin seeds, it’s time to dry them properly to preserve their flavor and nutritional value. Let’s explore the best drying methods together.
Air Drying vs. Oven Drying vs. Dehydrator Drying
When it comes to drying pumpkin seeds, you have three main options: air drying, oven drying, and dehydrator drying. Each method has its advantages and disadvantages, which we’ll explore below.
Air drying is a simple and low-cost method that works well for small batches of seeds. To air dry pumpkin seeds, spread them out in a single layer on a paper bag or a clean cloth, making sure they don’t overlap. Place the bag or cloth in a warm, dry area with good airflow, like a pantry or cupboard. The drying time will depend on the humidity and temperature, but it can take anywhere from 1-2 weeks to complete.
Oven drying is faster than air drying but requires more attention. Preheat your oven to its lowest temperature setting (usually around 150°F). Place the pumpkin seeds in a single layer on a baking sheet lined with parchment paper. Leave the oven door slightly ajar and let it run for 1-2 hours, or until the seeds are dry and brittle.
A dehydrator is a dedicated appliance that can dry your pumpkin seeds quickly and evenly. Simply place the seeds in the dehydrator trays according to the manufacturer’s instructions and set the temperature between 135°F – 155°F. The drying time will depend on the specific model, but it typically takes 6-12 hours.
When choosing a method, consider the amount of seeds you have and your available space. For small batches, air drying is a great option. If you have a larger quantity or prefer a faster process, oven drying or using a dehydrator might be more suitable. Additionally, keep in mind that oven drying can be less energy-efficient than other methods.
In terms of shelf life, all three methods will result in dried pumpkin seeds that can last for several months when stored properly in an airtight container. However, if you notice any mold or mildew during the drying process, it’s best to start over with fresh seeds.
Tips for Successful Air Drying: A Crucial Step
Air drying is a crucial step in preserving pumpkin seeds, and it’s surprising how many people get this part wrong. To successfully air dry your pumpkin seeds, you need to create an ideal environment that mimics nature. This means maintaining the right temperature and humidity levels.
Aim for a room temperature between 60°F to 70°F (15°C to 21°C) – any higher or lower can affect seed quality. Humidity is also crucial; aim for a relative humidity of around 50% to 60%. You can use a hygrometer to measure the exact levels.
When placing your seeds in the drying area, make sure they’re spread out evenly and not overlapping. This will prevent moisture from becoming trapped between them, which can lead to mold or rot. If you live in a humid climate, consider using a fan to circulate air and speed up the process. Be patient; air drying can take anywhere from 7-14 days depending on the conditions. Regularly check your seeds for dryness by biting into one – if it’s still moist, let them dry for another day or two.
Storage and Preservation of Dried Pumpkin Seeds
Now that you’ve dried your pumpkin seeds, it’s time to think about how you’ll store them for long-term use – we’ve got some tips on storage and preservation. Proper care will help keep them fresh and usable next year.
Why Proper Storage is Essential
When it comes to drying pumpkin seeds, one crucial step that often gets overlooked is proper storage. This is where many gardeners and food preservation enthusiasts make mistakes, leading to a decrease in the quality and shelf life of their dried seeds.
Proper storage helps maintain the viability and germination rate of the seeds by protecting them from moisture, heat, and light. Dried pumpkin seeds can absorb moisture from the air, causing mold or mildew growth, which can be devastating for seed quality. To prevent this, store your dried seeds in an airtight container, such as a glass jar with a tight-fitting lid.
You should also keep your stored seeds away from direct sunlight and heat sources. A cool, dark place like a pantry or cupboard is ideal. Some gardeners even store their seeds in the refrigerator to maintain optimal conditions. Remember to label your containers clearly, including the seed variety, date of drying, and any relevant notes on storage conditions.
By storing your dried pumpkin seeds properly, you can ensure they remain viable for many years, ready to be planted when the time is right.
How to Store Dried Pumpkin Seeds: Tips and Tricks
When you’ve successfully dried and cleaned your pumpkin seeds, it’s essential to store them properly to maintain their quality and viability. Here are some valuable tips for storing dried pumpkin seeds:
Store the seeds in airtight containers, such as glass jars or plastic bins with tight-fitting lids. You can also use vacuum-seal bags or Mylar bags, which remove oxygen from the container, preventing moisture buildup and spoilage. Label each container with the date stored and contents.
To further preserve your dried pumpkin seeds, consider freezing them. Place the containers in a freezer-safe bag or wrap them tightly in plastic wrap to prevent moisture from entering. Frozen seeds will keep for up to five years. When you’re ready to use them, simply thaw the desired amount at room temperature or soak them overnight before sowing.
When storing dried pumpkin seeds, remember that pests like insects and rodents can still damage the seeds. Store the containers in a cool, dry place away from direct sunlight. Regularly check on your stored seeds for signs of moisture, mold, or pest infestations to ensure they remain viable.
Troubleshooting Common Issues with Drying Pumpkin Seeds
Don’t panic if your pumpkin seeds aren’t drying as expected, we’ve got solutions for common problems that can arise during the drying process. Let’s get to troubleshooting!
Why are My Pumpkin Seeds Not Drying Properly?
If you’re experiencing issues with your pumpkin seeds not drying properly, don’t worry – it’s more common than you think. One of the main reasons for uneven drying is inadequate airflow. If the area where you’re drying your seeds doesn’t have good ventilation, moisture can become trapped, leading to slow or uneven drying.
Another issue that may arise is mold growth. This usually occurs when there’s excessive humidity in the environment, causing water droplets to form on the surface of the seeds. To prevent this, make sure the area where you’re drying your seeds is dry and well-ventilated.
When drying pumpkin seeds, it’s essential to monitor their moisture levels regularly. Use a food dehydrator or oven to speed up the drying process and maintain consistent temperatures between 135°F and 155°F (57°C and 68°C). Keep an eye out for any signs of mold growth, such as white patches or a musty smell, and remove affected seeds immediately.
If you notice uneven drying on specific parts of your pumpkin seeds, try rotating them regularly to ensure even exposure to heat. This will help prevent the formation of hot spots and promote more consistent drying.
How to Fix Over-Dried or Under-Dried Pumpkin Seeds
Fixing over-dried or under-dried pumpkin seeds can be a challenge. If you’ve noticed that your dried seeds are too brittle or fragile, it’s likely they’re over-dried. On the other hand, if they feel soggy and moist, they might have been under-dried.
To rehydrate over-dried seeds, try soaking them in water for several hours. Change the water a few times to ensure the seeds absorb evenly. Be cautious not to soak them for too long, as this can cause mold or rot. For under-dried seeds, you may need to dry them further using a food dehydrator or by placing them in a low-temperature oven (150°F – 200°F) for several hours.
It’s essential to inspect your seeds regularly during the drying process to catch any issues early on. If you notice your seeds are drying unevenly, consider stirring or rotating them periodically to promote even evaporation. With patience and attention to detail, you can salvage over-dried or under-dried pumpkin seeds and enjoy a successful harvest.
Conclusion and Final Tips
Now that you’ve successfully dried your pumpkin seeds, let’s wrap up with a few final tips to ensure they stay fresh and ready for use in your next recipe.
Recap of Key Takeaways
To recap, successfully drying pumpkin seeds requires attention to detail and adherence to a few key steps. First, harvesting at the right time is crucial – ensure the seeds are mature and dry before attempting to dry them further.
Next, it’s essential to understand that different methods work better for various types of seeds. For instance, those from smaller pumpkins like Jack Be Little or Baby Boo often require air drying due to their thinner hulls. Meanwhile, larger varieties can benefit from a food dehydrator or oven drying.
Key takeaways include:
* Harvesting mature and dry seeds
* Understanding the seed type’s specific drying needs
* Monitoring temperature and humidity levels during drying
* Ensuring even drying through gentle stirring or rotation
By following these guidelines and being mindful of your pumpkin variety, you’ll be well on your way to successfully dried pumpkin seeds. Remember to store them in a cool, dry place to preserve their flavor and nutritional value for future use.
Encouragement to Try Drying Your Own Pumpkin Seeds
If you’re new to drying pumpkin seeds, it’s easy to get intimidated by the process. But trust us, with a little practice and patience, you’ll be reaping the benefits of dried pumpkin seeds like a pro! Drying your own pumpkin seeds can seem daunting at first, but it’s actually a fun and rewarding experience that allows you to reap multiple rewards from your pumpkin harvest.
Not only do dried pumpkin seeds make for a delicious snack, they also offer numerous health benefits. By taking the time to dry them yourself, you’ll be able to enjoy them fresh and without any preservatives or additives found in store-bought versions. Plus, with the right techniques and equipment, you can save money by avoiding commercial packaging costs.
So why not give it a try? With our step-by-step guide, you’ll be well on your way to drying your own pumpkin seeds like a pro! By following these simple steps and taking the time to experiment with different techniques, you’ll be amazed at how easy it is to dry your own pumpkin seeds. Don’t be afraid to get creative and try new things – after all, that’s what makes this process so enjoyable!
Frequently Asked Questions
Can I dry pumpkin seeds that have been previously roasted or seasoned?
Yes, you can still dry pumpkin seeds that have been previously roasted or seasoned, but keep in mind that the flavor profile may be affected. If you’re looking to preserve the seasoning, make sure to apply a light coating and avoid over-drying.
How do I know if my dried pumpkin seeds are rancid?
Rancid dried pumpkin seeds can develop off-flavors, become slimy to the touch, or exhibit an unpleasant odor. Check your stored seeds regularly for these signs, and discard any that show evidence of spoilage.
Can I use a food dehydrator with temperature control to dry my pumpkin seeds?
Yes, using a food dehydrator with temperature control can be an excellent way to dry pumpkin seeds, especially if you’re new to the process. This method allows for precise temperature regulation, helping to preserve nutrients and flavor.
How do I store dried pumpkin seeds in a humid climate?
In humid climates, it’s essential to store dried pumpkin seeds in airtight containers or ziplock bags with silica gel packets to maintain dryness. You can also consider using a vacuum sealer for added protection against moisture.
Can I use the same drying method for different types of squash seeds?
While the basic principles remain the same, you may need to adjust your drying time and temperature depending on the specific type of squash seed you’re working with. For example, larger seeds like acorn squash might require longer drying times than smaller seeds like pattypan.