Drying flowers is an art that has been cherished for centuries, allowing us to preserve the beauty of nature and create stunning arrangements that last long after their fresh counterparts have wilted. Whether you’re a seasoned crafter or a busy homeowner looking for ways to add a personal touch to your decor, learning how to dry flowers can be a game-changer. With our comprehensive guide, you’ll discover the best methods for drying flowers, from air-drying and desiccant techniques to oven-drying and pressing flowers. We’ll walk you through each step, covering the pros and cons of each method so you can choose the one that works best for you. By following these simple tips, you’ll be able to create beautiful, long-lasting arrangements that bring a touch of elegance to any room in your home.
Choosing the Right Flowers
When it comes to preserving beautiful blooms, choosing the right flowers is crucial for a successful drying process. This selection will greatly impact the final appearance of your dried arrangements.
Selecting Dried-Friendly Varieties
When it comes to drying flowers, some varieties are naturally more cooperative than others. To increase your chances of achieving beautiful, long-lasting blooms, focus on selecting dried-friendly varieties.
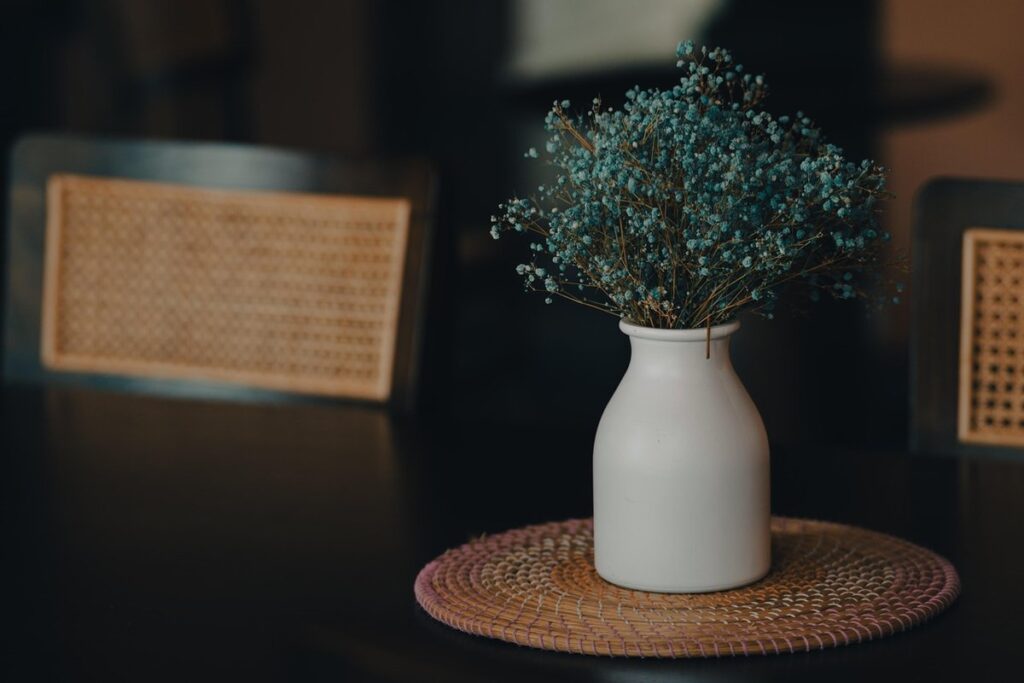
Flowers with low water content tend to dry better and faster. Consider choosing blooms like baby’s breath, lavender, and statice, which are renowned for their ability to retain color and shape when dried. These flowers have a naturally lower moisture level, making them more forgiving during the drying process.
To identify other dried-friendly varieties, look for flowers with delicate petals or wiry stems. Roses, carnations, and marigolds often work well, although they may require some extra TLC to ensure they dry evenly. Remember that even within popular varieties, there can be significant differences in performance based on factors like soil quality, climate, and growing conditions.
When selecting flowers for drying, choose those with a few days of bloom left. This allows you to cut the stems at the peak of freshness, reducing the risk of mold or discoloration during the drying process.
Considering Color and Texture
When it comes to drying flowers for decoration, the color and texture of the blooms play a significant role in creating visually appealing arrangements. Different colors can evoke various emotions and moods, while textures add depth and interest to the final product.
Consider combining cool-toned pastel shades like pale blue or lavender with natural textures like dried grasses or ferns. This contrast will create a calming and serene ambiance perfect for a bedroom or meditation room. On the other hand, bright and bold colors like sunflowers or gerbera daisies can add energy and vibrancy to a space.
Mixing different textures is just as important as choosing the right color palette. For instance, pairing delicate orchids with chunky dried hydrangeas will create a beautiful visual balance. To take your arrangements to the next level, experiment with combining matte and glossy finishes or velvety soft petals with smooth, waxy leaves.
By considering the colors and textures of your flowers, you can create stunning arrangements that add warmth and personality to any room in your home.
Preparing Flowers for Drying
Before you begin drying your flowers, it’s essential to prepare them correctly to preserve their beauty and prevent damage. This includes gently removing excess foliage and trimming stems.
Harvesting at the Right Time
When it comes to preserving flowers for decoration, timing is crucial when harvesting them. Delicate petals and sensitive stamens can be easily damaged if picked at the wrong stage of ripeness. This can result in unsightly wilted or brown flowers, which defeat the purpose of drying them in the first place.
To avoid this, it’s essential to recognize optimal flower ripeness before harvesting. For many types of flowers, like roses and peonies, a gentle pull on the stem will indicate if they’re ready. If the stem comes off easily, it’s likely time to pick. Conversely, if it resists removal, wait another day or two.
For more delicate blooms, such as lavender and baby’s breath, snip off individual florets or stems at the first signs of wilting or drooping. This will prevent further damage and preserve their appearance. Regularly inspect your flowers for optimal ripeness to ensure they dry well and retain their natural beauty. Timing is key when it comes to preserving these beautiful blooms – get it right, and you’ll be rewarded with gorgeous dried flowers that add a touch of elegance to any room.
Removing Leaves and Stems
Removing excess foliage and stems from dried blooms is an essential step to maintain their appearance and promote even drying. When flowers are attached to their stems and leaves, they can become compacted, leading to uneven drying and a less-than-desirable texture. This can also cause the flowers to shrink or discolor during the drying process.
To remove foliage and stems effectively, start by cutting off any excess leaves that will be below the waterline when you dry the flowers. Use scissors or pruning shears to trim the leaves close to the stem, leaving about 1-2 inches of stem intact. This will help prevent moisture from collecting in the leaves and promote even drying.
Next, cut the stems at an angle using a sharp knife or pruning tool. This helps increase the surface area for water absorption during the drying process. You can also use floral preservatives to help maintain the color and texture of the flowers. By removing excess foliage and stems, you’ll be able to preserve your beautiful blooms in their most vibrant state, ready for decoration.
Air Drying Methods
Now that you’ve learned the basics of flower drying, let’s explore the various air drying methods to help preserve your beautiful blooms.
Using Paper Bags or Wrapping
Air drying is one of the most popular and gentle methods for preserving flowers. It’s a low-cost approach that requires minimal equipment, making it perfect for beginners. When using paper bags or wrapping to dry individual blooms or small clusters, start by selecting fresh flowers with no signs of wilting.
Wrap each bloom in brown paper, leaving some space between them to allow air circulation. You can also use wrapping paper or parchment paper, but avoid shiny or metallic finishes as they can cause the flowers to become brittle. Secure the wrap with a twist tie or a small clip, making sure not to crush the delicate petals.
Place the wrapped blooms in a cool, dry, dark place for 1-2 weeks. Check on them regularly to ensure even drying. Avoid direct sunlight and heat sources, as they can cause the flowers to fade or become discolored. By using paper bags or wrapping, you’ll be able to preserve the delicate details of your flowers, keeping their natural beauty intact.
Creating a Dry Room
Creating a dedicated space with controlled temperature and humidity levels is crucial for air drying flowers. This environment allows you to monitor the drying process closely and maintain optimal conditions. To create a dry room, start by selecting a location that’s well-ventilated, has natural light, and is protected from direct sunlight.
Maintain a consistent temperature between 60°F to 70°F (15°C to 21°C) and relative humidity levels below 50%. You can achieve this using dehumidifiers or fans. Ensure good air circulation by opening windows or installing vents.
Monitor the flowers’ progress regularly, checking for any signs of mold or decay. Adjust your environment as needed to prevent these issues. A dry room will also help you maintain uniform drying times across different flower types.
When setting up your space, consider using shelves or racks to elevate the flowers and promote air circulation underneath. This will aid in even drying and prevent moisture buildup. By creating a dedicated dry room with controlled conditions, you’ll be able to preserve your beautiful blooms with ease and consistency.
Desiccant Methods
When it comes to drying flowers, desiccant methods offer a precise and controlled way to preserve blooms. This process involves using specific products to absorb moisture from the flowers.
Using Silica Gel or Sand
Using desiccants like silica gel, sand, or borax is an effective method for absorbing moisture from flowers. These substances are commonly used to preserve delicate blooms and can be found at most craft stores.
To use silica gel or sand effectively, you’ll need to mix the desiccant with your flowers in a container. A general rule of thumb is to use 1 part desiccant to 2 parts flowers. For example, if you’re drying a bouquet of roses, you would place one cup of silica gel into a large container and add two cups of rose petals.
Monitor the absorption rate by checking on your flowers every few days. It’s essential to ensure that the desiccant is not too dense or dry, as this can cause the flowers to become brittle and fragile. Aim for an even distribution of moisture throughout the mixture. With proper care, your flowers should be completely dry within a week to 10 days.
Keep in mind that borax can also be used as a desiccant, but it may leave a residue on delicate petals. Silica gel is generally considered the safest and most effective option for preserving beautiful blooms.
Creating a DIY Desiccant Mix
Creating a homemade desiccant mix is not only cost-effective but also eco-friendly. To dry flowers quickly and efficiently, you’ll need a mixture that absorbs excess moisture without causing damage to the petals. Here’s how you can create a DIY desiccant mix using household items.
One of the simplest mixes involves combining 1 cup of Epsom salt with 2 cups of borax. This potent blend will absorb moisture rapidly, making it perfect for drying delicate flowers like lavender or baby’s breath. Alternatively, you can use an equal mixture of rice and cornstarch, which is gentler on petals while still effective at desiccation.
Another option is to mix 1 cup of silica gel with 2 cups of baking soda. This combination works well for preserving larger blooms like peonies or roses. When creating your DIY desiccant mix, remember to adjust the proportions according to the type and size of flowers you’re working with.
Oven Drying Methods
For a delicate and long-lasting finish, you’ll want to master the technique of oven drying, where temperature and time are crucial factors. We’ll break down the steps for achieving perfectly dried flowers in this method.
Setting Up the Oven
When it comes to oven drying, understanding its benefits is essential. This method allows for quick and even drying of delicate flowers, making it a popular choice among flower preservation enthusiasts. By utilizing the oven’s controlled heat, you can successfully dry blooms that might otherwise be difficult to preserve using air-drying methods.
To set up your oven for successful drying, begin by adjusting the temperature to its lowest setting, usually around 150°F (65°C). This gentle heat helps prevent scorching and promotes even moisture evaporation. Next, ensure good air circulation within the oven by leaving the door slightly ajar. This allows excess moisture to escape, speeding up the drying process.
It’s crucial to keep a close eye on your flowers’ moisture levels during oven drying. Check on them frequently to avoid over-drying, which can cause petals to become brittle and discolored. Aim for a delicate balance between dryness and flexibility.
Monitoring Progress
Monitoring progress is crucial when drying flowers to ensure they retain their natural beauty and integrity. If not checked frequently, blooms can easily become over-dried, losing their delicate texture and color, or under-dried, fostering the growth of mold and bacteria.
To avoid this, it’s essential to regularly inspect the dried flowers for any signs of dryness, fragility, or discoloration. Check on them every day or two during the drying process, especially in the initial stages when changes are more pronounced.
When monitoring progress, pay attention to the following indicators:
* The texture: If the petals become brittle and start to crumble, they’re likely over-dried.
* Color: A noticeable change in hue or discoloration can indicate that the flowers have been exposed to too much heat or moisture.
* Fragrance: Over time, the scent of fresh blooms will fade. However, if it disappears rapidly, it may be a sign that the drying process is proceeding too quickly.
By keeping a close eye on these factors and making adjustments as necessary, you can preserve your beautiful blooms in their most radiant state.
Pressing Flowers
To preserve delicate blooms, air drying is a simple and effective method for drying flowers, but it requires some careful planning to ensure success. Let’s dive into the steps for pressing flowers.
Using Heavy Objects or Flower Presses
Pressing flowers is another low-cost method for drying delicate petals that’s perfect for preserving beautiful blooms. This technique involves using heavy objects to flatten and dry the flowers, which helps to maintain their natural color and texture.
To press flowers using a book or flower press, start by selecting a sheet of paper, such as blotting paper or newspaper, and place your flowers on it. If you’re using a book, you can stack several books on top of each other to apply even pressure. Alternatively, use a dedicated flower press with interchangeable plates, which allows for more precise control over the drying process.
For delicate petals like orchids or forget-me-nots, you may need to add some weighty objects, such as bricks or heavy decorative stones, to ensure they’re properly flattened. It’s essential to keep an eye on the flowers’ progress and flip them halfway through the pressing process to prevent uneven drying. By following this simple method, you can preserve your favorite blooms for years to come, adding a personal touch to your home decor or gifting them as unique keepsakes.
Creating a DIY Press
Creating a DIY Press is an excellent option if you’re looking to dry flowers on a budget or want a customized solution for specific types of petals. With some readily available materials like cardboard and wire mesh, you can build a functional flower press that will preserve those delicate blooms.
To get started, gather the following materials: two pieces of sturdy cardboard, some wire mesh (the kind used in gardening works well), scissors, and some string or twine. Cut out two identical squares from the cardboard, making sure they’re large enough to hold your flowers snugly. Next, wrap the wire mesh over one piece of cardboard, securing it with string or twine to create a sturdy frame.
Place this frame on top of the second piece of cardboard, pressing down gently but firmly to flatten out any air pockets. Now you have a basic flower press! Simply add a few sheets of paper towel between each layer of flowers and place them in your DIY press, making sure not to overstuff it.
Finishing Touches
Now that you’ve dried and preserved your beautiful blooms, it’s time to add some finishing touches to make them truly shine for your home decor. This is where creativity meets preservation.
Handling and Storage
When handling dried flowers, it’s essential to remember that they are delicate and can easily be damaged. When arranging them in displays or wreaths, gently place each flower in its desired position, taking care not to crush or bend the petals. You can use floral wire or green wire stems to support the flowers if needed.
To store dried flowers, keep them away from direct sunlight, moisture, and heat sources. This will help preserve their color and texture over time. Store them in a cool, dry place such as an attic or closet. If you need to store large quantities of dried flowers, consider using acid-free tissue paper or boxes specifically designed for storing dried flowers.
When not in use, store your dried flower arrangements or wreaths in a protective covering, such as a glass cloche or a breathable cloth bag, to shield them from dust and moisture. This will help maintain their beauty for years to come. Regularly inspect your stored dried flowers to ensure they remain dry and free of pests or mold.
Displaying Your Dried Flowers
Now that you’ve successfully dried and preserved your beautiful blooms, it’s time to showcase them in all their glory. Displaying your dried flowers is an art form in itself, and there are countless ways to do so.
One of the most popular methods is using glass containers or vases, which allow the delicate petals to take center stage. You can fill a mercury glass vase with a mix of dried wildflowers and greenery for a whimsical touch, or use a clear glass jar to showcase a single statement bloom. Consider adding some decorative stones or pebbles at the bottom of the container to add visual interest.
For a more rustic look, try incorporating your dried flowers into wreaths or potpourri. Simply tie a bunch of dried blooms together with twine and attach them to a wire or foam base, or combine them with other dried botanicals in a decorative bowl for a fragrant potpourri blend. You can also use dried flowers as a topping for homemade candles or soaps for an extra-special touch.
Experimenting with different display methods will help you find the perfect way to showcase your preserved blooms. Don’t be afraid to get creative and have fun with it!
Frequently Asked Questions
Can I dry flowers that are already wilted or past their prime?
Yes, while it’s ideal to harvest blooms at the right time for optimal drying results, many types of flowers can still be successfully dried even if they’re slightly wilted. However, keep in mind that older flowers might not retain as much color and shape.
How long does it take for air-dried flowers to dry completely?
The air-drying process typically takes anywhere from a few days to several weeks, depending on the humidity level of your environment and the flower type. Monitor their progress by checking on them every few days and adjusting the drying time as needed.
What if I notice mold or mildew developing during the drying process?
No, this shouldn’t happen if you’ve chosen the right flowers for drying and followed proper drying techniques! If you do encounter mold or mildew, gently remove the affected areas with a clean knife, then proceed to dry your flowers according to the method you’re using.
Can I mix different flower types when air-drying them together?
Yes, but it’s essential to choose varieties that have similar drying times and preferences. Combining delicate flowers like roses with more robust ones like baby’s breath can result in inconsistent drying rates and potentially damage the more fragile blooms.
How do I store dried flowers for long-term preservation and display?
To keep your dried arrangements looking their best, consider storing them in a cool, dry place away from direct sunlight. You can also use acid-free tissue paper or breathable bags to protect your flowers from dust and moisture buildup.