Are you tired of wasting precious rainwater and want to do your part for the environment? Installing a rain barrel system at home is an easy and cost-effective way to collect and conserve water, reducing your water bill and helping to mitigate stormwater runoff. But where do you start? With so many types of barrels and installation options available, it can be overwhelming to know which path to take.
In this comprehensive guide, we’ll walk you through the basics of installing a rain barrel system, covering the benefits of rainwater harvesting, different types of barrels to choose from, and troubleshooting tips to ensure your system runs smoothly. By the end of this article, you’ll have a clear understanding of how to install and maintain a rain barrel system at home, making it easy to start reaping the rewards of rainwater collection.
Understanding the Benefits of Rain Barrels
Harvesting rainwater is not just a clever way to save money on your water bills, but also an environmentally friendly practice that can make a significant difference in your community. Let’s explore some of the key benefits you’ll enjoy when using rain barrels at home.
Why Install a Rain Barrel?
Installing a rain barrel is one of the most effective ways to start harvesting rainwater at home. By doing so, you’ll not only be contributing to water conservation efforts but also reducing stormwater runoff and saving money on your water bills.
To begin with, installing a rain barrel helps conserve water by collecting and storing rainwater for non-potable uses such as watering plants, washing cars, or even flushing toilets. This reduces the demand on municipal water supplies and alleviates pressure on local water treatment plants. According to the US Environmental Protection Agency (EPA), a single rain barrel can collect up to 1,300 gallons of rainwater during a typical rainfall event.
By reducing stormwater runoff, you’ll also be helping to prevent erosion and pollution in nearby waterways. Excess rainwater that flows over surfaces can carry pollutants like oil, soap, and dirt into storm drains and ultimately harm aquatic ecosystems. Installing a rain barrel diverting this excess water back onto your property or lawn helps mitigate these effects.
In terms of cost savings, installing a rain barrel can help you save money on your water bills by reducing the amount of potable water used for non-potable purposes.
Types of Rain Barrels Available
When it comes to selecting a rain barrel for your DIY project, you’ll find a variety of options available in different materials. Plastic rain barrels are one of the most popular choices due to their affordability and durability. They’re often made from food-grade polyethylene or recycled plastic, making them an eco-friendly option. However, some homeowners might find them prone to cracking over time.
Metal rain barrels, on the other hand, offer a more rustic look and can be made from durable materials like galvanized steel or aluminum. They tend to be heavier than their plastic counterparts and may require additional support to prevent collapse. Metal barrels also have a longer lifespan compared to plastic ones but might rust if not properly coated.
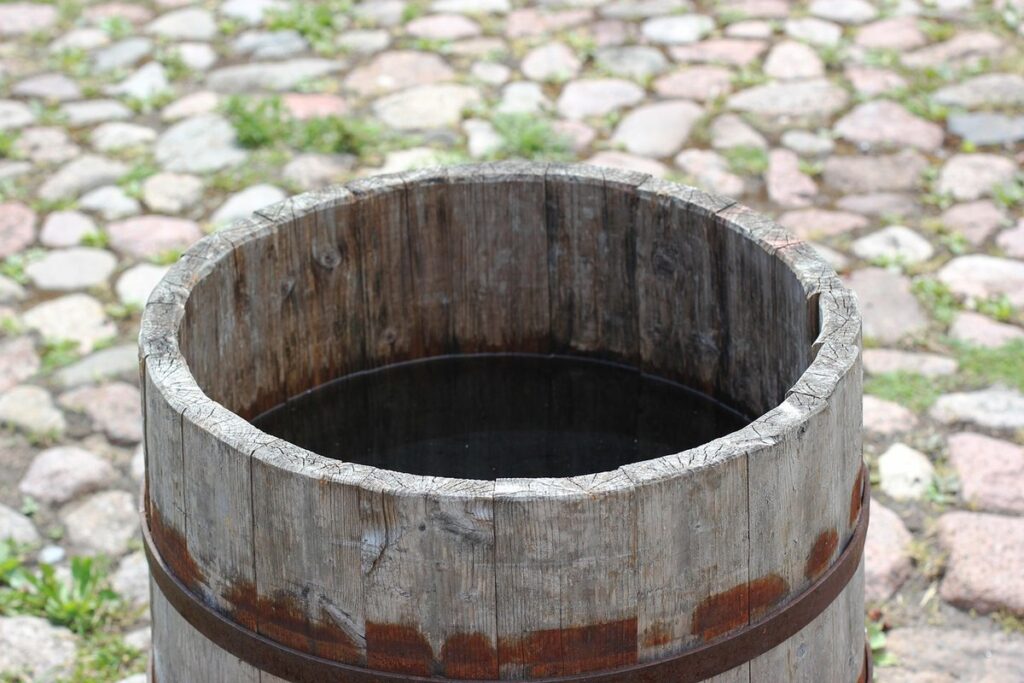
Wooden rain barrels provide a natural, aesthetic appeal and are often made from cedar or redwood. However, they can be more expensive than other materials and require regular maintenance to prevent rotting. Some wooden barrels may also leach chemicals into the water over time, which could impact water quality.
Determining the Right Size for Your Needs
When determining the right size for your rain barrel, several factors come into play. First and foremost, consider the roof size of your home or building. A larger roof means more rainwater collection potential, so you’ll want a bigger barrel to capture that excess water. As a general rule of thumb, a 1,000 square foot roof can produce about 600 gallons of rainfall per inch.
Next, think about your rainfall collection requirements. Do you need a steady supply for irrigation or washing machines, or do you just want to collect enough for occasional use? Consider the number of plants you’re watering and how often you’ll be using the collected water. For example, if you have a large vegetable garden, you may want a larger barrel to ensure consistent watering.
Space constraints are also essential to consider. Measure your available space and think about where the rain barrel will sit relative to downspouts and other structures. Make sure there’s enough clearance for easy access and maintenance. As a rough estimate, plan on dedicating at least 10 square feet of space per 100 gallons of storage capacity.
Finally, don’t forget about overflow considerations. What happens when your rain barrel is full? Will you need additional storage or a separate drainage system to prevent water from spilling over?
Preparing for Rain Barrel Installation
Before you start building, it’s essential to prepare your yard and home for a successful rain barrel installation. Make sure to clear any debris from around your chosen location first.
Assessing Your Roof’s Drainage and Gutters
When it comes to installing a rain barrel, one crucial step often gets overlooked: assessing your roof’s drainage system and gutters. This may seem like a minor detail, but trust us – it’s essential for optimal water flow and preventing clogs.
Before you start collecting that precious rainwater, take some time to evaluate the condition of your roof’s drainage system. Are your gutters clogged with debris? Is there sagging or rusting on the downspouts? If left unaddressed, these issues can lead to poor water flow into your rain barrel, resulting in reduced capacity and potentially even damage to your home.
Check for any blockages in the downspouts by inserting a hose or plumber’s snake into each one. Also, inspect the gutters for sagging or rusting – if you find any signs of wear, consider replacing them before installing your rain barrel. By taking care of these issues upfront, you’ll be able to collect and store more water efficiently, making your rain barrel installation a success.
Choosing the Right Location for Your Rain Barrel
When choosing the right location for your rain barrel, consider several factors to ensure optimal functionality and accessibility. First, think about sunlight exposure – most plants require at least four hours of direct sunlight per day, so position your rain barrel near a spot that receives sufficient light.
Consider accessibility as well; ideally, place your rain barrel in an area that’s easy to reach with a hose or watering can, making it simple to distribute collected water throughout the garden. Proximity to the house or garden is also crucial – aim for a location that minimizes water transportation distance to reduce labor and conserve energy.
Avoid placing rain barrels near trees or plants that may drop debris into the barrel, clogging its screen or inlet. Similarly, keep your rain barrel away from direct downspout flow; this can lead to oversaturation and erosion of nearby soil. By thoughtfully selecting a location for your rain barrel, you’ll be able to effectively harvest and utilize rainwater in your garden.
Installing a Rain Barrel System
To install a rain barrel system, you’ll need to choose a location for your barrel, ensure proper slope and drainage, and connect it to your downspout. Follow these steps carefully for a successful installation.
Step-by-Step Installation Process
When assembling your rain barrel system, start by laying out all the components and ensuring you have everything you need. This includes the rain barrel, downspout diverter, screen, and overflow valve (if applicable). Assemble the downspout diverter according to the manufacturer’s instructions, typically involving attaching it to the gutter downspout using a screw or clip.
Next, connect the diverter to the rain barrel by sliding the outlet onto the barrel’s spigot. Make sure the connection is secure and won’t leak over time. If you’re adding an overflow valve, attach it to the side of the barrel, ensuring it’s positioned to allow excess water to flow away from the home.
Finally, install any additional features such as a screen or first flush device to keep debris out of your rainwater. The screen should be placed over the barrel’s intake opening, while the first flush device can be installed at the inlet of the downspout diverter.
Tips for Securing Your Rain Barrel
Securing your rain barrel is crucial to prevent damage from strong winds and ensure its longevity. To anchor your barrel safely, consider using weights specifically designed for this purpose. These can be attached to the barrel’s bottom or side, weighing it down firmly on the ground.
Another effective option is to use brackets that secure the barrel to a solid object, like a wall or a fence post. This provides additional stability and prevents any potential movement during harsh weather conditions. Make sure to choose brackets suitable for your rain barrel’s size and material.
When anchoring, keep in mind the weight of your barrel when filled with water. Typically, this is around 30-40 gallons per square foot of rooftop collection area. Ensure that your anchoring system can support this added weight without compromising its stability or the surrounding structure.
Remember to check local building codes before installing any anchoring system, as regulations may vary depending on your region. With proper anchoring in place, you’ll be able to enjoy the benefits of rainwater harvesting for years to come, while also ensuring your safety and the integrity of your home’s infrastructure.
Maintaining and Caring for Your Rain Barrel
Regular maintenance is crucial to ensure your rain barrel continues to function properly, so be sure to check on it regularly for debris buildup and other issues. Regular cleaning will keep your water clean and safe to use.
Regular Cleaning and Inspection Schedule
Regular cleaning and inspection of your rain barrel system is crucial to maintain its efficiency and prevent contamination. Set aside time every 2-3 months to inspect the barrel, first by checking for signs of wear and tear on the exterior, such as cracks or dents that could compromise the structure.
Next, visually inspect the inner surface for algae growth, mineral deposits, or debris accumulation. If you notice any of these issues, perform a thorough cleaning using a mixture of 1 part white vinegar to 9 parts water. Scrub the affected areas gently and rinse thoroughly with fresh water.
Also, check for rust spots on metal components, which can weaken the structure over time. For metal barrels, apply a coat of rust-resistant paint or varnish annually to prevent corrosion. Keep your rain barrel system away from trees and shrubs to avoid debris accumulation and ensure proper water flow.
Finally, inspect the spigot and hose connections for leaks or damage. Replace worn-out parts with new ones if necessary, ensuring a secure seal to prevent contamination and maintain efficient water distribution. Regular maintenance will keep your rain barrel system running smoothly, ensuring you continue to harvest clean and safe rainwater for your home.
Troubleshooting Common Issues
Leaks and clogs are two of the most common issues you may encounter with your rain barrel. A leaky barrel can waste precious water and lead to a decrease in water pressure. To identify leaks, check for signs of dripping or moisture around the spigot, overflows, and joints. Tighten any loose connections and apply sealant to prevent further leaks.
Clogs occur when debris such as leaves, twigs, or sediment accumulates at the bottom of your barrel. Regularly inspect your barrel’s screen and clean it out to ensure water flows freely. You can also install a first flush device that allows excess debris to be diverted before entering the main barrel.
Animal infestations are another common problem for rain barrels. Rodents and birds may be attracted to the water and seek shelter in the barrel or its surroundings. To deter animals, consider adding a roof or covering your barrel, installing a rodent guard around the spigot, or applying a non-toxic repellent. Regularly inspecting your barrel and surrounding area will help you catch any issues before they become severe.
Advanced Rain Barrel DIY Projects
Now that you’ve mastered the basics, it’s time to get creative and take your rain barrel projects to the next level with these innovative DIY ideas. From smart sensors to automated irrigation systems, we’ll show you how!
Integrating Your Rain Barrel into a Larger Water System
When you’ve successfully installed and filled your rain barrel, it’s time to think about how to use that water more efficiently. One way to do this is by integrating your rain barrel system with other water-harvesting techniques. Let’s explore the possibilities of taking it to the next level.
Greywater reuse is a great example of this. Greywater is wastewater generated from sinks, showers, and washing machines, which can be treated and reused for irrigation or flushing toilets. By connecting your rain barrel to your greywater system, you can create a closed-loop water cycle that reduces your household’s water consumption. For instance, you could use the rainwater to flush your toilets and then reuse the greywater to irrigate your garden.
Another option is to integrate your rain barrel with a rainwater-fed irrigation system. This involves using the collected rainwater to supply a separate irrigation system for your plants. You can install a network of pipes and valves that distribute the water directly to your garden, reducing your reliance on municipal water supplies.
By taking this integrated approach, you’ll not only reduce your environmental footprint but also save money on your water bills. With a little creativity and planning, you can create a comprehensive rainwater harvesting system that meets all your household’s needs.
Upgrading or Expanding Your Existing System
Upgrading an existing rain barrel system can be a great way to increase its water-harvesting capacity and efficiency. Before starting the upgrade process, it’s essential to assess your current setup and identify areas for improvement. Consider factors such as the size of your roof, the amount of rainfall you receive, and the intended use of the collected water.
When selecting additional components, ensure they are compatible with your existing system. Check the material, size, and flow rate of new components to guarantee seamless integration. For instance, if you’re adding a larger barrel, make sure it fits in the designated space and doesn’t obstruct nearby areas.
To avoid potential issues during the upgrade process, inspect all connections, hoses, and joints for signs of wear or damage. Consider upgrading your overflow valve, first flush device, or other critical components to prevent water contamination or system failure. Remember to always follow safety guidelines when working with electricity or high-pressure systems. With careful planning and execution, you can expand your rain barrel system’s capabilities and maximize its potential.
Troubleshooting and FAQs
We’ve covered the basics, but things don’t always go as planned. If you’re experiencing issues or have questions about your rain barrel project, check out these troubleshooting tips and frequently asked questions for help.
Frequently Asked Questions about Rain Barrel Installation
When it comes to installing a rain barrel, there are several common questions that may arise. One of the most important considerations is the optimal slope for a rain barrel. A good rule of thumb is to ensure the barrel is positioned at a slight incline, about 1-2 inches per foot, to allow for proper water flow and prevent sediment buildup. This will also help to direct water away from any potential mosquito breeding areas.
To prevent mosquito breeding in your rain barrel, make sure to include a built-in screen or mosquito netting around the overflow spout. You can also add a few rocks or pebbles at the bottom of the barrel to create an environment that’s unfavorable for mosquito larvae growth. Another consideration is ensuring the rain barrel is placed at least 10 feet away from any windows, doors, or other areas where water might seep into.
Regular maintenance, such as cleaning and inspecting your rain barrel every few months, will also help prevent mosquito breeding. Consider adding a first flush device to divert debris and contaminants from entering the barrel during the initial flow of water after a rainfall event.
Common Issues and Their Solutions
One of the most frustrating issues with rain barrel systems is leaky connections. To troubleshoot this problem, inspect all connections between the barrel, pipes, and fittings for signs of wear or damage. Make sure to tighten loose connections and replace damaged ones. If you’re still experiencing leaks, try applying a bead of silicone sealant around the connection points.
Another common issue is clogged filters, which can prevent water from flowing freely into your rain barrel. To solve this problem, regularly clean or replace your filter screens. You can use a soft-bristled brush to gently scrub away any debris that may be clogging the screen.
Issues with pressure in your rain barrel system can also be a concern. This is often caused by blockages in the pipes or an over-pressurized system. To resolve this issue, check for kinks or bends in the pipes and install a pressure regulator to prevent excessive water pressure from building up.
By identifying and addressing these common issues, you’ll be able to enjoy a hassle-free rain barrel system that harvests rainwater efficiently.
Conclusion: Harvesting Rainwater at Home Made Easy
Now that you’ve successfully created your rain barrel, it’s time to put it into action and start harvesting water for your garden. In this final section, we’ll show you how to maintain and make the most of your DIY system.
Recap of the Key Takeaways
In this comprehensive guide to harvesting rainwater at home, we’ve walked you through the essential steps and considerations for a successful rain barrel DIY project. Now that you’re equipped with the knowledge and skills to create your own rainwater collection system, let’s recap the key takeaways.
Proper planning is crucial from the start. This includes assessing your roof size, gutter system, and downspout locations to ensure they can support a rain barrel installation. It’s also essential to determine how much water you need for irrigation, toilet flushing, or other household purposes. With this information, you can choose the right-sized rain barrel and select an optimal location.
Installation is where many DIY enthusiasts get tripped up. We’ve covered the importance of ensuring your rain barrel is level, secure, and properly connected to your downspout. Regular maintenance is also vital for keeping your system functioning smoothly. This includes checking the water level, inspecting the roof and gutters for debris buildup, and replacing worn-out parts.
Some final tips to keep in mind: always follow local regulations and ordinances regarding rainwater harvesting, use a first flush device to prevent debris from entering your barrel, and consider adding a treatment system to ensure safe and clean water. By following these guidelines, you’ll be well on your way to creating a functional and efficient rainwater collection system that will save you money, reduce your environmental footprint, and provide you with a steady supply of clean drinking water.
To recap, the essential steps for a successful rain barrel DIY project include proper planning, installation, and maintenance. By following these guidelines, you’ll be able to create a rainwater collection system that meets your household needs while also contributing to a more sustainable future.
Frequently Asked Questions
Can I use a rain barrel system during snowmelt season?
Yes, you can still use your rain barrel system during snowmelt season, but it’s essential to ensure the system is properly installed and maintained to prevent any potential damage from freezing temperatures. Typically, a rain barrel system will not freeze if it’s designed for outdoor use and placed in a shaded area.
How do I protect my rain barrel from mosquitoes and other pests?
To prevent mosquito breeding and pest infestations, consider adding a mesh screen or a mosquito-proof lid to your rain barrel. Regularly clean the barrel with a mild detergent and water, and inspect it regularly for signs of damage or wear.
What if I have limited space in my yard for a rain barrel?
If you have limited space, consider installing a compact or vertical rain barrel system that can be placed against a wall or in a corner. You can also explore alternative options like using a cistern or a storage tank.
Can I use a rain barrel to irrigate plants during the dry season?
Yes, a rain barrel system can be an excellent way to provide a steady supply of water for your plants during the dry season. Just ensure that you have a sufficient water storage capacity and consider implementing a drip irrigation system to minimize evaporation and runoff.
How do I integrate my rain barrel into an existing irrigation system?
To integrate your rain barrel with an existing irrigation system, you’ll need to connect it to your plumbing system using a suitable valve and piping. Consult a professional plumber or a DIY expert if you’re unsure about the installation process, as improper connections can lead to water damage or other issues.