Are you tired of your hosta plants outgrowing their space or losing their vibrant foliage? Dividing hostas is a simple yet effective way to keep these beautiful perennials thriving. Not only does division promote healthy growth, but it also helps to prevent overcrowding and reduces the risk of disease and pests. In this comprehensive guide, we’ll walk you through the benefits of dividing your hostas, including how to prepare for division, step-by-step instructions on how to transplant them, and tips for successful propagation. We’ll also cover some common issues that may arise during the process, so you can troubleshoot with confidence. Whether you’re a seasoned gardener or just starting out, this article will provide everything you need to know to successfully divide your hostas and keep them looking their best.
Understanding Hosta Care and Why Division is Necessary
To effectively divide and transplant your hostas, it’s essential to understand their care requirements and why division becomes necessary as they mature. This involves knowing the right timing and techniques for healthy plants.
Benefits of Dividing Hostas
Dividing hostas is an essential task that benefits their health and growth. One of the primary reasons for division is to prevent overcrowding within the plant. When hosta plants grow unchecked, they can become congested, leading to reduced air circulation and increased susceptibility to disease. By dividing them, you create space for new growth and allow each section to thrive.
Division also promotes root development by giving the individual sections of the plant a chance to establish their own root system. This process encourages new growth, as each section is now better equipped to absorb nutrients from the soil. As a result, your hostas will produce healthier leaves and stems, creating a lush and vibrant appearance in your garden.
When dividing hostas, be sure to cut back any dead or dying foliage to minimize the risk of disease transmission. This simple step can make all the difference in keeping your newly divided plants healthy and thriving.
Signs That Your Hostas Need to be Divided
As you care for your hosta plants, it’s essential to recognize when they need attention beyond regular maintenance. One crucial aspect of hosta care is division – separating the plant into smaller sections to promote healthy growth and prevent overcrowding.
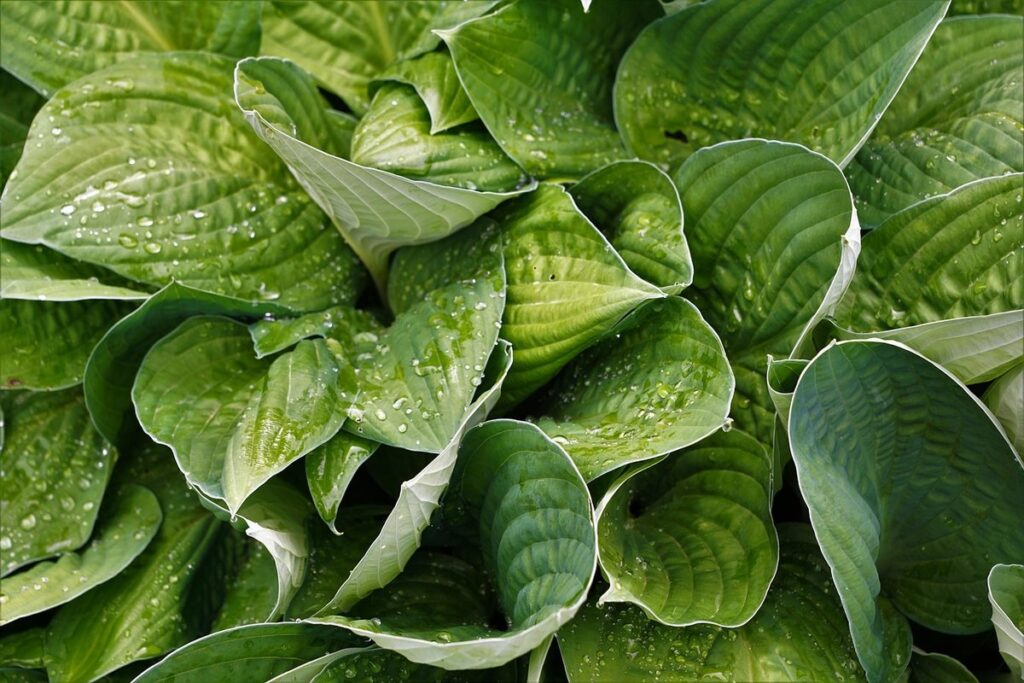
Look for visual cues that indicate division is necessary. If leaves are turning yellow or brown at the tips, this can be a sign that the center of the plant has become too dense. Similarly, if you notice the plants are not producing new flowers or their size has decreased over time, it may be due to overcrowding. Another obvious indicator is when the plants start to grow on top of each other, forming an unhealthy mat.
If you fail to divide your hostas regularly, negative consequences can occur. The plant’s growth slows down significantly as nutrients become scarce within the dense center. This can lead to poor overall health and potentially even disease or pest issues. Regular division prevents these problems by redistributing resources throughout the new sections, allowing each piece of the plant to thrive.
Preparing for Hosta Division: Tools and Techniques
Before you start dividing your hostas, make sure you have the right tools on hand to minimize damage and stress. We’ll walk through the essential equipment and techniques to prepare for a successful division process.
Choosing the Right Time for Division
When it comes to dividing hostas, timing is everything. You want to do it at a point when the plant is most receptive to division and transplanting. Generally, spring (about 2-4 weeks after the last frost) and fall (about 6-8 weeks before the first frost) are considered the best times for division.
In regions with mild winters, you can even divide hostas in late summer or early autumn, but this is not recommended for areas where the winter is harsh. Be sure to consider your climate and plant health when deciding on the right time for division.
Before you start dividing, prepare the area by testing the soil to determine its pH level and nutrient content. Based on the results, make necessary amendments to ensure the soil is well-draining and fertile. This will give your newly divided hostas a strong foundation to thrive in their new home.
Essential Tools for Dividing Hostas
To divide hostas successfully, you’ll need the right equipment. Start by donning a pair of sturdy gardening gloves to protect your hands from thorns and dirt. A good quality trowel or division tool is also essential for gently prying apart the roots without causing damage. You may also want to have a digging fork on hand to help loosen the soil around the plant.
Next, gather some digging tools such as a shovel or spade for excavating the hosta. A garden rake can be useful for smoothing out the area after division and transplanting. Make sure your tools are sharp and clean to avoid damaging the roots during the process.
Other useful items include a measuring tape or string for marking out the mature plant’s spread, and some sort of container for transporting the divided hostas to their new location. Keep in mind that it’s better to have too many tools than not enough – being well-prepared will make the division process much easier and less stressful.
Step-by-Step Guide to Dividing Hostas
To divide your hostas successfully, follow these simple steps: start by preparing the right tools and a well-draining area for repotting.
Removing Old Plant Material and Deadheading
Before you start dividing your hosta plants, it’s essential to remove any old plant material and deadhead flowers. This process may seem daunting, but it’s crucial for the health and vitality of your new divisions.
When removing old plant material, use a gentle touch to avoid damaging the roots or new growth. Start by carefully cutting away any dead or damaged leaves, stems, and flower stalks with a pair of clean, sharp pruning shears. This will help prevent the spread of disease and encourage healthy growth in your new divisions.
Deadheading is also an important step in this process. Remove spent flowers to promote more blooming and direct energy towards new growth. Simply snip off the faded blooms at their base, making sure not to damage any surrounding foliage.
As you’re removing old plant material and deadheading, be mindful of preserving new growth during the division process. Gently tease apart the roots and separate them into sections, making sure each section has a healthy crown of new leaves. This will ensure that your divisions have a strong foundation for future growth. By following these steps, you’ll be able to successfully remove old plant material and deadhead flowers, setting your hostas up for success in their new home.
Digging Up and Separating Roots
Digging up hosta roots can be a delicate process, but with the right techniques, you’ll be able to separate them gently and minimize damage. Start by digging around the plant, making sure to get as much of the root system as possible without causing too much disturbance to the surrounding soil.
To separate the roots, use a fork or a specialized tool designed for this purpose. Gently tease out the individual sections, working from the outside inwards. Be careful not to pull on any single section too hard, as this can cause damage to both the root and the plant.
If your hosta has rhizomes (thick underground stems that produce new plants), you’ll need to handle them with extra care. These can be divided into sections, but be sure to leave at least one “eye” or bud on each section to ensure it will regrow. If a section doesn’t have any buds, consider discarding it to prevent the risk of disease.
When handling divided sections without rhizomes, you can simply separate them using your fork or tool, making sure each piece has some growing points (eyes) attached.
Transplanting Divided Hostas: Aftercare and Tips
Now that you’ve successfully divided your hostas, it’s time to give them a new home. In this next step, we’ll cover aftercare and essential tips for transplanting divided hostas.
Planting New Divisions in the Right Location
When planting new divisions of hostas, it’s essential to choose the right location for them to thrive. Consider the amount of sunlight the area receives and ensure it aligns with the specific light requirements of your hosta varieties. Most hostas prefer partial shade, especially when young or during extreme weather conditions.
In terms of soil quality, select an area with well-draining soil that’s rich in organic matter. Hostas can tolerate a wide pH range but perform best in slightly acidic to neutral soils (pH 6.0-7.0). Test your soil and amend it if necessary before planting new divisions.
To plant divided hostas at the right depth, dig a hole twice as wide and just as deep as the root mass of the division. Gently remove any circling roots by gently teasing them with your fingers or a blunt instrument like a chopstick. Plant the crown (where the stem meets the roots) at soil level, firming in the soil to prevent settling.
The angle of planting is also crucial. Space hostas about 12-18 inches apart to allow for proper air circulation and growth.
Caring for Newly Transplanted Hostas
When transplanting divided hostas, proper aftercare is crucial to ensure their survival and thriving. Caring for newly transplanted hostas requires attention to watering, fertilizing, and pruning to promote healthy growth.
Watering is a critical aspect of aftercare. Water the new location thoroughly after planting, then keep the soil consistently moist but not waterlogged. Avoid overwatering, which can lead to root rot. During the first few weeks, check the soil daily, and adjust your watering schedule accordingly.
Fertilizing should wait until the hostas have established themselves in their new location. Apply a balanced fertilizer in early spring when new growth begins. This will provide essential nutrients for healthy growth.
Pruning is another important aspect of aftercare. Remove any dead or damaged leaves to prevent disease and encourage new growth. Cut back tall stalks to about 2-3 inches from the ground to promote bushy growth.
Common mistakes to avoid in aftercare include overwatering, which can lead to root rot, and not providing enough light, resulting in weak and leggy plants. By following these simple tips and guidelines, you’ll be able to give your newly transplanted hostas the best chance at thriving in their new location.
Handling Divided Hosta Rhizomes: Propagation and Storage
When it comes to dividing hostas, you may end up with multiple rhizomes that can be tricky to handle. We’ll walk you through propagation and storage tips for each divided section.
Propagating Hostas Using Rhizome Sections
Propagating hostas using rhizome sections is an excellent way to increase your plant collection without having to purchase new ones. To do this, you’ll need to carefully separate the rhizomes from the divided plants and then prepare them for propagation.
To begin, select healthy rhizome sections with at least one “eye” or bud per section. This will ensure that each new plant has a good chance of thriving. Next, trim any dead or damaged leaves and roots from the selected sections, taking care not to damage the remaining tissue.
For optimal results, make sure each section has its own growing medium – this can be achieved by potting them up in separate containers filled with a well-draining mix. Keep the soil consistently moist but not waterlogged during the first few weeks after propagation.
By following these steps and providing your new hosta plants with proper care, you should start to see new growth emerging within 2-3 months. Regularly inspect your propagated hostas for signs of disease or pests and take prompt action if necessary.
Storing Divided Hosta Rhizomes
When storing unused or dormant hosta rhizomes, it’s essential to provide them with the right conditions to ensure their survival and vitality. You can store divided hosta rhizomes in a variety of containers, such as plastic bags, cardboard boxes, or even paper bags. However, make sure the container is well-ventilated and not sealed tightly, as this can cause moisture buildup and lead to rot.
A breathable storage material like peat moss or perlite can be added to the container to maintain humidity and prevent drying out. Keep the stored rhizomes in a cool, dark place with temperatures between 35°F to 45°F (2°C to 7°C). Avoid storing them near heating vents or radiators, as this can cause temperature fluctuations that may damage the rhizomes.
It’s also crucial to check on the stored rhizomes regularly to ensure they’re not developing fungal diseases. If you notice any signs of decay or rot, remove the affected areas immediately to prevent further damage. By following these guidelines, you can store your divided hosta rhizomes safely and keep them healthy until it’s time to plant them again in the spring.
Troubleshooting Common Issues After Dividing Hostas
If you’ve recently divided your hostas and noticed some problems, don’t worry – we’ll walk you through common issues to look out for and how to resolve them.
Dealing with Wilted or Yellowing Leaves
When dividing hostas, it’s not uncommon for some plants to develop wilted or yellowing leaves. This can be caused by a range of factors, including overwatering, underwatering, or exposure to extreme temperatures.
If you notice that your divided hostas are suffering from wilted or yellowing leaves, the first step is to identify the cause. Check the soil moisture levels and adjust your watering schedule accordingly. Make sure not to overwater, as this can lead to root rot and further decline the health of the plant. On the other hand, if the soil feels dry to the touch, increase the frequency of watering.
Another potential issue is pest infestation. Keep an eye out for signs of aphids, slugs, or snails, which can cause significant damage to hostas. To address these problems, use neem oil or insecticidal soap to control aphid populations, and set traps or use copper tape to deter slugs and snails.
By taking swift action and making adjustments to your care routine, you can help recover your divided hostas and prevent further damage.
Addressing Root Rot and Other Problems
When dividing hostas, it’s not uncommon for new plant owners to encounter problems such as root rot and other issues. Root rot occurs when the roots of the hosta become waterlogged, causing them to rot and potentially killing the plant. This can happen if the pot or soil is too wet, or if the roots are damaged during division.
To identify root rot, look for soft, mushy stems and leaves that are often accompanied by a sour smell. If you suspect your hostas have root rot, gently remove them from their pots and inspect the roots. If they’re black or soggy, it’s likely a sign of root rot.
Preventing these issues in the future is easier than treating them after they occur. To avoid root rot, make sure to divide your hostas during the spring when the weather is cooler and less humid. Also, use fresh potting mix that drains well to prevent waterlogged soil.
Conclusion: Benefits of Regular Division and Maintenance
Now that you’ve successfully divided and transplanted your hostas, let’s explore the benefits of regular division and maintenance for a healthy and thriving plant.
Recap of Key Takeaways from Dividing Hostas
Dividing hostas can be a daunting task for gardeners of all levels, but understanding the key takeaways from this process is crucial for its success. By now, you’ve learned that dividing hostas is not only necessary to promote healthy growth and prevent overcrowding but also beneficial in rejuvenating your plants. When done properly, division can lead to improved plant vigor, increased blooming, and enhanced root development.
As a recap, here are the main points to keep in mind:
* Divide hostas every 3-4 years for optimal results
* Choose the right time to divide – spring or fall is ideal
* Cut back foliage before division for easy handling and reduced mess
* Remove old plant material from the crown, taking care not to damage new roots
* Replant divided sections immediately after processing
In addition to these practical considerations, it’s essential to remember that proper care for divided hostas is just as crucial. Water newly transplanted plants regularly until they establish themselves, and provide regular fertilization during the growing season.
By now, you’ve seen firsthand how division can make a world of difference in your hosta garden. Regular maintenance and monitoring plant health will also ensure their continued growth and success.
Don’t neglect to keep an eye out for signs of overwatering or underwatering – both can lead to poor plant performance. Monitor the soil moisture levels, adjust watering schedules as needed, and keep a lookout for pests and diseases that might affect your plants.
By following these guidelines and paying attention to your hostas’ needs, you’ll be well on your way to enjoying thriving, vigorous hosta plants in no time!
Frequently Asked Questions
How do I know if my hostas have been divided recently enough?
Divided hostas typically need to be replanted every 3-5 years, depending on the plant’s vigor and growth rate. Check for signs of overcrowding or declining health in your plants to determine if division is necessary.
Can I propagate new hosta divisions during any time of year, or are there specific seasons?
While hostas can be divided at almost any time of year when they’re dormant, spring and fall are considered the best times for propagation. During these periods, the plant’s energy reserves are replenished, allowing it to focus on new growth.
How do I care for newly transplanted hosta divisions to ensure successful establishment?
Newly planted hosta divisions require consistent moisture, especially during their first growing season. Water them regularly, but avoid overwatering, which can lead to root rot and other problems. Also, fertilize lightly in the spring to promote healthy growth.
What are some common mistakes people make when dividing hostas, and how can I avoid them?
One common mistake is separating the rhizome too aggressively, which can damage the plant’s roots and lead to poor establishment. To avoid this, gently tease out the roots with your fingers or a blunt instrument before separating the divisions.
Can I store divided hosta rhizomes in a dormant state for later propagation, and if so, what are some tips?
Yes, you can store divided hosta rhizomes in a dormant state by allowing them to dry slightly, then wrapping them in damp paper towels or sphagnum moss. Store them in an airtight container in the refrigerator until ready to plant. This method allows for optimal propagation results and helps prevent disease during storage.