Growing your own grapes can be a rewarding experience, but propagating them requires some know-how. Cutting grape vines at the right time is crucial to successful propagation. Not only does it ensure healthy growth, but it also gives you control over the quality of your new plants. If you’re looking to expand your vineyard or simply want to share your favorite varieties with friends and family, learning how to cut grape vines correctly is essential.
In this article, we’ll walk you through the process of choosing the perfect time to cut grape vines for propagation, preparing them for rooting, and mastering various rooting techniques. We’ll cover everything from understanding the right cutting methods to creating an optimal environment for your new plants to thrive. By following these steps, you’ll be well on your way to growing more grapes than you know what to do with!
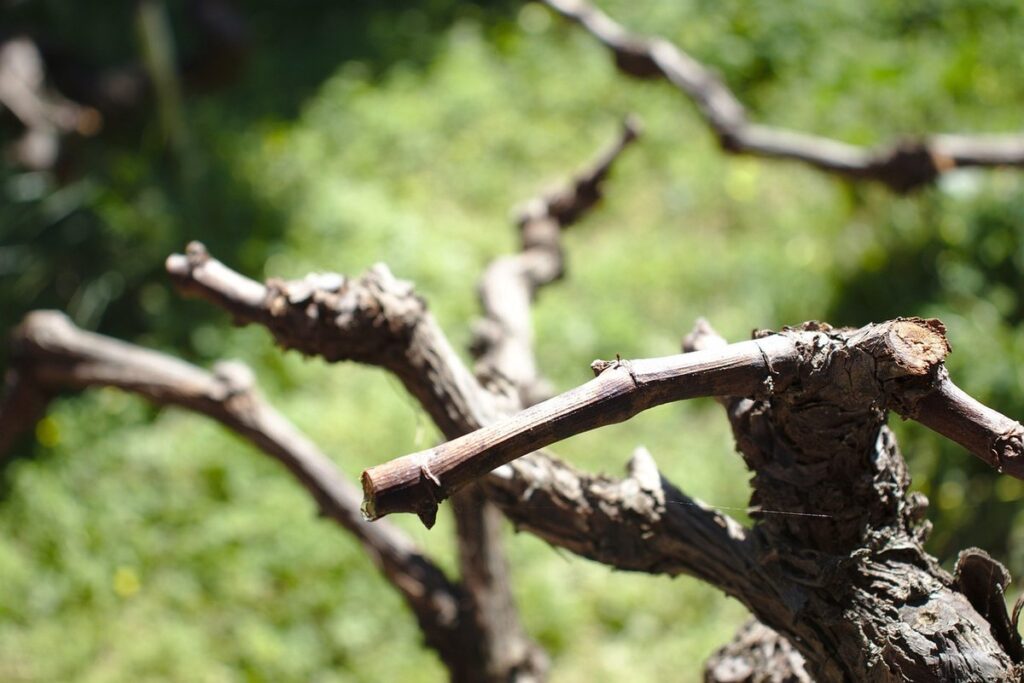
Choosing the Right Time to Cut
When it comes to propagating grape vines, timing is everything. In this crucial step, you’ll learn how to determine the perfect moment to take cuttings from your mature vine.
Understanding the Dormancy Cycle
When it comes to propagating grape vines, timing is crucial for successful rooting. The dormancy cycle of your vine plays a significant role in determining the best time to cut. A plant’s dormancy cycle refers to its period of reduced growth and activity, typically occurring during winter months.
Factors like climate, season, and vine age can affect the dormancy cycle. In regions with cold winters, grape vines usually go dormant from October to March or April. In contrast, warmer climates may have a shorter dormancy period or no dormancy at all. It’s essential to understand your local climate and adjust your cutting schedule accordingly.
Younger grape vines tend to be more sensitive to temperature fluctuations and might require protection during harsh winters. For mature vines, the dormant season can be an ideal time for pruning and training new growth. To ensure successful rooting, cut your vine cuttings at the right moment – not too early when the plant is still actively growing, nor too late when it’s emerging from dormancy.
In general, the ideal time to cut grape vines is about 30-60 days before the onset of active growth in your area. This allows the cutting to develop roots before new growth begins. Monitor your vine’s progress and adjust your schedule as needed based on local weather conditions and seasonal changes.
Preparing the Vine for Cutting
Before making cuts on your grape vine, it’s essential to prepare the vine for optimal cutting and rooting success. Start by selecting healthy stems that are at least 12 inches long and have a diameter of about 1/4 inch. Healthy stems will have a vibrant green color, be free of disease or pests, and exhibit good growth habits.
Next, inspect your vine and remove any weak growth or suckers that may be competing with the desired cutting area for resources. Weak growth can weaken the overall health of the vine and reduce its ability to root new cuttings. Also, take this opportunity to prune any damaged or diseased areas to prevent the spread of disease and promote healthy growth.
Removing dead, diseased, or damaged wood also helps to direct the plant’s energy towards producing vigorous, healthy shoots that are perfect for propagation. By carefully selecting and preparing your cutting material, you’ll increase the chances of successful rooting and a thriving new grapevine.
Identifying Suitable Vines for Propagation
When selecting cuttings from your grapevine, it’s essential to identify healthy stems with a balance of leaves and growth, ensuring a successful propagation process. Look for vines that are disease-free and vigorous in growth.
Selecting Healthy Stems
When selecting healthy stems for propagation, it’s essential to choose those that exhibit optimal vigor, suitable size, and desirable growth habits. Vigor refers to the vine’s ability to produce new shoots and grow rapidly. Look for stems with a diameter of at least 6-8mm, as these will be more likely to root successfully.
Choose stems from the current growing season, as they tend to have higher rooting percentages than those taken from dormant vines. Avoid selecting stems that are too vigorous, as these can become too dominant in the new plant and reduce its overall yield potential.
Consider the grape variety’s growth habit when selecting stems. For example, if you’re working with a high-wire variety like ‘Thompson Seedless’, look for stems with a more compact growth habit to ensure better performance in your specific climate.
When inspecting the stem, check for any signs of disease or pests, such as canker, powdery mildew, or mealybug infestations. Avoid selecting stems with visible damage, as these can compromise the health and productivity of the new plant.
Assessing Vine Health
When inspecting grape vines for propagation, it’s crucial to assess their overall health before making cuts. A vine under stress or infected with disease may not produce viable cuttings, leading to reduced success rates.
Look out for signs of nutrient deficiency, such as yellowing leaves, stunted growth, or twisted stems. These symptoms can be indicative of underlying issues like overwatering or inadequate soil fertility. Additionally, inspect the vine’s foliage for any visual cues of disease, including powdery mildew, black rot, or anthracnose.
Check for physical damage, such as torn or broken leaves, cankers, or girdling branches. These signs can indicate pests like phylloxera, mealybugs, or spider mites. If you notice any of these warning signs, it’s best to discard the vine and select a healthier one for propagation.
Regular monitoring and maintenance are key to identifying potential issues before they compromise the vine’s health. By carefully evaluating your grape vines’ condition, you can make informed decisions about which ones to propagate, ensuring the highest chances of success in your cutting and rooting endeavors.
Cutting Techniques for Maximum Success
To successfully propagate grape vines, it’s essential to learn the right cutting techniques. In this crucial step, we’ll walk you through the best methods for cutting your vines.
Preparing the Cut End
When preparing the cut end of the grape vine stem for propagation, it’s essential to get it right. This will ensure a healthy root system develops and the cutting grows into a strong, productive plant.
To begin, make a clean cut just above a node – this is the point on the stem where a leaf meets the stem. Nodes are crucial as they contain the highest concentration of auxins, hormones that promote rooting. Cutting above a node ensures the new growth will emerge from there, rather than trying to grow roots from a section with limited auxin production.
Next, remove any lower leaves or debris from the cut end. This helps prevent bacterial and fungal infections from taking hold in the wound area. Typically, you’ll want to leave only one or two sets of leaves at the top of the cutting – this will help it conserve moisture and energy while establishing roots.
Types of Cuts: Tipping, Sidelong, and Horn
When it comes to cutting grape vines for propagation, understanding the different types of cuts is crucial. Each cut type serves a specific purpose and is suited for certain situations.
Tipping cuts involve removing a single bud from the tip of a stem. This method encourages new growth and is ideal when you want to propagate a vine that’s already producing well. Make sure to leave at least two sets of leaves on the cutting, as this will help it establish itself quickly.
Sidelong cuts are taken about 6-8 inches below a node and involve removing a section of stem with one or more buds. This cut promotes lateral growth and is best used when you’re propagating from a vine that’s not yet producing. Be cautious not to damage the nodes, as this can hinder rooting.
Horn cuts involve cutting the stem about 2-3 inches below a node, removing two or three buds in the process. This type of cut encourages strong root development and is perfect for vines that are struggling with disease or pests.
When choosing which type of cut to use, consider the overall health and vigor of your vine as well as your specific propagation goals.
Rooting Hormones and Treatment Options
When it comes to rooting your grape vine cuttings, understanding how hormones affect root development is crucial. Here’s what you need to know about using rooting hormones for success.
When to Use Rooting Hormone
When it comes to propagating grape vines through cuttings, rooting hormones play a crucial role in promoting healthy root growth. These powerful compounds stimulate the development of new roots, increasing the chances of successful propagation.
But when should you use rooting hormone? The answer lies in understanding the natural process of rooting. Grapevine cuttings typically produce roots within 2-4 weeks after planting, but this timeframe can be significantly shorter or longer depending on factors like temperature, humidity, and cutting quality.
That’s where rooting hormones come into play. By applying a rooting hormone to your grapevine cuttings, you can enhance their ability to root by up to 200%. However, it’s essential to use them judiciously. For example, if the cuttings are already showing signs of natural rooting (e.g., white roots emerging from the base), using a rooting hormone might not be necessary.
In general, rooting hormones work best when used in conjunction with high-quality cuttings and optimal growing conditions. As a rule of thumb, use a rooting hormone on grapevine cuttings that have been taken during the dormant season or are particularly difficult to root. This will give them an extra boost in establishing new roots and increase their chances of survival.
Alternative Methods: Water Roots and Leaf Cuts
When it comes to propagating grape vines, you may be looking for alternative methods beyond traditional rooting hormones and treatments. Two such methods are using water roots and leaf cuts. These techniques can be more time-consuming but offer a higher success rate when done correctly.
Water root propagation involves placing the cut end of the vine into a container filled with water. The idea is that the cutting will develop roots within a few weeks, at which point you can transfer it to soil. This method requires frequent water changes and a suitable environment for root development. To use this method successfully, make sure your cuttings are taken from healthy vines and have at least two nodes (the joint where a leaf meets the stem). A general rule of thumb is to change the water every 2-3 days.
Leaf cuts involve removing a section of a grape vine’s foliage with some stem attached. This technique relies on the natural processes of rooting to occur, rather than relying on external hormones or treatments. To increase your chances of success, ensure that you remove healthy leaves and stems from the base of the plant. Once prepared, insert the cut end into a pot filled with moist soil, making sure not to bury the node (the joint where leaf meets stem). Water well, and keep the soil consistently moist until roots develop. This method can take longer than others but offers an excellent alternative for propagating grape vines.
Planting and Care Instructions
When planting grape vine cuttings, it’s essential to ensure you’re taking healthy sections from mature vines. This section will walk you through the process of selecting and preparing your cuttings for successful propagation.
Soil Preparation and pH Levels
When preparing soil for rooting grape vine cuttings, it’s essential to select a mix that is well-draining and rich in organic matter. A good quality potting mix specifically designed for fruiting plants will work well. You can also create your own mix using a combination of peat moss, perlite or vermiculite, and compost.
Achieving the right pH level is critical for rooting success. Grape vines prefer a slightly acidic to neutral soil pH, ranging from 6.0 to 7.0. If your tap water is hard, it may have a high pH level that can affect root development. To combat this, use rainwater or filtered water for mixing the potting mix.
When preparing the rooting tray, make sure to moisten the medium before inserting the cuttings. A pH meter will help you monitor and adjust the soil pH accordingly. Keep in mind that grape vines are sensitive to extreme pH fluctuations, so it’s better to err on the side of caution and maintain a stable environment for optimal root development.
Providing Adequate Light and Water
When you’ve carefully cut your grapevine cutting, it’s essential to provide optimal conditions for root growth to occur. Adequate light is crucial, as it triggers the production of auxins – hormones responsible for cell elongation and root development. Place your cutting in a bright, south-facing location with temperatures between 65°F to 75°F (18°C to 24°C) during the day. Avoid direct sunlight, which can cause scorching or overheating.
Water is another critical aspect of successful propagation. Water your cuttings thoroughly after taking them, and maintain a moist environment until roots develop – typically within 1-3 weeks. However, be cautious not to overwater, as this can lead to root rot and reduce the chances of successful rooting. A well-draining potting mix will help prevent waterlogged soil and promote healthy root growth.
In addition to light and water, ensure your cuttings receive necessary nutrients for optimal growth. Fertilize with a balanced, water-soluble fertilizer at half the recommended strength until roots are established. This will provide essential micronutrients without promoting excessive vegetative growth.
Monitoring Progress and Troubleshooting
Now that you’ve successfully taken cuttings from your grape vines, it’s time to monitor their progress and address any issues that may arise during the rooting process. Keep an eye out for signs of health and growth.
Signs of Root Growth: What to Look For
As you care for your newly cut grape vine cuttings, it’s essential to monitor their progress and identify signs of successful rooting. One of the most exciting moments is when you notice visual cues indicating root growth. Keep an eye out for a few key changes: the cutting will start to develop new leaves, which will be slightly larger than the original leaves on the stem.
Another sign is the appearance of tiny white roots or root hairs at the base of the cutting, just above the node (where the leaf meets the stem). This indicates that the plant has started to develop its root system. You can also look for changes in color: as the roots grow, the stem may turn slightly greenish or take on a more vibrant hue.
If you notice any of these visual cues, it’s likely that your cutting is rooting successfully. As an added check, gently tug on the cutting – if it resists being moved, it’s a good sign that new roots have formed and are holding the plant in place.
Common Challenges and Solutions
As you navigate the process of propagating grape vines through cuttings, you may encounter some common challenges. Don’t worry, these are normal and can be overcome with a little knowledge and practice.
One challenge is delayed rooting or failure to root at all. This can be due to factors such as inadequate cutting quality, insufficient light, or inadequate water and humidity levels. To combat this, ensure that your cuttings are taken from healthy parent vines, have the right amount of nodes (typically 3-4), and are cut just above a node. Provide bright indirect light, maintain a consistent temperature between 65-75°F (18-24°C), and keep the rooting medium consistently moist but not waterlogged.
Another common issue is fungal diseases or pests infestation on the cutting. To prevent this, treat your cuttings with a fungicide or insecticidal soap before planting them in the rooting medium. You can also use a clean potting mix specifically designed for rooting cuttings to minimize contamination risks.
Regular monitoring of your cuttings’ condition and adjusting your care routine as needed will help you overcome these common challenges. Keep an eye out for signs of stress, such as yellowing or droopy leaves, and adjust your watering schedule accordingly.
Frequently Asked Questions
Can I propagate grape vines at any time of the year?
Yes, but it’s essential to consider the vine’s dormancy cycle and choose a period when it’s dormant or semi-dormant for optimal results. This will help reduce stress on the plant and increase the chances of successful rooting.
How often should I inspect my cuttings for signs of root growth?
Regular monitoring is crucial, but checking your cuttings daily can be too frequent. Instead, inspect them every 2-3 days to track progress and identify any potential issues early on. This will help you make informed decisions about watering, pruning, or repotting.
Can I use a rooting hormone on all types of grape vines?
Not necessarily. While rooting hormones can improve success rates for certain varieties, some grape species may require more natural approaches. Research the specific needs of your vine type and experiment with different methods to find what works best.
What if I accidentally cut a stem that’s too old or too young?
If you’ve taken a cutting from an old or weak section of the vine, it might not root well. Similarly, very young stems may not have enough stored energy for successful propagation. Try to identify suitable stems in advance and prioritize those with a mix of age, size, and vigor.
How long does it typically take for cuttings to develop roots?
The time frame varies depending on factors like temperature, humidity, and rooting hormone usage. Generally, you can expect to see visible root growth within 2-6 weeks after planting. However, some varieties might take longer or shorter periods to develop a robust root system.