Are you looking to tap into the growing demand for artisanal syrups? Cultivating elderberries is an excellent way to produce high-quality syrup, but where do you start? Not only are elderberries a sustainable and eco-friendly crop, but they’re also packed with nutrients and have been used in traditional medicine for centuries. However, growing and harvesting these delicate plants can be intimidating, especially if you’re new to gardening or food production.
In this comprehensive guide, we’ll walk you through the entire process of cultivating elderberries for syrup production. From choosing the right variety and planting conditions to processing your harvest into delicious, homemade syrup, we’ve got you covered. We’ll also touch on marketing strategies so you can sell your unique product with confidence. Whether you’re a seasoned gardener or just starting out, this article will equip you with the knowledge and skills needed to succeed in the world of elderberry syrup production.
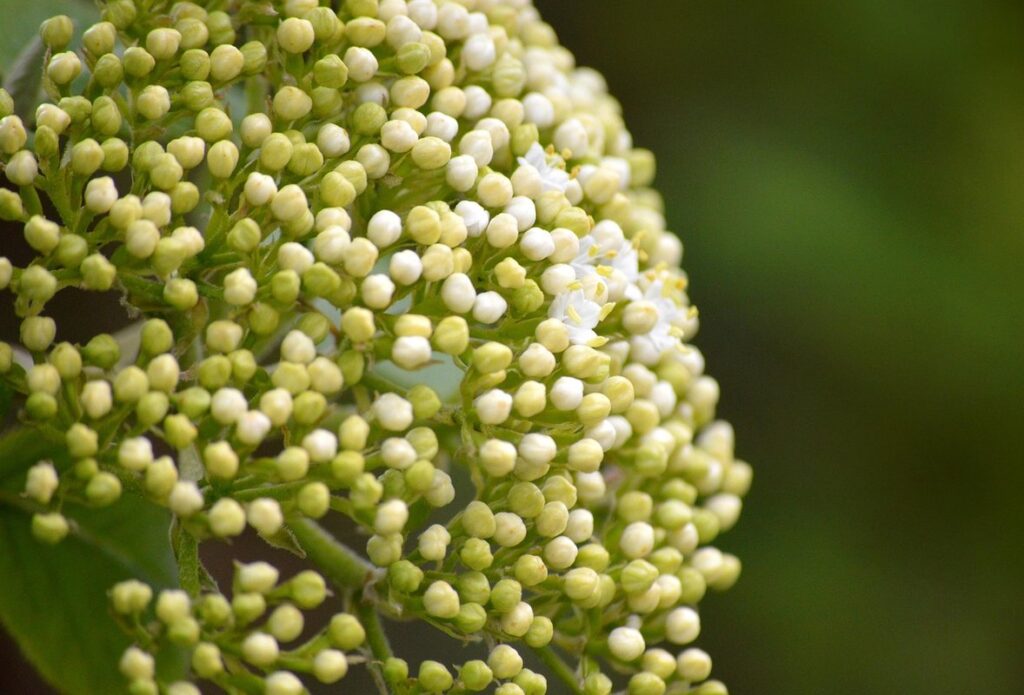
Introduction to Elderberry Cultivation
If you’re new to elderberry cultivation, don’t worry – we’ve got you covered. This section will walk you through the basics of growing these beautiful plants for a bountiful harvest of syrup-producing flowers and berries.
Benefits of Growing Your Own Elderberries
Cultivating elderberries can be incredibly rewarding, and it’s not just about creating delicious syrup. Growing your own elderberries can bring a range of benefits that will make you wonder why you didn’t start sooner.
One of the most significant advantages is cost savings. When you grow your own elderberries, you’ll have complete control over the cost of production. No more relying on fluctuating market prices or expensive commercial products. Plus, with your own land and resources, you can scale up or down as needed, making it easier to adjust to changing demand.
Another benefit is the ability to control quality. By growing your own elderberries, you can ensure that your plants are free from pesticides, herbicides, and other chemicals. This not only makes for a healthier syrup but also gives you peace of mind knowing exactly what’s going into your product. And if you’re interested in exploring medicinal uses, cultivating elderberries allows you to tap into the plant’s rich history of use as a natural remedy.
By growing your own elderberries, you’ll have the freedom to experiment with different varieties and harvesting techniques, allowing you to create truly unique products that showcase the full potential of this incredible plant.
Choosing the Right Variety for Syrup Production
When it comes to choosing the right variety for elderberry syrup production, you’ll want to consider several factors. American and European elderberries are two of the most common types used for syrup production.
American elderberries (Sambucus canadensis) tend to produce a sweeter, more delicate flavor profile, which makes them well-suited for those who prefer a milder taste in their syrup. They also tend to be more resistant to disease and have higher yields, making them a popular choice among growers.
European elderberries (Sambucus nigra), on the other hand, produce a stronger, more tart flavor that’s often preferred by those looking for a more robust syrup. However, they can be more susceptible to disease and may require more maintenance.
Hybrid varieties, such as ‘Adams’ or ‘York’, offer a balance between the two, with good yields and moderate disease resistance. These are often recommended for growers who want to minimize the risk of disease while still achieving high-quality syrup production.
Ultimately, the choice will depend on your personal preference, climate, and growing conditions. Be sure to research the specific needs and characteristics of each variety before making a decision.
Preparing the Soil and Climate for Elderberry Growth
To grow thriving elderberries, it’s essential that you create a suitable environment by preparing the soil and climate to meet their specific needs. This section will walk you through those critical steps.
Assessing Your Land’s Suitability for Elderberry Cultivation
When evaluating your land’s suitability for elderberry cultivation, it’s essential to consider three key factors: climate, soil type, and sun exposure. Elderberries are hardy plants that can thrive in a variety of conditions, but they do have specific requirements.
Firstly, let’s talk about climate. Elderberries prefer temperate climates with warm summers and cold winters. They’re sensitive to extreme temperatures, so if you live in an area prone to frequent heatwaves or prolonged droughts, elderberry cultivation might not be the best choice. In contrast, regions with moderate temperatures between 65°F to 75°F (18°C to 24°C) during the growing season are ideal.
When it comes to soil type, well-draining soil is crucial for healthy elderberry growth. Elderberries don’t like waterlogged soil and can be susceptible to root rot if the conditions aren’t right. Test your soil pH levels – elderberries prefer slightly acidic to neutral soil with a pH range of 6.0 to 7.0. If your land has poor drainage or heavy clay soils, consider installing a French drain system or raised beds to create better growing conditions.
Sun exposure is also vital for healthy elderberry growth. Elderberries need full sun to produce an abundance of fruit, so choose a spot that receives at least six hours of direct sunlight per day.
Amending the Soil for Optimal Growth
When it comes to cultivating elderberries for syrup production, amending the soil is crucial for optimal growth. Elderberry plants require well-draining, fertile soil with a pH between 5.5 and 6.5 to thrive. To prepare the soil, start by adding organic matter such as compost or well-rotted manure to improve its structure and fertility.
You can also adjust the pH levels of your soil if necessary. Most gardening stores sell pH test kits that will give you an accurate reading of your soil’s pH level. If it’s too acidic or alkaline, add lime or sulfur to bring it into balance. For example, if your soil is too alkaline and has a high pH, adding sulfur can help lower the pH and create a more hospitable environment for elderberry roots.
In addition to adjusting pH levels, controlling pests and diseases is also essential for healthy growth. Regularly inspect your plants for signs of aphids, spider mites, or powdery mildew, and treat them promptly if you notice any issues. Mulching around the base of your plants can help retain moisture, suppress weeds, and prevent soil-borne diseases from taking hold.
It’s also a good idea to implement Integrated Pest Management (IPM) strategies that combine physical barriers, biological controls, and cultural practices to minimize chemical use. By following these tips, you’ll be well on your way to creating an optimal growing environment for your elderberry plants.
Planting and Caring for Elderberry Plants
To grow healthy elderberry plants, you’ll want to choose a spot that gets full sun and has well-draining soil, which will set the stage for a bountiful harvest. Proper care is crucial.
Propagation Methods: Cutting, Layering, and Grafting
When it comes to propagating elderberry plants, you have three main methods to choose from: cutting, layering, and grafting. Each method has its advantages and potential challenges.
Cutting is the most common method of propagation, as it allows you to produce a large number of plants in a short amount of time. To propagate using cuttings, start by selecting healthy stem sections with at least two sets of leaves. Remove lower leaves, dip the cutting into rooting hormone powder or liquid, and plant it 1-2 inches deep in a pot filled with well-draining soil. Water thoroughly and keep the soil consistently moist but not waterlogged. Within 6-8 weeks, you should see roots developing, after which you can transfer the new plant to a larger container.
Layering is another effective method for propagation, especially when dealing with large plants or limited space. To layer an elderberry branch, bend it down and secure it with a rock or U-shaped wire. Cut through the stem below the node where a leaf meets the branch, and bury the buried section in soil up to the node. Water well and wait 2-3 months for roots to develop before cutting the new plant away from the mother plant.
Grafting is often used when combining two different varieties of elderberry or when trying to improve disease resistance. To graft an elderberry branch, select a healthy stem section with at least two sets of leaves and join it onto the root system of another mature elderberry plant using a specialized grafting tape. The grafted section should be watered thoroughly and kept consistently moist during the first few weeks after grafting.
It’s essential to note that these methods can have varying levels of success, depending on factors like soil quality, climate, and timing. Additionally, not all varieties respond equally well to propagation by cutting or layering. Experiment with different techniques to find what works best for your specific situation and desired outcome.
Care and Maintenance: Pruning, Fertilizing, and Pest Management
Proper care and maintenance are crucial for healthy elderberry plant growth. Pruning is an essential practice to promote air circulation, prevent disease, and encourage new growth. Cut back dead branches and reduce the size of overgrown plants by one-third each year. This will also help control the plant’s shape and promote fruiting.
Fertilizing your elderberry plants regularly is vital for optimal production. Use a balanced fertilizer (10-10-10) in early spring, following the manufacturer’s instructions. You can also side-dress with a high-phosphorus fertilizer to boost fruiting.
Managing pests is another critical aspect of caring for your elderberry plants. Keep an eye out for common issues like aphids, spider mites, and Japanese beetles. Use organic or integrated pest management (IPM) methods whenever possible, such as introducing beneficial insects or using neem oil sprays.
Regular maintenance will ensure healthy plant growth and a bountiful harvest. Set aside time each year to inspect your plants for signs of disease or pests, and address any issues promptly. This will help prevent the spread of problems and keep your plants thriving.
Harvesting and Processing Elderberries
Now that you’ve harvested your elderberries, it’s time to process them into a usable form for syrup production. This section will walk you through the necessary steps for drying, crushing, and preparing the berries for extraction.
Timing and Methods for Harvesting Elderberries
When to Harvest Elderberries
Timing is crucial when it comes to harvesting elderberries. The ideal time for harvest is when the berries are fully ripe and have reached their deepest color, typically between late summer and early fall. Check for ripeness by gently tugging on a stem; if the berries come off easily, they’re ready.
Look for the following signs of ripeness:
• Deep purple or black color (some varieties may remain blue-black)
• Soft, plump texture
• Sweet, slightly tart aroma
Harvesting methods vary depending on the scale and equipment available. For small plots, hand-picking is a gentle and efficient way to collect berries, allowing for quality control and minimizing damage to the plants.
For larger operations or commercial-scale production, mechanical harvesting can be more practical using specialized equipment like berry pickers or shakers. However, this method requires careful calibration to avoid damaging the delicate flowers and stems.
Regardless of the harvesting method, it’s essential to work carefully and quickly to minimize bruising and contamination. Cleanliness is paramount when handling berries destined for syrup production.
Processing Elderberries: Washing, Drying, and Storing
Processing harvested elderberries is a crucial step in producing high-quality syrup. To start, gently wash the berries in cold water to remove any dirt, debris, or insects. Use a soft-bristled brush to scrub the berries, especially around the stems and leaves, where dirt tends to accumulate. Rinse the berries thoroughly to remove any soap residue.
Next, dry the elderberries either by air-drying them on paper towels or using a food dehydrator set at a low temperature (95°F – 105°F). This helps prevent spoilage and preserves the flavor and color of the berries. Monitor the drying process closely, as over-drying can lead to a loss of flavor and aroma.
Once dry, store the elderberries in an airtight container, such as a glass jar or mylar bag, to maintain their quality and freshness. Keep the container away from direct sunlight, heat sources, and moisture. The dried berries can be stored for up to six months before using them for syrup production. Regularly inspect the containers for signs of spoilage or infestation, and replace any affected berries to ensure a smooth syrup-making process.
Making Elderberry Syrup: Recipes and Tips
Now that you’ve harvested your elderberries, it’s time to turn them into a delicious and healthy syrup for cooking and medicinal uses. We’ll share our favorite recipes and expert tips to get you started.
Basic Elderberry Syrup Recipe and Variations
Making elderberry syrup is a simple process that requires just a few ingredients. To start, you’ll need 1 cup of processed elderberries, which can be purchased online or made from fresh berries using a food dehydrator or oven on the lowest temperature setting. Combine the elderberries with 2 cups of water in a saucepan and bring to a boil. Reduce heat and simmer for 30-40 minutes, or until the liquid has reduced by half.
Once you’ve extracted the flavor and nutrients from the elderberries, it’s time to add the sweetener and preservative. You can use either honey or maple syrup as your sweetener, depending on your personal preference. Add 1 cup of your chosen sweetener to the mixture and stir until dissolved. Next, add a tablespoon of lemon juice and stir again.
You can customize this basic recipe by adding other ingredients or flavor combinations to create unique variations. Some ideas include:
* Adding a cinnamon stick or pinch of ground ginger for an autumnal twist
* Using rose petals or hibiscus flowers to give the syrup a floral flavor
* Infusing the syrup with citrus zest, such as lemon or orange
* Making a spicy version by adding a dash of cayenne pepper
Experiment with different combinations to create your own signature elderberry syrup flavors!
Safety Precautions and Quality Control Measures
When making homemade elderberry syrup, safety precautions and quality control measures are crucial to ensure the product is not only delicious but also safe for consumption. First and foremost, it’s essential to use clean equipment and sanitized surfaces throughout the process. This means washing your hands thoroughly before starting, using a sanitizing solution on all utensils and containers, and storing them in a clean environment.
To guarantee the syrup’s quality and safety, you should test its pH levels regularly. Elderberry syrup typically has a pH level between 2.5 and 3.5, which is slightly acidic. If the pH level is too high or too low, it may indicate spoilage or contamination. Monitor for signs of mold, yeast, or bacterial growth, such as an off smell, slimy texture, or visible mold.
Additionally, inspect the syrup’s appearance and consistency regularly. Any unusual color changes, sediment, or separation can signal a problem. Regularly checking the pH levels and monitoring for spoilage will help you produce high-quality elderberry syrup that is both safe to consume and free from contaminants. This attention to detail ensures your homemade syrup meets the highest standards of quality and food safety.
Marketing and Selling Your Homemade Elderberry Syrup
Now that you’ve harvested your elderberries and made a batch of syrup, it’s time to share it with others – but first, let’s talk about how to market and sell your homemade product effectively.
Branding and Labeling: Essential Considerations
Creating a unique brand identity for your homemade elderberry syrup is crucial to standing out in the market. This involves developing a consistent visual and tone of voice that reflects your values and products. Consider what makes your syrup special – whether it’s the use of organic ingredients, small-batch production, or unique flavor combinations. Your brand identity should be reflected in your logo, packaging, and marketing materials.
Labeling is another critical aspect to consider. You must ensure compliance with local regulations regarding labeling requirements for food products. This includes providing essential information such as ingredient lists, nutritional facts, and contact details. Be mindful of allergen warnings and any specific labeling requirements for elderberry syrup in your area. Packaging also plays a significant role – choose materials that are eco-friendly, durable, and suitable for the product’s shelf life. Research local regulations and consult with a packaging expert to ensure you’re meeting all necessary standards.
Online and Offline Sales Strategies
When it comes to marketing and selling your homemade elderberry syrup, having a solid sales strategy is crucial. This involves not only creating an online presence but also leveraging offline opportunities to reach a wider audience.
Social media promotion is a great starting point. Utilize platforms like Instagram and Facebook to showcase the unique benefits of your elderberry syrup. Share high-quality images, customer testimonials, and behind-the-scenes content to build brand awareness. Engage with potential customers by responding to comments and messages promptly. Collaborate with influencers or other local businesses to amplify your reach.
In addition to online marketing, attending local markets or events is a fantastic way to connect with customers face-to-face. Consider participating in farmers’ markets, craft fairs, or wellness expos to showcase your product and build relationships with potential buyers. Partnering with local health food stores, yoga studios, or spas can also help you reach new customers.
When partnering with other businesses, focus on finding complementary products that align with your target audience’s interests. This can include joint promotions, co-branded events, or even bundling your products together for a special offer. By diversifying your sales channels and strategies, you’ll be well on your way to successfully marketing and selling your homemade elderberry syrup.
Conclusion: Cultivating Elderberries for Syrup Production
Now that you’ve learned how to plant, maintain, and harvest your elderberry bushes, it’s time to explore the final steps in creating delicious homemade syrup. Let’s dive into cultivating these berries for syrup production.
Recap of Key Takeaways
In summary, we’ve covered a lot of ground when it comes to cultivating elderberries for syrup production. Let’s review some of the key takeaways from our discussion.
First and foremost, selecting the right variety is crucial. As we discussed earlier, choose a cultivar that’s specifically bred for its high berry yield and desirable flavor profile. Some popular options include ‘Adams’, ‘York’, and ‘Nova’. These varieties have proven themselves to be well-suited for syrup production and are worth considering.
When it comes to growing conditions, ensure your elderberry plants receive full sun to partial shade and well-drained soil with a pH between 6.0 and 7.0. Also, don’t forget to plant multiple varieties for cross-pollination, which will lead to healthier and more robust plants.
Now that we’ve covered the basics of cultivation, let’s talk about harvesting. The ideal time for harvesting is in mid-to-late summer when the berries are ripe and fully purple. Use a clean picking basket or container to collect the berries, taking care not to bruise them.
Of course, no discussion on elderberry syrup production would be complete without mentioning the importance of proper sanitation and food safety practices. When handling and processing the berries, make sure to wash your hands frequently and sanitize any equipment that comes into contact with the fruit.
To recap, our top tips for cultivating elderberries for syrup production are: choose a suitable variety, provide optimal growing conditions, harvest at the right time, and maintain proper sanitation and food safety practices. By following these guidelines, you’ll be well on your way to producing delicious homemade elderberry syrup that’s perfect for topping pancakes, waffles, or even using as a natural remedy.
Frequently Asked Questions
Can I start cultivating elderberries with a small space or balcony?
Yes, you can cultivate elderberries in containers on a small space or balcony. Just ensure the container is at least 12-18 inches deep to accommodate the root system of the plant. Also, keep in mind that dwarf or compact varieties are more suitable for limited spaces.
How do I handle common pests and diseases affecting my elderberry plants?
Common pests like aphids, spider mites, and whiteflies can be managed using neem oil, insecticidal soap, or introducing beneficial insects. Diseases like powdery mildew and root rot can be prevented by maintaining good air circulation, pruning infected areas, and ensuring proper soil drainage.
What’s the ideal time for harvesting elderberries for syrup production?
The ideal time for harvesting elderberries for syrup production depends on the variety and your desired flavor profile. Generally, berries are ready to harvest when they’re dark purple and release from the stem easily. Harvest in the morning after a dry night to minimize moisture content.
Can I use wild or foraged elderberries for syrup production?
Yes, you can use wild or foraged elderberries for syrup production, but ensure proper identification of the plant to avoid contamination with toxic species like American Elderberry (Sambucus nigra). Also, be aware that wild elderberries may have varying levels of contaminants like heavy metals.
How do I store my harvested elderberries for later processing?
Harvested elderberries can be stored in a cool, dry place or refrigerated at 32-40°F (0-4°C) to preserve their flavor and nutritional content. Berries can also be frozen to make them easier to process later. When storing, keep the berries away from direct sunlight and moisture to prevent spoilage.