Are you ready to add some vibrant color and drama to your outdoor space? Container gardening with cannas is an excellent choice for beginners and experienced gardeners alike. Not only do cannas thrive in containers, but they’re also relatively low maintenance and can tolerate a range of conditions. However, growing cannas in pots requires careful consideration when it comes to choosing the right variety, container size, and care techniques.
In this article, we’ll cover everything you need to know to grow thriving cannas in containers. We’ll discuss how to select the perfect canna variety for your space, what container sizes work best, and expert tips on watering, fertilizing, and managing pests and diseases. Whether you’re a seasoned gardener or just starting out, this guide will provide you with all the information you need to grow stunning cannas in containers that will add beauty and vibrancy to your outdoor space.
Choosing the Right Canna Variety
When selecting a canna variety for your container garden, there are several factors to consider, including growth habits and bloom times. This will help you choose a selection that thrives in its new home.
Selecting Dwarf or Compact Varieties
When selecting canna varieties for container gardening, choosing dwarf or compact types can be a game-changer. These plants have been bred to grow more slowly and remain shorter in height, making them perfect for smaller spaces like containers.
One of the main benefits of compact canna varieties is their ability to produce plenty of blooms without taking up too much room. They typically reach heights between 2-3 feet (60-90 cm), which is significantly shorter than standard varieties that can grow upwards of 6 feet (180 cm) or more in ideal conditions.
Another advantage of dwarf and compact canna varieties is their controlled growth habits, which allows them to thrive in smaller containers. They tend to have a more contained root system, reducing the risk of overwatering and root bound issues common with larger varieties. This makes them an excellent choice for container gardens where space is limited. By choosing these varieties, you can enjoy beautiful blooms without sacrificing valuable garden real estate.
Popular Canna Types for Containers
When it comes to container gardening with cannas, you’ll want to choose varieties that thrive in smaller spaces and don’t mind being a bit root-bound. Two popular options for containers are ‘Red Satin’ and ‘Tropicanna’. These stunning canna types are perfect for adding a pop of color and drama to your patio or balcony.
‘Red Satin’ is a low-maintenance option with beautiful, dark red flowers that bloom from mid-summer until the first frost. Its compact growth habit makes it ideal for smaller containers (at least 12-18 inches deep) and can be grown in partial shade to full sun. Water ‘Red Satin’ regularly, but avoid overwatering to prevent root rot.
‘Tropicanna’ is another eye-catching choice with bright orange-red flowers and striking yellow stripes. It grows a bit taller than ‘Red Satin’, reaching up to 4-5 feet, so be sure to choose a container that’s at least 2-3 feet deep. Give it plenty of sunlight (at least 6 hours direct sun) and water regularly, making sure the soil doesn’t dry out completely.
Both varieties are relatively drought-tolerant once established, but consistent moisture will encourage more blooms. To maximize their growth in containers, be prepared to repot every 2-3 years with fresh potting mix and a slightly larger container.
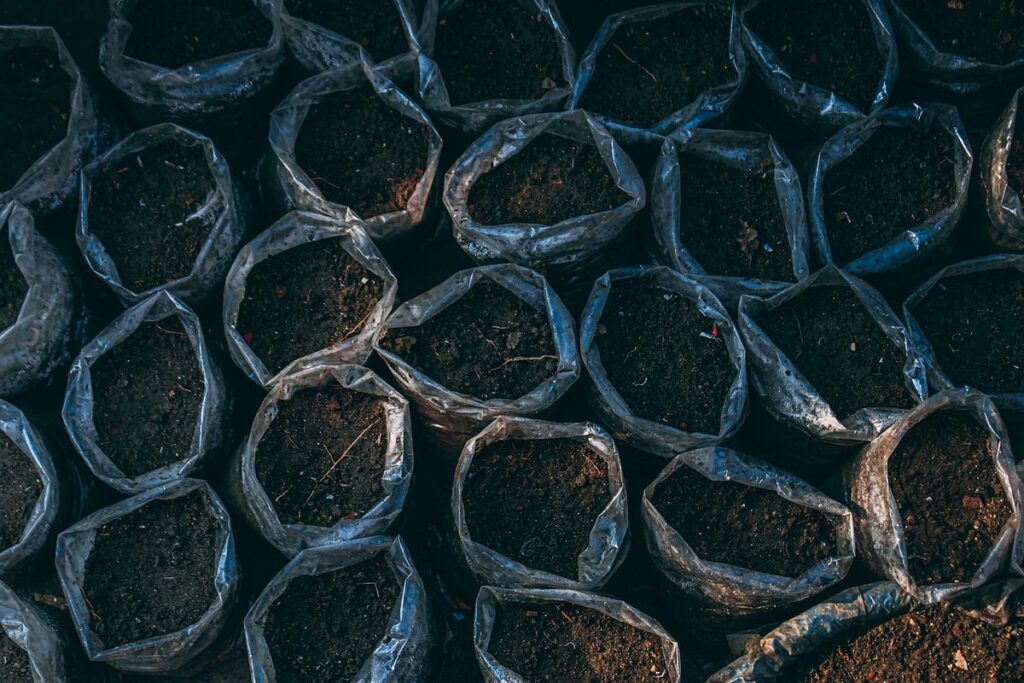
Container Selection and Preparation
When it comes to growing stunning canna plants in containers, choosing the right pot is crucial. Let’s dive into selecting and preparing the perfect container for your tropical beauty.
Selecting the Right Container Size and Material
When it comes to container gardening cannas, selecting the right container size and material is crucial for their growth and well-being. A good rule of thumb is to choose a container that’s at least 12-18 inches deep and has a wide mouth to accommodate the plant’s mature size. Cannas can grow quite tall, so make sure your container is sturdy enough to support them.
The material of your container is also worth considering. Plastic containers are lightweight, easy to clean, and often inexpensive. However, they may not provide the best drainage for your plants. Ceramic or terra cotta pots are a good option as they allow for excellent drainage and can help prevent waterlogged soil. Wooden planters, on the other hand, add a touch of rustic charm but may require more maintenance.
Regardless of the material, make sure your container has at least 3-4 holes in the bottom for proper drainage. This will help prevent root rot and ensure your cannas receive the oxygen they need to thrive.
Preparing the Container for Planting
Before you start planting your canna lilies, it’s essential to prepare the container to provide a healthy and thriving environment for your plants. A well-prepared container will help prevent root rot, ensure proper drainage, and promote strong growth.
Begin by adding a 1-2 inch layer of broken pottery or small rocks at the bottom of the container. This helps with drainage and prevents the potting mix from washing away when watering. Next, add a 4-6 inch layer of high-quality potting mix specifically designed for containers. You can also add some organic matter like compost to improve soil fertility.
It’s crucial to fertilize your canna lilies before planting to give them a boost of nutrients. Use a balanced fertilizer (10-10-10) and follow the instructions on the label. Add one-half cup of fertilizer per gallon of potting mix, mixing it well to avoid any lumps. This will provide your canna lilies with essential nutrients like nitrogen, phosphorus, and potassium for healthy growth.
By following these simple steps, you’ll be giving your canna lilies a strong foundation to thrive in their new container home. Remember to check the pH level of the potting mix, as cannas prefer slightly acidic soil with a pH between 6.0-7.0.
Planting Canna in Containers
If you’re planning to grow canna in containers, we’ve got some essential tips and tricks for getting started with planting your cannas successfully. This is where it begins!
Soaking Seeds or Tubers
When it comes to planting canna in containers, you have two primary options: starting from seeds or using tubers. Soaking and sprouting techniques can be employed for both methods to ensure successful germination.
For seed starting, a simple soak method involves placing the seeds in water for 24-48 hours before sowing them in the container. This helps to rehydrate the seeds and encourages quicker germination. For tuber starting, soaking is also an effective approach, but it’s essential to note that over-soaking can cause the tubers to rot. A good rule of thumb is to soak the tubers for 1-2 hours before planting.
Some gardeners swear by a sprouting method using water and a plastic bag to create a humid microclimate. Place the seeds or tuber in a bowl, cover with water, and seal it in a plastic bag. This method can significantly reduce germination time and increase chances of success.
Keep in mind that soaking and sprouting methods might not be suitable for all types of seeds or tubers. It’s crucial to research specific requirements for your variety before attempting these techniques.
Planting Canna in Container Gardens
When planting canna in containers, it’s essential to provide enough space for the rhizomes to grow and thrive. A good rule of thumb is to plant them 6-12 inches apart, depending on the mature size of the variety. This will prevent overcrowding and promote healthy growth.
To get started, dig a hole that’s about twice as deep as the rhizome. Gently place the rhizome in the hole, making sure the “eyes” or growing points are facing upwards. Cover with soil, and firm it gently to secure the plant in place. Water thoroughly to settle the soil.
Newly planted rhizomes require adequate care. Keep the soil consistently moist but not waterlogged, as this can lead to root rot. A general rule of thumb is to water when the top 1-2 inches of soil feel dry to the touch. Make sure containers have good drainage holes to prevent water from accumulating.
Provide your canna with full sun to partial shade, depending on the variety. Most canna varieties prefer temperatures between 65-85°F (18-29°C), but some tropical varieties may require warmer conditions. With proper care and attention, your potted canna will flourish and add a splash of vibrant color to your container garden.
Watering and Fertilizing Canna in Containers
When growing cannas in containers, it’s essential to get their watering and fertilizing needs just right. This section will walk you through the best practices for keeping your container-grown cannas happy and thriving.
Understanding Cana’s Watering Needs
When it comes to growing canna in containers, one of the most critical factors is maintaining consistent moisture levels. Canna plants thrive in moist environments, but overwatering can be just as detrimental as underwatering. To ensure healthy growth, you’ll need to monitor soil moisture regularly.
Start by checking the top 1-2 inches of soil daily. Stick your finger into the soil or use a moisture meter to get an accurate reading. If the soil feels dry, it’s time to water. Water your canna deeply but infrequently to encourage deep root growth. Avoid getting water on the leaves to prevent fungal diseases.
To further monitor soil moisture, you can also observe your plant’s behavior. Canna plants will typically wilt when they need water. However, this can be a sign of underwatering or other issues. By paying attention to these signs and checking soil moisture regularly, you’ll be able to provide the perfect balance for your container-grown canna.
Keep in mind that soil type and pot size also impact moisture levels. Well-draining pots and sandy soils will dry out faster than those with heavier soils. Be mindful of these factors when determining how often to water your canna.
Fertilizing Canna in Containers
Fertilizing Canna regularly is essential for promoting healthy growth and vibrant blooms. When grown in containers, canna plants tend to exhaust their nutrient reserves more quickly due to the limited soil volume.
To keep your potted canna happy and thriving, choose a balanced fertilizer that contains nitrogen (N), phosphorus (P), and potassium (K) – typically represented by the NPK ratio on the label. A 20-20-20 formula is an excellent starting point for most canna varieties. However, some experts recommend using a fertilizer with a slightly higher P content to promote lush foliage and blooming.
To fertilize effectively:
* Feed your potted canna every 2-3 weeks during the growing season (spring-fall).
* Dilute the recommended amount of fertilizer by half to avoid burning your plant’s roots.
* For best results, apply fertilizers in the morning when the soil is still moist from watering.
Regular fertilization will reward you with healthy, robust growth and a spectacular display of flowers. Experiment with different NPK ratios or organic fertilizers if you prefer a more nuanced approach, but always follow the manufacturer’s instructions for application rates.
Pests and Diseases to Watch Out for
When it comes to container gardening cannas, being aware of potential pests and diseases is crucial to ensure their health and longevity. This section will help you identify common issues that may affect your plants.
Common Pests Affecting Cana in Containers
When growing canna in containers, it’s not uncommon to encounter pests that can cause significant damage to the plant. Two of the most common pests affecting canna in containers are aphids and spider mites.
Aphids are small, soft-bodied insects that feed on the sap of plants, causing curled or distorted leaves. They can be identified by their pear-shaped bodies and long, slender legs. If you notice a sticky substance on your canna’s leaves or stems, it could be an indication of aphid infestation. To manage aphids, remove any heavily infested leaves, and treat the plant with neem oil or insecticidal soap.
Spider mites are tiny, spider-like insects that feed on the sap of plants, causing yellowing or bronzing of the leaves. They can be identified by their fine webbing and distinctive red eyes. To prevent spider mite infestations, ensure good air circulation around your canna plant, and keep the soil consistently moist but not waterlogged.
Regularly inspect your canna for signs of pests, and take action promptly to prevent infestations from getting out of hand.
Managing Canna Diseases in Containers
As you tend to your container-grown canna plants, it’s essential to be aware of common diseases that can quickly take hold. Root rot and leaf spot are two of the most prevalent issues affecting canna in containers.
Root rot is caused by overwatering, which leads to a buildup of moisture in the soil. This creates an ideal environment for fungal growth, causing roots to rot and eventually kill the plant. Symptoms include yellowing or browning leaves, soft or mushy stems, and a foul odor emanating from the potting mix.
Leaf spot is another common disease affecting canna in containers, often caused by excessive moisture and poor air circulation. It appears as small, circular lesions on the leaves, which may turn yellow or brown before falling off. To prevent both root rot and leaf spot, ensure good air circulation around your plants and avoid overwatering. Allow the top 1-2 inches of soil to dry out between waterings, and use a well-draining potting mix to reduce the risk of waterlogged soil.
Tips for Container Gardening with Canna Year-Round
To keep your canna blooms going strong all year round, consider these expert tips on how to successfully grow and care for container gardens in every season. It’s easier than you think!
Winter Care for Cana in Containers
As winter approaches and temperatures drop, it’s essential to protect your potted canna plants from harsh conditions. One effective strategy is to bring them indoors where they can thrive in a warmer environment. Choose a bright, sunny spot with temperatures between 40°F to 60°F (4°C to 15°C), ideal for canna growth.
Before moving the pots indoors, clean and inspect each plant carefully. Remove any dead or dying leaves, and trim back overgrown stems to maintain air circulation and promote healthy growth. Next, repot the canna in a slightly larger container with fresh potting mix, ensuring good drainage is maintained.
Once settled indoors, monitor your plants closely for signs of pests, such as spider mites, mealybugs, or scale. Use organic pest control methods whenever possible to avoid harming your plants. With proper care and attention, your potted canna should thrive throughout the winter months, ready to burst back into bloom come springtime.
Keep in mind that some varieties may not tolerate indoor conditions well, so research specific needs for your plant type beforehand.
Encouraging Continuous Growth and Bloom
To encourage continuous growth and blooming throughout the growing season, it’s essential to provide your canna plants with the right conditions. This includes adequate light, water, and nutrients. Canna plants are sensitive to temperature fluctuations, so make sure they’re protected from extreme temperatures.
One way to promote healthy growth is by repotting your canna plants every 4-6 weeks during the growing season. This will give them a fresh supply of nutrients and prevent the soil from becoming depleted. You can also divide and re-pot established canna plants to encourage new growth and blooms.
Another tip is to prune your canna plants regularly to maintain their shape and promote bushy growth. Remove any dead or damaged leaves, and cut back overgrown stems to about half their height. This will encourage the plant to produce more blooms and prevent it from becoming leggy.
By following these tips, you’ll be able to enjoy a continuous display of vibrant flowers throughout the growing season. With proper care and attention, your canna plants will thrive in their containers, bringing color and energy to your outdoor space.
Frequently Asked Questions
What’s the ideal time to plant cannas in containers for optimal growth?
Cannas can be planted in containers year-round, depending on your climate and region. In areas with frost, it’s best to start cannas indoors 4-6 weeks before the last frost date, then transplant them outside when the weather warms up.
Can I use regular potting mix for my container garden cannas?
Regular potting mix is not ideal for cannas as they prefer a slightly acidic and well-draining mix. A tropical plant mix specifically designed for plants like cannas will provide the right balance of nutrients and acidity to support their growth.
How do I know if my canna needs more water, considering its different watering needs throughout the year?
Yes, cannas have varying watering requirements depending on the season. Generally, cannas need more frequent watering during the active growing phase (spring-fall) and less during the dormant phase (winter). Monitor your plant’s soil moisture by sticking a finger into the soil up to the first knuckle.
Can I grow multiple canna varieties in the same container?
Yes, you can grow multiple canna varieties together, but ensure they have similar growing conditions and mature heights. This will also help promote cross-pollination, resulting in more vibrant blooms.
How often should I fertilize my cannas to maintain their health and vigor?
Fertilize your cannas every 2-3 weeks during the active growing phase with a balanced fertilizer (10-10-10 NPK). You can switch to a bloom-promoting fertilizer (15-30-15) when you want to encourage more flowering. Be cautious not to over-fertilize, as this can cause damage to the plant’s roots and leaves.