Are you tired of relying on expensive store-bought fertilizers to nourish your plants? Composting is a simple, eco-friendly way to create nutrient-rich plant fertilizer that will make your garden thrive. By harnessing the power of decomposition, you can turn kitchen scraps and yard waste into a valuable resource for your garden. But with so many different composting techniques out there, it’s hard to know where to start. In this article, we’ll explore effective methods like hot and cold composting, vermicomposting, and bokashi, as well as expert tips on setting up a compost pile, managing odors and pests, and using your finished compost. Whether you’re a seasoned gardener or just starting out, these techniques will help you create the perfect fertilizer for your plants.
Benefits of Composting
Composting is a simple yet effective way to reduce waste, save money on fertilizer, and create a nutrient-rich soil amendment for your garden. In this next part, we’ll explore its many benefits in detail.
What is Compost?
Compost is a nutrient-rich soil amendment that plays a vital role in gardening. Essentially, compost is a mixture of decomposed organic materials such as food waste, leaves, grass clippings, and other plant matter. As these materials break down, they release essential nutrients like nitrogen, phosphorus, and potassium, which are crucial for healthy plant growth.
Composting involves creating an optimal environment for microorganisms to thrive, allowing them to convert these organic materials into a valuable resource. This process can take anywhere from a few weeks to several months, depending on factors such as temperature, moisture, and the type of materials used. Regular composting not only reduces waste but also creates a natural fertilizer that promotes soil structure, aeration, and water retention.
For gardeners, using compost is essential for creating a thriving ecosystem. It helps neutralize soil pH levels, suppress plant diseases, and even attracts beneficial insects. By incorporating compost into your gardening routine, you’ll be providing your plants with the necessary nutrients to grow strong, healthy roots and develop disease-resistant systems.
Types of Composts
Composting is not a one-size-fits-all process. Various methods cater to different needs and preferences, ensuring you can find an approach that suits your lifestyle and environment. Hot composting, cold composting, and vermicomposting are three popular types of composts.
Hot composting involves creating a mix of “green” nitrogen-rich materials (food scraps, grass clippings) with “brown” carbon-rich materials (dried leaves, shredded newspaper). This method requires regular turning to maintain optimal temperatures for decomposition. A well-balanced hot compost can be ready in as little as 2-3 weeks.
Cold composting, on the other hand, is a more relaxed approach that allows materials to break down over time without intense heat or frequent maintenance. Simply layer your compost materials and let nature take its course – it may take several months for decomposition to occur.
Vermicomposting uses worms (red wigglers) to speed up the process. Add a mix of worm-friendly foods, bedding, and water to a bin, then add the worms. They will break down the materials in a matter of weeks. This method is ideal for small-scale composting with minimal space and maintenance requirements.
Nutritional Value of Compost
Compost is often referred to as “black gold” for its incredible nutritional value and ability to improve soil health. When added to the soil, compost provides a rich source of essential nutrients that support plant growth and development. These nutrients are released slowly over time, allowing plants to absorb them as needed.
The key to understanding the nutritional value of compost lies in its carbon-to-nitrogen ratio. A healthy compost pile has a mix of 2/3 “brown” materials (dry leaves, straw) and 1/3 “green” materials (food scraps, grass clippings). This balance allows for optimal decomposition and nutrient release.
Some of the primary nutrients provided by compost include nitrogen, phosphorus, potassium, and micronutrients like iron and zinc. These elements are essential for plant growth and can be particularly beneficial in soil that has been depleted or degraded over time. By incorporating compost into your gardening routine, you can expect to see improvements in soil structure, fertility, and overall health – ultimately leading to healthier, more resilient plants.
Choosing the Right Composting Method
When it comes to creating nutrient-rich compost, selecting the right method can make all the difference. Let’s explore the key factors to consider when choosing a composting technique that suits your needs and lifestyle.
Cold Composting vs Hot Composting
When it comes to composting, you have two main options: cold composting and hot composting. While both methods can produce rich, nutrient-dense fertilizer for your plants, they differ significantly in their approach and benefits.
Cold composting involves adding organic materials to a pile or bin over time, allowing them to break down naturally at their own pace. This method is ideal for small-scale composting and can be done with minimal effort. Simply add food scraps, leaves, grass clippings, and other organic matter to the pile as you go, and let nature do its thing.
Hot composting, on the other hand, involves actively managing the composting process through aeration, moisture control, and turning the pile regularly. This method is faster and more efficient than cold composting, producing finished compost in just a few weeks. However, it requires more effort and attention to detail.
The key differences between these two methods lie in their speed, efficiency, and required maintenance. Cold composting is perfect for beginners or those with limited space, while hot composting offers faster results but demands more involvement. Consider your lifestyle, available time, and desired outcome when deciding which method suits you best.
Vermicomposting
Vermicomposting is a unique and efficient method of composting that utilizes worms to break down organic matter. This process has gained popularity due to its compact space requirements and high nutrient retention rates. By using red wiggler worms, you can efficiently convert kitchen scraps and other organic waste into a nutrient-rich fertilizer.
To set up a vermicomposting system, start by acquiring a bin specifically designed for worm composting. Add a mix of bedding materials such as shredded newspaper or coconut coir to provide a comfortable environment for the worms. Then, introduce 1-2 pounds of red wiggler worms to the system and maintain adequate moisture levels.
As the worms work their magic, they will consume and break down organic matter, producing a high-quality compost within 2-3 months. The key to successful vermicomposting is maintaining the right balance between moisture, temperature, and pH levels. By following these guidelines and monitoring your system regularly, you can enjoy the benefits of vermicomposting while minimizing odors and mess.
Keep in mind that vermicomposting is ideal for small-scale operations due to its space requirements. However, it’s an excellent choice for gardeners with limited space or those looking for a low-maintenance composting solution.
Bokashi Composting
Bokashi composting is a unique and efficient method that can be particularly beneficial for urban gardeners or those with limited space. This Japanese technique involves fermenting organic matter using microorganisms, similar to the way sauerkraut or kimchi are made. The process starts by adding a proprietary mixture of microorganisms (bokashi) to your kitchen scraps, along with other compost materials like leaves and grass clippings.
The bokashi mix contains beneficial bacteria that break down the organic matter in 1-2 weeks, resulting in a nutrient-rich liquid fertilizer and a solid mass that can be buried in the ground. This method has several advantages: it doesn’t require turning or aerating the compost pile, making it suitable for small spaces; it produces a higher quality fertilizer due to the efficient breakdown process; and it’s odor-free.
To get started with bokashi composting, you’ll need to purchase a bokashi bin or make your own using a plastic container. Simply add your kitchen scraps, along with some water, and sprinkle the bokashi mix on top. Let the mixture ferment for 1-2 weeks before adding it to the soil as fertilizer.
Setting Up a Compost Pile
To start composting, you’ll need to set up a pile that’s just the right size and mix of ingredients to break down efficiently and create nutrient-rich fertilizer for your plants. Let’s cover the essential setup steps together.
Materials Needed for Composting
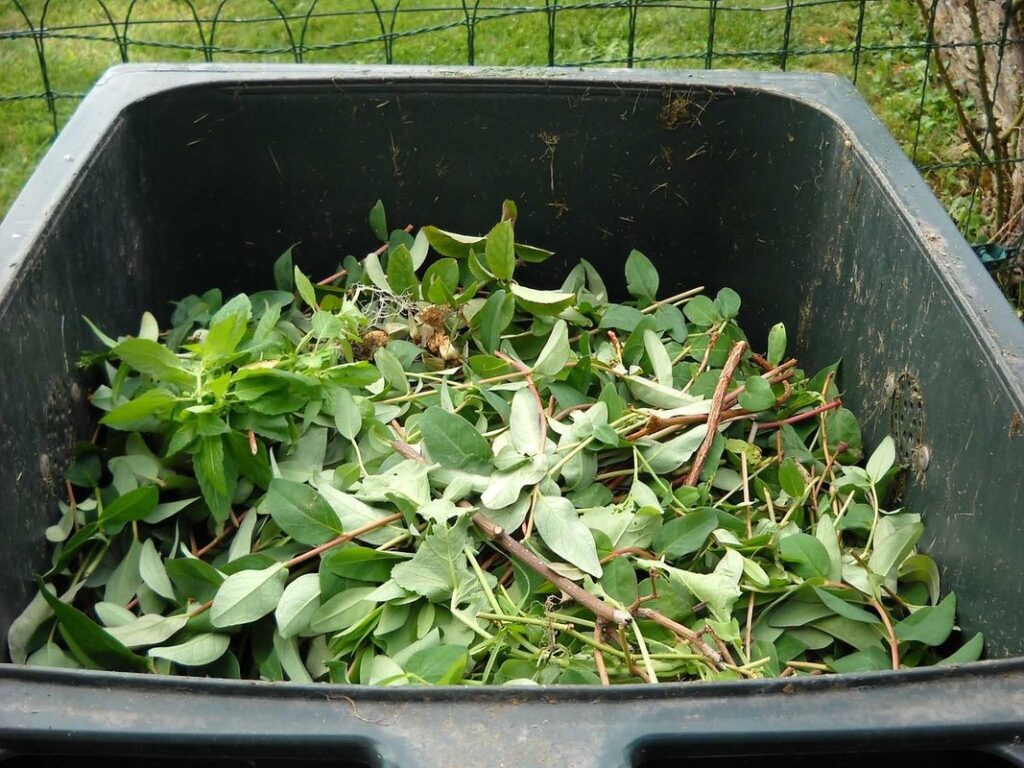
To set up a thriving compost pile, you’ll need to gather some essential materials. Start by collecting brown and green materials, as they play crucial roles in the decomposition process.
Brown materials, also known as carbon-rich ingredients, provide the base for your compost pile. They help absorb excess moisture and support the growth of beneficial microorganisms. Examples of brown materials include:
* Dried leaves
* Shredded newspaper or cardboard
* Sawdust (untreated wood only)
* Straw or hay
Green materials, on the other hand, are nitrogen-rich ingredients that fuel the decomposition process. They help break down the brown materials and produce heat. Examples of green materials include:
* Fresh grass clippings
* Fruit and vegetable scraps
* Manure from herbivores (e.g., horses, cows)
* Coffee grounds
Remember to maintain a balance between 2/3 brown materials and 1/3 green materials in your compost pile. This ratio will ensure optimal decomposition and prevent odors or pests. Be sure to shred large materials like leaves and branches to increase their surface area and speed up the process.
Layering Techniques for Optimal Composting
When layering organic matter for optimal composting, it’s essential to create a balanced and harmonious mix of “green” and “brown” materials. Green materials, such as food scraps, grass clippings, and fresh manure, are high in nitrogen and moisture content, while brown materials like dried leaves, straw, or shredded newspaper are high in carbon and dry matter.
A good rule of thumb is to alternate between 2-3 inches of green material and 2-3 inches of brown material. This creates a layered effect that promotes healthy decomposition. Start with a layer of brown material at the bottom of your compost pile, followed by a layer of green material. Repeat this process, finishing with a layer of brown material on top.
For example, if you’re adding kitchen scraps and grass clippings (green materials), balance them out with dried leaves or straw (brown materials). This technique ensures that excess moisture is absorbed, while preventing anaerobic conditions from forming, which can lead to unpleasant odors and reduced decomposition efficiency.
Maintaining the Right Moisture Levels
Maintaining optimal moisture levels in your compost pile is crucial for its overall health and efficiency. If the pile is too dry, it can lead to reduced microbial activity, slowing down the decomposition process. On the other hand, if the pile is too wet, it can create anaerobic conditions, producing unpleasant odors and attracting pests.
Aim to maintain a moist consistency similar to that of a damp sponge. This level of moisture allows for optimal microbial activity, helping break down organic matter efficiently. To achieve this balance, aim to add about 2-3 gallons of water per 100 pounds of compost material.
Regularly checking the pile’s moisture levels will help you make adjustments as needed. You can do this by feeling the bottom layer of the pile – it should feel slightly damp but not soggy. Avoid overwatering by using a gentle sprinkling or misting system to maintain optimal moisture levels, ensuring your compost pile operates at its best and produces high-quality fertilizer for your plants.
Managing Odors and Pests
As you start composting, it’s not uncommon for unwanted odors and pests to pop up. This section will help you tackle these common issues effectively.
Controlling Odor and Pest Infestations
When it comes to composting, controlling odor and pest infestations is crucial for maintaining a healthy and efficient process. To minimize odors, it’s essential to balance the carbon-to-nitrogen ratio in your compost pile. This can be achieved by adding a mix of green materials (high in nitrogen) like food scraps and grass clippings, along with brown materials (high in carbon) such as dried leaves or shredded newspaper.
To further reduce odors, ensure that your compost pile is aerated regularly. You can do this by using a pitchfork to turn the pile every few days or incorporating aeration tubes. This will help speed up the decomposition process and eliminate excess moisture that can lead to unpleasant smells.
Pest infestations are another common issue in compost piles. To prevent pests like rodents, flies, and ants from taking over your pile, keep it covered with a lid or tarp. Also, avoid adding meat, dairy products, and oils to the pile as they attract pests and create odors. By following these simple tips, you can maintain a balanced composting process that minimizes odors and pest infestations, resulting in rich, nutrient-dense fertilizer for your plants.
Common Composting Mistakes to Avoid
When it comes to composting, making a few common mistakes can lead to unpleasant odors and attract pests. One of the most significant errors is overloading the pile with too much food waste. This can cause anaerobic conditions to develop, resulting in ammonia buildup and strong odors. To prevent this, aim for a mix of 2/3 “brown” materials like leaves or straw and 1/3 “green” materials such as kitchen scraps.
Another mistake is not layering the pile correctly. If you add too many wet materials at once, it can create anaerobic pockets that foster pest infestations. Instead, alternate between layers of brown and green materials to ensure airflow and balance moisture levels. Don’t overdo it with high-moisture items like grass clippings or fresh manure – these should be limited to one layer per week.
Adding meat, dairy, or oils can also create unpleasant odors and attract pests. These items are too rich in nitrogen and can break down quickly, leading to imbalances in the pile. Stick to fruit and vegetable scraps, tea bags, and coffee grounds for a balanced compost. By avoiding these common mistakes, you’ll be well on your way to creating a thriving, odor-free composting system.
Harvesting and Using Your Compost
Now that you’ve created a nutrient-rich compost, it’s time to reap the rewards by learning how to harvest and utilize your homemade fertilizer effectively in your garden. Let’s dive into the practical steps of making the most of your compost.
When to Harvest Your Compost
When you’ve spent weeks or months cultivating your compost pile, it’s exciting to finally harvest and use it as fertilizer for your plants. But when is the right time? The answer lies in observing the compost’s readiness and quality.
Look for a rich, earthy aroma and a uniform texture that resembles dark brown soil. This indicates that decomposition has occurred, breaking down organic matter into nutrient-rich humus. As you dig into the pile, check for an absence of recognizable materials like food scraps or yard trimmings. If you notice these, it’s not yet ready.
For an easy test, perform a “squeeze” on the compost: grab a handful and compress it firmly. If it holds its shape but crumbles easily when released, it’s likely ready to use. Aim for this consistency as your goal.
Remember that different compost piles may take longer or shorter times to mature. Don’t worry if yours takes months; the end result will be worth the wait.
Using Compost as a Fertilizer
Now that you’ve created a rich and nutrient-dense compost, it’s time to put it to good use as a natural fertilizer for your plants. Using compost as a fertilizer is a straightforward process that can provide numerous benefits for your garden. The best part? It’s free, eco-friendly, and requires no synthetic chemicals.
To start using your compost as a fertilizer, begin by adding a 2-3 inch layer to the top of the soil around your plants. You can also mix it into the soil at a ratio of about 10% compost to 90% existing soil. This will give your plants a slow release of nutrients over time.
When applying compost, it’s essential to follow some general guidelines to avoid over-fertilizing. Aim for about 1-2 pounds of compost per square foot of garden bed. Excessive application can lead to nutrient imbalances and potentially damage plant roots.
In practice, this means you can use your finished compost as a top dressing or mix it into the soil according to its intended purpose: as a starter fertilizer for new seedlings, as a boost for established plants, or as a conditioning agent to improve soil structure.
Examples of Successful Composting Projects
Here are some inspiring examples of successful composting projects that can motivate and educate you to start or improve your own composting endeavors.
In a small community garden in Brooklyn, New York, residents came together to create a massive composting project. They built a large worm bin using recycled materials and started adding food scraps and yard waste. Within months, they had created a rich, dark soil amendment that boosted their crop yields and reduced waste sent to landfills. This project not only demonstrated the potential of community-driven composting but also provided valuable lessons on scale-up and resource management.
In Australia, a family-owned farm implemented an innovative composting system using bokashi bins. By fermenting food scraps and mixing them with carbon-rich materials, they produced high-quality compost that increased soil fertility and reduced greenhouse gas emissions. This project showcased the potential of micro-scale composting solutions for small farmers and gardeners.
In urban areas, small-scale composting initiatives can be as simple as a household worm bin or a community shared bin. For instance, in San Francisco’s Mission District, residents created a network of backyard composting systems using compact, space-saving bins. This grassroots movement demonstrated that even in densely populated areas, individuals can contribute to the larger goal of reducing waste and creating nutrient-rich soil amendments.
These examples demonstrate the diversity and adaptability of successful composting projects, from community-driven initiatives to small-scale urban endeavors. By learning from these experiences and applying practical knowledge, you can create your own successful composting project that nourishes your plants and minimizes waste.
Troubleshooting Common Composting Issues
Don’t worry if your compost isn’t turning out as expected – we’ve got you covered with solutions to common issues that can arise during the composting process. From pests to unpleasant odors, let’s tackle them together.
Dealing with Insect Pests and Rodents
Composting can be a rewarding experience, but it’s not without its challenges. One common issue many composters face is dealing with insect pests and rodents that try to make themselves at home in the pile. These unwanted visitors can not only be annoying but also contaminate your compost.
To manage insect pests like fruit flies, ants, and beetles, ensure your compost has a balance of carbon-rich “brown” materials (dried leaves, straw) and nitrogen-rich “green” materials (food scraps, grass clippings). This balance will help speed up decomposition and make the environment less appealing to pests.
Rodents like mice, rats, and squirrels are attracted to food sources in your compost. To deter them, cover your pile with a durable mesh or wire enclosure that allows air to circulate while keeping critters out. You can also add a layer of sharp gravel or small rocks on top to discourage digging. Regularly turning your compost will also help keep the environment uninviting to rodents.
Some common household items like citrus peels and onions can repel pests naturally, so consider adding them to your pile as needed.
Overcoming Compost Odors and Foul Smells
Compost odors and foul smells can be a significant issue for many composters. The good news is that they’re usually a sign that your compost pile is working too hard! When organic matter breaks down, it releases gases like ammonia, methane, and hydrogen sulfide, which can cause unpleasant odors. To eliminate these smells, you need to balance the carbon-to-nitrogen ratio in your compost pile.
First, ensure you have a mix of “green” materials (high in nitrogen) like food scraps, grass clippings, or manure, and “brown” materials (high in carbon) such as leaves, straw, or shredded newspaper. Aim for a balance between the two, with 2/3 brown materials and 1/3 green materials.
Regularly turning your compost pile will also help to aerate it and speed up decomposition, reducing odors. Try adding a 2-3 inch layer of finished compost or well-aged manure on top of your pile to absorb excess moisture and odor-causing compounds.
Monitor your pile’s temperature regularly; if it gets too hot (above 160°F), it can create unpleasant smells. By maintaining the right balance, aerating your pile, and controlling its temperature, you should be able to minimize odors and enjoy a healthy, thriving compost pile.
Addressing Nutrient Imbalance
Identifying nutrient imbalances in compost can be a challenge, but with a little detective work, you can get back on track. Start by monitoring the “nitrogen to carbon ratio” (N:C) of your compost pile. If it’s too high in nitrogen-rich materials like food scraps or grass clippings, microorganisms will break them down rapidly, leading to an overabundance of nitrate. Conversely, if it’s skewed towards carb-rich inputs like leaves and branches, decomposition slows down.
To address the imbalance, adjust the input materials accordingly. For example, add more carbon-rich materials like coconut coir or straw to balance out excess nitrogen. Alternatively, mix in some nutrient-dense inputs like blood meal or alfalfa meal to boost nitrogen levels. Keep a record of your inputs and monitor the compost pile’s decomposition rate. Regularly turning the pile can also help distribute heat and moisture, ensuring microorganisms break down nutrients efficiently.
Remember, achieving an optimal N:C ratio (around 25:1 to 30:1) takes time and patience. Be prepared to make adjustments as you go, and don’t hesitate to get your compost tested for nutrient levels if needed.
Frequently Asked Questions
Can I compost pet waste, including cat litter?
No, it’s not recommended to compost pet waste, as it can contain pathogens and parasites that can harm humans and plants. Stick to composting food scraps, yard trimmings, and other organic materials. If you have a large amount of pet waste, consider disposing of it through your regular trash collection.
How do I maintain the optimal carbon-to-nitrogen ratio in my compost pile?
To achieve the perfect balance, aim for a mix of 2/3 “brown” materials (dry leaves, straw, shredded newspaper) and 1/3 “green” materials (food scraps, grass clippings, manure). Add brown materials to absorb excess moisture and reduce odors, while green materials provide nutrients. Monitor the pile’s temperature and moisture levels to adjust the ratio as needed.
Can I compost meat and dairy products?
No, it’s not recommended to compost animal products like meat, bones, or dairy, as they can attract pests and create unpleasant odors. Stick to composting plant-based materials like fruits, vegetables, leaves, and grass clippings.
How do I know when my compost is ready for use in the garden?
Finished compost should be dark, crumbly, and have an earthy aroma. Check for these characteristics by digging into the pile or sampling the contents. If it’s still too wet, dry, or has visible debris, give it more time to mature.
Can I use my kitchen scraps as is in a vermicomposting bin?
Yes, but make sure to chop them into manageable pieces and bury them under 2-3 inches of bedding material (like shredded newspaper or coconut coir) to prevent pests from attracting insects. Worms will break down the materials as they move through the bin.