Are you tired of throwing away food scraps and yard waste without knowing how to turn them into something valuable? You’re not alone! Composting is an easy and effective way to reduce your household’s environmental impact, create nutrient-rich soil for your garden, and even save money on fertilizers. But with so many different techniques out there, it can be overwhelming to know where to start.
In this comprehensive guide, we’ll walk you through the basics of hot composting, worm composting, and other expert techniques that will have you creating rich, loamy soil in no time. We’ll cover everything from setting up your bin to maintaining optimal conditions for maximum decomposition. Whether you’re a seasoned gardener or just starting out, our expert tips and tricks will help you get the most out of your waste and start growing a healthier, more sustainable garden.
Understanding Composting Basics
To get started, let’s dive into the basics of composting and explore what you need to know to create rich, nutrient-dense soil for your garden. We’ll cover the fundamentals of turning waste into a valuable resource.
What is Composting?
Composting is the process of breaking down organic materials into a nutrient-rich soil amendment that can improve soil structure and fertility. It’s an essential practice for sustainable gardening, as it reduces waste, conserves water, and promotes healthy plant growth.
At its core, composting involves collecting kitchen scraps, yard trimmings, and other organic waste, and allowing microorganisms to break them down into a stable humus. This process can be achieved through active or passive methods, depending on your schedule and available space. Active composting involves regularly turning the pile to aerate it, while passive composting relies on natural processes.
By incorporating compost into your garden, you’ll reap numerous benefits. Compost improves soil drainage, increases its water-holding capacity, and enhances nutrient availability for plants. It also suppresses plant diseases and pests by creating an unfavorable environment for them to thrive in. Whether you’re a seasoned gardener or just starting out, composting is a simple yet effective way to enhance your garden’s productivity and reduce waste.
A good compost pile should have the right balance of “green” materials (high in nitrogen) and “brown” materials (high in carbon). Aim for a mix that includes one-third green material and two-thirds brown material. This will ensure an optimal decomposition rate and prevent odors or pests from developing in your compost pile.
To get started with composting, simply gather the right materials and set up a designated area for your compost pile. Start by layering kitchen scraps and yard trimmings to create a balanced mix. Keep the pile moist but not soggy, and allow it to break down over several weeks or months. As you observe your compost pile transform from raw waste into rich soil, you’ll begin to appreciate the simplicity and rewards of this sustainable gardening practice.
Composting is an iterative process that involves adjusting and fine-tuning your approach based on the materials you have available and the results you’re seeing. With patience and persistence, you can create a high-quality compost that will benefit your garden for years to come.
The Science Behind Composting
Composting is essentially a controlled decay process that relies on microorganisms to break down organic matter. These microorganisms, primarily bacteria and fungi, thrive in environments with adequate oxygen and the right balance of carbon-rich materials (brown) and nitrogen-rich materials (green). The ideal ratio for composting is between 2:1 and 3:1 brown:green, although this can vary depending on factors like the specific materials being composted.
For example, kitchen scraps and grass clippings have a high nitrogen content and should be balanced with carbon-rich materials like shredded newspaper or dried leaves. Too much green material can lead to anaerobic conditions, where oxygen is depleted and microorganisms start to decompose rather than break down the waste. This produces unpleasant odors and even methane gas.
To create an optimal environment for decomposition, ensure your compost pile has adequate aeration through regular turning. Aim for a mix of 50-70% brown materials and 30-40% green materials. Monitor the temperature, which should reach 130-140°F (54-60°C) during active decomposition. Regular monitoring and maintenance will help you achieve a balanced compost that’s rich in nutrients and free from pathogens.
Types of Compost
There are several types of composting techniques that cater to different needs and preferences. Hot composting is one of the most popular methods, involving a high-energy process where materials are layered and turned regularly to speed up decomposition. This approach can produce finished compost within a few weeks.
On the other hand, cold composting is a low-maintenance method that involves piling organic waste in a designated area without regular turning or maintenance. While it may take longer – often several months – this approach is ideal for busy individuals who want to encourage natural decomposition processes.
Worm composting, also known as vermicomposting, utilizes red worms to break down organic matter into nutrient-rich fertilizer. This method is particularly useful for indoor spaces and can be a space-saving solution.
Bokashi composting involves fermenting organic waste using microorganisms in an anaerobic environment. This approach produces liquid fertilizer that can be used immediately or added to the bokashi compost pile, creating rich humus within weeks. Each type of composting has its benefits and drawbacks; understanding these differences is essential for choosing a method that suits your needs and lifestyle.
When deciding between these options, consider factors such as space constraints, desired outcome, and personal energy levels. By exploring different types of composting techniques, you can find the approach that best fits your goals and daily routine.
Choosing the Right Composting Method
Now that you’ve decided composting is for you, let’s dive into choosing a method that suits your lifestyle and space. We’ll explore the options to help you get started with ease.
Factors to Consider
When selecting a composting method, there are several factors to consider that can greatly impact the success of your composting efforts. First and foremost, think about the space you have available for composting. If you live in an urban area or have limited outdoor space, consider methods like vermicomposting (composting with worms) or indoor composting bins.
Climate is also a crucial factor to consider. In hot and dry climates, it’s essential to choose a method that can withstand extreme temperatures and moisture fluctuations. For example, using a bin with good airflow and shading can help regulate temperature and prevent drying out. On the other hand, in cooler and wetter climates, methods like cold composting or worm composting may be more suitable.
Additionally, consider your personal preferences when choosing a composting method. Do you have time to regularly turn and maintain your compost pile? Or do you prefer low-maintenance options? Are you interested in using specialized equipment or can you stick with basic tools? By taking these factors into account, you can select the perfect composting method for your needs and achieve successful results.
Advantages and Disadvantages of Each Method
When it comes to choosing the right composting method, it’s essential to consider the advantages and disadvantages of each approach. Let’s break down the benefits and drawbacks of popular methods.
Hot Composting is a fast and efficient way to turn food scraps into nutrient-rich compost. It’s ideal for those with limited space and time, as it can produce compost in as little as 2-3 weeks. However, it requires regular mixing and monitoring to ensure optimal conditions. Hot Composting also generates heat, which can be challenging for urban dwellers without access to a dedicated area.
Cold Composting, on the other hand, is a more laid-back approach that allows materials to break down slowly over several months. It’s perfect for those with ample space and a low-maintenance lifestyle. Cold Composting is cost-effective and doesn’t require frequent mixing or monitoring, but it can take up to 6-12 months to produce compost.
Worm Composting (Vermicomposting) is another method that’s gaining popularity due to its high yield of nutrient-rich fertilizer. It’s ideal for small spaces and requires minimal maintenance, as worms do the work for you. However, it can be an initial investment, and the worm population needs regular monitoring.
Ultimately, the best composting method for you will depend on your lifestyle, available space, and personal preferences. Consider your time commitment, budget, and desired outcome to choose a method that suits your needs.
Setting Up Your Composting System
Before you start composting, it’s essential to set up your system correctly. This section will walk you through the initial steps to create a thriving and efficient composting process.
Selecting the Right Location
When it comes to setting up your composting system, selecting the right location is crucial for its success. Consider placing your compost pile or bin in a spot that receives partial sunlight, but not direct sunlight, which can cause moisture loss and unpleasant odors. Aim for an area with moderate wind protection to prevent the spread of pests and dust.
Choose a location that’s easily accessible for regular maintenance, such as turning the compost pile and monitoring its progress. Ideally, it should be close to a water source to make adding water easier. Consider proximity to your kitchen or garden as well, so you can easily collect food scraps and yard trimmings without having to transport them far.
Avoid areas with standing water, as this can attract pests and create anaerobic conditions that hinder the composting process. Also, steer clear of spots where children or pets frequently play, as they may accidentally disturb the compost pile. By choosing a suitable location, you’ll set yourself up for a successful composting experience and enjoy a rich, nutrient-dense soil amendment in no time.
Preparing Your Compost Materials
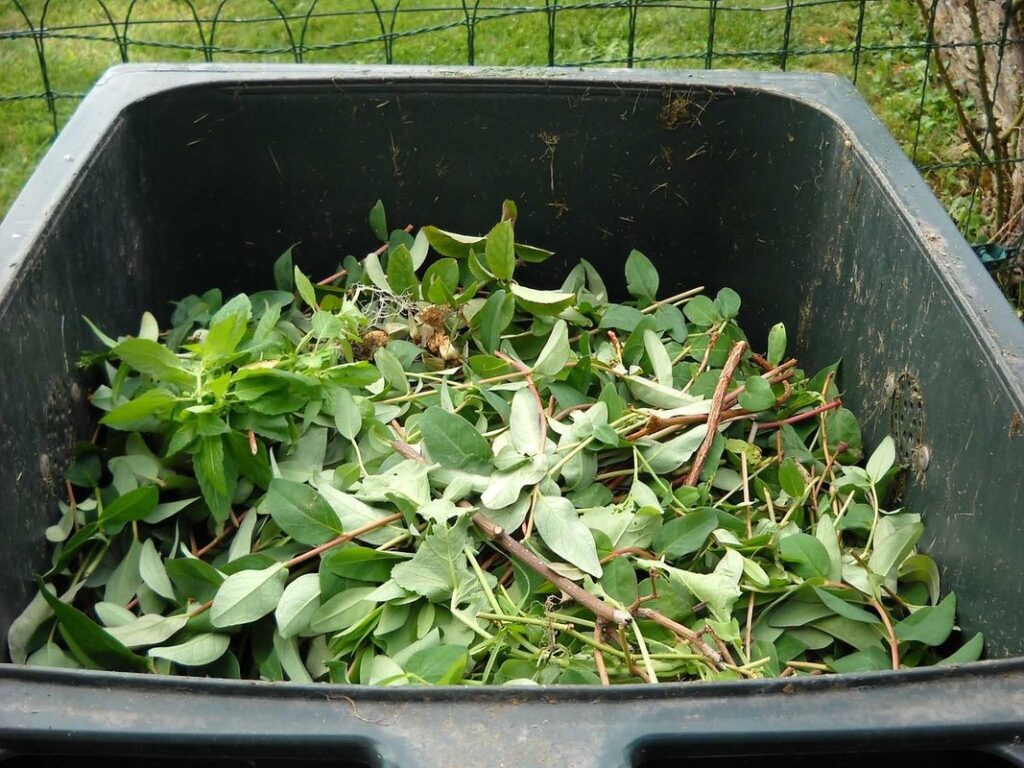
Preparing organic materials for composting is an essential step in creating a thriving compost pile. To start, you’ll need to collect a mix of “green” and “brown” materials.
Green materials are high in nitrogen and include food scraps like fruit and vegetable peels, tea bags, and coffee grounds. These can be added directly to your compost pile, but make sure to balance them with brown materials to avoid attracting pests. You can also use grass clippings or manure from herbivores as green materials.
Brown materials, on the other hand, are high in carbon and include dried leaves, shredded newspaper, and cardboard. These materials help absorb excess moisture and provide aeration for your compost pile. When collecting leaves, it’s best to shred them first to increase their surface area and speed up decomposition.
When preparing your materials, aim for a mix of 2/3 brown materials and 1/3 green materials. This will create an optimal environment for microorganisms to break down the organic matter. Remember to chop or shred large materials like leaves and twigs before adding them to your compost pile.
Maintaining Your Composting System
To keep your composting system running smoothly, it’s essential to regularly inspect and maintain its various components. This includes monitoring moisture levels and adjusting aeration as needed.
Monitoring pH Levels and Moisture
Monitoring pH Levels and Moisture is crucial to maintaining a healthy compost pile. To check the pH level, you can purchase a soil testing kit or use a pH meter. These tools will give you an accurate reading of the pH level, which should ideally range between 6.0 and 7.5. If your compost pile’s pH level is too high (above 8.0), add some peat moss or coconut coir to lower it down.
On the other hand, if your compost pile’s pH level is too low (below 4.5), you can sprinkle some dolomitic limestone or crushed eggshells to raise it up. It’s essential to maintain a balanced pH level as extreme levels can kill off beneficial microbes and slow down the decomposition process.
To check moisture content, simply insert your hand into the compost pile. If it feels dry, add water; if it feels wet, wait for a few days before checking again. You should aim for a slightly damp consistency – like a sponge that’s been squeezed out most of the way. This will ensure optimal microbial activity and prevent anaerobic conditions from developing in your compost pile.
Managing Odors and Pests
As you continue to maintain your composting system, managing odors and pests is crucial for keeping your operation running smoothly. One of the most effective strategies for minimizing these issues is by adding bulking agents. Bulking agents like straw or shredded newspaper help absorb excess moisture, which can contribute to unpleasant odors. They also provide air pockets that improve aeration and reduce the risk of pest infestations.
When it comes to pests, using pest-repellent materials can be just as effective. Certain plants like lavender and mint are known to repel rodents and other critters. Adding these plants to your compost pile or incorporating them into your bulking agents can help keep unwanted visitors at bay. Another useful material is diatomaceous earth – a non-toxic, organic powder that dehydrates insects on contact.
Regular monitoring of your compost pile’s moisture levels and temperature will also help prevent odors and pest infestations. By maintaining an optimal balance between wet and dry conditions, you’ll be less likely to attract pests and promote the breakdown of organic matter.
Troubleshooting Common Issues
If you’re experiencing problems with your compost, such as pests or unpleasant odors, we’ve got you covered. This section will walk you through common issues and their easy solutions to get you back on track.
Problems with Compost Pile Temperature
When it comes to composting, maintaining the right temperature is crucial for breaking down organic matter efficiently. However, issues can arise with either inadequate heat generation or excessive temperatures in the compost pile.
Inadequate heat generation can be caused by a lack of nitrogen-rich materials or insufficient moisture. To address this, try adding more green materials like grass clippings or food scraps to your compost pile. You should also ensure that your pile is kept consistently moist, as dry conditions can slow down decomposition.
On the other hand, excessive temperatures can be detrimental to the microorganisms in your compost pile. If the temperature exceeds 160°F (71°C), it can kill off these beneficial microbes, setting back the entire process. To prevent this, you can try turning the pile regularly or adding bulking agents like straw or shredded newspaper to improve airflow.
Monitoring your compost pile’s temperature is key to identifying and addressing these issues. Use a compost thermometer to track temperatures daily, and adjust your strategy accordingly.
Issues with Insect or Rodent Infestations
When unwanted visitors like insects or rodents show up at your composting site, it can be frustrating and even create safety concerns. These pests not only contaminate the compost but also spread diseases. To avoid this, exclusion methods are essential.
Firstly, ensure that your compost bin has a secure lid or cover to prevent pests from entering. Use hardware cloth or chicken wire to cover any gaps around the lid or walls of the bin. Bury the edges of these materials at least 12 inches underground to keep them from being dug up by curious critters. You can also use physical barriers like fine-mesh screens or nylon netting to cover the bin’s openings.
Repellents are another effective way to deter pests. Certain scented oils like peppermint, lemongrass, and citronella have natural pest-repelling properties. Mix a few drops of these oils with water and spray them around the compost area. Also, make sure to keep the composting site clean by removing any food scraps that might attract pests. This includes keeping pet food and bird seed far away from the compost bin. Regularly inspect your compost for signs of pest activity and take action promptly if you notice any.
Using Your Finished Compost
Now that you’ve created rich, nutrient-dense compost, let’s talk about how to put it to good use in your garden and indoor plants.
Composting Methods for Specific Crops
When it comes to using finished compost as fertilizer for your garden, the type of crop you’re growing plays a significant role in determining the best application method. For example, vegetables like tomatoes and peppers are heavy feeders and require more nitrogen-rich compost to promote healthy fruit growth.
For these crops, mix 2-3 inches of finished compost into the soil before planting, or use it as a side dressing around established plants. This will help improve soil structure, increase nutrient availability, and support beneficial microbial activity.
On the other hand, flowers like roses and herbs like basil prefer a more balanced fertilizer approach. For these crops, mix 1-2 inches of finished compost into the soil at planting time, or use it as a top dressing to provide ongoing nutrition and improve soil health.
Fruits like strawberries and blueberries benefit from acidic soil conditions, so use a mixture of peat moss and finished compost to lower the pH and provide essential nutrients. By tailoring your fertilizer application method to specific crop needs, you’ll get the most out of your finished compost and enjoy a thriving, productive garden.
Long-Term Benefits of Regular Composting
As you’ve been using your finished compost to nourish your garden, it’s essential to acknowledge the long-term benefits of regular composting. These advantages extend far beyond a single growing season and have a profound impact on the overall health of your soil.
One of the most significant benefits is improved soil structure. As microorganisms in the compost break down organic matter, they create a network of air pockets that allow water and nutrients to penetrate deeper into the soil. This enhances root growth, increases crop yields, and reduces erosion. A study conducted by the University of California found that compost-amended soils have up to 20% more organic matter than unamended soils.
Regular composting also boosts biodiversity in your garden. As decomposed plant material releases nutrients, it becomes a haven for beneficial microbes, which support a wide range of microorganisms. This increases soil’s water-holding capacity and improves its ability to retain essential nutrients. Additionally, composting reduces waste by diverting organic materials from landfills and minimizing the need for synthetic fertilizers.
By continuing to incorporate compost into your gardening routine, you’ll enjoy improved soil health, increased biodiversity, and reduced waste over the long term. To maximize these benefits, aim to add 2-3 inches of fresh compost to your garden beds every spring, allowing it to mix with existing topsoil.
Frequently Asked Questions
Can I compost meat, bones, and dairy products?
Yes, you can include these items in your compost pile, but they should be added in moderation and mixed well with other materials to avoid attracting pests and creating odors. It’s essential to balance their carbon-to-nitrogen ratio by adding plenty of “green” materials like kitchen scraps and grass clippings.
How long does it take for my compost pile to break down completely?
The decomposition process can take anywhere from a few weeks to several months, depending on factors like temperature, moisture, and the type of materials being composted. As a general rule, hot composting piles typically turn in 2-3 weeks, while worm composting can take 1-2 months.
How do I deal with compost pile temperatures that are too high or too low?
To regulate your compost pile temperature, maintain adequate moisture levels and ensure good air circulation. If the temperature is too high (above 160°F), turn the pile to aerate it; if it’s too low (below 50°F), add more “green” materials like manure or grass clippings.
Can I use my finished compost as fertilizer for indoor plants?
Yes, you can use your finished compost as a nutrient-rich fertilizer for indoor plants. However, make sure the compost has reached its optimal carbon-to-nitrogen ratio (around 25:1) and is free of pathogens and weed seeds. You can also mix it with other potting materials or use it as a top dressing.
How do I prevent weeds from growing in my compost pile?
To minimize weed growth, ensure your compost pile has sufficient carbon-rich materials like straw or shredded newspaper to suppress weed seeds. Regularly turn the pile to aerate and break up any clumps that might harbor weed growth. You can also use a weed barrier or landscape fabric around your compost area for added protection.