Composting is one of those simple yet powerful practices that can make a huge difference in how we manage our waste and care for the environment. As a beginner, diving into composting can seem overwhelming, but trust us, it’s easier than you think! With just a little know-how and some basic setup, you’ll be turning kitchen scraps and yard trimmings into nutrient-rich soil that will make your plants thrive.
In this article, we’re going to break down the basics of composting for beginners. We’ll cover everything from choosing the right type of bin for your space – whether it’s an indoor worm composter or a larger outdoor bin – to maintaining the perfect balance of green and brown materials. By the end of this guide, you’ll be well on your way to creating a steady supply of rich compost that will transform your garden into a lush oasis.
What is Composting and Why Should You Do It?
Let’s dive into the basics of composting, starting with what it actually is and why it’s an essential practice for anyone looking to reduce their waste. This section will cover the fundamentals.
Benefits of Composting
Composting is not only an eco-friendly way to reduce waste, but it also offers numerous benefits for our environment and soil health. By composting, you can significantly reduce the amount of waste sent to landfills, which helps minimize greenhouse gas emissions and preserves natural resources.
One of the most significant advantages of composting is its ability to conserve water. When your soil is rich in organic matter, it has better water retention capabilities, reducing the need for frequent watering. This not only saves you money on your water bill but also ensures that plants receive the right amount of moisture.
In addition to conserving water, composting improves soil health by increasing its fertility and structure. Compost acts as a natural fertilizer, supplying essential nutrients to plants, which promotes healthy growth and development. It can also help reduce soil erosion, making it an excellent practice for gardeners and farmers alike.
By incorporating compost into your gardening routine, you can create a balanced ecosystem that supports the well-being of both plants and the environment. So, start reducing waste, conserving water, and improving soil health today by giving composting a try!
Common Misconceptions About Composting
Composting is often misunderstood by many people, and it’s time to set the record straight. One of the most common misconceptions about composting is that it smells bad. However, a well-maintained compost pile should not have an unpleasant odor. This is because the carbon-rich materials, such as leaves or straw, balance out the nitrogen-rich materials, like food scraps, preventing anaerobic conditions that lead to strong odors.
Another myth surrounding composting is that it attracts pests and rodents. While it’s true that some pests might be attracted to a compost pile with fruit or vegetable scraps, this can be avoided by keeping the right mix of materials in your compost. For example, you can add a layer of brown materials like straw or shredded newspaper to absorb excess moisture and reduce the likelihood of attracting pests.
In reality, composting is a natural process that helps break down organic matter into a nutrient-rich soil amendment. By understanding how to set up and maintain a healthy compost pile, you can create a valuable resource for your garden while minimizing potential drawbacks.
Choosing the Right Composting Method
When it comes to starting a compost pile, selecting the right method can be overwhelming with so many options available. We’ll break down the different types of composting methods and help you choose what works best for you.
Option 1: Indoor Composting with Worms
If you’re short on outdoor space or want to compost year-round without worrying about weather conditions, indoor composting with worms is an excellent option. This method is known as vermicomposting, and it’s perfect for small spaces like apartments, condos, or even a tiny house.
Vermicomposting uses red wiggler worms (Eisenia fetida) to break down food waste into nutrient-rich compost. These worms are ideal for indoor composting because they thrive in dark, moist environments and don’t produce odors. To get started, you’ll need a worm bin or container with drainage holes, a mix of bedding materials like shredded newspaper or coconut coir, and some worms.
Begin by adding 1-2 pounds of red wiggler worms to your bin, followed by 4-6 inches of bedding material. Add food waste in moderation – about 1/2 pound per day – and maintain the moisture level by spraying water as needed. As the worms work their magic, you’ll start seeing compost within a few weeks. This method is also great for dealing with meat and dairy scraps, which can be challenging to compost outdoors due to attracting pests. With proper care and attention, indoor worm composting can produce up to 1 pound of usable compost per week!
Option 2: Outdoor Composting Bins
If you’re dealing with larger quantities of waste, an outdoor composting bin is a great option. These bins are specifically designed for outdoor use and come in various sizes to accommodate different amounts of waste. They usually have a lid or door that allows easy access for turning and maintaining the pile.
To set up an outdoor composting bin, start by placing it in a well-ventilated area with good drainage. Add a 4-6 inch layer of brown materials like leaves or shredded newspaper at the bottom to help with airflow. Then, add a mix of green and brown materials, following the general rule of 2/3 “brown” materials (dried leaves, straw, etc.) and 1/3 “green” materials (food scraps, grass clippings, etc.). Make sure to leave enough space at the top for adding new waste.
Outdoor composting bins are relatively low maintenance. Simply add new waste as needed, turn the pile every week or two to aerate it, and keep an eye out for pests like rodents and raccoons. With proper care, you can enjoy a rich, nutrient-dense compost in just a few months.
Setting Up Your Compost Bin
Let’s get started on setting up your compost bin, which is the foundation of successful composting. This section will walk you through the simple steps to create a thriving compost ecosystem at home.
Selecting a Location for Your Compost Bin
When choosing a location for your compost bin, there are several factors to consider. First and foremost, think about sunlight. Compost needs oxygen to break down efficiently, so it’s essential to place your bin in an area that receives partial shade or direct sunlight for at least 6 hours a day. Avoid placing the bin under trees or near buildings with shading structures.
Accessibility is another crucial factor to consider. Make sure you can easily transport food scraps and yard waste from your kitchen and garden to the compost bin without exerting yourself too much. A location close to your kitchen and gardening area will make it more convenient for you to add materials as needed.
Additionally, consider the proximity of the bin to a water source. You’ll need to regularly sprinkle water on the compost pile to maintain optimal moisture levels, so having a hose or nearby watering can within reach is a big plus. Lastly, try to position your compost bin away from footpaths and high-traffic areas to avoid attracting pests and unwanted visitors.
Understanding the Carbon-to-Nitrogen Ratio
Maintaining the right balance between “green” and “brown” materials is crucial for successful composting. Green materials are high in nitrogen, while brown materials are rich in carbon. Think of it like a recipe: too much nitrogen can lead to smelly, anaerobic conditions, while too little can result in slow decomposition.
The ideal mix is about 2/3 “brown” materials and 1/3 “green” materials. Brown materials include dried leaves, straw, and shredded newspaper, which are abundant in carbon. Green materials, on the other hand, are high-nitrogen foods like fruit and vegetable scraps, grass clippings, and manure.
To ensure the right balance, start by adding a 4-6 inch layer of brown materials to the bottom of your compost bin. Then, add a smaller amount of green materials, mixing them in well. As you add more materials, aim for the 2:1 ratio. Remember that this is just a starting point – the key is to monitor and adjust as needed.
Monitor your pile’s temperature, texture, and odors to gauge if it needs adjustments. If it’s too wet or smelly, add more brown materials. If it’s too dry, incorporate some green materials. With practice, you’ll develop an eye for the perfect balance between nitrogen-rich “green” and carbon-rich “brown” materials.
Collecting and Preparing Materials for Composting
Now that you have a clear understanding of what composting is, it’s time to get started by collecting and preparing your materials. This process may seem daunting at first, but don’t worry, we’ve got you covered!
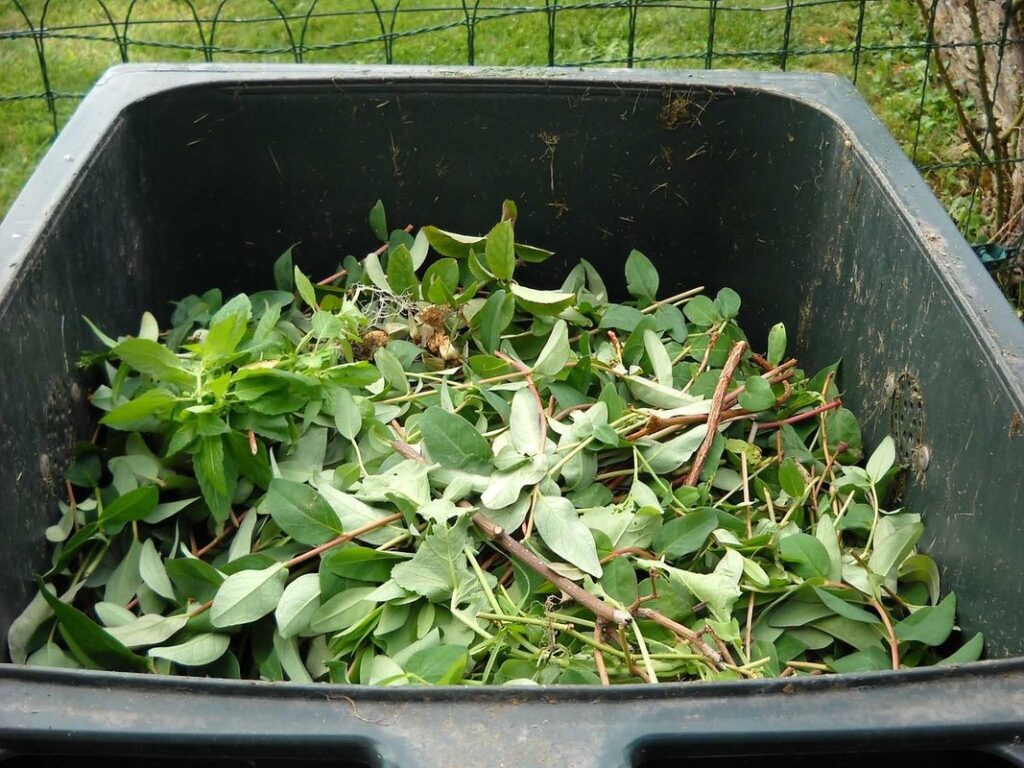
What Can Be Composted?
When it comes to composting, you’ll be pleased to know that there are plenty of materials you can use to create nutrient-rich soil for your garden. But before we dive into what can and can’t be composted, let’s cover the basics.
Food scraps are a great place to start, but not all food is created equal. Fruits and vegetables, bread, grains, and eggshells are all fair game for the compost pile. Meat, dairy, and oils, on the other hand, should be avoided as they can attract pests and create unpleasant odors. Coffee grounds and tea bags are also excellent additions to your compost.
Leaves are another excellent source of carbon-rich material that will help balance out the nitrogen in your food scraps. Grass clippings, shredded newspaper, cardboard, and straw are all great options too. Even hair and fur can be composted – just make sure to mix them in well with other materials to avoid clumps. Remember, a balanced mix of “green” (food scraps) and “brown” (leaves, grass, etc.) materials is key to creating healthy compost.
What Should Not Be Composted?
When collecting materials for composting, it’s essential to know what not to include. Some items can contaminate the compost and potentially harm plants when used in gardening. Plastic and metal objects are two primary examples of prohibited items.
Avoid adding plastic bags, straws, water bottles, or any other type of plastic container to your compost pile. These materials don’t break down easily and can persist for years, even decades. Moreover, they might leach chemicals into the soil when exposed to moisture, which can be detrimental to plant growth.
Similarly, metal objects like wire hangers, broken tools, or old machinery parts should not be included in the compost. These items are non-organic materials that don’t break down naturally and can attract pests or create problems for microorganisms working in the pile.
Also, avoid adding diseased plants, weeds with seeds, or plant material infected by fungal diseases to the compost. This can spread pathogens and lead to further contamination of your garden soil. Remove any debris, rocks, glass, and other non-biodegradable items from the compost as well.
Maintaining Your Compost Bin
Regular maintenance is key to keeping your compost bin healthy and effective, so let’s dive into some essential tips for keeping it running smoothly.
Turning the Compost
Regularly turning your compost pile is essential to ensure it breaks down efficiently. When you leave the compost undisturbed for too long, a layer of material called “compost tea” forms on top. This tea-like liquid can be a nutrient-rich fertilizer, but it’s not what you want at the bottom of your compost bin.
As the compost decomposes, it can get compacted and develop anaerobic conditions, slowing down the decomposition process. Turning the pile introduces oxygen, which helps to break down the organic matter more quickly. It also prevents pests like rodents and flies from making themselves at home in your compost bin.
To turn your compost, use a pitchfork or shovel to gently mix the contents every 7-10 days. Start by removing any finished compost that’s ready to use, and then work your way through the layers, turning over any compacted areas. Don’t over-turn – this can damage the beneficial microorganisms that are doing all the hard work. By regularly turning your compost pile, you’ll ensure it breaks down efficiently and produces a nutrient-rich fertilizer for your garden.
Monitoring Temperature and Moisture Levels
Monitoring temperature and moisture levels is crucial for creating optimal decomposition conditions in your compost bin. To check for ideal temperatures, insert a food thermometer into the pile, avoiding any hot spots. The ideal temperature range is between 130°F (54°C) and 140°F (60°C), although some composters prefer it even warmer.
As for moisture levels, aim for a mix that’s like a damp sponge – not soaking wet but not dry either. You can check this by squeezing a handful of the compost mixture. If it forms a loose crumb when released, it’s about right. Too much water can lead to anaerobic conditions, while too little might slow down decomposition.
It’s also essential to monitor your pile regularly and adjust as needed. Be prepared for fluctuations in temperature and moisture levels due to changing weather conditions or the natural decomposition process. Don’t be afraid to add more brown materials (dried leaves, straw) to balance out excess green waste, which can contribute to excessive moisture.
Harvesting and Using Your Finished Compost
Now that you’ve worked hard to create your finished compost, it’s time to reap the rewards by learning how to harvest and use it in your garden. We’ll walk you through the next steps together!
Recognizing When Compost is Ready
When you start to notice these signs, it’s time to put aside your compost and let it finish breaking down.
The finished compost should be dark brown or black in color, with a rich, earthy aroma. If it still smells like rotting food, it needs more time. You can check on it by digging into the pile with a pitchfork – if it feels damp but not soggy, and there are no visible chunks of uneaten food, it’s likely done.
Another way to tell is by texture: finished compost should crumble easily when touched, like wet soil. If it still holds its shape or breaks apart unevenly, it needs more time.
You can also do a simple squeeze test – take a handful of compost and squeeze it tightly. If water drips out and the compost forms a small ball that crumbles easily when dropped, it’s finished. If it doesn’t crumble or releases no water, keep waiting.
Ideas for Using Compost in Your Garden or Home
Now that you’ve got your finished compost, it’s time to put it to good use! One of the most exciting parts of the composting process is seeing your hard work turn into a valuable resource for your garden or home. Here are some creative ways to utilize your finished compost:
You can use compost to improve soil structure by mixing it with existing soil or using it as a top dressing. This will help retain moisture, suppress weeds, and create a more hospitable environment for roots to grow. For example, if you’re planting a new tree or shrub, mix some compost into the hole before backfilling – this will give your plant a nutrient-rich start in life.
Compost can also be used as a fertilizer by sprinkling it around plants or mixing it with water to create a liquid feed. This is particularly effective for vegetables and fruits that need a boost of nutrients to produce high yields. Alternatively, you can use compost to make your own potting mixes – simply mix equal parts compost, peat moss, and perlite for a nutrient-rich growing medium.
Remember, compost is a versatile resource that can be used in many different ways, so get creative and experiment with new ideas!
Frequently Asked Questions
What if I have limited outdoor space for my compost bin?
Yes, you can still compost successfully even with a small yard or no yard at all! Consider indoor worm composting methods that don’t require a lot of space and are perfect for urban areas. Just make sure to follow the manufacturer’s instructions and maintain proper moisture levels.
How do I know if I’m adding the right balance of green and brown materials?
The key is to aim for a mix of 2/3 “brown” materials (dried leaves, straw, or shredded newspaper) and 1/3 “green” materials (food scraps, grass clippings, or manure). You can also add a handful of finished compost as a starter to help kickstart the process.
Can I compost meat, dairy, and oils?
No, it’s best to avoid adding these items as they attract pests, create unpleasant odors, and can even harbor pathogens. Stick to “green” materials like vegetable scraps, fruit peels, and eggshells for a balanced compost pile.
What if I notice mold or mildew in my compost bin?
Don’t worry! This is usually a sign that your compost pile needs more oxygen. Simply turn the mix with a pitchfork to aerate it, and make sure there’s adequate space between the materials. You can also try adding some brown materials like straw or shredded newspaper to help absorb excess moisture.
How long will it take for my compost to be ready?
The time frame depends on several factors, including temperature, moisture levels, and carbon-to-nitrogen ratio. As a general rule, you can expect your compost to be ready within 2-6 months. Be patient, regularly turn the pile, and monitor its progress until it reaches a rich, earthy aroma and crumbly texture.