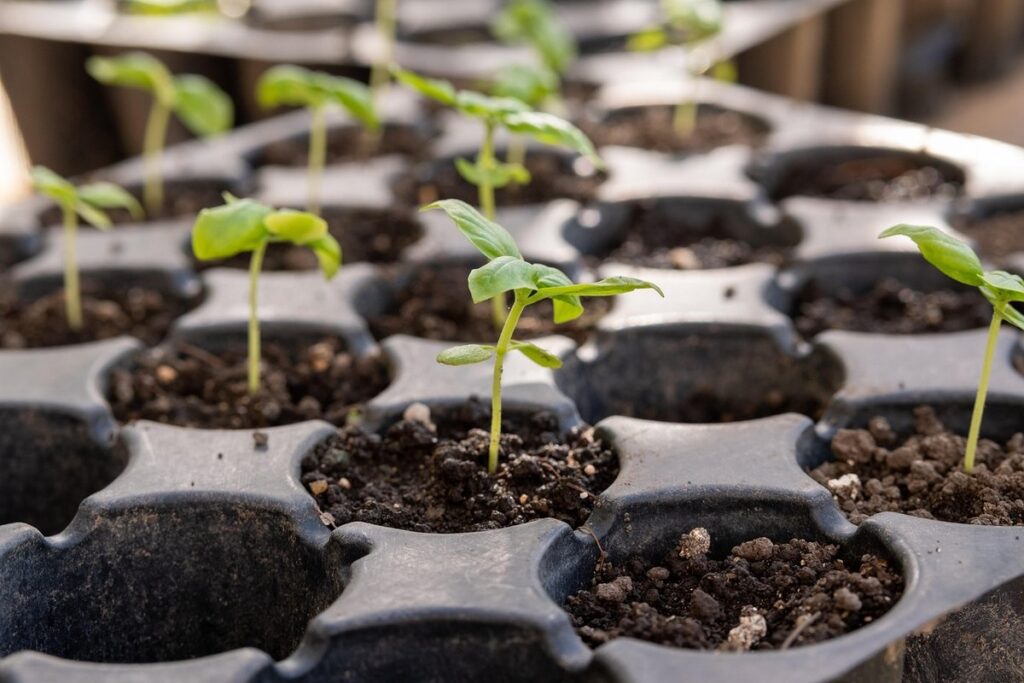
Starting your garden from scratch can be both exciting and intimidating. As a gardener, you’re probably eager to see your seeds sprout into healthy seedlings, but reality often sets in when you encounter common problems that can hinder their growth. Light, temperature, water – it’s easy to get these basics wrong, leading to nutrient deficiencies, pest infestations, and even transplant shock. But don’t worry, with the right guidance, you can overcome these issues and give your seedlings the best chance at thriving. In this article, we’ll cover the most common seedling problems in gardening, from light and temperature extremes to pests and diseases. We’ll share expert tips on how to prevent these issues and provide your plants with a strong foundation for growth.
Insufficient Light and Temperature Control
Let’s face it, seedlings can be delicate, and inadequate light and temperature control are often overlooked factors that can cause a lot of stress for young plants. We’ll explore common mistakes to avoid here.
1. Signs of Insufficient Light
When seedlings don’t receive enough light, it can lead to several noticeable issues that may be mistaken for other problems. One of the most common signs is stunted growth. If you notice that your seedlings are not growing as tall or wide as they should be, it could be due to inadequate light. This is especially true if they’re supposed to grow into plants that require a lot of sunlight.
Weak stems and pale leaves are also indicative of insufficient light. When seedlings don’t receive enough photons, their stems may become leggy and weak in search of more light. Leaves can turn pale or even develop white or yellow spots due to the lack of chlorophyll production. This can lead to a weakened plant that’s more susceptible to diseases.
To check if your seedlings are getting enough light, place them under different lighting conditions for a few days and observe their response. Alternatively, you can use a grow light specifically designed for indoor plants. By adjusting the lighting accordingly, you can ensure that your seedlings receive the necessary amount of light to thrive.
2. Temperature-Related Issues
Temperature fluctuations can significantly impact seedling development, affecting their growth rate, health, and ultimately, their chances of survival. Different plant species have optimal temperature ranges that they thrive in, and deviating from these can lead to issues such as stunted growth, weakened stems, or even death.
For example, tomatoes prefer daytime temperatures between 65-70°F (18-21°C) and nighttime temperatures around 55-60°F (13-15°C). On the other hand, peppers require warmer temperatures, typically above 70°F (21°C), to produce well. Cool-season crops like broccoli and cauliflower, however, perform best in cooler temperatures between 40-50°F (4-10°C).
To maintain a stable temperature for your seedlings, ensure they’re placed in an area with consistent temperatures or use heating mats and grow lights specifically designed for indoor gardening. Monitor the temperature closely to prevent sudden fluctuations that can shock your seedlings. By providing the optimal temperature conditions, you’ll give your seedlings the best chance to develop strong roots, healthy leaves, and robust stems.
3. Environmental Factors Affecting Light and Temperature
When it comes to growing seedlings, many gardeners focus on providing adequate light and temperature control. However, there are other environmental factors that can significantly impact a seedling’s ability to thrive. Humidity levels, for example, play a crucial role in seedling growth. If the air is too dry, seedlings may suffer from stunted growth or develop brown edges on their leaves. On the other hand, excessively high humidity can lead to fungal diseases and root rot.
Air circulation is another critical factor to consider. Seedlings need sufficient airflow to prevent fungal diseases and promote healthy growth. When plants are too close together, they can create a humid microclimate that fosters disease development. To combat this, gardeners can space seedlings farther apart or use trellises to improve air circulation.
The surrounding environment also affects light and temperature control. Nearby plants can cast shade on seedlings, reducing their ability to photosynthesize and grow. Gardeners should carefully plan the layout of their seedling trays to ensure that each plant receives sufficient light.
Water-Related Issues
When it comes to seedlings, water-related issues can be particularly pesky, causing a range of problems from fungal diseases to nutrient deficiencies. Let’s take a closer look at some common water-related mistakes.
1. Overwatering vs. Underwatering
When it comes to seedlings, water-related issues can be a major concern. Two common mistakes gardeners make are overwatering and underwatering. While they may seem like opposing extremes, the effects of both can lead to similar problems for young plants.
Overwatering is often easy to spot – seedlings with yellowing leaves or droopy stems are usually a sign that they’re getting too much water. This can cause root rot, which is especially damaging to delicate seedling roots. If you suspect overwatering, stop watering immediately and let the soil dry out slightly between waterings.
Underwatering, on the other hand, may not be as obvious. However, if the leaves are consistently wilted or crunchy to the touch, it’s likely that your seedlings need more moisture. But here’s a tip: don’t assume underwatering just because you haven’t watered recently. Instead, stick your finger into the soil up to the knuckle – if it feels dry, it’s time to water.
Keep in mind that seedlings have different watering needs than mature plants. Be sure to research specific guidelines for the type of plant you’re growing and adjust your watering schedule accordingly.
2. Soil Moisture Levels and Seedling Health
Checking soil moisture levels is crucial to maintaining optimal water conditions for healthy seedling growth. You can do this by inserting your finger into the soil up to the first knuckle, feeling for dryness or dampness. Alternatively, you can use a moisture meter for more accurate readings. For seedlings, the ideal moisture level is when the top 2-3 inches of soil feels slightly moist but not waterlogged.
Maintaining this balance is vital because overwatering and underwatering can have devastating effects on young plants. Overwatering can lead to root rot, while underwatering causes stress that makes them more susceptible to pests and diseases. For example, seedlings with poor soil moisture levels may develop yellowing leaves or stunted growth.
To ensure you’re providing the right amount of water, check the soil moisture daily, especially during hot weather when plants need extra hydration. If the top inch of soil feels dry, it’s time to water. Be cautious not to overwater by letting the pot drain thoroughly between waterings. By paying attention to these subtleties, you can provide your seedlings with a healthy environment to thrive in.
3. Preventing Water-Related Problems
When it comes to preventing water-related problems with your seedlings, there are several key strategies to keep in mind. First and foremost, choose pots that are well-draining. Avoid plastic containers that can retain too much water, as this can cause the soil to become waterlogged. Instead, opt for terracotta or ceramic pots that allow excess moisture to escape.
Another crucial step is to monitor your seedlings’ soil moisture regularly. Stick your finger into the soil up to the first knuckle and if it feels dry, it’s time to give them a drink. On the other hand, if it’s already moist, wait another day or two before watering again. This simple check can help you avoid overwatering, which is one of the most common mistakes gardeners make.
It’s also essential to consider your local climate and adjust your watering schedule accordingly. If you’re experiencing a particularly dry spell or are in an area with high humidity, you may need to water more frequently. By being mindful of these factors and taking a few simple precautions, you can help prevent both overwatering and underwatering issues and keep your seedlings thriving.
Pests and Diseases
Pests and diseases can be particularly devastating for young seedlings, so let’s take a closer look at some common culprits to watch out for. From aphids to root rot, we’ll explore the most troublesome pests and diseases.
1. Common Seedling Pests
When it comes to seedlings, pests can be a major problem. One of the most common issues is aphids. These tiny insects feed on plant sap, causing curled or distorted leaves and stunted growth. To identify aphid infestations, look for sticky substance or honeydew on leaves and stems.
Another pest that targets seedlings is whiteflies. These flying insects can be identified by their piercing-sucking mouthparts and distinctive hovering behavior around plants. Whiteflies can weaken seedlings and spread diseases like tomato spotted wilt virus. To manage whitefly infestations, use neem oil or insecticidal soap to control populations.
Spider mites are another common pest that targets seedlings. These tiny arachnids feed on plant sap, causing yellowing or bronzing of leaves. Spider mite infestations can be identified by fine webbing on plants and a sticky substance on leaves. To manage spider mite infestations, increase humidity around the plant and use miticides to control populations.
By recognizing these common pests early, you can take action to prevent damage and protect your seedlings from further harm. Regularly inspecting plants for signs of infestation and taking prompt action can help prevent pest problems from getting out of hand.
2. Fungal and Bacterial Diseases
As seedlings grow, they can be susceptible to various diseases that can hinder their development and even lead to their demise. Fungal and bacterial diseases are two common types of infections that can affect young plants.
Damping off is a fungal disease caused by the fungus Pythium or Phytophthora, which thrives in moist environments. It’s characterized by the seedling’s stem collapsing at the soil line, often accompanied by yellowing or browning of the leaves. To prevent damping off, ensure good air circulation around your seedlings and avoid overwatering.
Root rot is another fungal disease that occurs when the roots of the seedling are submerged in water for an extended period. This can cause the stem to turn mushy and the leaves to wilt. Bacterial diseases like bacterial soft rot and bacterial leaf spot can also affect seedlings, causing them to develop lesions or spots on their leaves.
To identify these diseases early on, keep a close eye out for any unusual growth patterns or discoloration on your seedlings’ leaves or stems. If you notice any of these symptoms, take action promptly by removing affected plants and improving air circulation around the remaining seedlings.
3. Organic Pest Control Methods
When it comes to managing pests and preventing disease outbreaks in your garden, it’s essential to explore organic methods that are not only effective but also environmentally friendly. One of the most popular natural pest control methods is neem oil. Derived from the seeds of the neem tree, this oil has been used for centuries to control a wide range of pests, including aphids, whiteflies, and spider mites.
To use neem oil effectively, mix it with water according to the label instructions and spray it directly on the affected plants. Repeat the process every 7-10 days as needed. Another natural method is diatomaceous earth, a powdery substance made from fossilized algae that can be used to deter slugs and snails. Simply sprinkle it around the base of your plants, making sure not to inhale it yourself.
Crop rotation is another essential technique for preventing disease outbreaks. By rotating your crops regularly, you’ll break the life cycle of pests and diseases, reducing the risk of infestation. For example, if you’re growing tomatoes in a particular spot, try moving them to a new location the following season to give the soil a chance to recover.
Incorporating these organic methods into your gardening routine will not only keep pests at bay but also promote healthy plant growth and development. With a little creativity and persistence, you’ll be able to maintain a thriving garden without relying on harsh chemicals.
Nutrient Deficiencies
When it comes to seedlings, nutrient deficiencies are a common issue that can be tricky to diagnose and address. Let’s take a closer look at some of the most likely culprits.
1. Signs of Nutrient Deficiencies
As a gardener, it’s essential to recognize the signs of nutrient deficiencies in your seedlings. These issues can arise from inadequate soil preparation, poor fertilization, or even pests and diseases. One of the most common symptoms is yellowing leaves, which can be a sign of nitrogen deficiency. This is because nitrogen plays a crucial role in plant growth, and without it, leaves may turn pale or yellow.
Other signs include stunted growth, slow development, and weak stems. If your seedlings are not getting enough phosphorus, they may experience poor root development, leading to unstable plants that can topple easily. Similarly, a lack of potassium can cause poor fruit production, resulting in small or misshapen fruits.
To diagnose nutrient deficiencies, look for these telltale signs and consider conducting a soil test to determine the nutrient levels in your soil. This will help you identify which nutrients are lacking and provide guidance on how to rectify the situation. Some common nutrient-deficient symptoms include:
• Yellowing or pale leaves
• Stunted growth or slow development
• Poor root development
• Weak stems
• Small or misshapen fruits
By recognizing these signs early, you can take corrective action and ensure your seedlings receive the necessary nutrients for healthy growth.
2. Essential Nutrients for Seedling Growth
Nitrogen, phosphorus, and potassium are the holy trinity of essential nutrients for seedling growth. These three macronutrients play a crucial role in supporting healthy development, from germination to establishment.
Nitrogen (N) is responsible for promoting leafy growth and green coloration. It’s the driving force behind photosynthesis, allowing plants to convert sunlight into energy. However, be careful not to overdo it – excessive nitrogen can lead to weak stems and a lack of root development. A balanced ratio of 10-20-10 (nitrogen-phosphorus-potassium) is ideal for seedlings.
Phosphorus (P), on the other hand, is essential for root development and flowering. It helps seedlings absorb water and nutrients from the soil, enabling them to thrive in challenging conditions. Aim for a phosphorus-rich fertilizer when transplanting seedlings to promote strong root growth.
Potassium (K) supports overall plant health by regulating water balance and protecting against disease. It’s often referred to as the “stress reliever” of essential nutrients, helping seedlings adapt to environmental stressors.
3. Organic Fertilizers and Soil Amendments
Organic fertilizers and soil amendments can make all the difference when it comes to addressing nutrient deficiencies in seedlings. By choosing natural options, you’ll not only promote healthy growth but also avoid the potential harm caused by synthetic chemicals.
Compost is a popular choice for fertilizing seedlings, as it’s rich in nutrients and easy to prepare at home. To make compost, simply collect kitchen scraps and yard waste, mix them with some brown materials like leaves or straw, and let it decompose. You can also purchase bagged compost from your local nursery.
Another natural option is worm castings, which are essentially the nutrient-rich poop of worms that have broken down organic matter. These castings are packed with microorganisms that promote beneficial soil biota, making them an excellent choice for seedlings.
When using any fertilizer or amendment, be sure to follow the recommended application rates to avoid burning your seedling’s roots. A general rule of thumb is to apply a small amount and gradually increase as needed. This approach will also help you fine-tune the nutrient levels in your soil, reducing the risk of over-fertilization.
Some additional natural options worth exploring include kelp meal, alfalfa meal, and fish bone meal – each with its own unique set of nutrients that can benefit seedlings.
Transplant Shock and Handling
When transplanting seedlings, it’s not uncommon for them to experience shock, which can be a challenging issue to overcome. We’ll walk you through how to identify and manage this common problem.
1. Causes and Symptoms of Transplant Shock
Transplant shock is one of the most common issues gardeners face when transplanting seedlings. It occurs when a seedling experiences stress due to its roots being disturbed or exposed to new growing conditions. This stress can cause wilting, yellowing leaves, and stunted growth.
Wilting is often the first sign of transplant shock, as the seedling’s roots are unable to absorb water efficiently. Yellowing leaves are another indication that the seedling is struggling to adapt to its new environment. Stunted growth can also occur due to the seedling’s energy being redirected towards recovery rather than growth.
Common causes of transplant shock include over-handling or rough handling during transplantation, exposure to extreme temperatures, and inadequate watering. To prevent transplant shock, make sure to handle seedlings gently when transplanted, keep them in a shaded area for a few days to adjust to new conditions, and water thoroughly but avoid overwatering.
By recognizing the symptoms of transplant shock and taking preventative measures, you can significantly reduce the risk of losing your newly transplanted seedlings.
2. Minimizing Transplant Shock
Transplant shock is a common issue that can set back even the healthiest seedlings. To minimize this risk, it’s essential to harden off your seedlings before transplanting them outside. This process involves gradually exposing them to outdoor conditions over the course of 7-10 days.
Start by moving seedlings from their indoor location to a shaded area outdoors for a few hours a day. Gradually increase the duration and exposure to direct sunlight over the next week. Monitor your seedlings’ response and adjust the schedule as needed. For example, if you notice wilting or discoloration, it may be too much too soon.
During the acclimation process, provide optimal care by watering thoroughly before transplanting and avoiding extreme temperatures. Watering before transplanting helps to settle the soil and reduce shock. Be mindful of temperature fluctuations, as this can cause additional stress on newly transplanted seedlings. By following these steps, you can significantly reduce the risk of transplant shock and give your seedlings a healthy start in their new environment.
3. Handling Seedlings for Optimal Growth
When handling seedlings, it’s essential to be gentle and deliberate to avoid damaging their delicate roots, leaves, or stems. Start by gently removing them from the soil using a soft-bristled brush or a blunt instrument like a chopstick, taking care not to disturb the surrounding soil.
To minimize root disturbance, it’s crucial to handle seedlings by their true leaves (the first set of leaves that emerge after germination), rather than their tender stem. This will help prevent accidental damage and promote healthy growth. If you must move the seedling, do so in a way that doesn’t involve handling its delicate roots.
When transporting seedlings, use a breathable container or a mesh bag to prevent moisture buildup and reduce the risk of root rot. Avoid exposing them to direct sunlight or extreme temperatures during transport. By following these simple tips, you can minimize the risk of damage and ensure your seedlings get off to a strong start. Remember to handle each one with care, as it’s the foundation for optimal growth and development in the garden.
Frequently Asked Questions
How can I measure light levels for my seedlings?
To ensure your seedlings receive adequate light, use a light meter to measure the intensity of light in your growing space. This will help you determine if you need supplemental lighting or if adjustments to plant placement are necessary.
What’s the best way to prevent transplant shock in delicate plants?
To minimize transplant shock, handle seedlings gently and avoid exposing them to extreme temperatures during transport. Also, water the seedlings thoroughly a day before transplanting to reduce stress caused by moisture loss.
Can I use organic pest control methods for indoor gardens too?
Yes, many organic pest control methods are suitable for both outdoor and indoor gardening. Consider using neem oil or insecticidal soap to control pests like spider mites, mealybugs, and aphids in your indoor garden.
How do I choose the right fertilizer for my seedlings’ needs?
Select an organic fertilizer that matches the nutrient requirements of your seedling type (e.g., nitrogen-rich for leafy greens). Consider the soil pH level and adjust accordingly to prevent nutrient deficiencies. Start with small amounts and gradually increase as needed to avoid overfertilization.
What should I do if my seedlings are showing signs of fungal diseases?
To combat fungal diseases, improve air circulation around your seedlings by pruning nearby plants or using fans. Treat the affected area with a fungicide specifically designed for plant growth regulators, following the product’s instructions carefully.