Are you tired of struggling to maintain your garden, only to be met with soil erosion and depleted nutrients? If so, you’re not alone. Many gardeners face these challenges every year, but there’s a simple solution: clover living mulch. This low-maintenance, eco-friendly approach has been gaining popularity among garden enthusiasts for its numerous benefits. By incorporating white clover or other species into your garden, you can improve soil health, reduce erosion, and even attract beneficial insects. But how do you establish a thriving system? In this article, we’ll explore the ins and outs of clover living mulch, covering everything from selecting the right type to maintaining a healthy, balanced ecosystem. By the end, you’ll be equipped with the knowledge to create your own thriving clover garden.
Introduction to Clover Living Mulch
Let’s start with the basics: what is clover living mulch and how does it work its magic in your garden, providing numerous benefits for your soil and plants.
What is Clover Living Mulch?
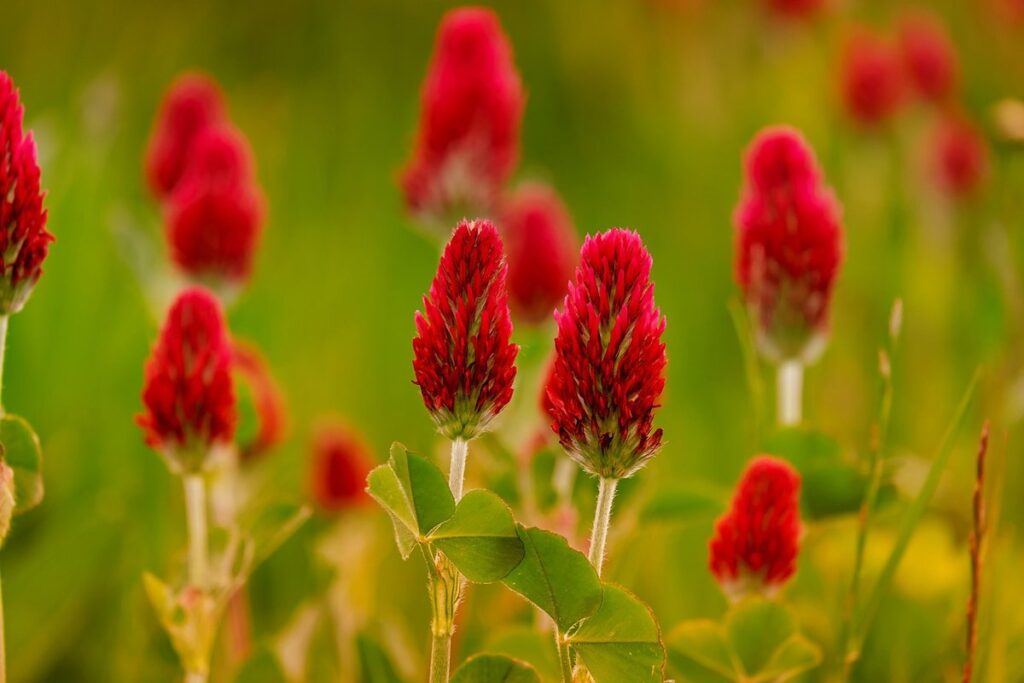
Clover living mulch is a game-changer for gardeners looking to revolutionize their soil health and reduce maintenance. Also known as “white clover” or “perennial clover,” this type of groundcover has been used for centuries, dating back to ancient Europe where it was prized for its ability to fix nitrogen in the soil. In recent years, however, it’s gained popularity among gardeners due to its numerous benefits.
White clover (Trifolium repens) is a low-growing, spreading legume that forms a dense mat of tiny white flowers. It thrives in poor soil and can tolerate foot traffic, making it an excellent choice for lawns, paths, and even containers. With its ability to fix nitrogen, suppress weeds, and retain moisture, clover living mulch offers a one-two punch against common garden problems. Whether you’re looking to create a lush meadow or simply reduce your mowing frequency, this eco-friendly solution is worth exploring further in our next section on the benefits of using clover living mulch.
Advantages of Using Clover as a Living Mulch
Using clover as a living mulch comes with numerous advantages that can greatly benefit your garden. One of the primary benefits is its ability to improve soil health. Clover has an extensive root system that helps break up compacted soil, allowing air and water to penetrate more easily. This leads to healthier roots on other plants, improved nutrient uptake, and increased overall fertility.
Another significant advantage of using clover as a living mulch is weed suppression. With its dense growth habit, clover shades out weeds, making it an effective natural alternative to chemical herbicides. According to a study by the University of California, Davis, white clover can suppress weed growth by up to 90%. By controlling weeds, you’ll reduce the competition for water and nutrients, allowing your other plants to thrive.
Additionally, clover helps prevent soil erosion, especially on slopes or areas with heavy rainfall. Its extensive root system holds the soil in place, preventing it from washing away or being eroded by wind. This is particularly beneficial for gardeners with small or sloping plots of land.
Choosing the Right Type of Clover for Your Garden
When it comes to planting a clover living mulch, selecting the right type of clover is crucial. Let’s explore some popular options that’ll thrive in your garden.
Clover Species Suitable for Various Climate Zones
When it comes to choosing the right type of clover for your garden, one of the most crucial factors is climate zone. Different types of clovers thrive in varying temperature and rainfall conditions, making some more suitable than others for specific regions.
For cooler climates with moderate temperatures (USDA zones 3-5), White Clover (Trifolium repens) is an excellent choice. It’s highly adaptable, tolerates frost well, and can survive extreme weather conditions. Red Clover (Trifolium pratense), on the other hand, prefers temperate climates with adequate moisture (USDA zones 4-7). This species is known for its deep taproots, which allow it to access water deeper in the soil profile.
Sweet Clover (Melilotus officinalis) is a warm-season crop that thrives in regions with hot summers and cold winters (USDA zones 3-8). However, be aware that this type of clover can become invasive if not properly managed. It’s essential to consider your local climate when selecting the perfect clover species for your garden.
When choosing a clover variety, also think about soil quality, sunlight exposure, and intended use. Some species are more suitable for lawns, while others excel as cover crops or wildlife attractants. Research the specific needs of each type before making an informed decision. By selecting the right clover species, you can create a thriving living mulch ecosystem that brings numerous benefits to your garden.
Considerations for Specific Soil Types and Conditions
When selecting clover for your garden, it’s essential to consider the specific soil type and conditions. Different types of clover thrive in various pH levels, nutrient levels, and moisture conditions. For instance, White Clover (Trifolium repens) is highly adaptable and can tolerate a wide range of soil pH, from slightly acidic to slightly alkaline. However, it prefers well-drained soils with moderate fertility.
Red Clover (Trifolium pratense), on the other hand, is more sensitive to soil pH and prefers slightly acidic to neutral soils. It also requires higher nutrient levels than White Clover. If your garden has heavy clay or sandy soils, you may need to opt for a clover type that’s more resistant to waterlogging or drought.
To determine the right type of clover for your garden, test your soil pH and nutrient levels before planting. Based on these results, choose a clover variety that suits your specific conditions. For example, if your soil is heavily alkaline, you may want to consider Sweet Clover (Melilotus officinalis) or Alsike Clover (Trifolium hybridum), which are more tolerant of high pH levels.
In addition, be aware of the moisture conditions in your garden. Some clover types, like White Clover, can handle drought well, while others, like Red Clover, may require more consistent moisture. By selecting a clover type that matches your soil and climate, you’ll ensure its optimal growth and maximize the benefits of using clover living mulch in your garden.
Establishing a Clover Living Mulch in Your Garden
To successfully establish a clover living mulch, you’ll first need to prepare your garden bed by loosening the soil and removing any debris. This will give your clover seeds a smooth start.
Preparation and Planting Steps
Before you can enjoy the benefits of clover living mulch, you need to prepare and plant it properly. Start by testing your soil pH and adjusting it if necessary, as clover prefers slightly acidic to neutral soil (pH 6.0-7.0). Remove any weeds or debris from the area, and till the soil to a depth of about 8 inches.
Next, choose a high-quality white clover or red clover seed specifically suited for living mulch. Sow the seeds at a rate of 1/4 pound per 100 square feet, depending on the density you want to achieve. Keep the soil consistently moist during the germination period (about 7-10 days) and reduce watering once established.
As the clover establishes itself, mow it regularly to maintain a height of about 2-3 inches. This will encourage spreading and prevent weeds from growing. You can also use mulch or cover crops to suppress weeds until the clover is well-established.
Keep in mind that over-fertilization can be detrimental to your living mulch. Instead, focus on building soil health through natural means such as composting and crop rotation. With proper care, a healthy clover living mulch will outcompete weeds, improve soil fertility, and attract beneficial insects to your garden.
Tips for Encouraging Good Growth and Spread
To encourage good growth and spread of clover living mulch in your garden, it’s essential to maintain a few simple practices. First, ensure the soil has the right pH balance for clover to thrive, typically between 6.0 and 7.0. Regular watering is also crucial; aim for about an inch of water per week, either through rainfall or irrigation.
Another key aspect is controlling weeds. Since clover is a legume, it naturally suppresses weeds by competing with them for resources like light, water, and nutrients. To encourage this process, avoid using herbicides or tillage methods that can disrupt the soil ecosystem. Instead, mow your clover living mulch at a height of 2-3 inches to promote dense growth and prevent weeds from taking hold.
To achieve an even spread, divide your clover patch into sections and focus on one area at a time. This allows you to monitor progress and address any areas that may be lagging behind.
Benefits of Clover Living Mulch on Soil Health
By planting clover living mulch, you’ll be supporting your soil’s natural processes and creating a thriving ecosystem that’s beneficial for your plants’ health. Let’s explore how it impacts soil health in more detail.
Nitrogen Fixation and Soil Fertility
One of the most significant benefits of clover living mulch is its ability to contribute to nitrogen fixation and improve soil fertility over time. This process involves converting atmospheric nitrogen into a form that’s usable by plants, which is essential for healthy plant growth. Clover, being a legume, has nodules on its roots where bacteria convert atmospheric nitrogen into ammonia, making it available to the surrounding plants.
As clover grows and thrives in your garden, its root system expands, allowing it to cover more ground and fix even more nitrogen. This not only benefits the clover itself but also other plants growing alongside it. Over time, the soil’s nitrogen levels increase, reducing the need for synthetic fertilizers and promoting a balanced ecosystem.
To maximize the nitrogen-fixing potential of your clover living mulch, ensure that you maintain a diverse range of plant species in your garden. This will create a mutually beneficial relationship between plants, with each species contributing to the overall soil health. By adopting clover living mulch, you’ll be creating a self-sustaining ecosystem that promotes healthy plant growth and reduces environmental impact.
Improved Water Retention and Erosion Control
One of the most significant advantages of using clover living mulch is its ability to improve water retention and reduce erosion. When clover is left to grow between plants, it creates a dense mat that covers the soil surface. This helps retain moisture by reducing evaporation and runoff. Clover’s extensive root system also enables it to draw up deep-seated water from the subsoil, making it available for surrounding plants.
As a result of its strong roots, clover living mulch is highly effective at preventing erosion. Its fibrous stems hold onto soil particles, preventing them from being washed away by rainwater or irrigation. This reduces the risk of soil compaction and minimizes the need for costly soil amendments or repair work.
By incorporating clover into your garden design, you can significantly reduce water consumption and maintenance costs while also creating a more resilient and sustainable growing environment. Regularly mowing or pruning clover is crucial to maintain its benefits, but with a little practice, it becomes second nature.
Integrating Clover Living Mulch with Other Gardening Practices
When combining clover living mulch with other gardening techniques, you can create a highly effective and sustainable garden ecosystem that reduces maintenance and boosts biodiversity. Let’s explore some ways to integrate it with your existing practices.
Companion Planting and Crop Rotation
When using clover as a living mulch, companion planting and crop rotation become essential practices to maximize its benefits. Companion planting involves pairing plants that complement each other in growth habits, pest resistance, and nutrient uptake. For instance, planting marigolds alongside clover can repel nematodes, while basil and mint can improve flavor and aroma.
Crop rotation is another vital technique to maintain soil health and fertility. By rotating crops with clover, you can break disease and pest cycles, reduce soil erosion, and replenish nutrients. A common rotation pattern for gardens using clover as a living mulch includes planting nitrogen-fixing legumes like beans or peas in the spring, followed by a summer crop of vegetables or fruits.
Some examples of effective rotations include:
* Beans (spring) → Tomatoes (summer) → Clover (fall)
* Peas (spring) → Carrots (summer) → Winter squash (fall)
Remember to consider factors like climate, soil type, and desired harvests when designing your rotation. By incorporating companion planting and crop rotation into your clover living mulch system, you can create a thriving, self-sustaining ecosystem that minimizes maintenance and maximizes yields.
Using Clover in Permaculture and Regenerative Design
Incorporating clover living mulch into permaculture and regenerative design principles is a game-changer for sustainable gardening practices. Permaculture’s core philosophy of working with nature rather than against it makes clover an ideal choice for these systems.
When designing your permaculture or regenerative garden, consider the benefits of using clover as a living mulch. It fixes nitrogen in the soil, suppresses weeds, and attracts beneficial insects – all essential components of a thriving ecosystem. Planting clover alongside fruit trees or other crops can create a mutually beneficial relationship, where the legumes provide nutrients to the trees in exchange for shade and water.
In permaculture design, clover is often used as a groundcover between garden beds or under fruit trees. This not only reduces weed competition but also creates a habitat for beneficial insects like bees and butterflies. To incorporate clover into your regenerative design, start by selecting a suitable variety that thrives in your climate and soil type. Then, simply broadcast the seeds evenly across your designated area and let nature do its magic.
For an added layer of fertility, consider using clover as a cover crop before planting a new crop. This will ensure that the soil is replenished with nitrogen and other essential nutrients.
Maintenance and Troubleshooting Tips for Clover Living Mulch
To ensure your clover living mulch continues thriving, it’s essential to understand common issues that may arise and how to address them effectively.
Regular Tasks to Keep Your Clover Healthy
To keep your clover living mulch thriving, regular maintenance tasks are essential. Watering is one of the most critical aspects to consider. Clover requires about 1-2 inches of water per week, either from rainfall or irrigation. You can use a rain gauge to measure the amount of rainfall and supplement with watering if necessary. However, be cautious not to overwater, as this can lead to shallow roots and make the clover more susceptible to disease.
Mowing is another crucial task to maintain your clover’s health. It’s recommended to mow the clover at a height of 2-3 inches using a string trimmer or lawn mower with a bag attachment. This will help control weeds, promote new growth, and prevent the formation of seed heads. Fertilizing is also necessary, but it’s essential to use organic fertilizers that are rich in nitrogen, phosphorus, and potassium. A balanced fertilizer (10-10-10 N-P-K) applied at a rate of 1 pound per 1000 square feet can provide the necessary nutrients for healthy growth.
Regularly inspecting your clover living mulch is also vital to identify any potential issues early on. Look out for signs of pests, diseases, and nutrient deficiencies, and take corrective action promptly if you notice anything unusual. By following these maintenance tasks, you’ll be able to enjoy a lush, vibrant, and healthy clover living mulch in your garden.
Common Issues and Solutions
When using clover living mulch, you may encounter some common issues that can be detrimental to its health and effectiveness. One of the primary concerns is pest infestations, particularly aphids, whiteflies, and spider mites. These pests feed on the sap of the clover plants, causing yellowing or stunted growth.
To address this issue, consider introducing beneficial insects like ladybugs, lacewings, or parasitic wasps that prey on these pests. You can also spray neem oil or insecticidal soap to control infestations. Keep your garden clean by removing weeds and debris, which can harbor pests.
Another common problem is disease susceptibility, particularly powdery mildew and leaf spot. Regularly inspect your clover plants for signs of disease, such as white powdery patches or yellow lesions. Practice good sanitation by disposing of infected plants and implementing crop rotation to reduce the risk of disease transmission.
In addition to pest control and disease management, be mindful of nutrient deficiencies, which can impact clover growth and health. Regularly test your soil pH and nutrient levels to ensure optimal growing conditions for your living mulch.
Frequently Asked Questions
How do I know which clover species is best for my climate zone?
Choosing the right type of clover for your garden is crucial for its success. To determine which clover species is suitable for your region, check the average temperature and frost dates in your area. White clover (Trifolium repens) prefers cooler temperatures and is ideal for temperate climates. Red clover (Trifolium pratense), on the other hand, tolerates warmer temperatures and is more suited to tropical or subtropical regions.
Can I mix different types of clover in my garden?
Yes! Mixing different types of clover can create a diverse and resilient ecosystem. By combining species with varying growth habits and characteristics, you can create a balanced living mulch that’s better equipped to handle changing conditions. Just ensure the selected species have similar growing requirements and are compatible.
How often should I water my clover living mulch during hot summer months?
During periods of drought or extreme heat, it’s essential to provide adequate moisture for your clover living mulch. Water deeply once or twice a week, depending on soil type and weather conditions. Aim to keep the soil consistently moist but not waterlogged, as this can lead to root rot.
Can I plant clover living mulch in areas with poor soil?
Yes! Clover living mulch is an excellent option for areas with poor soil due to its nitrogen-fixing abilities. However, it’s essential to note that clover requires a base level of nutrients to grow. If your soil lacks sufficient organic matter or has high levels of salt, consider adding compost or other amendments to create a favorable growing environment.
How long does it take for the benefits of clover living mulch to become apparent?
The time frame for noticeable improvements in soil health and plant growth can vary depending on factors like climate, soil type, and clover species. However, you may start seeing results within 6-12 months after establishing your clover living mulch. Benefits such as improved water retention, increased nitrogen levels, and enhanced biodiversity typically become apparent over a period of 1-2 years or more.