Are you looking for a low-maintenance and air-purifying addition to your home? Look no further than the humble clover houseplant! Not only is it easy to care for, but it’s also a natural magnet for pollinators like bees and butterflies. With its delicate white or pink flowers, clover houseplants add a touch of whimsy and charm to any room.
But beyond their aesthetic appeal, clover houseplants offer some serious benefits. They’re proven air purifiers, capable of removing pollutants from the air with ease. And with the right care, you can propagate your own clovers and create stunning arrangements that attract all sorts of beneficial insects to your home. In this article, we’ll cover everything you need to know about growing, caring for, and decorating with clover houseplants – so keep reading to learn more!
What is a Clover Houseplant?
Clover houseplants, also known as Trifolium repens, are a type of flowering plant that’s perfect for indoor spaces. Let’s dive into what makes them so special and unique.
Types of Clover Houseplants
There are several species of clover houseplants that you can grow indoors, each with its own unique characteristics and origins. One popular variety is the Microclover (Trifolium microphyllum), which is native to Europe and Asia. This plant is known for its small leaves and delicate white flowers that bloom in the spring.
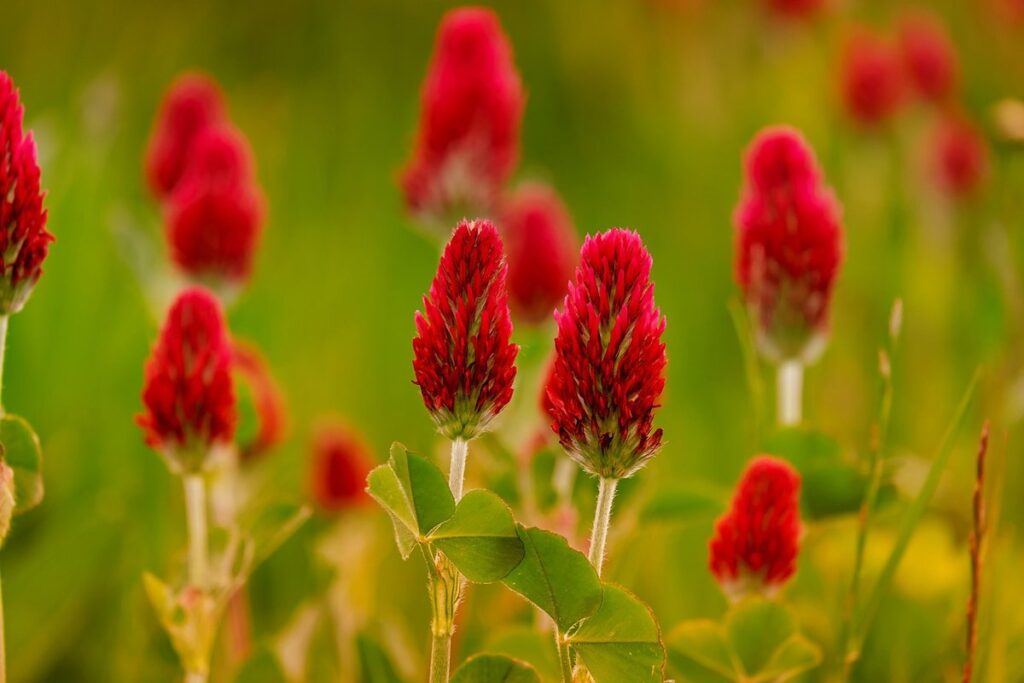
Another type of clover houseplant is the Red Clover (Trifolium pratense), which originated in North America and Europe. It’s a bit larger than Microclover, with larger leaves and pink or red flowers. White Clover (Trifolium repens) is another common variety, known for its small white flowers and heart-shaped leaves.
If you’re looking for something a bit more exotic, you might consider the Italian Clover (Trifolium campestre), which has distinctive purple flowers and is native to southern Europe. Whatever type of clover houseplant you choose, make sure to research its specific care requirements to ensure it thrives indoors.
Some key things to keep in mind when selecting a clover species are its light requirements, temperature tolerance, and watering needs.
History of Using Clovers as Houseplants
Clovers have been used as ornamental plants in homes and gardens for centuries. One of the earliest recorded uses of clover was by the ancient Greeks and Romans, who valued them not only for their beauty but also for their medicinal properties. They were often used in floral arrangements and decorative designs to add a pop of color and texture.
In Europe during the Middle Ages, white clover (Trifolium repens) was commonly used as a groundcover in gardens, while red clover (Trifolium pratense) was prized for its vibrant flowers. As trade routes expanded, clovers were introduced to new regions, where they quickly became popular among gardeners and houseplant enthusiasts.
Today, with the rise of indoor gardening, clovers have become increasingly popular as low-maintenance houseplants. Their ability to thrive in a variety of lighting conditions makes them an attractive choice for busy home gardeners. By planting white or red clover in your home, you can enjoy their delicate flowers and deep green foliage year-round, adding a touch of natural beauty to your living space.
Benefits of Growing Clover Houseplants
Growing clover houseplants isn’t just about aesthetics, it also offers several benefits that can improve your indoor air quality and boost your mood. Let’s explore these advantages in more detail.
Air Purification Properties
Growing clover houseplants isn’t just about adding a pop of greenery to your space; it also has some amazing benefits for indoor air quality. These plants are packed with tiny flowers that release oxygen and absorb pollutants from the air, making them natural air purifiers.
One of the key ways clover houseplants help purify the air is by removing volatile organic compounds (VOCs). Studies have shown that VOCs can cause headaches, dizziness, and other health issues. By introducing a clover plant into your home, you’re essentially creating a natural filter to absorb these toxins.
For instance, White Clover (Trifolium repens) has been found to remove up to 90% of formaldehyde from the air within a few hours. Formaldehyde is a common indoor pollutant found in many household products and building materials. By having a clover plant on your windowsill or shelf, you can significantly reduce exposure to this chemical.
To maximize the air purification properties of your clover houseplant, make sure it’s getting enough light (direct sunlight for 2-3 hours daily) and watering regularly. This will ensure its ability to absorb pollutants from the air is at its best.
Attracting Pollinators
Clover houseplants are not only visually appealing, but they also play a vital role in attracting beneficial pollinators to your home. Bees and butterflies are essential for the reproduction of many plant species, including clover. By incorporating clover houseplants into your indoor space, you can create a welcoming environment for these important visitors.
To attract pollinators, choose varieties like White Clover (Trifolium repens) or Red Clover (Trifolium pratense), which are known to be bee-friendly. Plant them in a spot that receives direct sunlight and is close to a water source, as bees need water to drink and cool their bodies.
When planting clover houseplants, avoid using pesticides or other chemicals that can harm pollinators. Instead, focus on creating a natural environment by incorporating native flowers and plants that provide nectar-rich blooms for bees and butterflies. This will not only attract beneficial insects but also support local biodiversity.
By following these simple tips, you can create a thriving ecosystem in your home that supports the health of both your clover houseplants and the pollinators they attract.
Easy to Care for
One of the most significant advantages of growing clover houseplants is their ease of care. Unlike other houseplants that require constant attention and maintenance, clovers are incredibly low-maintenance, making them perfect for busy people or those new to plant parenthood.
To keep your clover houseplant happy and thriving, you don’t need to fuss over it daily. Watering once a week is usually sufficient, unless the soil feels extremely dry to the touch. This means you can enjoy the benefits of having a lush, green plant without dedicating hours each day to its care.
In fact, clovers are known for their ability to tolerate neglect. If you forget to water your clover houseplant from time to time, it will simply adapt and carry on. This makes them an excellent choice for those who tend to overwater or underwater their plants.
To maximize the ease of care with your clover houseplant, be sure to repot it only when necessary (usually every 1-2 years). This will prevent root bound conditions that can cause problems for other types of plants. With minimal effort and attention, you can enjoy a beautiful and thriving clover houseplant in your home.
Choosing the Right Clover Houseplant Variety
When it comes to growing clover houseplants, selecting the right variety is crucial for success. With so many options available, let’s explore how to choose the perfect one for your space and needs.
Factors to Consider
When selecting the perfect clover variety for your home, it’s essential to consider several factors that will determine its success. Lighting is a crucial aspect to think about – some clover varieties require bright indirect light, while others can tolerate low light conditions. For example, the ‘Tricolor’ variety does exceptionally well in low-light environments, making it perfect for rooms with limited natural light.
Temperature also plays a significant role in choosing the right clover variety. Some species prefer warmer temperatures around 65-75°F (18-24°C), while others thrive in cooler temperatures between 55-65°F (13-18°C). The ‘Emerald’ variety, for instance, does well in temperatures up to 80°F (27°C).
Lastly, consider the type of soil you have available. Some clover varieties prefer acidic soils with a pH range of 6.0-7.0, while others can tolerate neutral or slightly alkaline conditions. The ‘Kidney Bean’ variety, for example, thrives in well-draining acidic soils.
When choosing your clover houseplant, make sure to research the specific needs of each variety to ensure you provide the right environment for it to flourish.
Popular Varieties for Beginners
When starting out with clover houseplants, it’s essential to choose a variety that’s easy to care for and forgiving if you make mistakes. Some popular varieties for beginners include the ‘Little Leaf’ or ‘Miniature’ types, which are compact and produce fewer leaves than larger varieties.
These small-leaved clovers are perfect for tight spaces or terrariums, and they require minimal pruning to maintain their shape. Another beginner-friendly option is the ‘Trifolium’ variety, also known as the ‘Common White Clover’. This variety is easy to propagate by division, making it a great choice if you’re new to plant propagation.
For those who want a more visually appealing clover, consider the ‘Red Clover’ or ‘Pink Clover’, which produce vibrant flowers in shades of red and pink. These varieties are relatively low-maintenance but may require occasional deadheading to keep them looking their best. Regardless of the variety you choose, make sure to research specific care requirements to ensure your clover thrives under your care.
Exotic Varieties for Experienced Growers
If you’re an experienced grower looking for a challenge, you’ll love exploring exotic clover varieties that require more skill and attention to thrive. These unusual plants offer unique characteristics, such as striking foliage patterns or vibrant flower colors, that can add an extra layer of interest to your indoor garden.
One example is the ‘Tricolor’ clover (Trifolium incarnatum), which boasts leaves with three distinct shades of green, creating a beautiful mottled effect. This variety prefers well-draining soil and partial shade, making it perfect for growers who enjoy experimenting with different lighting conditions. Another option is the ‘Rosea’ clover (Trifolium pratense), known for its delicate pink flowers that add a touch of elegance to any room.
When growing these exotic varieties, remember to provide them with the right balance of water and nutrients. Overwatering can be detrimental, so monitor your plant’s needs carefully and adjust your care routine accordingly. With proper attention and patience, you’ll be rewarded with thriving plants that will become the stars of your indoor garden.
Growing and Caring for Clover Houseplants
Now that you’ve learned how to propagate and care for your clover houseplant, it’s time to dive into the specifics of growing and caring for them long-term. Let’s get started on creating a thriving environment!
Lighting Requirements
When it comes to lighting requirements for clover houseplants, there’s a bit of variation depending on the specific type you have. White clover, for instance, can thrive in low-light conditions and is often used as a shade-loving option for indoor spaces. In contrast, red clover prefers bright, indirect light but can tolerate some direct sunlight.
For most types of clover houseplants, including Microclover and Sweet Clover, east- or west-facing windows are ideal. These provide gentle, indirect light that’s perfect for promoting healthy growth without causing scorching or discoloration. If you’re unable to place your clover near a window, consider using grow lights as an alternative.
When choosing lighting options, remember that most clover houseplants prefer daytime temperatures between 65-75°F (18-24°C). Avoid placing them near heating vents or radiators, which can cause drying and stress. By providing the right amount of light for your clover houseplant, you’ll be rewarded with lush greenery and vibrant blooms – a true delight in any indoor space!
Watering and Humidity Levels
Watering clover houseplants requires attention to their unique needs. Allow the soil to dry slightly between waterings, as overwatering can lead to root rot and other issues. Check the top inch of soil for dryness by sticking your finger into it. Water thoroughly when necessary, making sure not to let the plant sit in excess moisture.
Maintaining optimal humidity levels is also crucial for healthy growth. Clover houseplants prefer a humid environment, typically between 40-60% relative humidity. You can increase the humidity around your plant by placing the pot on a tray filled with water and pebbles or using a humidifier nearby. Avoid placing your clover in drafty areas or directly under air conditioning vents.
Monitor your plant’s response to these conditions and adjust accordingly. If you notice yellowing leaves or stunted growth, it may be a sign that your clover needs more humidity. Conversely, if the leaves are developing brown tips, it could indicate over-humidification. By striking this balance, you’ll provide your clover with the best chance to thrive and maintain its vibrant green color.
Fertilization Needs
When it comes to fertilizing your clover houseplant, providing optimal nutrients is crucial for its overall health and vibrant appearance. Clover plants require a balanced diet of nitrogen, phosphorus, and potassium (NPK) to promote healthy growth. You can use a general-purpose fertilizer or a specifically formulated one for flowering plants like clover.
A good rule of thumb is to fertilize your clover plant during the growing season, which typically spans from spring to fall. Dilute the fertilizer to half the recommended strength to avoid burning your plant’s roots. Water thoroughly after application to help the nutrients reach the soil.
As a general guideline, aim for a 20-20-20 NPK ratio or an organic alternative like fish emulsion or compost tea. Avoid over-fertilizing, as this can lead to weak and leggy growth. Instead, fertilize lightly but consistently, adjusting your schedule based on your plant’s specific needs.
You may also consider repotting your clover houseplant with fresh potting mix that contains slow-release fertilizer granules for added convenience. Whatever method you choose, be sure to monitor your plant’s response and adjust your fertilization plan accordingly to achieve the desired results.
Common Problems and Solutions
Don’t let pesky problems get in the way of your clover houseplant’s success! We’ll tackle common issues and share expert tips to keep your plant thriving.
Pests and Diseases
When it comes to growing and caring for clover houseplants, there are several common pests and diseases that can affect their health. One of the most prevalent issues is root rot, which occurs when the plant’s roots become waterlogged due to overwatering or poor drainage. To prevent this, make sure your pot has good drainage holes and only water your clover when the soil feels dry to the touch.
Another common pest that can infest clover houseplants is spider mites. These tiny insects feed on the sap of the plant, causing yellowing leaves and a fine webbing on the foliage. To get rid of them, use neem oil or insecticidal soap according to the product’s instructions.
Fungal diseases like powdery mildew can also affect clover houseplants, especially in humid environments. To prevent this, provide good air circulation around your plant and avoid overwatering. Regularly inspect your clover for any signs of pests or disease, and take action promptly if you notice anything unusual.
Nutrient Deficiencies
Identifying nutrient deficiencies in clover houseplants can be a challenge, but there are some key signs to look out for. If your clover plant is showing yellowing leaves, it may be a sign of nitrogen deficiency. Check the soil pH level as well – if it’s too high or low, nutrients won’t be absorbed properly.
Leaf color and texture changes can also indicate nutrient deficiencies. For example, if your clover plant has pale green or white spots, it could mean magnesium or iron is lacking. On the other hand, if leaves are turning yellow with black spots, it may indicate a potassium deficiency.
To ensure your clover houseplant gets all the necessary nutrients, use a balanced fertilizer during the growing season (spring and summer). Watering schedule also plays a crucial role – overwatering can lead to nutrient deficiencies. Check the soil moisture by sticking your finger into the soil up to the first knuckle. If it feels dry, water your plant.
If you suspect a nutrient deficiency, repot your clover houseplant in fresh potting mix and adjust your fertilizer schedule accordingly. Keep an eye on your plant’s response and adjust your care routine as needed.
Tips for Reviving Dying Plants
If you’ve been struggling to keep your clover houseplant alive and it’s starting to show signs of distress, don’t worry – with some TLC, you can revive it. One of the most common problems with indoor plants is underwatering or overwatering. Check the soil moisture by sticking your finger into the soil up to the first knuckle. If it feels dry, give it a good watering.
To avoid root rot and other issues, make sure not to waterlog the plant. You can also try repotting the clover in fresh, well-draining potting mix. This will give the roots some breathing room and help prevent fungal diseases.
Another issue that might be plaguing your clover is pests like spider mites or mealybugs. Check for these tiny critters by gently examining the leaves and stems. If you find any, isolate the plant immediately to prevent the infestation from spreading. You can treat pests with neem oil or insecticidal soap.
By addressing these common problems, you should be able to revive your dying clover houseplant. Just remember to adjust your care routine as needed – every plant is different, after all. With a little patience and attention, your clover should thrive once more.
Propagation Methods for Clover Houseplants
Now that you’ve mastered the basics of clover care, it’s time to learn how to multiply your beloved houseplant and share it with friends through various propagation methods. Let’s dive in!
Stem Cuttings
Taking stem cuttings is an excellent way to propagate new clover plants. It’s a relatively simple process that requires minimal equipment and can be done at home. To begin, choose a healthy clover plant with plenty of leaf growth. Select a stem section with at least two sets of leaves, cutting just above a node (where a leaf meets the stem). Remove lower leaves from the stem section to prevent them from getting wet and developing root rot.
Place the cut end in a glass of water or a propagation tray filled with water, making sure the node is submerged. Roots should develop within 7-10 days, at which point you can transfer the cutting into a pot filled with well-draining soil. Water thoroughly and provide bright, indirect light. Keep the soil consistently moist but not waterlogged.
When taking stem cuttings, it’s essential to choose healthy mother plants with plenty of leaf growth to ensure successful propagation. By following these steps and providing optimal growing conditions, you can successfully propagate new clover plants using stem cuttings.
Division
When your clover houseplant has outgrown its container and is producing more roots than leaves, it’s time to divide it. This process not only gives you a chance to propagate new plants but also rejuvenates the mother plant. To divide an established clover clump, start by gently removing it from its pot.
Look for areas where the stems are most densely packed and use a sharp knife or pruning tool to carefully separate them. You can also try dividing the roots while the plant is still in its pot, but be careful not to damage the surrounding soil. Make clean cuts just above a node (where a leaf meets the stem) to encourage new growth.
Separate the divided sections into individual pots filled with well-draining soil and water thoroughly. Keep the soil consistently moist during this period, as the new plants will need time to establish themselves. You can expect roots to develop within 2-3 weeks, at which point you can begin fertilizing your newly propagated clover houseplants regularly.
Divided clover sections can be propagated in spring or summer when they’re actively growing, providing you with a continuous supply of healthy new plants for your collection. By following these simple steps, you’ll be able to multiply your favorite clover varieties and enjoy their unique charm throughout the seasons.
Leaf or Bud Cuttings
When it comes to propagating new clover houseplants, leaf and bud cuttings are two effective methods that allow you to multiply your favorite varieties quickly and easily. Leaf cuttings involve removing a healthy stem from the mother plant, making sure it has at least one node (the joint where a leaf meets the stem), and then placing it in a propagation tray or pot filled with a well-draining mix. Keep the soil consistently moist but not waterlogged, as this can cause root rot.
For bud cuttings, you’ll want to choose healthy buds that are about 1-2 inches long, removing them from the mother plant and placing them in a propagation tray or pot with a rooting hormone. This method encourages the development of new roots and promotes faster growth. By using leaf and bud cuttings, you can create multiple identical plants from just one parent plant, allowing for easy sharing with friends and family or expanding your own clover houseplant collection.
To increase your chances of successful propagation, make sure to use a rooting hormone powder or liquid on the cut ends of both methods. This helps stimulate root growth and development.
Decorative Uses and Arrangements
When it comes to incorporating your clover houseplant into your home decor, we’ll explore creative ways to display it, from vases to living wreaths. This versatile plant can add a touch of whimsy to any space.
Creating a Clover Terrarium
Creating a clover terrarium is a delightful way to showcase the beauty of this charming houseplant. To get started, you’ll need a clear glass container with a wide mouth, such as a jar or vase, and some decorative rocks or pebbles for drainage. Add a layer of small rocks at the bottom of the container, followed by a thin layer of activated charcoal to prevent moisture buildup.
Next, add a layer of sphagnum moss, which will help retain moisture and provide a habitat for your clover plants. Plant several small clover seedlings or cuttings in the moss, leaving enough space between each plant for proper growth. Top-dress with more moss or small decorative stones to conceal any bare spots.
To complete the terrarium, add some decorative elements like seashells, pinecones, or small figurines that complement your clover plants. Finally, mist the terrarium gently but thoroughly, and place it in a spot with bright, indirect light. With proper care, your clover terrarium will thrive as a miniature, self-sustaining ecosystem.
Using Clovers in Hanging Baskets
Clover houseplants are incredibly versatile and can add a pop of color and texture to various decorative arrangements. When it comes to using clovers in hanging baskets, the possibilities are endless. You can create a whimsical and charming display by grouping different types of clover houseplants together in a single basket. For example, combine white clover with pink or purple clover for a beautiful ombre effect.
Another idea is to use a single type of clover as a statement piece in a hanging basket. Train the stems to cascade over the edges of the basket by providing plenty of light and regular watering. You can also add some decorative rocks or pebbles to the bottom of the basket for added visual interest.
When selecting a hanging basket, choose one with good drainage holes to prevent waterlogged soil. This will ensure that your clover houseplants receive the right amount of moisture and thrive in their new arrangement. With a little creativity, you can turn a simple hanging basket into a stunning display piece that showcases the beauty of your clover houseplant.
Mixing with Other Plants
When it comes to creating visually appealing arrangements with clover houseplants, mixing them with other plants can add depth and interest to your space. One popular combination is pairing clover with succulents. Their contrasting textures and growth habits create a beautiful balance. For example, the delicate leaves of clover pair well with the chunky stems of echeveria or crassula.
Consider combining clover with flowering plants like African violets or begonias to add pops of color to your arrangement. These blooms will not only attract pollinators but also draw attention to the clover’s unique foliage. To create a harmonious mix, group plants with similar light and watering requirements together. For instance, pair clover with plants that prefer well-draining soil and moderate watering, like sedum or air plants.
Some other plants that complement clover include mosses and ferns. Their lush, delicate growth habits provide a nice contrast to the clover’s more compact form. Experiment with different combinations to find your favorite pairing. Remember to choose plants that share similar growing conditions and maintenance needs for a low-maintenance arrangement that brings joy to any space.
Frequently Asked Questions
Can I grow clover houseplants outdoors as well as indoors?
Yes, clover houseplants can thrive in outdoor conditions with proper care. However, they may require more frequent watering and fertilization due to exposure to direct sunlight and changing weather conditions.
How often should I repot my clover houseplant?
You should repot your clover houseplant every 6-12 months, depending on its growth rate and container size. This will help maintain soil fertility and prevent the roots from becoming root-bound, ensuring optimal health and air purification capabilities.
What are some common pests that can infest clover houseplants?
Common pests that can infest clover houseplants include spider mites, mealybugs, and aphids. To control these pests, inspect your plants regularly and treat any infestations promptly with insecticidal soap or neem oil according to the product’s instructions.
Can I propagate clover houseplants using leaf cuttings?
Yes, you can propagate clover houseplants using leaf cuttings. Simply remove a healthy leaf from the mother plant, trim the base, and place it in water or a propagation medium with the right humidity and temperature conditions. Roots should develop within 2-4 weeks.
How do I create a stunning arrangement with multiple clover houseplants?
To create a beautiful arrangement, choose clover houseplants with varying flower colors and textures, and arrange them in a visually appealing way. Use a decorative pot or container that complements the plant’s style, and consider adding other air-purifying plants or decorative elements to enhance the overall aesthetic.