If you’re anything like me, you’ve probably fallen in love with the vibrant colors and delicate petals of chrysanthemums at least once. But let’s be real – these beautiful flowers can be a bit finicky when it comes to care. Choosing the right variety for your garden, preparing the perfect soil, and keeping those pesky pests at bay can be overwhelming, especially if you’re new to gardening.
Don’t worry, we’ve got you covered! In this comprehensive guide, we’ll take you through everything you need to know to grow stunning chrysanthemums. From variety selection and soil preparation to fertilization, pruning, pest control, propagation, and troubleshooting common issues, we’ll cover it all. Whether you’re a seasoned gardener or just starting out, our expert tips will help you coax the most beautiful blooms from your chrysanthemum plants.
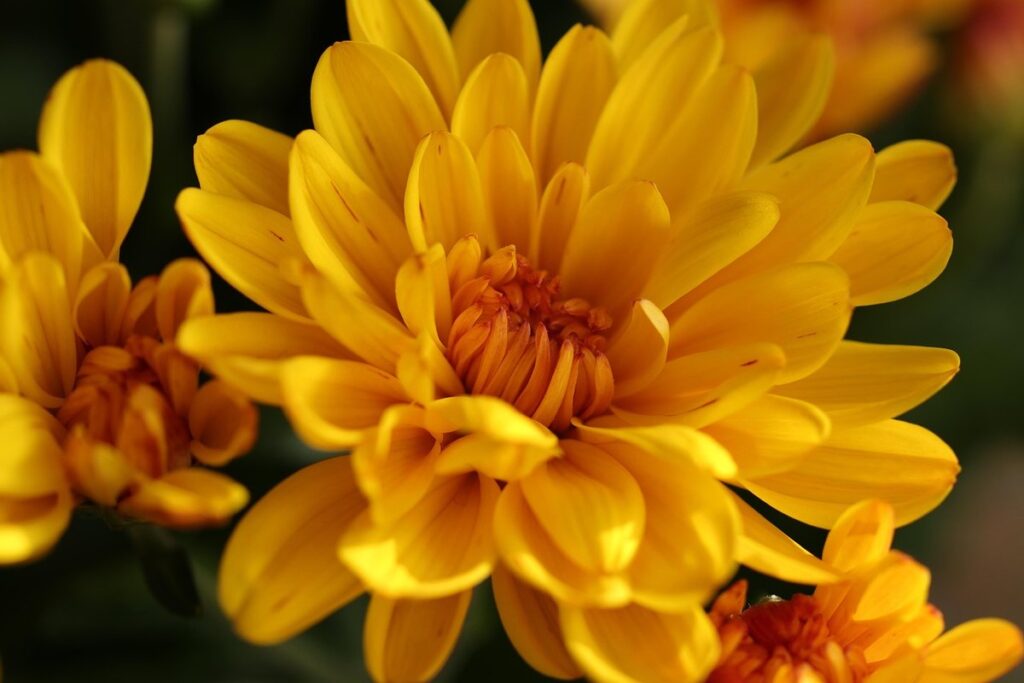
Choosing the Right Chrysanthemum Variety
When it comes to growing chrysanthemums, selecting the right variety is crucial for your garden’s success. In this section, we’ll guide you through the factors to consider when choosing a chrysanthemum that thrives in your climate and meets your needs.
Understanding Chrysanthemum Classification
Chrysanthemum enthusiasts often get confused by the numerous types available. But understanding the different classifications can help you choose the perfect variety for your climate and needs.
There are primarily three main categories: Asiatic, Japanese, and Garden varieties. Asiatic chrysanthemums are known for their vibrant colors and compact growth habit, making them ideal for small spaces or containers. They bloom relatively early in the season and require minimal maintenance.
Japanese chrysanthemums, on the other hand, have a more delicate appearance with feathery foliage and dainty blooms. They prefer cooler temperatures and well-drained soil, which makes them suitable for northern climates. Garden varieties are the most common type and come in a wide range of sizes, shapes, and colors.
When selecting a chrysanthemum variety, consider your climate zone, available space, and desired bloom time. For example, if you live in an area with hot summers, Asiatic or Garden varieties might be more suitable due to their heat tolerance. If you’re looking for a low-maintenance option, Japanese chrysanthemums could be the way to go.
Keep in mind that these classifications are not mutually exclusive, and many hybrids combine traits from multiple categories. Research specific varieties to ensure they meet your needs and thrive in your environment. By understanding these differences, you’ll be able to choose a chrysanthemum variety that brings joy and beauty to your garden for years to come.
Factors to Consider When Selecting a Variety
When selecting a chrysanthemum variety, it’s essential to consider several key factors to ensure you choose one that thrives in your garden and meets your specific needs. Bloom time is a crucial consideration – do you want a variety that blooms early in the season or later? Some popular varieties like ‘Sheffield Pink’ bloom as early as June, while others like ‘Moonlight Serenade’ don’t start blooming until September.
Another vital factor to consider is flower size and color. If you’re looking for a dramatic statement piece, larger-flowered varieties like ‘Gentle Shearer’ might be the way to go. However, if you prefer smaller, more delicate blooms, look for varieties with smaller flowers like ‘Snowbowl’. Growth habit is also crucial – do you have space for tall, upright varieties or would you prefer something more compact?
Consider your garden’s conditions and climate when selecting a variety. For example, some chrysanthemums are more drought-tolerant than others, while others may require regular watering. By carefully considering these factors, you can choose the perfect variety to suit your specific needs and ensure it blooms beautifully in your garden.
Planting Chrysanthemums: Soil, Sun, and Water
When planting chrysanthemums, you’ll want to focus on creating a healthy environment by selecting well-draining soil, providing sufficient sunlight, and watering them correctly. This section will break down these essential factors for your blooms’ success.
Preparing the Soil for Chrysanthemums
When it comes to growing chrysanthemums, one of the most crucial steps is preparing the soil for optimal growth. Chrysanthemums prefer well-draining soil that allows water to pass through easily, preventing root rot and other issues. If your soil is heavy clay or prone to waterlogging, it’s essential to amend it before planting.
To create an ideal growing environment, mix in a combination of compost and perlite or sand to improve drainage. Aim for a ratio of 20% organic matter to 80% inorganic material. This will not only enhance the soil’s ability to retain moisture but also provide essential nutrients for your chrysanthemums.
Another critical aspect is pH balance. Chrysanthemums prefer slightly acidic to neutral soil with a pH between 6.0 and 7.0. If your soil tests higher or lower, consider adding lime to raise the pH or sulfur to lower it. Don’t forget to remove any debris or weeds from the area before planting, as these can compete with your chrysanthemums for resources.
Remember to test your soil periodically to ensure it remains optimal for your plants’ growth. By taking the time to prepare the soil properly, you’ll be rewarded with vibrant blooms and a thriving chrysanthemum garden.
Providing Adequate Sunlight and Water
When it comes to providing adequate sunlight and water for your chrysanthemums, there are several factors to consider. Chrysanthemums generally require full sun to partial shade, depending on the specific variety. If you’re growing chrysanthemums in a region with hot summers, it’s essential to provide some afternoon shade to prevent scorching of the leaves and flowers.
In terms of direct sunlight, aim for at least 4-6 hours of direct sunlight per day. However, if your chrysanthemums are exposed to intense midday sun, consider providing a sheer curtain or screen to filter the light. On the other hand, if you’re growing chrysanthemums in a cooler climate, they can tolerate more shade.
In terms of watering, chrysanthemums prefer well-draining soil and consistent moisture. Water your chrysanthemums deeply once or twice a week, depending on weather conditions. Avoid getting water on the leaves to prevent fungal diseases. Also, be mindful of drought tolerance – some chrysanthemum varieties can survive with minimal watering, while others require more frequent watering.
Chrysanthemum Care Tips: Fertilization, Pruning, and Pest Control
To ensure your beautiful blooms continue to thrive, let’s dive into some essential tips for fertilizing, pruning, and controlling pests in your chrysanthemum garden. With these techniques, you’ll be a pro at caring for your favorite flowers!
Fertilizing Chrysanthemums for Optimal Growth
When it comes to fertilizing chrysanthemums for optimal growth, timing is everything. You’ll want to fertilize your plants regularly throughout the growing season, but over-fertilization can be detrimental to their health.
To avoid this common mistake, start by choosing a balanced fertilizer that contains equal amounts of nitrogen (N), phosphorus (P), and potassium (K). These nutrients will help promote healthy growth, blooming, and root development. You can opt for a water-soluble or granular fertilizer – both work well for chrysanthemums.
A general rule of thumb is to fertilize your chrysanthemums once a month during the growing season (spring-fall). You can also side-dress with an additional application every 2-3 weeks to give them an extra boost. However, be cautious not to overdo it – excessive nitrogen can cause leggy growth and weakens the plant.
Some signs that you’re fertilizing too much include yellowing leaves, stunted growth, or a strong unpleasant odor from the roots. If you notice any of these symptoms, cut back on fertilizer applications immediately and repot your chrysanthemum in fresh soil to give it a clean slate.
Pruning Techniques for Healthy Plants
When it comes to pruning chrysanthemums, timing is everything. Prune your mums in late winter or early spring, before new growth begins, to encourage bushy growth and prevent them from becoming leggy. Start by removing dead flowers, also known as spent blooms, to promote healthy growth and prevent seed production.
To shape the plant, cut back about one-third of the stems to a bud eye, which is where a new stem will grow from. Make clean cuts just above a bud eye using sharp, sterile pruning tools. This will help maintain the plant’s natural shape and encourage branching. Remove any dead or damaged branches, cutting them back to the base of the plant.
By following these simple steps, you’ll be able to promote healthy growth, encourage blooming, and keep your chrysanthemums looking their best all season long. Remember to disinfect your pruning tools between cuts to prevent the spread of disease. With a little practice, you’ll be a pro at pruning chrysanthemums in no time!
Common Chrysanthemum Pests and Diseases
Chrysanthemums can be susceptible to various pests and diseases, which can cause damage and affect their appearance. Let’s take a look at some of the most common issues gardeners face when growing chrysanthemums.
Identifying Common Pests Affecting Chrysanthemums
Chrysanthemums are susceptible to various pests that can cause damage and stress to these beautiful flowers. Among the most common ones, aphids, whiteflies, and spider mites stand out for their ability to infest plants quickly.
Aphids are small, soft-bodied insects with a pear-shaped body, usually 1-3 mm long. They’re found on the underside of leaves or stems, feeding on plant sap, causing curled or distorted leaves. Whiteflies, on the other hand, are tiny flying insects that feed on plant sap as well, often leaving behind sticky honeydew droplets.
Spider mites are extremely small, nearly invisible to the naked eye, and look like fine spider webs on the underside of leaves. They suck plant sap, causing yellowing or bronzing leaves.
To control these pests, inspect your plants regularly for any signs of infestation. Use neem oil or insecticidal soap to deter aphids and whiteflies. For spider mites, mix 1 tablespoon of mild dish soap with 1 quart of water and spray it on the affected areas.
Understanding and Managing Chrysanthemum Diseases
Chrysanthemum diseases can be challenging to manage, but understanding their causes and symptoms is key to preventing and treating them. Powdery mildew, a common issue for chrysanthemums, appears as a white, powdery coating on leaves and stems. It’s caused by high humidity and temperatures above 65°F (18°C), so providing good air circulation and keeping your plants in well-ventilated areas can help prevent it.
Root rot is another major concern, often caused by overwatering or waterlogged soil. If you notice yellowing leaves or a soft, mushy stem base, reduce watering immediately to give the roots a chance to recover. To prevent root rot, make sure your potting mix has good drainage properties and avoid getting water on the crown (where the stem meets the roots).
Leaf spot diseases like septoria leaf spot and alternaria leaf blight are also prevalent among chrysanthemums. They manifest as small, circular lesions on leaves that can merge to form larger patches. These issues often arise from moisture accumulation on leaves, so be sure to remove any debris or excess water from the foliage to keep it dry.
To treat fungal diseases like powdery mildew and root rot, use fungicides specifically designed for these issues, following the product’s instructions carefully to avoid harming your plants. For bacterial leaf spot diseases, copper-based bactericides are often effective, but always read the label and follow safety precautions when handling chemicals.
Propagating Chrysanthemums: Division and Cuttings
To multiply your favorite chrysanthemum varieties, you can use division or cuttings to create new plants, making it easy to share with friends or expand your garden. This section covers both methods in detail.
Dividing Established Chrysanthemum Plants
Dividing established chrysanthemum plants can be a bit more challenging than propagating through cuttings, but with the right technique and care, you can successfully divide your mature mums to create new plants for yourself or share with friends. To get started, wait until the end of the blooming season when the plant is dormant. This will make it easier to handle the roots without causing damage.
Begin by digging up the entire plant, taking care not to disturb the surrounding soil. Gently brush away any excess dirt from the roots, and then separate the rhizome into sections using a sharp, sterile knife or pruning tool. Make sure each section has at least one growing eye (where new stems will emerge) to ensure it’ll produce healthy growth.
Next, prepare your division site by loosening the soil with a fork to a depth of about 12 inches. Plant the new divisions about 6-8 inches deep, making sure the eyes are facing upwards. Water thoroughly and mulch around the base to retain moisture and suppress weeds. With proper care, these newly divided chrysanthemums should begin producing blooms within a year or so.
Taking Cuttings for Propagation
Taking cuttings from healthy chrysanthemums is an effective way to propagate new plants. To take softwood cuttings, choose stems with a high percentage of water content, typically from spring to early summer when the plant is actively growing. Cut 10-15cm sections just above a node, making sure each cutting has at least two sets of leaves.
Dip the cut ends into rooting hormone powder or liquid to stimulate root growth and increase the chances of successful propagation. Place the cuttings in a propagation tray filled with a well-draining potting mix, such as perlite or vermiculite. Water gently but thoroughly, making sure not to overwater.
For hardwood cuttings, take 10-15cm sections from older stems during late summer to early fall when the plant is dormant. Remove lower leaves and dip the cut ends into rooting hormone powder. Plant them in a propagation tray with a well-draining mix, keeping the soil consistently moist but not waterlogged. It can take several weeks for roots to develop on hardwood cuttings.
Keep the propagation area warm (around 20-25°C) and humid to promote root growth. Check on the cuttings regularly, watering as needed until they are established enough to be transplanted into individual pots. With proper care and conditions, you should see new growth within a few weeks.
Troubleshooting Common Chrysanthemum Problems
Don’t worry if your chrysanthemums aren’t thriving – we’ve got you covered. This section tackles common issues and offers practical solutions to get your plants back on track.
Addressing Common Issues with Chrysanthemum Care
If you’re noticing that your chrysanthemums aren’t blooming as expected, there could be several reasons. First, check if they’re receiving enough sunlight and warmth – a lack of these essential elements can prevent blooms from developing properly. Ensure your plants are situated in an area with at least six hours of direct sunlight daily.
Another issue you might encounter is yellow leaves on your chrysanthemums. This could be due to overwatering or root rot, as the roots may not have enough space to breathe. To fix this, let the soil dry out a bit between waterings and consider repotting your plant into a container with good drainage.
Fungal diseases can also affect your chrysanthemum plants, often caused by too much moisture and humidity. These diseases usually manifest as white powdery patches on leaves or soft black spots that may ooze liquid. To prevent this, maintain a consistent watering schedule and ensure good air circulation around your plants. If you spot any fungal growths, treat them promptly with fungicides to stop the spread of disease.
To minimize issues like these from arising in the first place, keep an eye on the temperature range for your chrysanthemums – ideally between 65-75°F (18-24°C) during the growing season. Avoid overfertilizing, as this can also lead to weakened plant health and greater susceptibility to disease.
Encouraging Repeat Bloom in Chrysanthemums
Encouraging repeat blooming in chrysanthemums requires a combination of proper care and intentional pruning techniques. To start, make sure you’re deadheading regularly – this involves removing spent blooms to direct the plant’s energy towards producing new flowers rather than seeds. Cut back faded petals to the first set of leaves, taking care not to damage any emerging buds.
Pruning is also crucial for encouraging repeat bloom in chrysanthemums. In the spring, prune your plants to about 6-8 inches from the ground to promote bushy growth and encourage new stems. Make clean cuts just above a leaf node, using sharp, sterile pruning tools to minimize disease risk. Throughout the growing season, remove any weak or spindly growth to maintain a balanced shape and direct energy towards flowering.
Adjusting your care routine can also make a big difference. Chrysanthemums typically require less water and fertilizer when they’re not actively producing flowers. By providing them with a period of stress – achieved through reduced watering and fertilization – you can trick the plant into thinking it’s preparing for winter and induce repeat blooming in the fall.
Frequently Asked Questions
Can I grow chrysanthemums indoors if I live in a cold climate?
Yes, you can grow chrysanthemums indoors in pots or containers to protect them from harsh winter conditions. Just ensure the pot has good drainage and provide it with sufficient light, ideally south-facing windows or grow lights. Water sparingly, as overwatering can be detrimental.
How often should I fertilize my chrysanthemum plants for optimal growth?
To promote healthy growth and blooms, fertilize your chrysanthemums regularly throughout the growing season (spring-fall). Use a balanced fertilizer once a month during this period. You can also use compost tea as an alternative to provide essential nutrients.
What are some common mistakes to avoid when propagating chrysanthemum plants?
Some common pitfalls include overwatering, which can lead to root rot; inadequate light, causing the cutting to weaken; and insufficient humidity, making it difficult for the cutting to establish itself. Ensure you’re using a clean propagation tray, maintaining optimal temperatures (around 70-75°F), and providing sufficient moisture.
How do I know if my chrysanthemum plant has contracted a disease or pest infestation?
Regularly inspect your plants for signs of pests like aphids, whiteflies, or spider mites. Check for yellowing leaves, black spots, or powdery mildew – all indicative of diseases that can affect chrysanthemums. If you notice any unusual growths or symptoms, consult a gardening expert to provide the best advice.
What’s the ideal time to divide established chrysanthemum plants?
Divide your mature chrysanthemums in early spring (February-March) when new growth begins. Cut back old stems to about 6 inches from the ground, then gently separate the roots and re-pot the divisions with fresh soil. This will help prevent overcrowding and encourage new growth throughout the season.