Are you a proud owner of a spider plant? With its delicate white flowers and striking green leaves, it’s no wonder this low-maintenance plant has become a favorite among indoor gardeners. But even with its easy-going nature, your spider plant still needs some TLC to thrive. The good news is that caring for spider plants is relatively simple – all you need are the right techniques and a bit of knowledge.
In this article, we’ll take you through everything you need to know about caring for your spider plant. From providing it with the perfect amount of light and water to fertilizing and propagating, we’ve got you covered. We’ll also share tips on pest control to ensure your plant stays healthy and pest-free. By the end of this comprehensive guide, you’ll be a spider plant expert, ready to grow a lush and thriving indoor garden that brings joy to your home for years to come.
Choosing the Right Environment
When it comes to spider plant care, selecting a suitable environment is crucial for your plant’s health and happiness. Let’s explore the best conditions for your new addition to thrive.
Light Requirements
Light is one of the most critical factors to consider when it comes to growing spider plants. These plants thrive in bright, indirectly lit areas but can also tolerate low light conditions. However, direct sunlight can be detrimental to their growth.
For optimal growth, place your spider plant near an east- or west-facing window, where it receives plenty of indirect sunlight throughout the day. This will provide the necessary light for photosynthesis without causing scorching on the leaves. If you don’t have a sunny windowsill, a spot near a north-facing window with some filtered light can also work.
Avoid placing your spider plant in areas that receive direct sunlight, especially during peak hours (usually between 11 am and 3 pm). This can cause the leaves to become scorched, leading to discolored spots or even leaf drop. On the other hand, insufficient light will slow down growth, causing the plant to produce fewer white blooms.
Monitor your spider plant’s response to its environment and adjust its position accordingly. With a little experimentation, you’ll find the perfect spot for your plant to thrive.
Temperature Considerations
When it comes to providing the best care for your spider plant, temperature is an essential factor to consider. Spider plants prefer a moderate temperature range between 65-75°F (18-24°C), and temperatures outside this range can cause stress and even damage to the plant.
If you live in an area with consistently high temperatures above 80°F (27°C), it’s crucial to take measures to keep your spider plant cool. This can be achieved by moving the plant to a shaded area or using shades or blinds on windows to block direct sunlight, which can increase the temperature. Similarly, if you experience extremely low temperatures below 55°F (13°C), bring your spider plant indoors to prevent damage.
It’s worth noting that sudden changes in temperature can also cause stress to the plant. If you notice your spider plant is struggling with a change in temperature, make sure to keep it away from drafts and provide adequate humidity by misting it regularly. This will help the plant adapt to its new environment more smoothly.
Humidity Levels
Spider plants thrive in environments with moderate to high humidity levels. Ideally, they prefer an atmosphere with a relative humidity of 40-60%. When the humidity is too low, spider plants may exhibit symptoms such as crispy leaves and stunted growth.
To achieve the optimal humidity level for your spider plant, you can use a humidifier or place the pot on a tray filled with water and pebbles. As the water evaporates, it will increase the surrounding air’s moisture content. This method is particularly useful in dry climates or during the winter months when indoor spaces tend to be drier.
On the other hand, if your spider plant is exposed to high humidity for an extended period, it may develop root rot and leaf drop. In such cases, you can place the pot on a tray filled with activated charcoal or use an air purifier to reduce the moisture levels. It’s essential to monitor your spider plant’s response to changes in humidity and adjust accordingly.
Remember, spider plants are adaptable and can survive in average indoor conditions. However, by maintaining a suitable humidity level, you’ll encourage healthy growth and prevent potential problems.
Watering and Soil Care
To keep your spider plant happy and thriving, it’s essential to get its watering and soil care just right. In this next part, we’ll dive into the details of providing your plant with a healthy environment.
Proper Watering Techniques
Watering your spider plant correctly is crucial to its overall health and well-being. Over-watering can lead to root rot, while under-watering can cause the leaves to turn yellow and wilt. So, how often should you water your spider plant? The frequency depends on the environment it’s in – if it’s placed in a bright spot with temperatures above 65°F (18°C), it’ll need more frequent watering. Conversely, if it’s in a low-light area or cooler temperature, less frequent watering is required.
A good rule of thumb is to water your spider plant when the top inch of soil feels dry to the touch. Check the moisture level by sticking your finger into the soil – if it’s dry, it’s time to water. Water thoroughly until you see water coming out from the drainage holes. Avoid getting water on the leaves to prevent fungal diseases.
Some common mistakes people make when watering their spider plant include over-watering, which can lead to root rot and kill the plant. Other errors include not letting the soil dry out enough between waterings, causing the roots to become weak and susceptible to disease. To avoid these issues, ensure you’re checking the moisture level regularly and adjusting your watering schedule accordingly.
Soil Selection and Repotting
When it comes to spider plants, the right soil mix can make all the difference. You want a well-draining potting mix that’s specifically designed for indoor plants like yours. A good rule of thumb is to look for a mix that contains ingredients such as peat moss, vermiculite, or perlite – these will help to retain moisture but also prevent waterlogged soil.
On the other hand, some common mistakes when it comes to spider plant soil include using regular garden soil, which can be too dense and cause root rot. Another no-no is using a potting mix that’s too rich in fertilizer – this can scorch your roots. To avoid these pitfalls, choose a high-quality potting mix specifically formulated for indoor plants.
As for repotting, you’ll know it’s time when the soil has broken down significantly or your plant is top-heavy and requires more support. Here are some signs that indicate repotting is necessary: if water runs straight through the soil without being absorbed within a minute, if the pot feels light when lifted (indicating the roots have outgrown their container), or if you notice visible roots growing above the surface of the soil.
When transplanting your mature spider plant into fresh soil, make sure to handle the roots gently and avoid exposing them to direct sunlight. Water thoroughly after repotting to settle the new soil around the roots.
Fertilization and Pruning
To keep your spider plant thriving, let’s dive into the essential steps of fertilizing and pruning to promote healthy growth and maximize those beautiful white flowers.
Fertilizer Options and Application
When it comes to fertilizing your spider plant, you have several options to choose from. Balanced fertilizers are a good starting point, as they provide equal amounts of nitrogen (N), phosphorus (P), and potassium (K). However, if you want to promote blooming or fruiting, consider high-phosphorus fertilizers, which contain more P than N and K.
Organic options like fish emulsion, compost tea, and bone meal are also excellent choices for spider plants. These natural alternatives are gentle on the plant’s roots and won’t burn them if applied incorrectly. To use these products effectively:
* Dilute the fertilizer according to the manufacturer’s instructions
* Apply it every 1-2 weeks during the growing season (spring-fall)
* Water your plant thoroughly before applying the fertilizer
You can also make your own liquid fertilizer by steeping a handful of fish bones in water for a few days. Strain and use this solution as a regular fertilizer. Remember to reduce fertilization during the winter months when your spider plant is dormant, as it won’t require as many nutrients.
Pruning Techniques for Optimal Growth
Pruning is an essential part of spider plant care, as it helps maintain the plant’s shape, promotes healthy growth, and prevents pests and diseases. When to prune your spider plant depends on its needs – if you notice the leaves are getting too long or the plant is becoming leggy, it’s time for a trim.
Remove any dead or damaged leaves or stems first, as these can attract pests and create an entry point for diseases. Use clean scissors or pruning shears to prevent spreading bacteria. To promote bushy growth, cut back the longest stems to about half their length, just above a leaf node. This will encourage new growth and branching.
Another technique is to remove any weak or spindly growth, which can help direct the plant’s energy towards healthier areas. For example, if you notice a long stem with leaves that are small and pale, consider pruning it back to about an inch from the base. This will allow the plant to focus its energy on producing new growth from more robust stems.
Pest Control and Common Issues
We’ve all been there – discovering unwanted critters feasting on our beloved spider plant’s leaves. In this section, we’ll tackle common pests and issues that might be plaguing your plant.
Identifying and Managing Pests
Spider plants are generally low-maintenance and hardy, but they can be susceptible to certain pests that can weaken their growth and spread disease. Mealybugs and spider mites are two of the most common pests that target spider plants.
Mealybugs are small, white insects with a cottony appearance that feed on sap from plant leaves and stems. They secrete a sticky substance called honeydew, which attracts other pests like ants and promotes fungal growth. To check for mealybugs, gently brush your fingers over the undersides of leaves; if you notice a powdery coating or sticky droplets, inspect more closely.
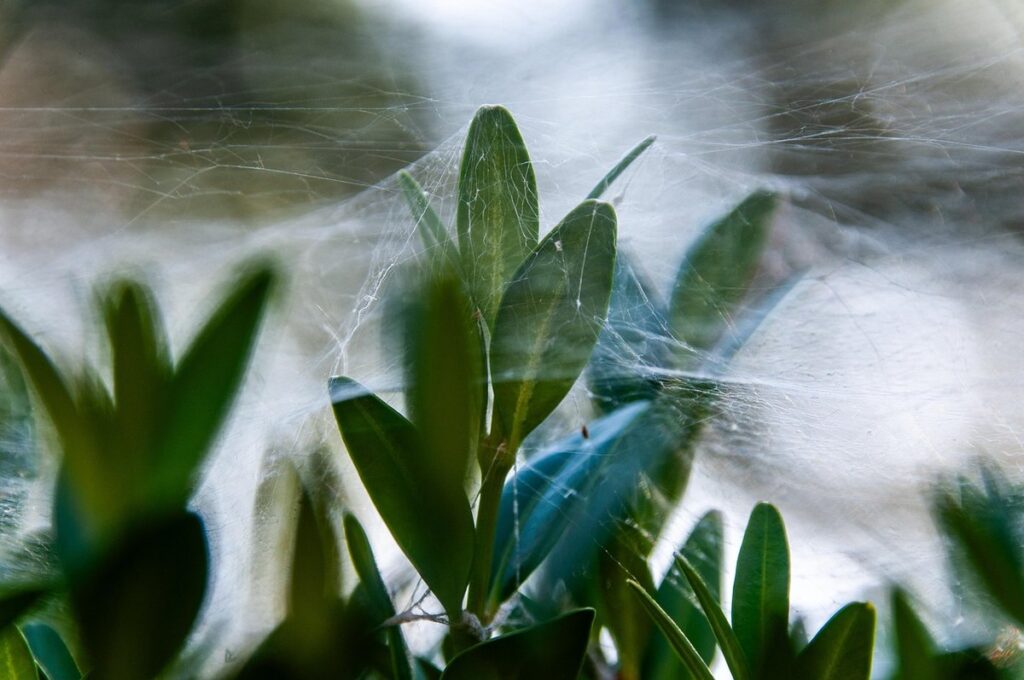
Spider mites are tiny, spider-like insects that feed on plant sap, causing yellowing leaves and fine webbing between stems. They thrive in dry environments with high temperatures. To manage an infestation, isolate the affected plant to prevent further spread. Use neem oil or insecticidal soap to control mealybugs and spider mites; repeat applications as directed until pests are gone.
For long-term pest prevention, maintain good hygiene by washing your hands before handling plants, and inspect your spider plant regularly for signs of pests.
Addressing Root Rot and Overwatering
Root rot and overwatering are two common issues that can quickly kill off even the most resilient spider plant. When you water your spider plant too much, it’s like drowning it – the roots can’t breathe and start to rot from the inside out. This is because spider plants don’t like wet feet; their roots need oxygen to grow, just like humans need air.
If you notice yellowing leaves or a mushy stem, it’s likely that your plant has contracted root rot. In this case, stop watering immediately and repot the plant in well-draining soil as soon as possible. Remove any dead or dying roots with sterile scissors, taking care not to damage any healthy tissue.
To prevent overwatering, make sure to check the moisture level of the soil before each watering by sticking your finger into it up to the knuckle. Water only when the top 1-2 inches feel dry. With a little care and attention, you can save even the most badly affected spider plant from certain doom.
Propagation and Reproduction
Spider plants are incredibly easy to propagate, and knowing how to do so will help you multiply your plant collection in no time. We’ll walk through the simple steps of division and leaf cuttings.
Methods for Propagating Spider Plants
Propagating spider plants is an exciting process that allows you to multiply these beautiful plants and share them with friends. There are several methods to achieve this, but not all of them guarantee success. Let’s explore the most effective techniques: leaf cuttings, stem cuttings, and division.
Leaf cuttings involve snipping off a healthy leaf from the mother plant, allowing it to dry for 24-48 hours before planting in well-draining soil. The success rate is around 50-60%. Make sure to choose leaves with a visible growing point at the base, as these are more likely to produce roots.
Stem cuttings require snipping off a section of stem from the mother plant, typically 2-3 inches long, and allowing it to dry for 24 hours. Then, plant it in moistened soil. The success rate is around 70-80%. This method works best when using younger stems.
Division involves separating mature spider plants into smaller sections, taking care not to damage the roots. This method has a high success rate of 90% or more. To increase your chances of successful propagation, use clean tools, maintain proper humidity and temperature conditions, and provide enough light for the new plantlets.
Plant Spacing and Air Circulation
When it comes to caring for spider plants, proper plant spacing and air circulation are often overlooked but crucial aspects of their overall health. To ensure your spider plant receives the right amount of air circulation, start by planting multiple individual plants at least 12-18 inches apart from each other. This allows for optimal growth and prevents overcrowding, which can lead to fungal diseases.
Air circulation is equally important in maintaining a healthy environment for your spider plant. Aim for at least three to four feet of clearance around the plant on all sides to facilitate air movement. You can also promote air circulation by placing your spider plant near an open window or using fans to gently circulate the air. Avoid over-fertilizing, as this can exacerbate any issues related to poor air circulation.
By providing sufficient space between plants and promoting air circulation, you’ll be able to prevent pests, diseases, and nutrient deficiencies that often stem from inadequate care. Keep in mind that spider plants are adaptable to different environments but still require careful consideration of their spatial needs.
Tips for Advanced Growers
If you’re already familiar with spider plant care, we’ve got some expert-level tips to help you take your green thumb to the next level. From propagation techniques to troubleshooting common issues.
Advanced Fertilization Techniques
As an experienced grower, you’re likely looking to take your spider plant’s nutrient intake to the next level. Advanced fertilization techniques can do just that, but it’s essential to understand the benefits and potential drawbacks of each method.
When it comes to liquid vs. solid fertilizers, both have their advantages. Liquid fertilizers are easy to apply and provide quick results, as they’re absorbed rapidly by the plant’s roots. This is particularly beneficial for spider plants that require high levels of nutrients during peak growth periods. However, some growers may find liquid fertilizers too concentrated or difficult to measure accurately.
Solid fertilizers, on the other hand, offer a more controlled release of nutrients and can be less expensive in the long run. They also allow you to avoid over-fertilization, which can harm your plant’s roots. A balanced solid fertilizer with N-P-K ratios (nitrogen-phosphorus-potassium) specifically formulated for houseplants like spider plants is an excellent choice.
To get the most out of advanced fertilization techniques, use a combination of both liquid and solid fertilizers throughout the growing season. For example, you can apply a balanced liquid fertilizer during the spring and summer months when your plant is actively growing. Then, switch to a slow-release solid fertilizer in the fall to provide nutrients over an extended period.
Experimenting with Different Environments
As you’ve mastered the basics of caring for your spider plant, it’s time to take it to the next level by experimenting with different environments. This is where the true magic happens, and you’ll discover just how adaptable these plants can be.
Start by moving your spider plant outside during the warmer months. Place it in a spot that receives bright, indirect light – such as a north-facing patio or under a shaded tree. Be sure to acclimate your plant to outdoor conditions gradually, starting with short periods outdoors and increasing the duration over time. This will prevent shock from sudden changes in temperature, humidity, or light exposure.
Alternatively, try growing your spider plant in unique containers like hanging baskets, macramé planters, or even an old boot! These unconventional vessels can add a touch of whimsy to your space while still providing adequate drainage and air circulation.
Remember, the key is to observe how your spider plant responds to its new surroundings. Take note of changes in growth rate, leaf color, and overall health. Use this information to fine-tune your care routine and optimize conditions for optimal growth.
Frequently Asked Questions
Can I propagate my spider plant at any time of the year?
Yes, you can propagate your spider plant throughout the year, but spring and summer are ideal times for optimal growth. During these seasons, the temperatures are warmer, and the humidity levels are higher, making it easier to encourage new growth.
How often should I fertilize my spider plant if I’m using a balanced fertilizer?
Fertilize your spider plant once a month during the growing season (spring-fall) with a balanced fertilizer. However, during the winter months when the plant is dormant, reduce fertilization to every 2-3 months.
What are some common pests that can infest my spider plant and how do I prevent them?
Common pests like mealybugs, spider mites, and scale can infest your spider plant. To prevent infestation, ensure good air circulation around the plant, inspect it regularly for signs of pests, and treat any infestations promptly with insecticidal soap or neem oil.
Can I grow multiple spider plants together in the same pot?
While it’s possible to grow multiple spider plants together, they prefer some space between them. For optimal growth, provide each plant with a separate pot that allows for good air circulation and is slightly larger than the plant’s root system.
How can I tell if my spider plant needs repotting?
Check your spider plant every 6-12 months to see if it needs repotting. If the plant has outgrown its container, or you notice roots growing out of the drainage holes, it’s time for a larger pot with fresh, well-draining soil.