When we think about capturing stunning animal photography, our minds often wander to the great outdoors – the savannas, forests, or even wildlife sanctuaries. But have you ever considered bringing the beauty of nature right into your own backyard? Photographing animals in garden settings is a fantastic way to create unique and captivating images that showcase the intricate relationships between humans, plants, and our furry friends.
Not only does this type of photography allow us to get up close and personal with wildlife in their natural habitats – or at least, as natural as it gets in our own gardens! – but it also offers endless opportunities for creative expression. In this article, we’ll share expert tips on choosing the perfect backdrops, editing techniques, and showcasing your work to create images that truly celebrate the beauty of nature and its inhabitants.
Setting Up Your Perfect Photo Shoot Location
When it comes to capturing your furry friends in their natural habitat, choosing the right location can make all the difference. We’ll explore how to select and prepare the perfect garden setting for a stunning animal photography session.
Choosing a Variety of Backdrops
When it comes to capturing stunning animal photographs in garden settings, choosing a variety of backdrops is crucial. A single type of setting can become repetitive and boring, whereas incorporating different environments will keep your photos fresh and engaging.
Consider photographing animals in gardens with water features, such as ponds or fountains. The sound and movement of the water create a soothing atmosphere, perfect for capturing serene and peaceful moments. For example, a deer sipping from a pond’s edge or a bird bathing in the shallows can be mesmerizing.
Wildflower meadows offer another picturesque backdrop, with vibrant colors and textures adding depth to your photos. These settings are ideal for capturing animals in their natural habitat, grazing or playing among the flowers. Alternatively, photographing animals in vegetable plots can result in humorous and endearing shots, as they explore and interact with their surroundings.
To incorporate a variety of backdrops into your photo shoot, plan ahead by researching local gardens that meet your requirements. Consider scouting different locations to ensure you have a mix of settings for the types of animals you’re photographing. This will not only make your photos more diverse but also provide opportunities to capture unique and memorable moments.
Factors to Consider for a Successful Shoot
When setting up your perfect photo shoot location in a garden setting, there are several key factors to consider for a successful shoot. Lighting is one of the most critical elements to get right. Natural light can be both a blessing and a curse when shooting in gardens. Soft overcast skies provide gentle, even lighting that’s ideal for capturing delicate animal features, but direct sunlight can create harsh shadows and unflattering highlights.
Weather conditions are also crucial to consider. Avoid shooting during peak sun hours (usually between 11am and 3pm) as this can lead to uncomfortable heat stress for both you and your furry subjects. Instead opt for early morning or late afternoon shoots when the light is softer and more forgiving. Additionally, be prepared for unpredictable British weather – have a backup plan in place in case of rain.
Timing is also essential – consider the natural behavior patterns of the animals involved. For example, birds are often most active during dawn and dusk, while deer tend to be more active at dawn and early morning. By aligning your shoot with these natural rhythms, you’ll capture authentic, engaging images that truly showcase the beauty of your garden setting.
Understanding Your Subject: Animal Behavior and Body Language
When photographing animals in your garden, it’s essential to understand their behavior and body language, which can help you anticipate and capture special moments. By recognizing subtle cues, you’ll become a more intuitive wildlife photographer.
Recognizing and Interpreting Animal Postures
When photographing animals in garden settings, it’s essential to recognize and interpret their body language to capture genuine and captivating images. One of the most significant aspects of animal behavior is posture – whether an animal appears relaxed or tense can reveal its personality.
Relaxed postures often display a more open, spread-out position, while tense postures appear stiff and contracted. Birds, for instance, may show relaxed behavior by perching with their wings partially spread or tail feathers splayed, whereas tension might be exhibited through tight wing positions or a rigid posture.
To recognize these cues effectively, observe your subject’s overall demeanor – consider the subtle variations in facial expressions, ear positions, and tail carriage. For example, dogs that tuck their tails between their legs may signal fear or anxiety, while those with their tails held high convey confidence. By paying attention to these details, you can better capture an animal’s personality through your photographs, creating a more authentic representation of the subject in its garden setting.
Capturing the Right Moments with Patience and Preparation
When photographing animals in garden settings, it’s essential to anticipate and be prepared for those fleeting moments that capture their true essence. These are often the simplest yet most revealing moments – like a bird pecking at a seed, a squirrel chasing its tail, or a cat lounging in a sunbeam.
To increase your chances of capturing these special moments, take time to observe the animals in their natural habitat. Learn their routines and habits, including when they typically eat, play, and rest. For instance, many birds are most active during early morning hours, so plan your shoot accordingly. Be patient and allow yourself to blend into the surroundings – avoid sudden movements that might scare them away.
Anticipate and prepare for these key moments by:
* Bringing a variety of lenses with different focal lengths
* Using camouflage or neutral-colored clothing to minimize visibility
* Being prepared to adapt quickly to changing situations, such as unexpected weather changes
* Taking note of the animals’ preferences and habits in your surroundings
By being patient and prepared, you’ll be well-equipped to capture those unforgettable moments that reveal the true character of your animal subjects.
Camera Settings and Equipment for Capturing Garden Animals
To capture garden animals at their best, you’ll want to consider a few essential camera settings and equipment that will help you get up close and personal without startling your subjects. Let’s take a look at what works best.
Choosing the Right Lens and Focal Length
When it comes to capturing garden animals, choosing the right lens and focal length is crucial. The type of lens you use will greatly impact the level of detail, perspective, and depth of field in your images.
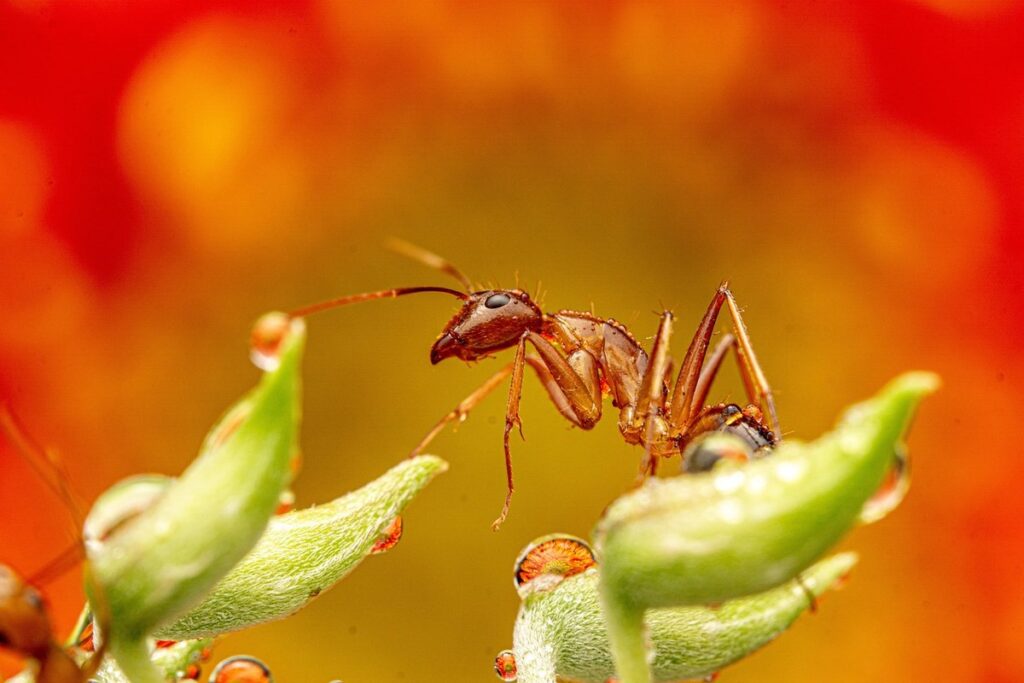
Consider using a macro or close-up lens for intimate portraits of insects, birds, and small mammals. These lenses typically have a short focal length (around 50-100mm) and are ideal for capturing intricate details and textures. For example, a 60mm macro lens can help you get up close and personal with the delicate patterns on a butterfly’s wings or the soft fur of a rabbit.
However, if you want to capture wider scenes, such as birds in flight or larger animals roaming the garden, a telephoto lens is a better option. Look for lenses with a longer focal length (200-400mm) that can compress perspective and convey a sense of scale. For instance, a 300mm telephoto lens can help you capture stunning images of birds soaring through the sky or deer grazing in the distance.
Ultimately, the right lens will depend on your personal preference and the type of shot you’re trying to achieve. Experiment with different lenses to find what works best for you and your garden photography style.
Lighting Techniques to Enhance Your Photos
When it comes to capturing garden animals with your camera, lighting can make all the difference. Different lighting setups can be used to create dramatic or intimate effects that elevate your photos from good to great.
One of the most effective ways to achieve this is by using natural light. Shoot near a window or outside during the golden hour (the hour just before sunset) when the soft, warm light creates long shadows and adds depth to your images. This type of lighting is ideal for capturing intimate moments between animals, such as a mother bird feeding her chicks.
For more dramatic effects, consider using artificial light sources like flash or continuous lights. These can be used to highlight specific features or create contrast in the scene. For example, you could use a flash to capture the sparkle in an animal’s eye or create a shallow depth of field by placing the light source close to the subject.
Experiment with different lighting setups to find what works best for your garden photography style and subject matter. Remember, practice makes perfect, so don’t be afraid to try out new techniques and see how they affect your photos.
Tips for Working with Animals: Building Trust and Safety
When working with animals in your garden, it’s essential to establish trust and ensure their safety to capture stunning photos that are both beautiful and respectful. Let’s dive into some valuable tips for building a strong bond with your furry subjects.
Understanding Animal Behavior and Psychology
When working with animals in garden settings for photography, it’s essential to understand and respect their natural behavior. This involves being aware of stress levels and boundaries that may impact the quality of your shots.
Start by observing your subject from a distance to gauge its comfort level. If you notice signs of distress such as pacing, vocalization, or avoiding eye contact, give it space and reassess your approach. Be mindful of personal space, allowing animals to move freely without feeling cornered or trapped.
Recognize that each species has unique stress triggers and coping mechanisms. For instance, some birds may become agitated when approached too closely, while others might be more tolerant of human presence. Understanding these dynamics helps you tailor your strategy to minimize disruptions and build trust with the animal.
Remember that animals have their own ‘comfort zones’ – much like humans do. Be prepared to adapt your approach if a subject appears stressed or uncomfortable, prioritizing its well-being over achieving the perfect shot.
Strategies for Building Trust and Getting Close to Your Subject
Building trust with animals requires patience, understanding, and a gentle approach. When photographing animals in garden settings, it’s essential to establish a rapport with them to capture authentic and intimate moments. Start by observing the animal’s behavior and body language. If they appear stressed or fearful, give them space and let them come to you on their own terms.
To build trust, move slowly and calmly around the animal, avoiding sudden movements that may startle them. Use a gentle voice and avoid loud noises that can spook them. Bring treats or toys to entice them closer, but be patient and don’t force interaction. Allow them to sniff and explore you at their own pace.
Some animals may take longer than others to trust you, so it’s crucial to respect their boundaries. For example, a deer may require days or even weeks of consistent visits before they become comfortable with your presence. Be prepared for varying levels of success and don’t push the animal too hard – this can damage the relationship and make future interactions more challenging.
By taking the time to build trust, you’ll not only get closer to your subject but also capture unique and captivating images that reveal their personality and character.
Editing and Post-Processing Techniques
Now that you’ve captured those stunning garden photos, it’s time to refine your images with editing techniques tailored specifically for wildlife photography. Learn how to enhance colors and details in this crucial final step.
Enhancing Colors and Contrast in Garden Animal Photos
When editing garden animal photos, enhancing colors and contrast can make all the difference in capturing the essence of your subject. The vibrant hues and textures of plants and flowers can easily overpower the animal’s features if not balanced properly.
To start, adjust the white balance to ensure that the colors are accurate and natural-looking. This will help you achieve a more pleasing color palette for both the plant life and the animal itself. Be mindful of the time of day when shooting – overcast skies or warm afternoon light can create beautiful soft tones, while harsh midday sun may require more aggressive editing to compensate.
Next, experiment with contrast adjustments to make your subject stand out. Boosting the shadows will help reveal fine details in both the animal’s fur and the surrounding foliage. Conversely, reducing highlights can prevent overexposure of bright areas like flowers or sunlight filtering through leaves.
Remember, subtle adjustments are often more effective than drastic changes. Experiment with different settings and techniques to find the perfect balance for your image – it may take some trial and error, but the results will be well worth it.
Retouching and Removing Distractions
When editing photos of animals in garden settings, it’s common to encounter distracting elements that take away from the main subject. Skillfully removing or retouching these distractions is crucial without compromising the natural look and feel of the image.
One way to approach this is by identifying what’s distracting you about an image. Is it a twig stuck in the animal’s fur? A leaf blower in the background? Or perhaps a pesky fly buzzing around the subject? Once you’ve pinpointed the issue, consider whether it can be removed or retouched digitally.
For minor distractions like dirt or dust on the animal’s fur, a gentle brush with a soft brush tool is usually sufficient. However, for more prominent issues like branches or leaves in the background, it may be better to remove them entirely using a selection tool or the “content-aware” removal feature in your editing software.
Remember, less is often more when retouching distractions. Avoid over-processing, as this can lead to an unnatural, staged look that detracts from the authenticity of the image. Instead, aim for subtle corrections that preserve the organic feel of the scene.
Showcasing Your Best Work: Presentation and Marketing
When it comes to showcasing your animal photography skills, presentation is key. Here, we’ll share expert tips on how to effectively market and present your garden wildlife photos.
Effective Image Titles, Captions, and Descriptions
When sharing your animal photography in garden settings, it’s essential to pay attention to the image titles, captions, and descriptions. These small details can significantly impact how viewers interact with your work and what message they take away from each photograph.
Let’s start with the title. A good image title should be descriptive yet concise, conveying the essence of the photo in just a few words. For example, “Playful Kitten Chases Butterfly” immediately gives the viewer an idea of what to expect. Aim for specificity and avoid generic titles like “Garden Scene.” Instead, focus on the main subject or unique feature of the image.
Captions provide additional context, allowing you to share more about your creative vision, the location, or any notable details that might not be immediately apparent in the photo. They’re also a chance to showcase your writing skills and engage your audience. Descriptions, on the other hand, are often used for online platforms like stock photo websites. Keep them concise, avoiding lengthy paragraphs of text.
To write effective image titles, captions, and descriptions, consider the following tips:
* Use relevant keywords that match the content of your photo
* Be creative with your words, but avoid clichés or overused phrases
* Keep it short – 5-7 words is a good starting point for titles and captions
* Include notable details like location, season, or equipment used
By paying attention to these often-overlooked aspects, you can elevate the presentation of your animal photography in garden settings and make a stronger connection with your audience.
Displaying and Selling Your Garden Animal Photography
Now that you’ve captured some amazing shots of those furry and feathered friends in your garden, it’s time to share them with the world! But where do you start when it comes to showcasing and selling your garden animal photography? A strong online presence is key, so let’s dive into building a portfolio website. This will be the central hub for all your best work, making it easy for potential clients or buyers to find and view your photos.
When creating your website, consider using platforms like Wix or Squarespace that offer customizable templates specifically designed for photographers. Make sure to include high-quality images, detailed descriptions of each photo, and information about yourself as a photographer. Social media is also an essential tool in showcasing your work. Share behind-the-scenes moments, sneak peeks, and exclusive promotions on platforms like Instagram and Facebook.
Consider partnering with local businesses or exhibiting at community events to showcase your garden animal photography in-person. This can be a great way to connect with potential clients who appreciate your unique style and niche. Don’t forget to also reach out to local pet stores, veterinarians, or wildlife organizations – they might be interested in using your photos for their marketing materials or events. By diversifying your online presence and exploring local opportunities, you’ll increase the visibility of your garden animal photography and attract more buyers.
Frequently Asked Questions
How do I prepare my garden for a professional-looking photoshoot?
Before inviting your furry friends to pose, ensure your garden is tidy and free of distractions. This includes trimming plants, removing debris, and even rearranging furniture to create visually appealing backdrops. Consider adding props like benches or vintage items to add context and character.
Can I use any type of lens for photographing animals in the garden?
Not all lenses are created equal when it comes to capturing high-quality images of animals in gardens. A medium telephoto zoom lens (around 70-200mm) is ideal, as it allows you to maintain a safe distance while still capturing intimate moments.
How do I handle situations where my subject gets anxious or scared during the photoshoot?
Yes, this can be a common challenge! To alleviate stress and anxiety in your subjects, try introducing yourself gradually, allowing them to become familiar with your presence. You can also use positive reinforcement techniques like treats and praise to help them feel more at ease.
Can I still achieve great results if my garden lacks natural light?
No, but don’t worry – you have options! Consider scheduling your photoshoot during the golden hour (soft, warm light) or using flash photography to add depth and interest. Additionally, editing techniques like dodging and burning can help balance out underexposed areas.
How do I ensure my garden animal photos showcase the best of both worlds: stunning visuals and a message?
Consider incorporating subtle hints about conservation or environmental awareness into your images. This could be achieved through thoughtful composition, use of props, or even a clever image title that encourages viewers to look beyond the beauty of the photo itself.
What are some essential equipment items I should have on hand for photographing animals in gardens?
While not exhaustive, here’s a must-have list: comfortable clothing and shoes, plenty of water and snacks for both you and your subject, a sturdy tripod (for added stability), a reflector or diffuser (to control light), and a backup camera memory card.